
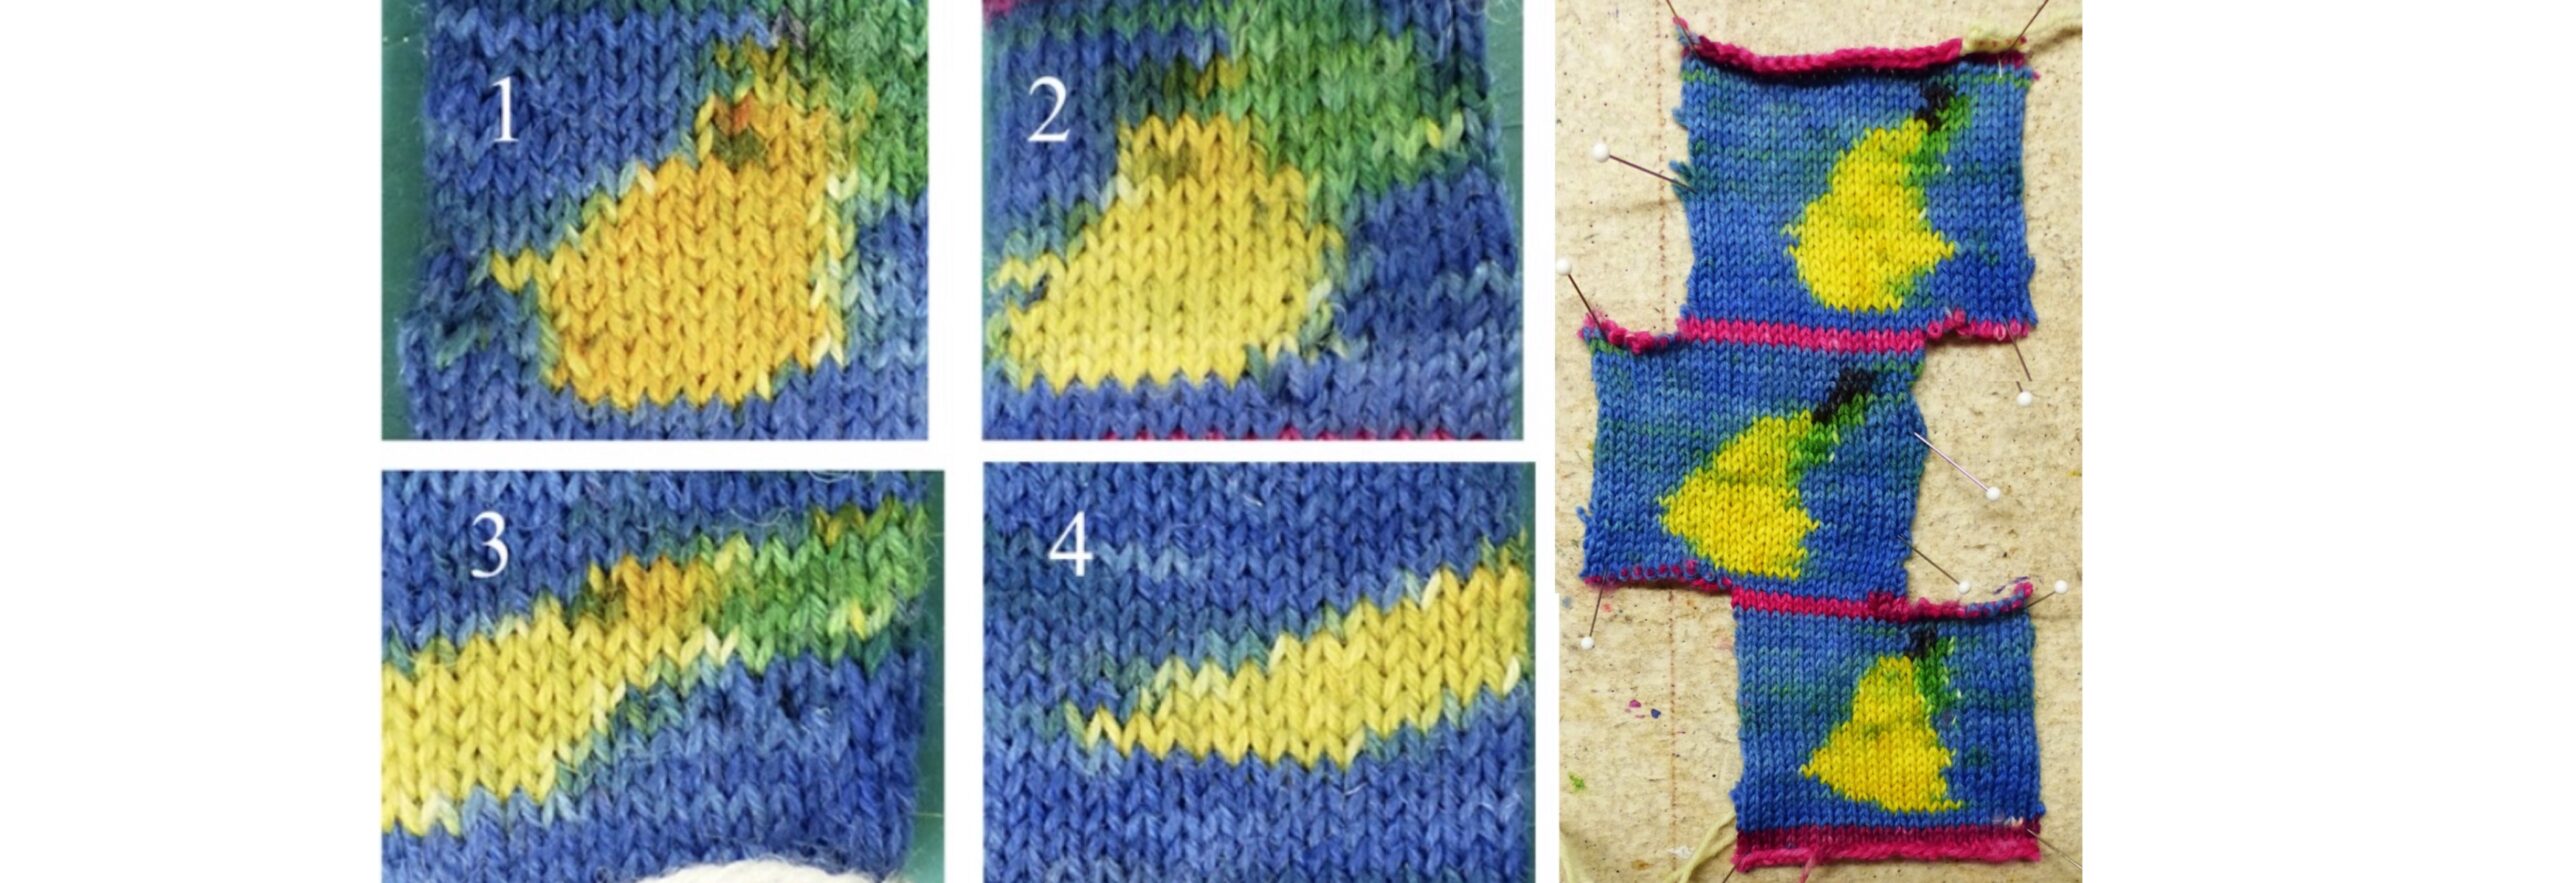
This content was expanded from several Ravelry Projects.
A group of people on Ravelry thought that they could paint words or a picture on a blank, and that when the fabric was reknit (or crocheted, or woven) that the pictures would magically transfer. These examples were posted by them.
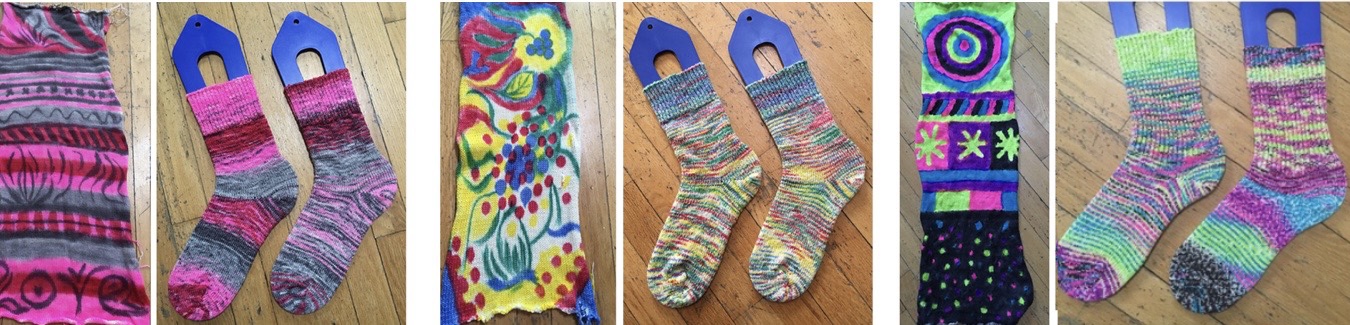
They got variations on colored confetti back. They kept making the same mistakes and expecting different results. So much frustration!
This project was to show how to dye motifs that would transfer to a different format.
Yarn, when dyed, usually changes: it gets thicker, or thinner, sometimes more fuzzy or bulky. My mistake in the first sample was working with raw yarn.
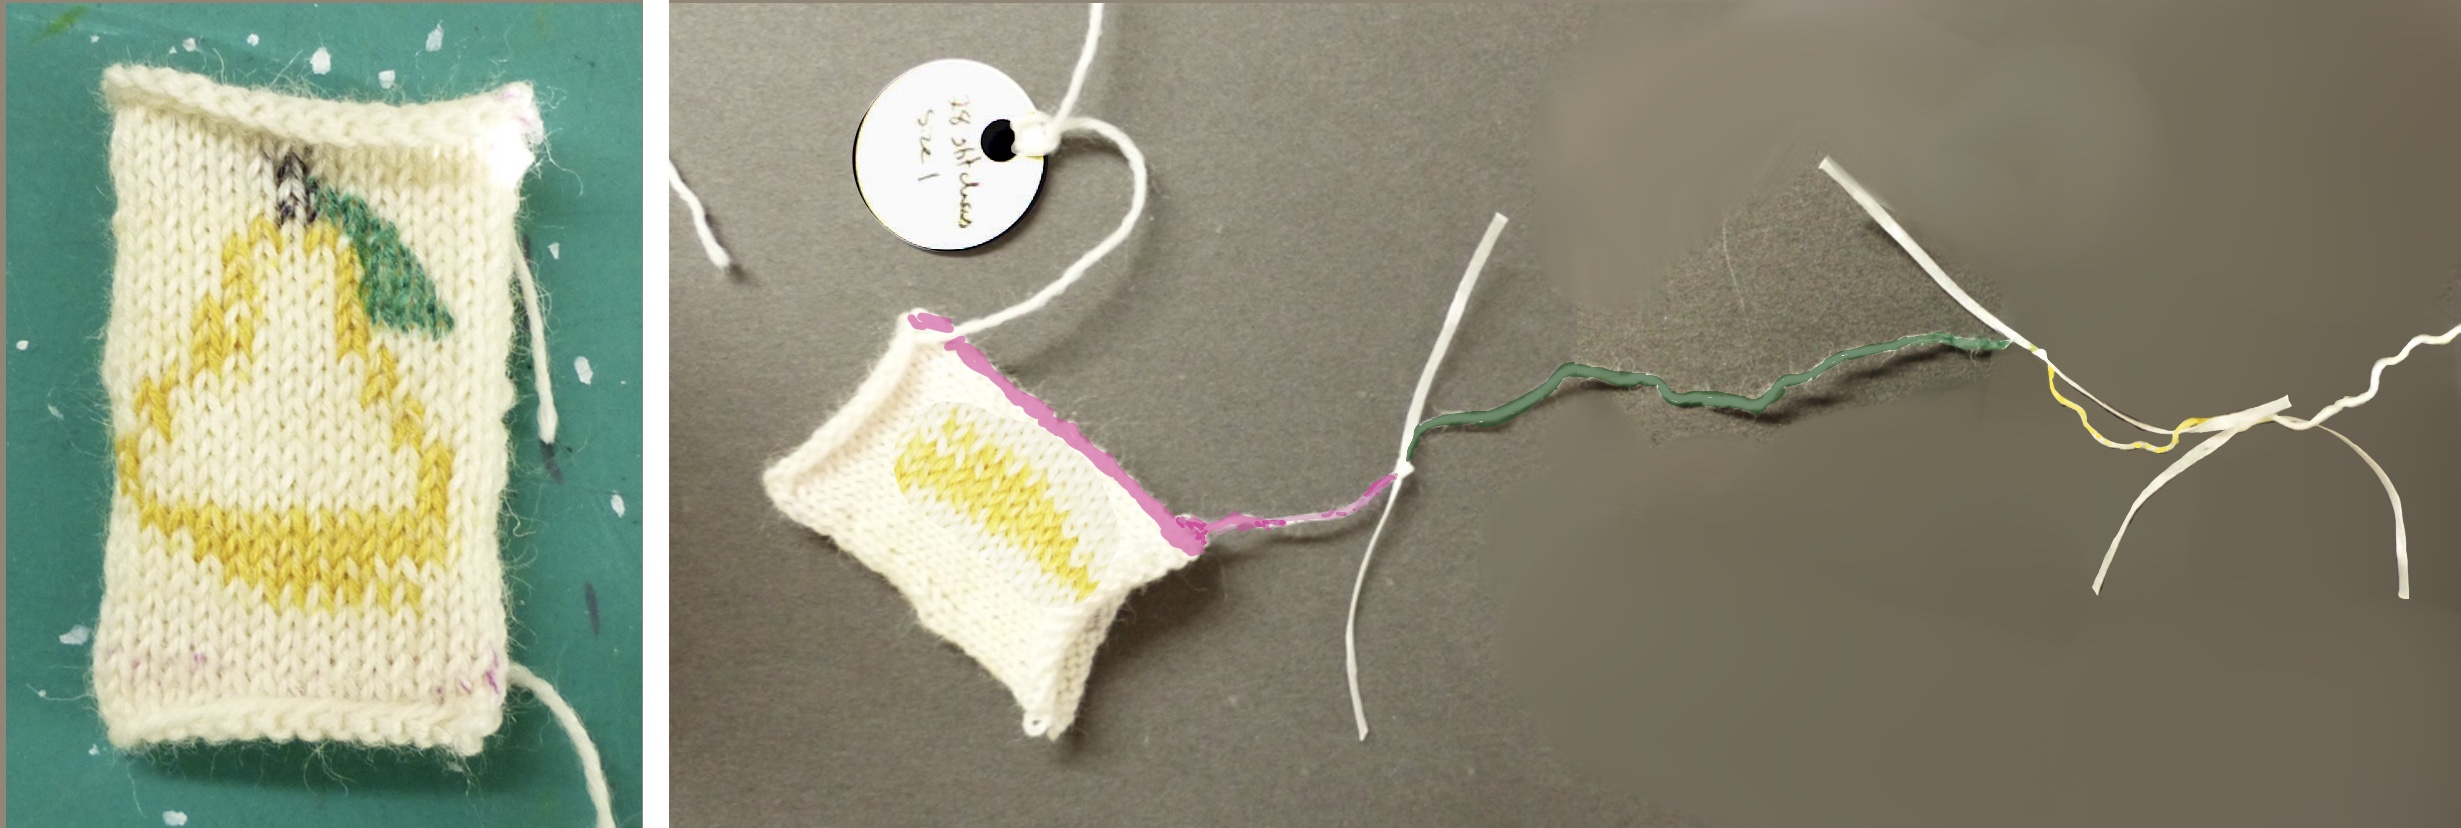
I started by knitting a 28-stitch swatch of fingering yarn using US 1/2.25 mm needles. I wanted the smallest possible sample that wasn’t too finicky to manage.
I drew a pear on it using a magic marker.
This was unraveled, tying pieces of waxed tape at the color changes.

I stretched the yarn into a giant circle around studio furniture and made more loops (reversing directions, which is why the images in the first set are out of sequence), then retied the knotted pieces over all the strands. The yarn was soaked in a salt-vinegar solution.
The heat-sensitive dye solution was painted on in non-touching sections and set in the microwave. This helped keep the colors from bleeding into each other.

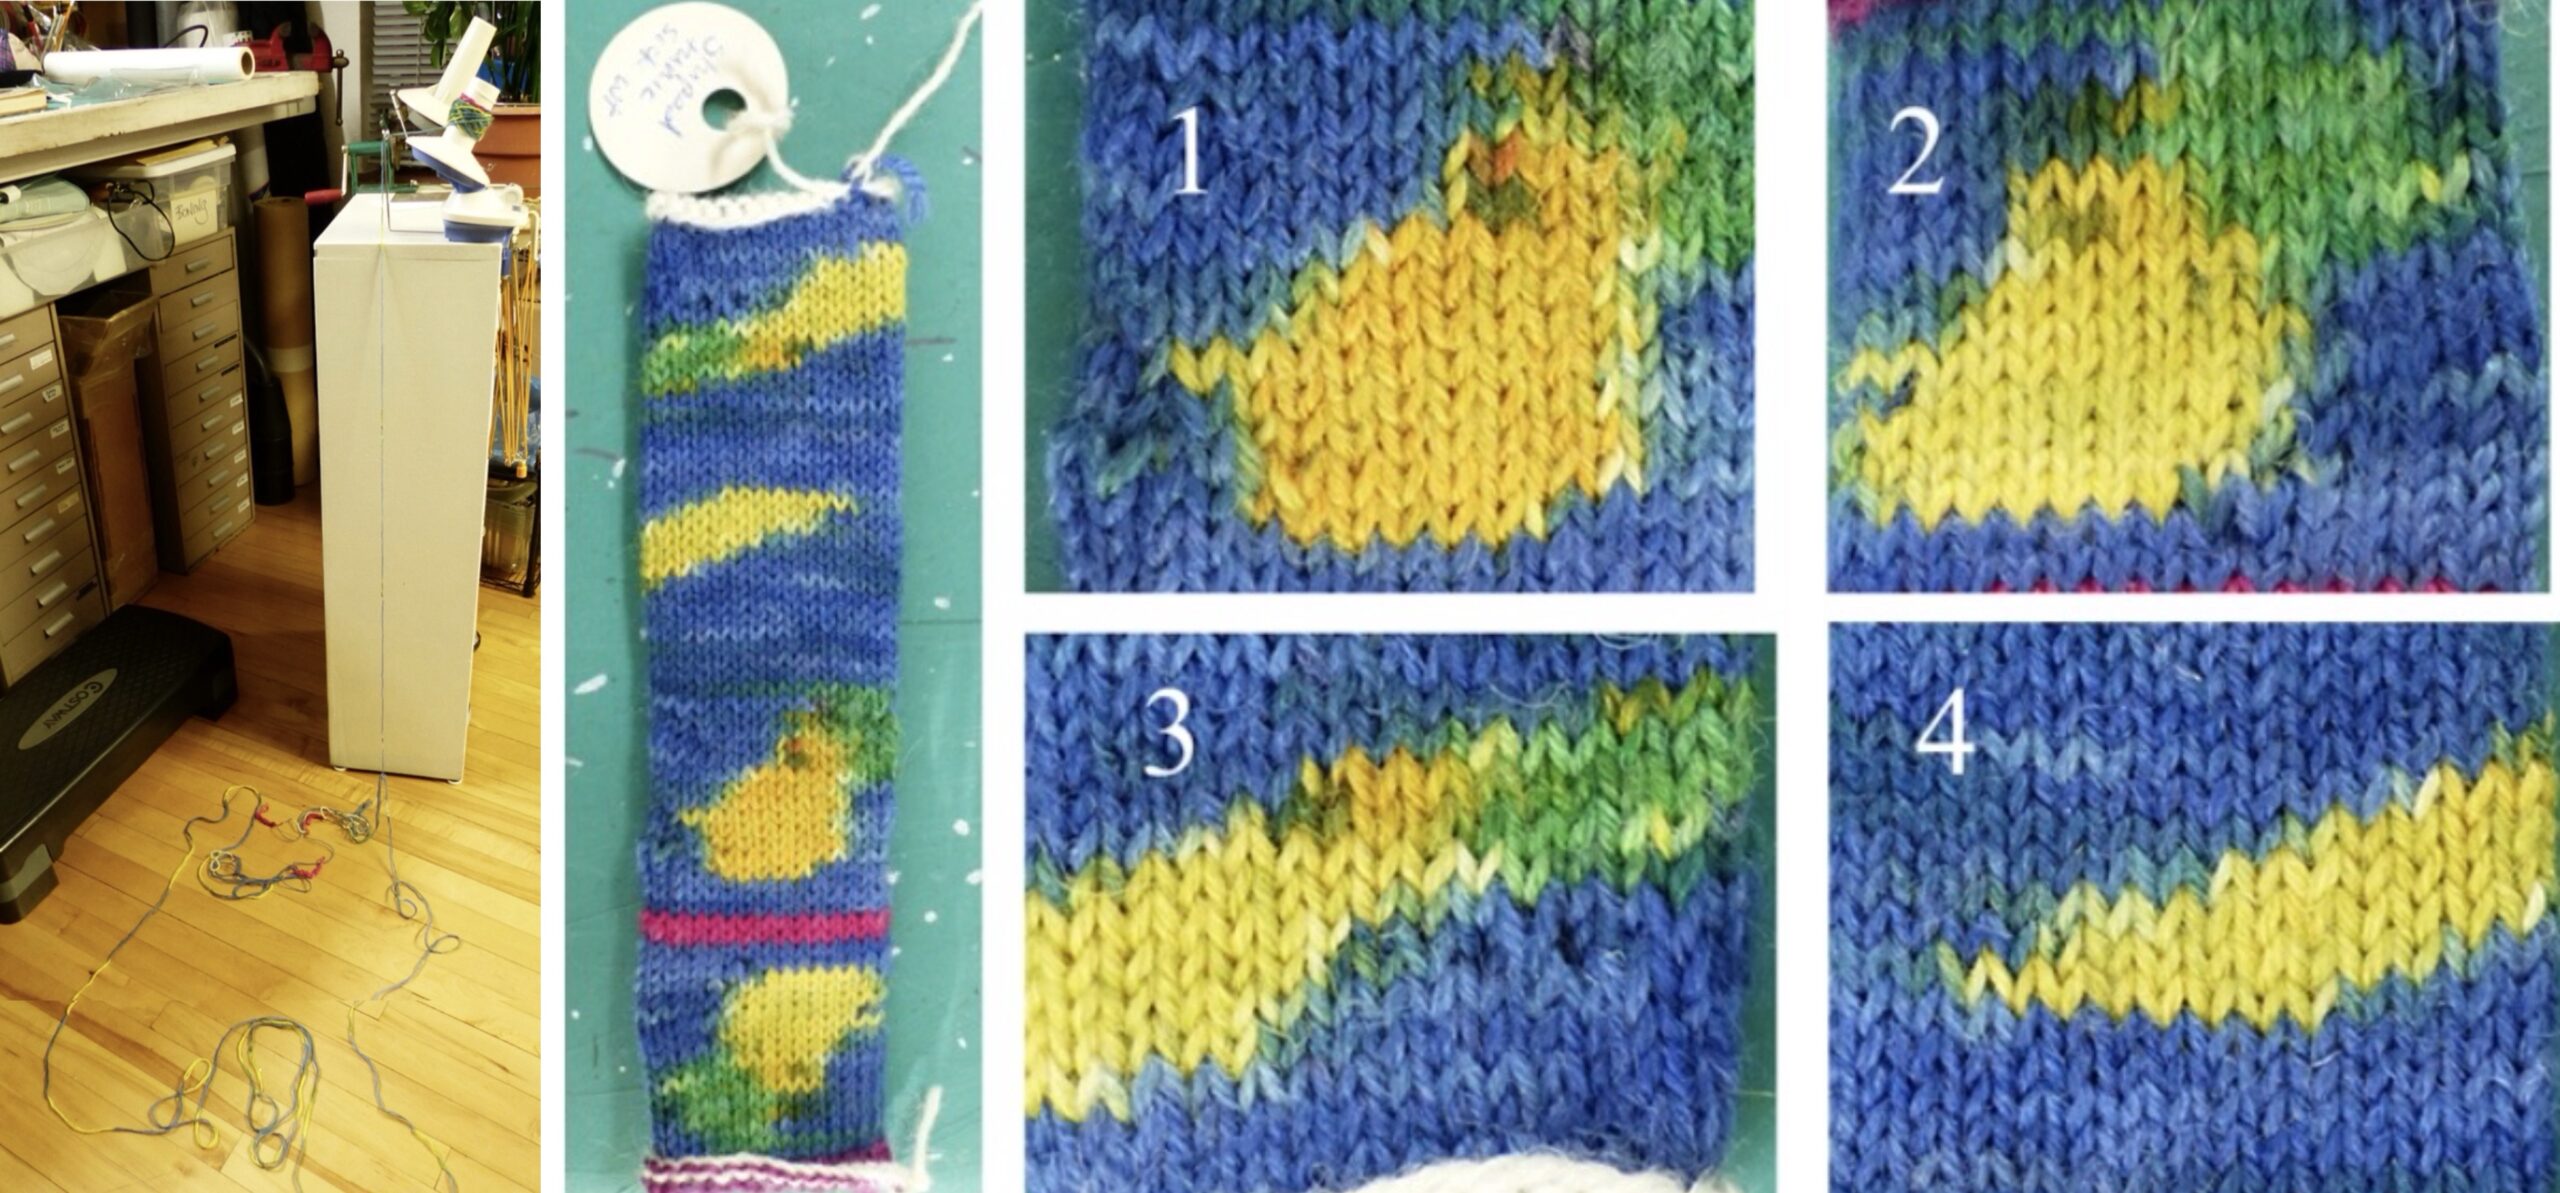
After winding the result into a ball, I cast on the same number of stitches and began knitting, but discovered almost immediately that the color stretches weren’t lining up. The skewing got worse with each round. I changed my needle size, frogged and reknit several times trying to adjust my tension (has this ever worked?!). The trip through the dye bath had changed the yarn very slightly, but enough to throw off my gauge.
Finally I measured out fresh yarn, boiled it with salt and vinegar, knit a blank tube, drew a pear on it, blah blah blah.
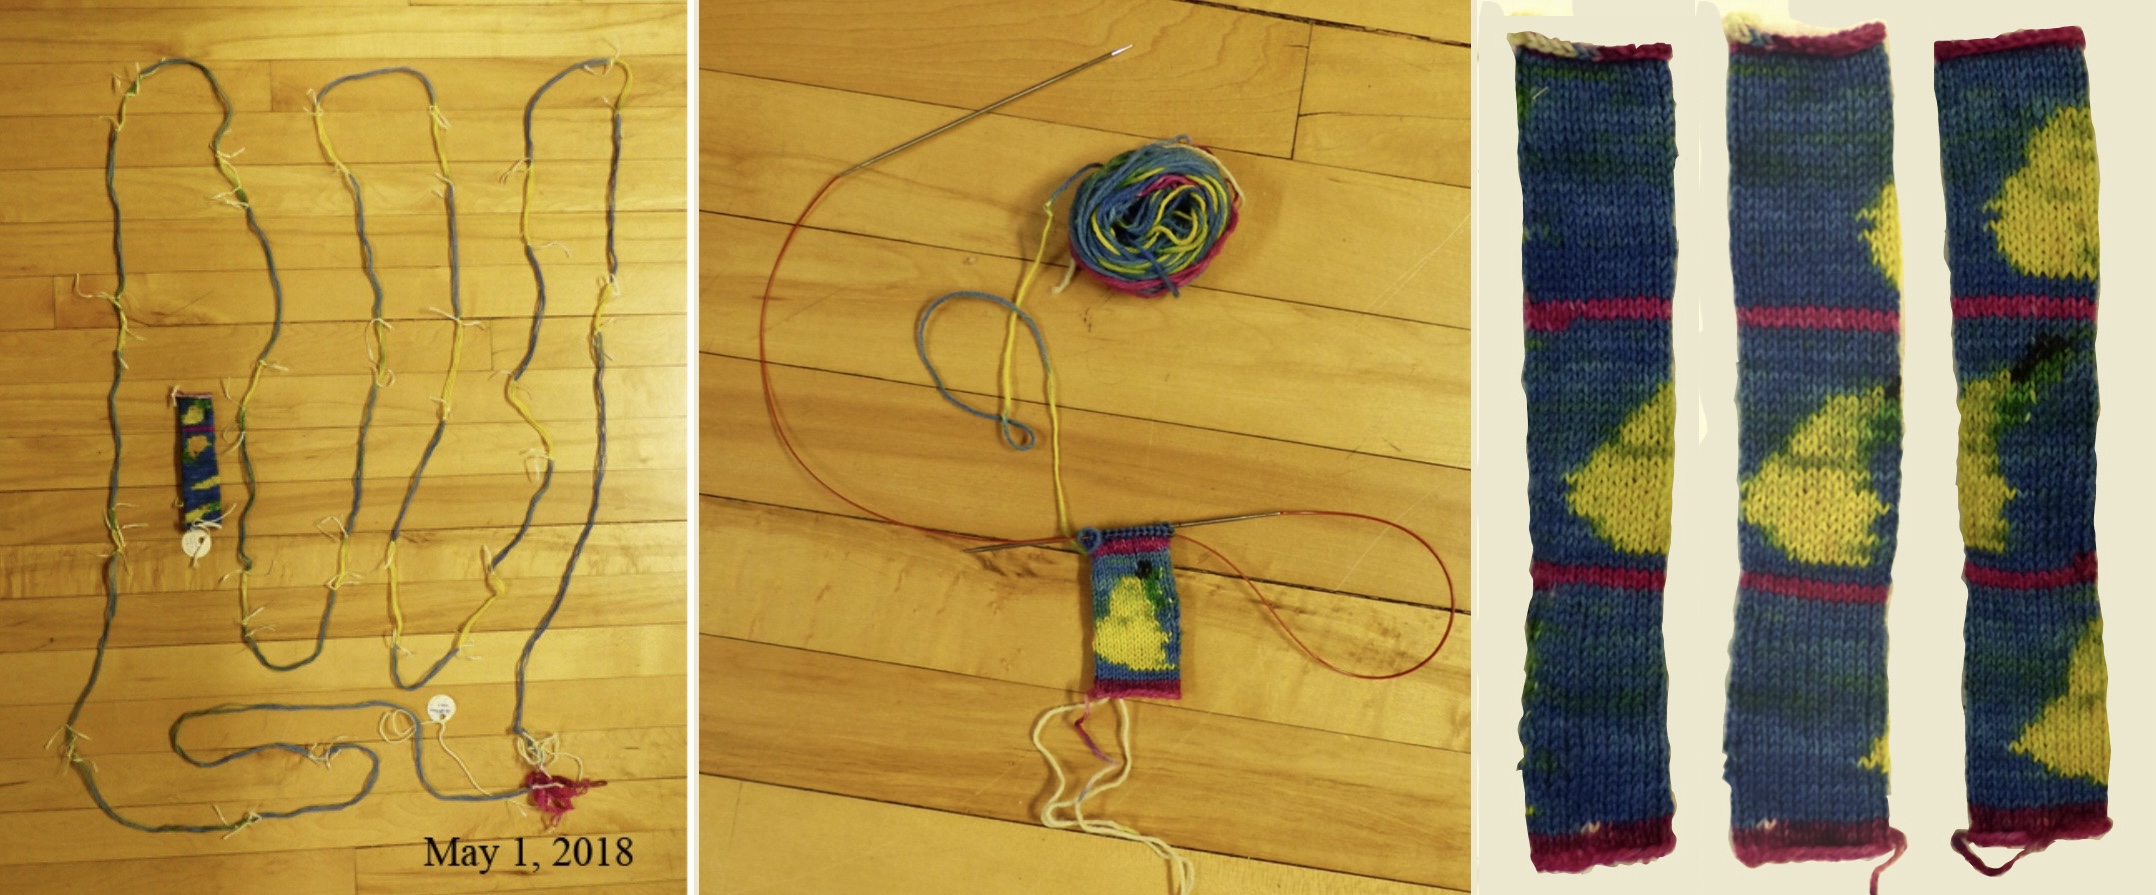
The old tube is in the middle of the yarn for the second attempt. There was minimal creep on the first pear, so I kept going. The tube (rotated at right) was carefully clipped and flattened (its graphic is in the header). I could have gotten it closer if I’d been more tidy, but this was about figuring out a new technique, not perfecting it. Using a warping board to hold the strands taut would have helped, as would have working at a larger scale – same yarn, more stitches.
The difficulty of creating a patterned yarn (such as ghosts or pumpkins for Halloween) is that any change in yarn/number of stitches cast on/needle type and size (metal to wood, for example)/personal tension is going to skew what comes out.
*****
Stepping back a decade and moving through various approaches:
My first striped socks were done with similar giant loops of yarn.
I knit several rounds, marked where the third finished, unraveled back, and so on.
I tried knitting a blank on large needles (tedious), then on a knitting machine.
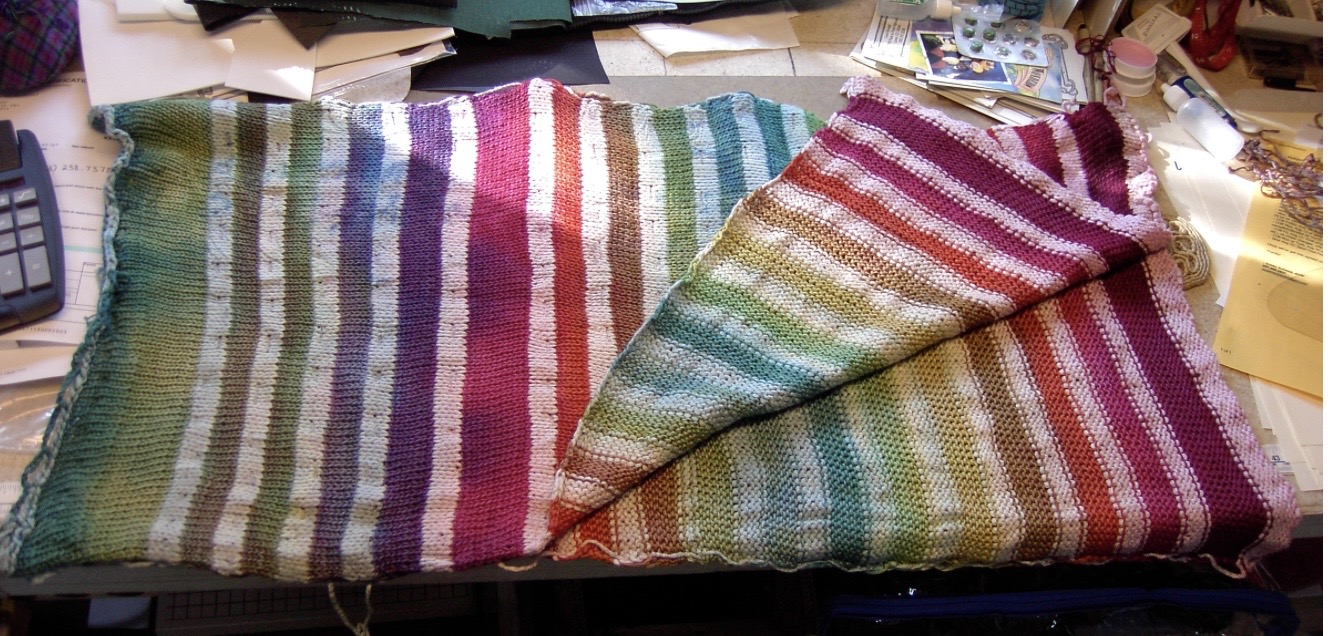
The off-white sections were waste yarn, to give color separation. Those socks are not shown, but the same technique was used for these:

Mermaid socks from Lucy Neatby’s “Cool Socks, Warm Feet” – an excellent primer.
Seven or eight pairs later, I discovered entrelac. It gave a similar effect to the pattern above.
Almost all the fuss is in the setup.
Stockinette blocks are worked from a set-up of triangles.
This effectively puts the fabric on the bias (the mermaid socks were not), making socks that fit smoothly and do not bag at the ankle.
My Netherlands’ friend BreiKonijn promoted loosely crocheting a blank to dye using a huge hook. I’m not much into crochet otherwise, but this is what I’ve used ever since.
For some time, my socks have been worked two-at-a-time, Magic Loop.
The footies are done separately of more robust yarn, joined only at the backs of the heels, then whip-stitched together. When the feet wear, replacing them is far less effort than doing entire socks.
Even better than graduated dyeing (I’ve done solid-color and the boredom almost killed me) was alternating two strands of colors.
Here, the freshly-emerging colors pull the project along like a runaway horse.
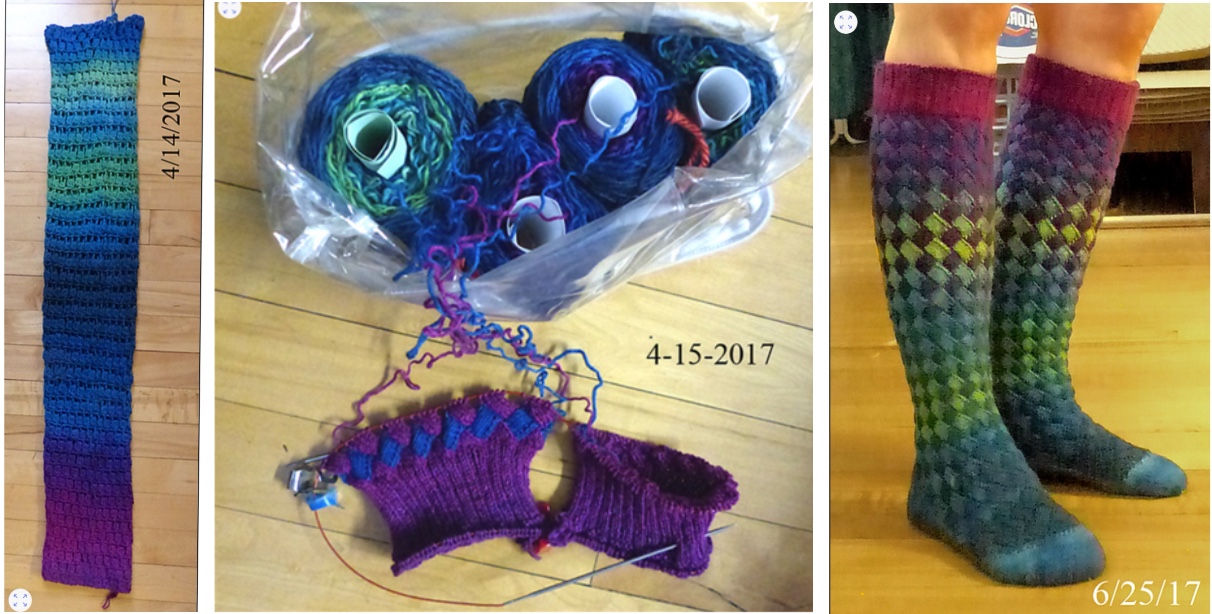
Two strands’ worth of socks (determined by weight) were held together and crocheted loosely into a tube. The upper toes of the feet are in the middle (nominee for weird sentence of the day). After dyeing, the yarn was separated into two balls, and rewound to work one sock from each end without cutting.
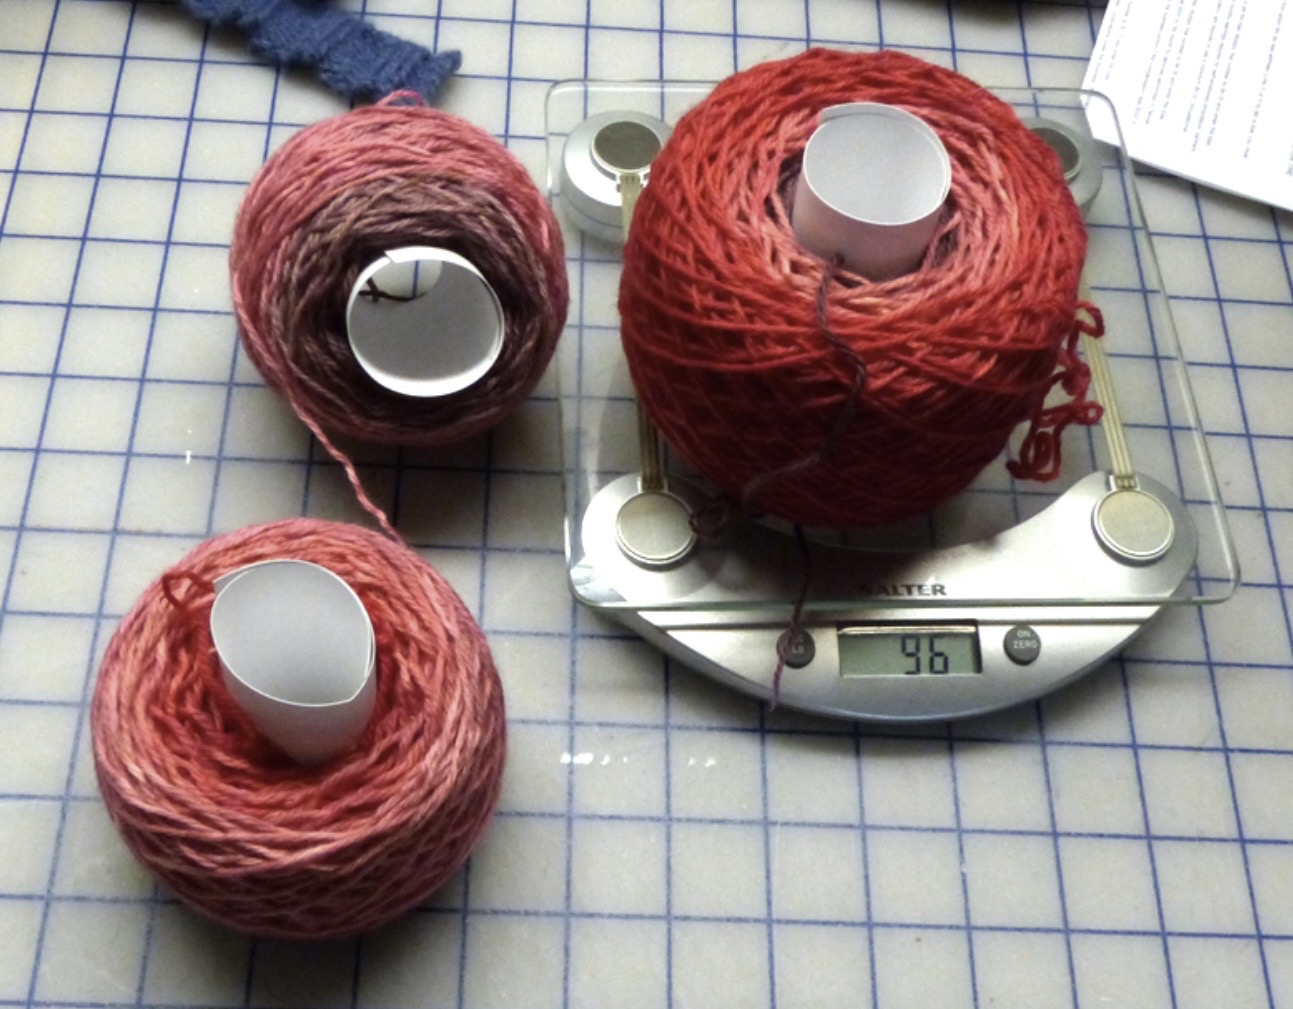
Popping the balls into a plastic bag kept them from tangling and made the project portable.
I have more than enough well-fitting knee socks to bridge doing laundry, yet writing this up makes me itch to weigh out yarn and dye up blanks.