(or joining any pieces of different shapes)
The first step is reconciling your pattern pieces.
“Oh, this is a pattern I bought so I don’t need to.”
Yes, you always should. Even the Big Four were becoming increasingly slipshod.
DO NOT SKIP checking your pattern!
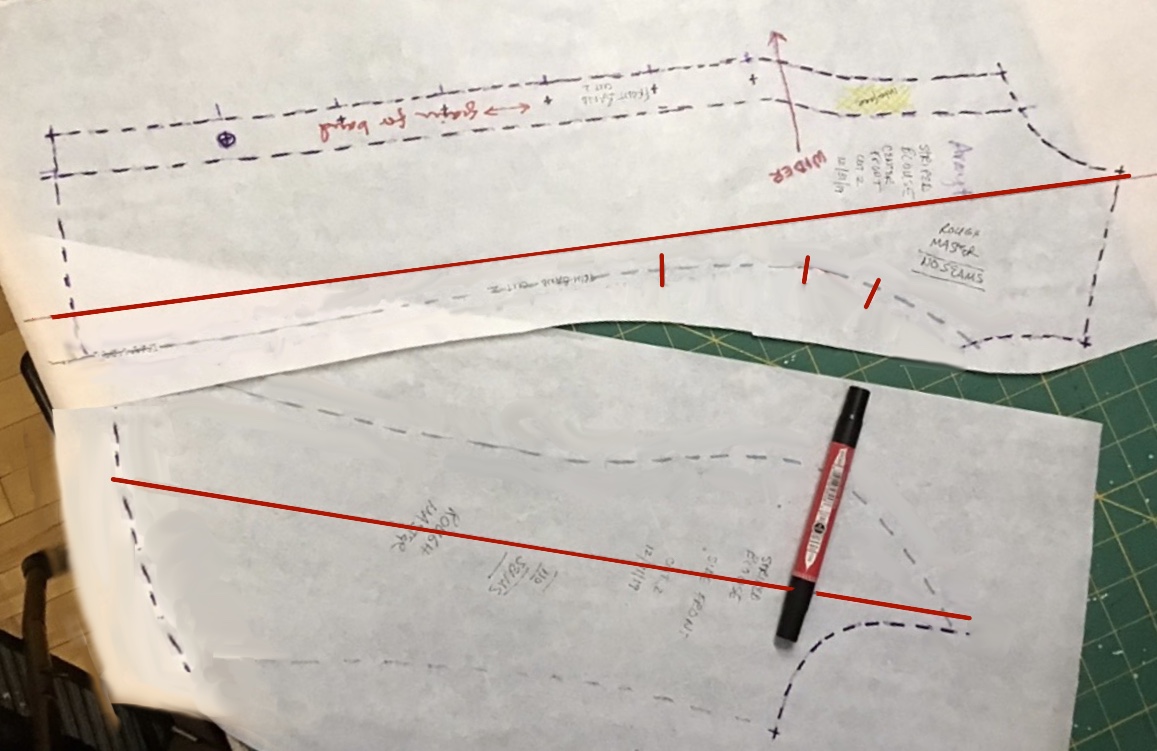
Reconcile the side front to the center front along the side front seam (the princess). Begin by tracing both pieces. Add three cross marks on the side front seam of the front piece: one at the fullest part of the bust (hold it up to the body if you’re not sure where this is), one about a third closer to the underarm, and the third about twice that much lower.
If you’re doing a longer garment you can add more cross marks further down.
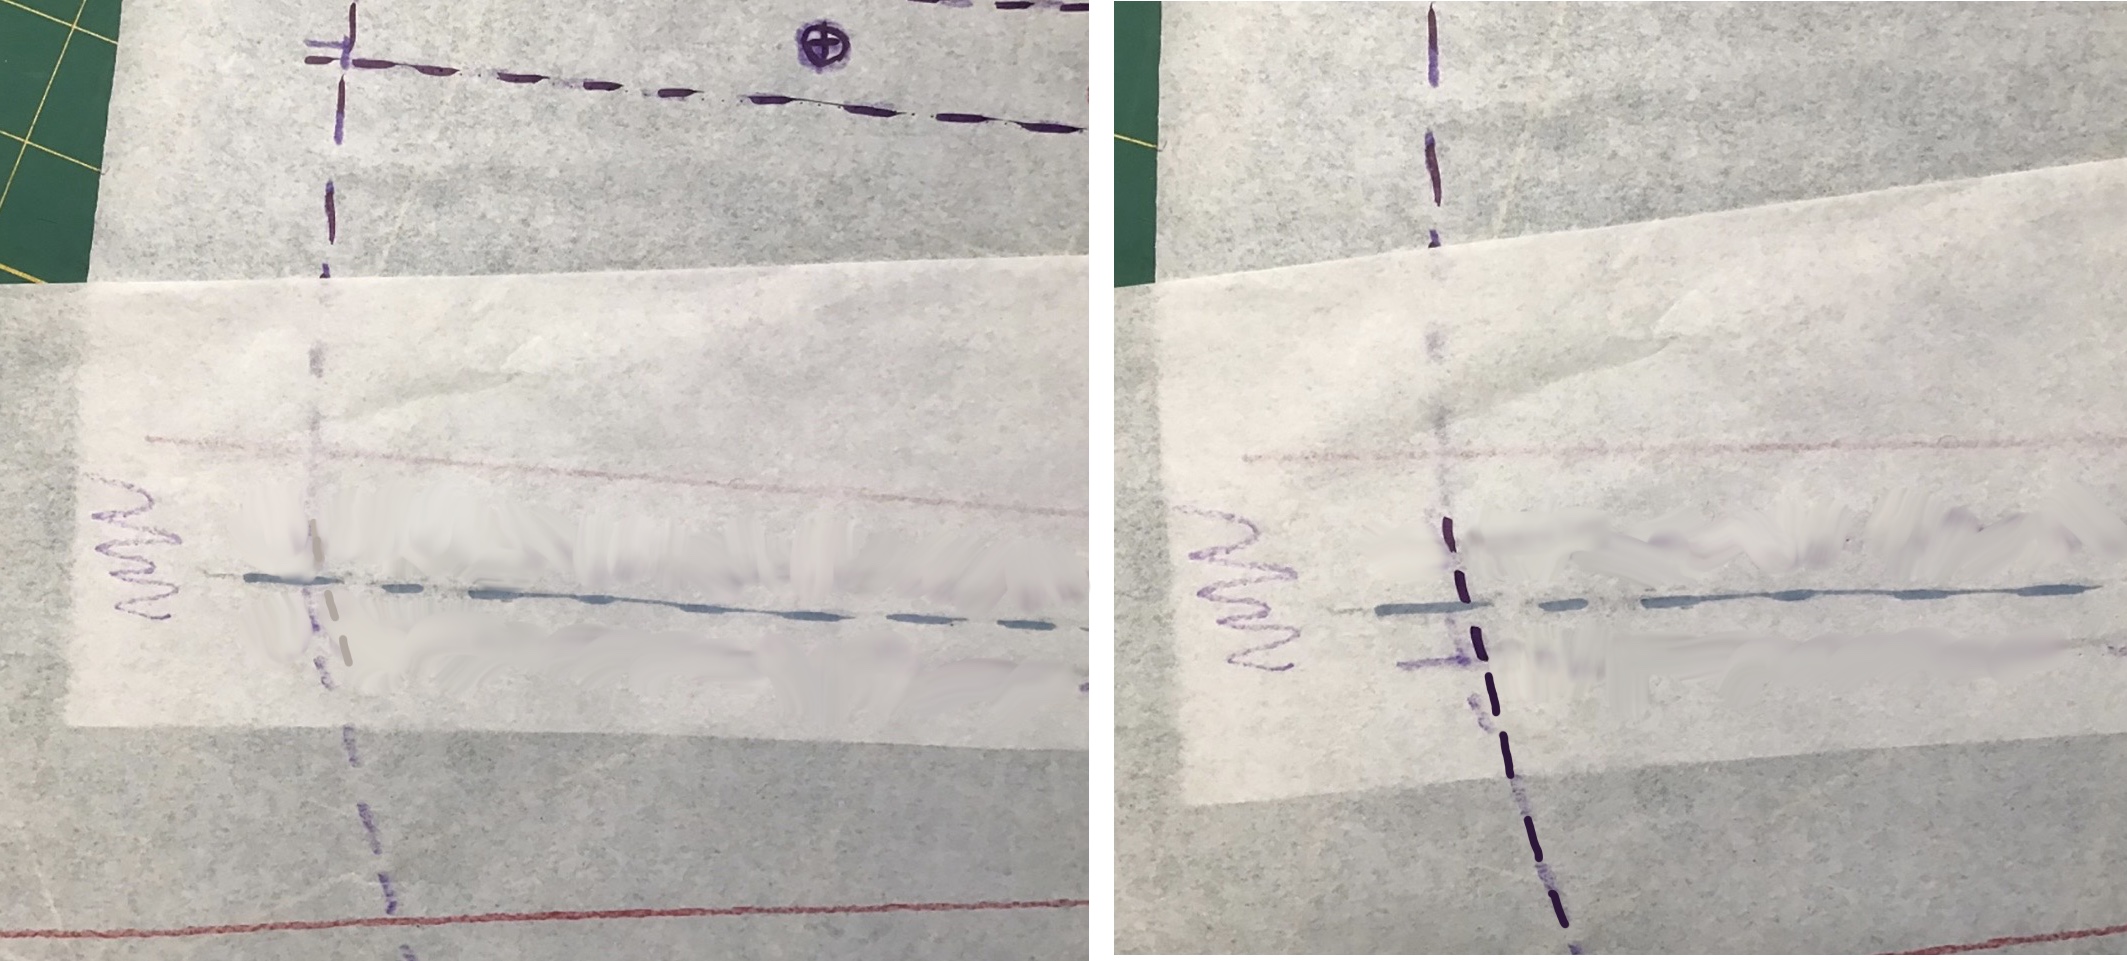
The marks can be doubled or tripled as you work around from back to front – a sleeve’s armscye usually has a single at the front and a double at the back. The industry transfers these as short nips into the seam allowance. Couture runs short crosswise lines of basting. I have seen students painstakingly cut little tepees standing up from the cutting line as that’s what was printed on the pattern. No, that was to make the marks more visible.
I nip the edge.
A princess seam should go together 1:1, with no ease. I’ve never seen one that added ease that sewed without fussing or stayed smooth afterward.
The classic mistakes are not handling the fabric carefully enough (bias edges stretch out easily), trying to sew too fast, not pressing between each step, and not properly clipping the seam allowances when pressing them open.
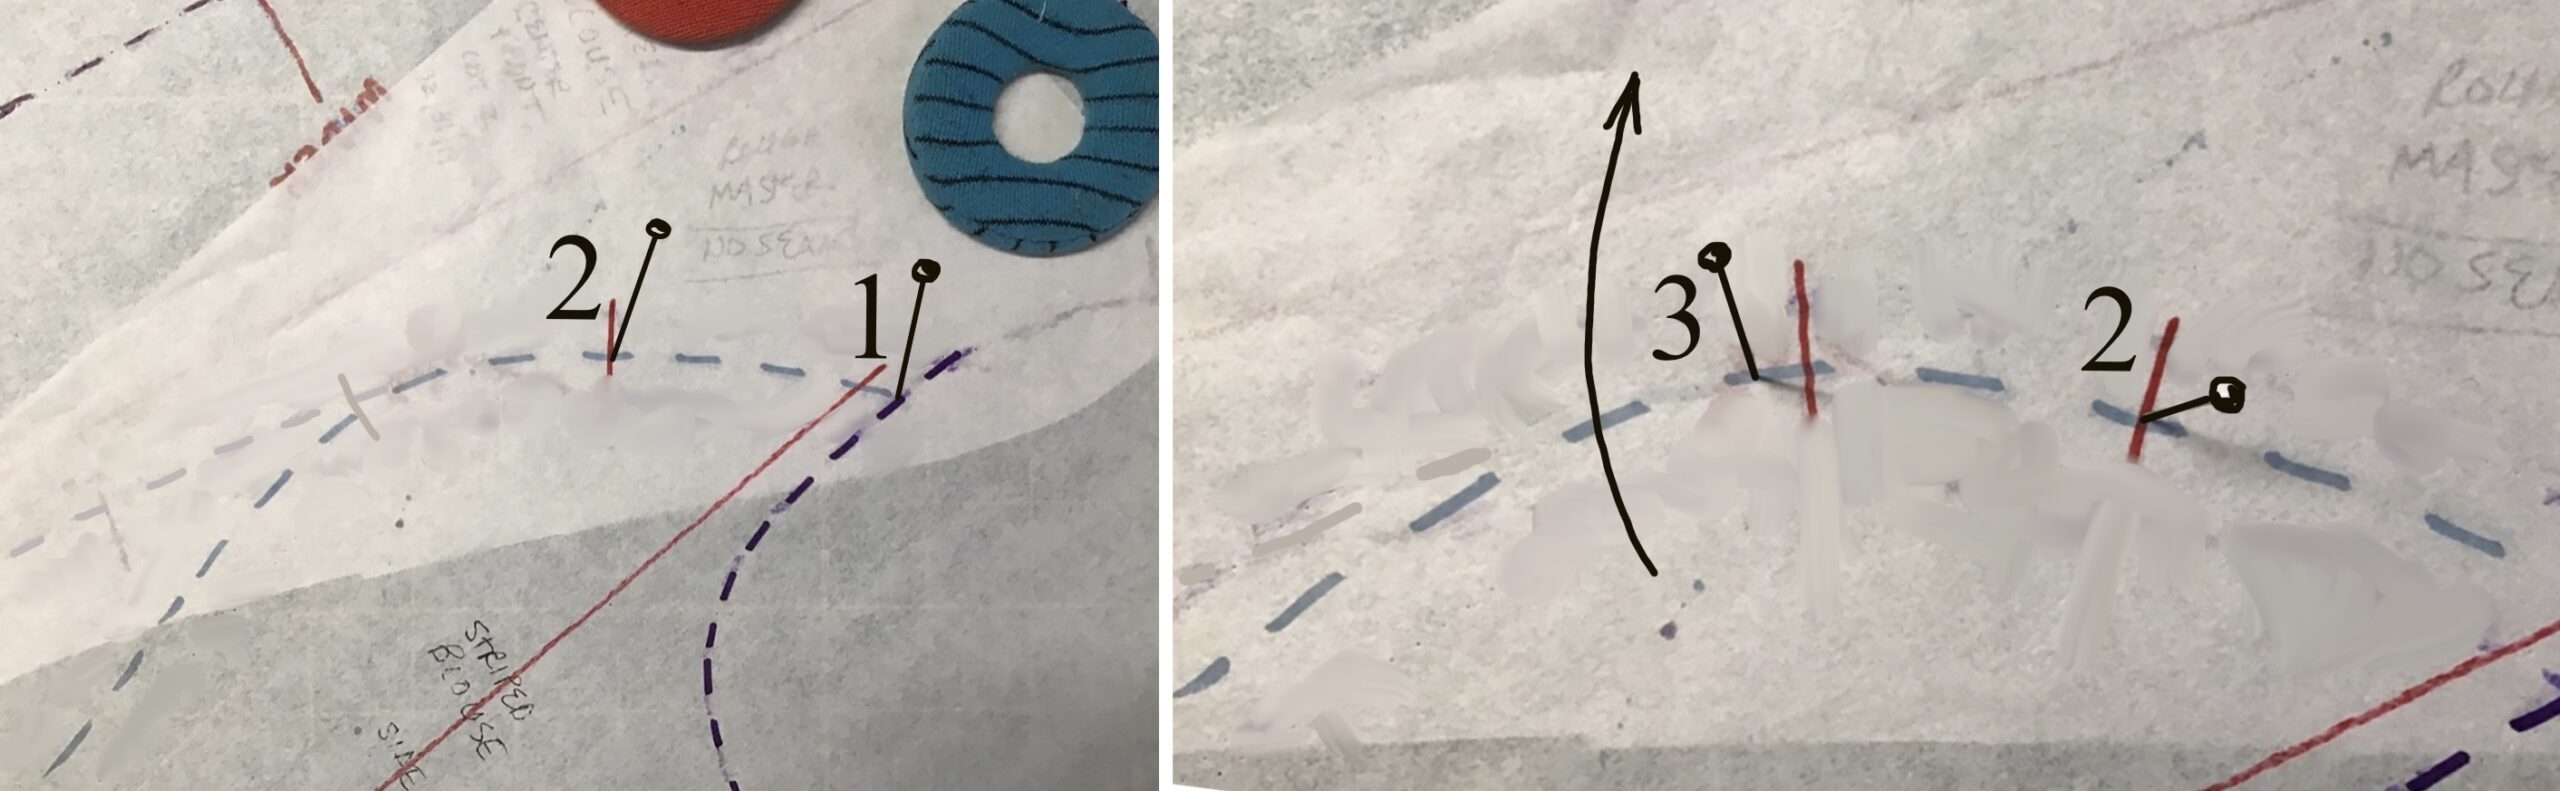
Align the starting points of the seams at the armscye and pin through (1). Overlay the seams as far as possible and put in a second pin (2). Take out the first pin and pivot until the next section aligns, then put a pin there (3). Keep leapfrogging your pins along the sewing line until you get to the bottom.
When you cross a red mark, draw it on.
This is called pin-tracking, truing, or reconciling your registration marks. It ensures that your sewing lines are exactly the same length.
The lengths often don’t match precisely. Usually you reconcile the new piece to the one underneath, but you can match the old to the new one or split the difference.
Reconciling your pattern pieces and adding reference marks makes sewing faster, easier, and more accurate. You are constantly reassured that you’re on track.
Lay out all of your pieces, being sure they’re on grain, and cut out. Transfer your reference nips using the very tips of your scissors to avoid accidentally cutting into the body of your piece.
Avoid pulling on/stretching your pieces.
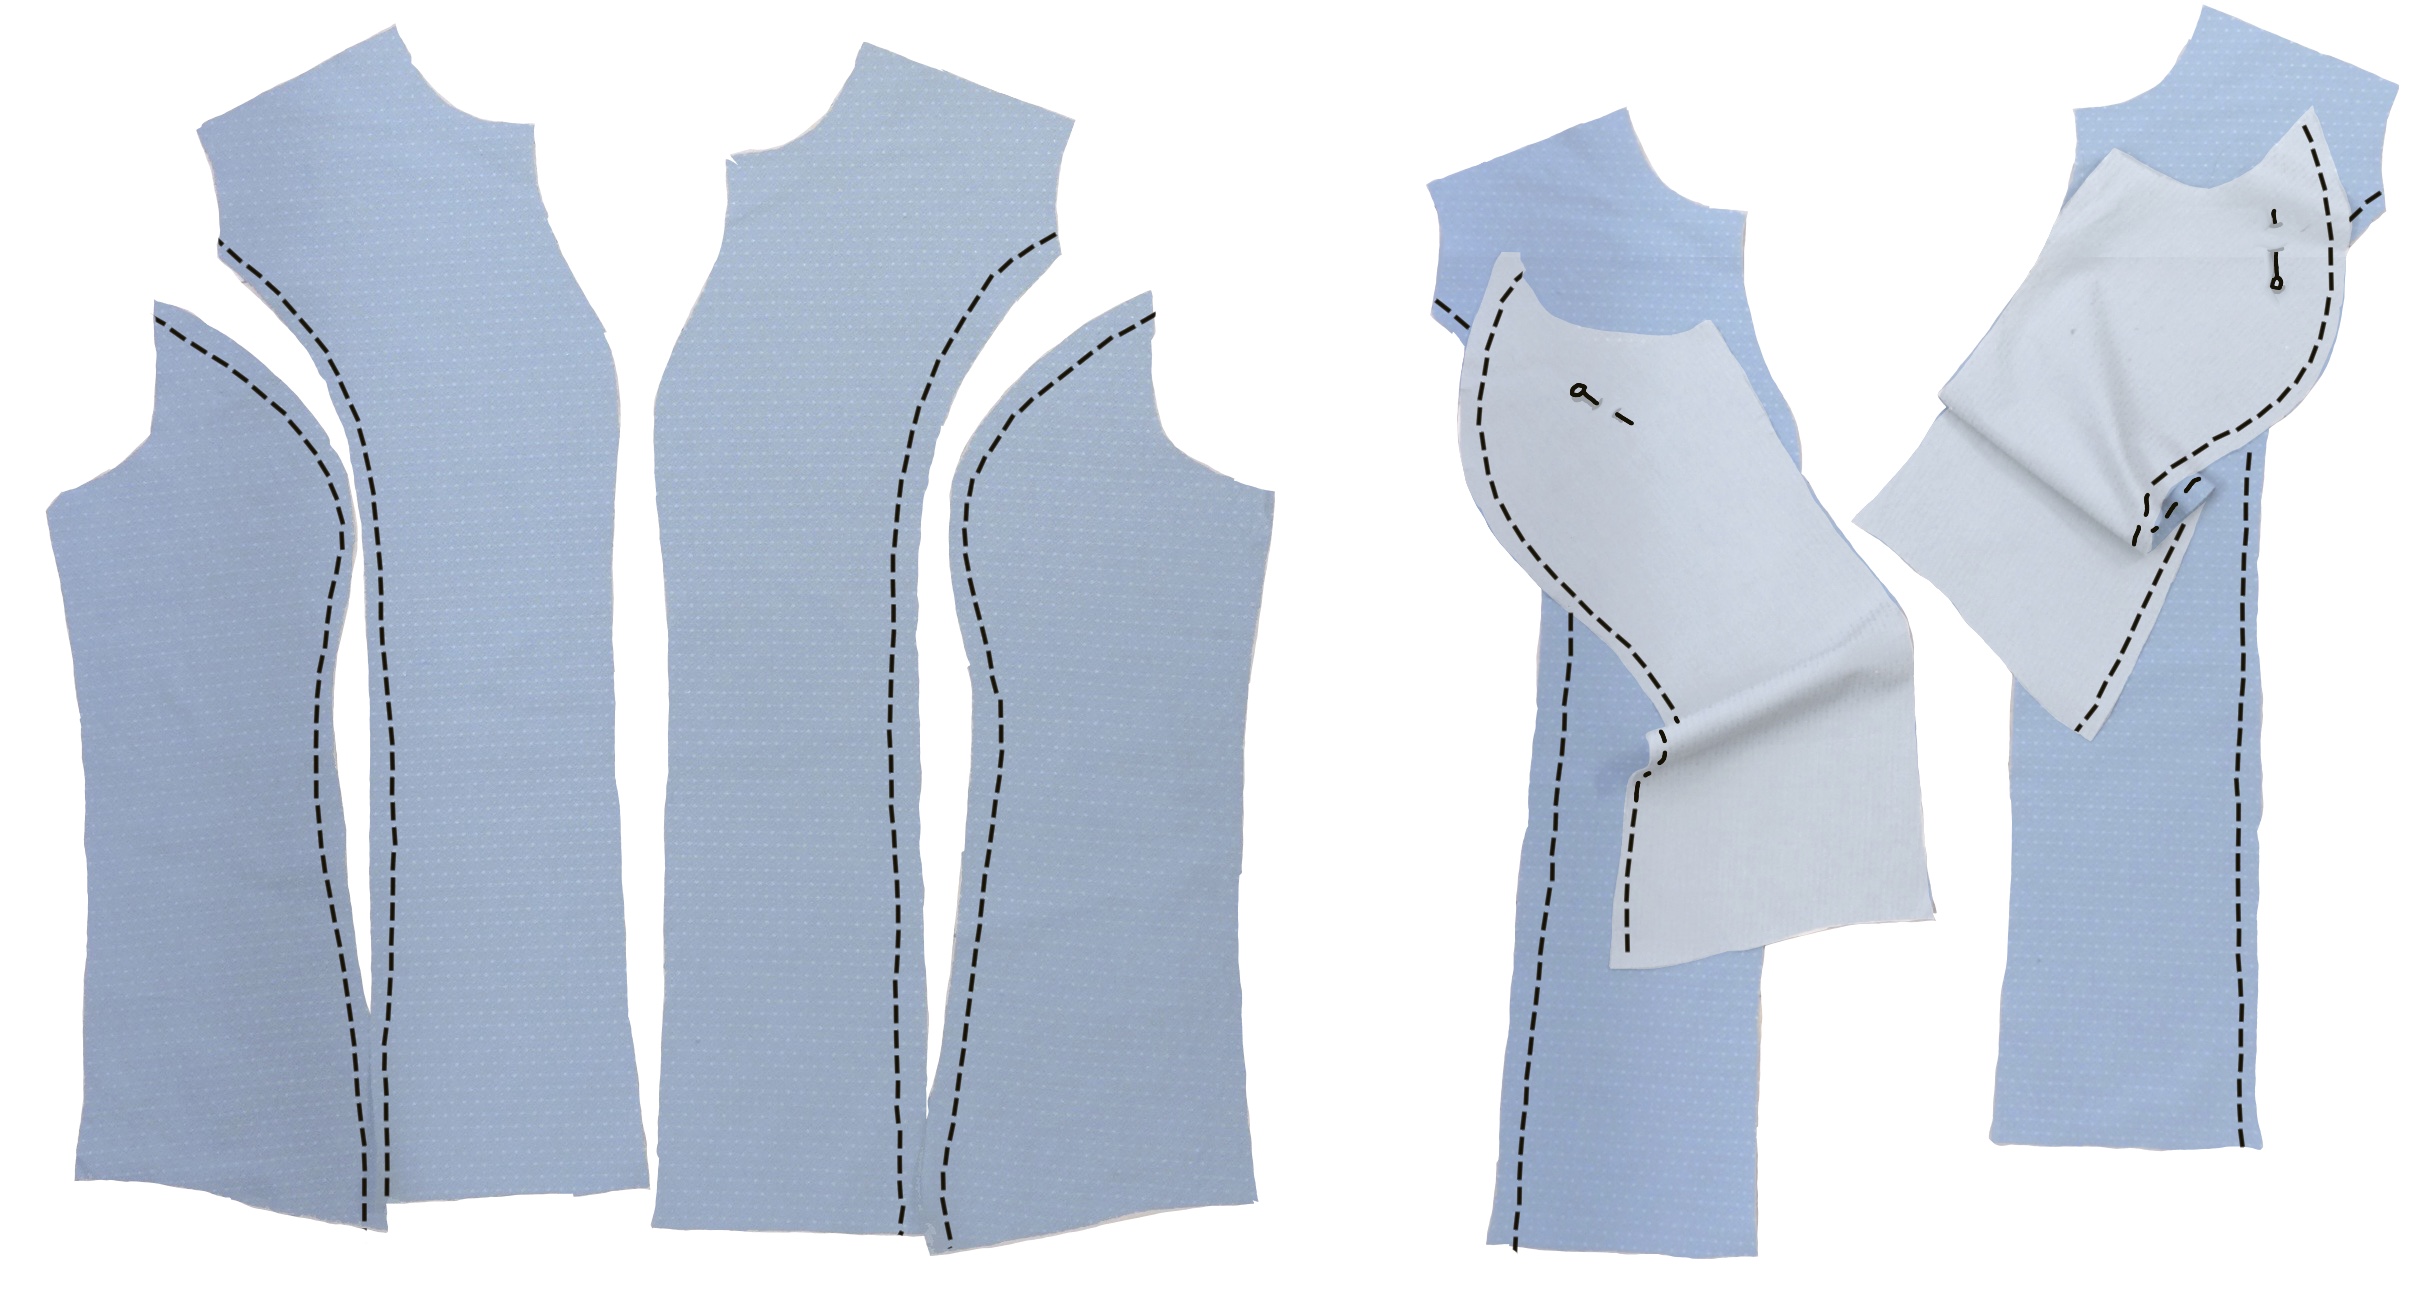
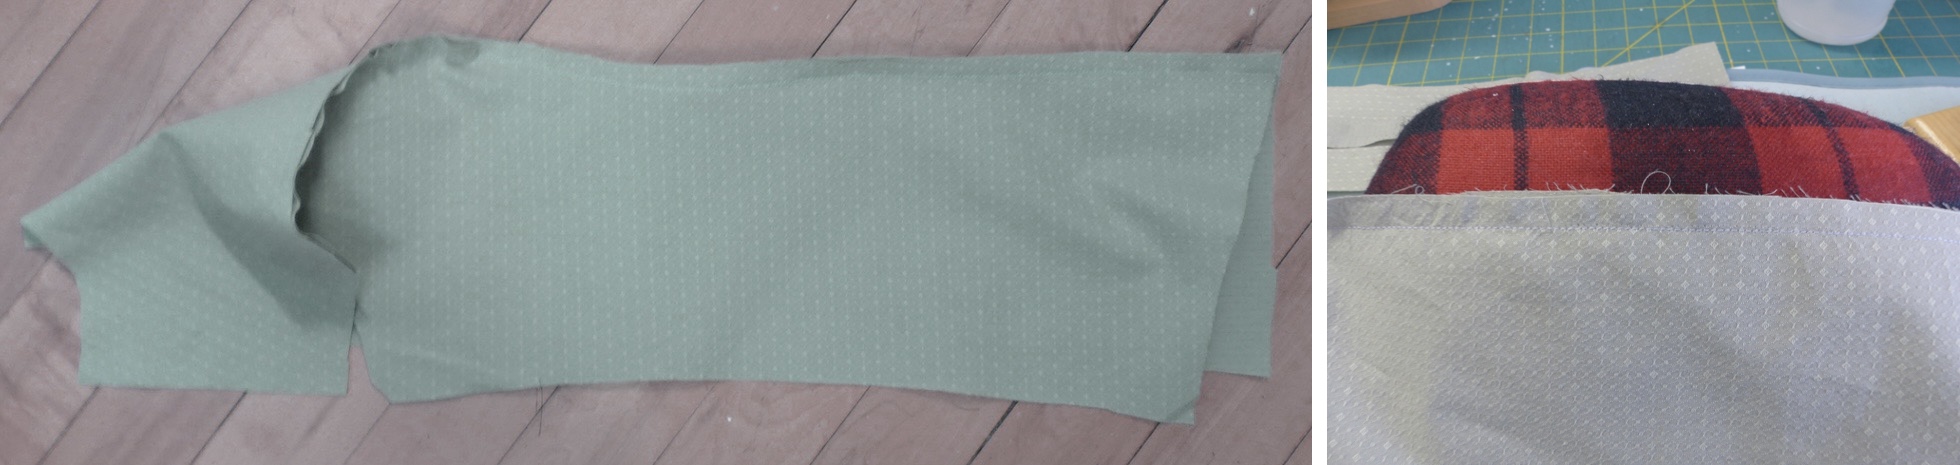
Here are the front and side front pieces, with only the sewing lines that will join them shown. Lay each set right-sides together, and hold together with a pin towards the edges that will be sewn (don’t try to line them up more yet).
Beginning at the armscye, match the top nips and then gently track the pieces together up to the start of the seam. Sew as far as the nips and stop with the needle down. Lift the presser foot if necessary and align the next section. Sew in short controlled bursts – don’t try to chew through, adjusting as you go.
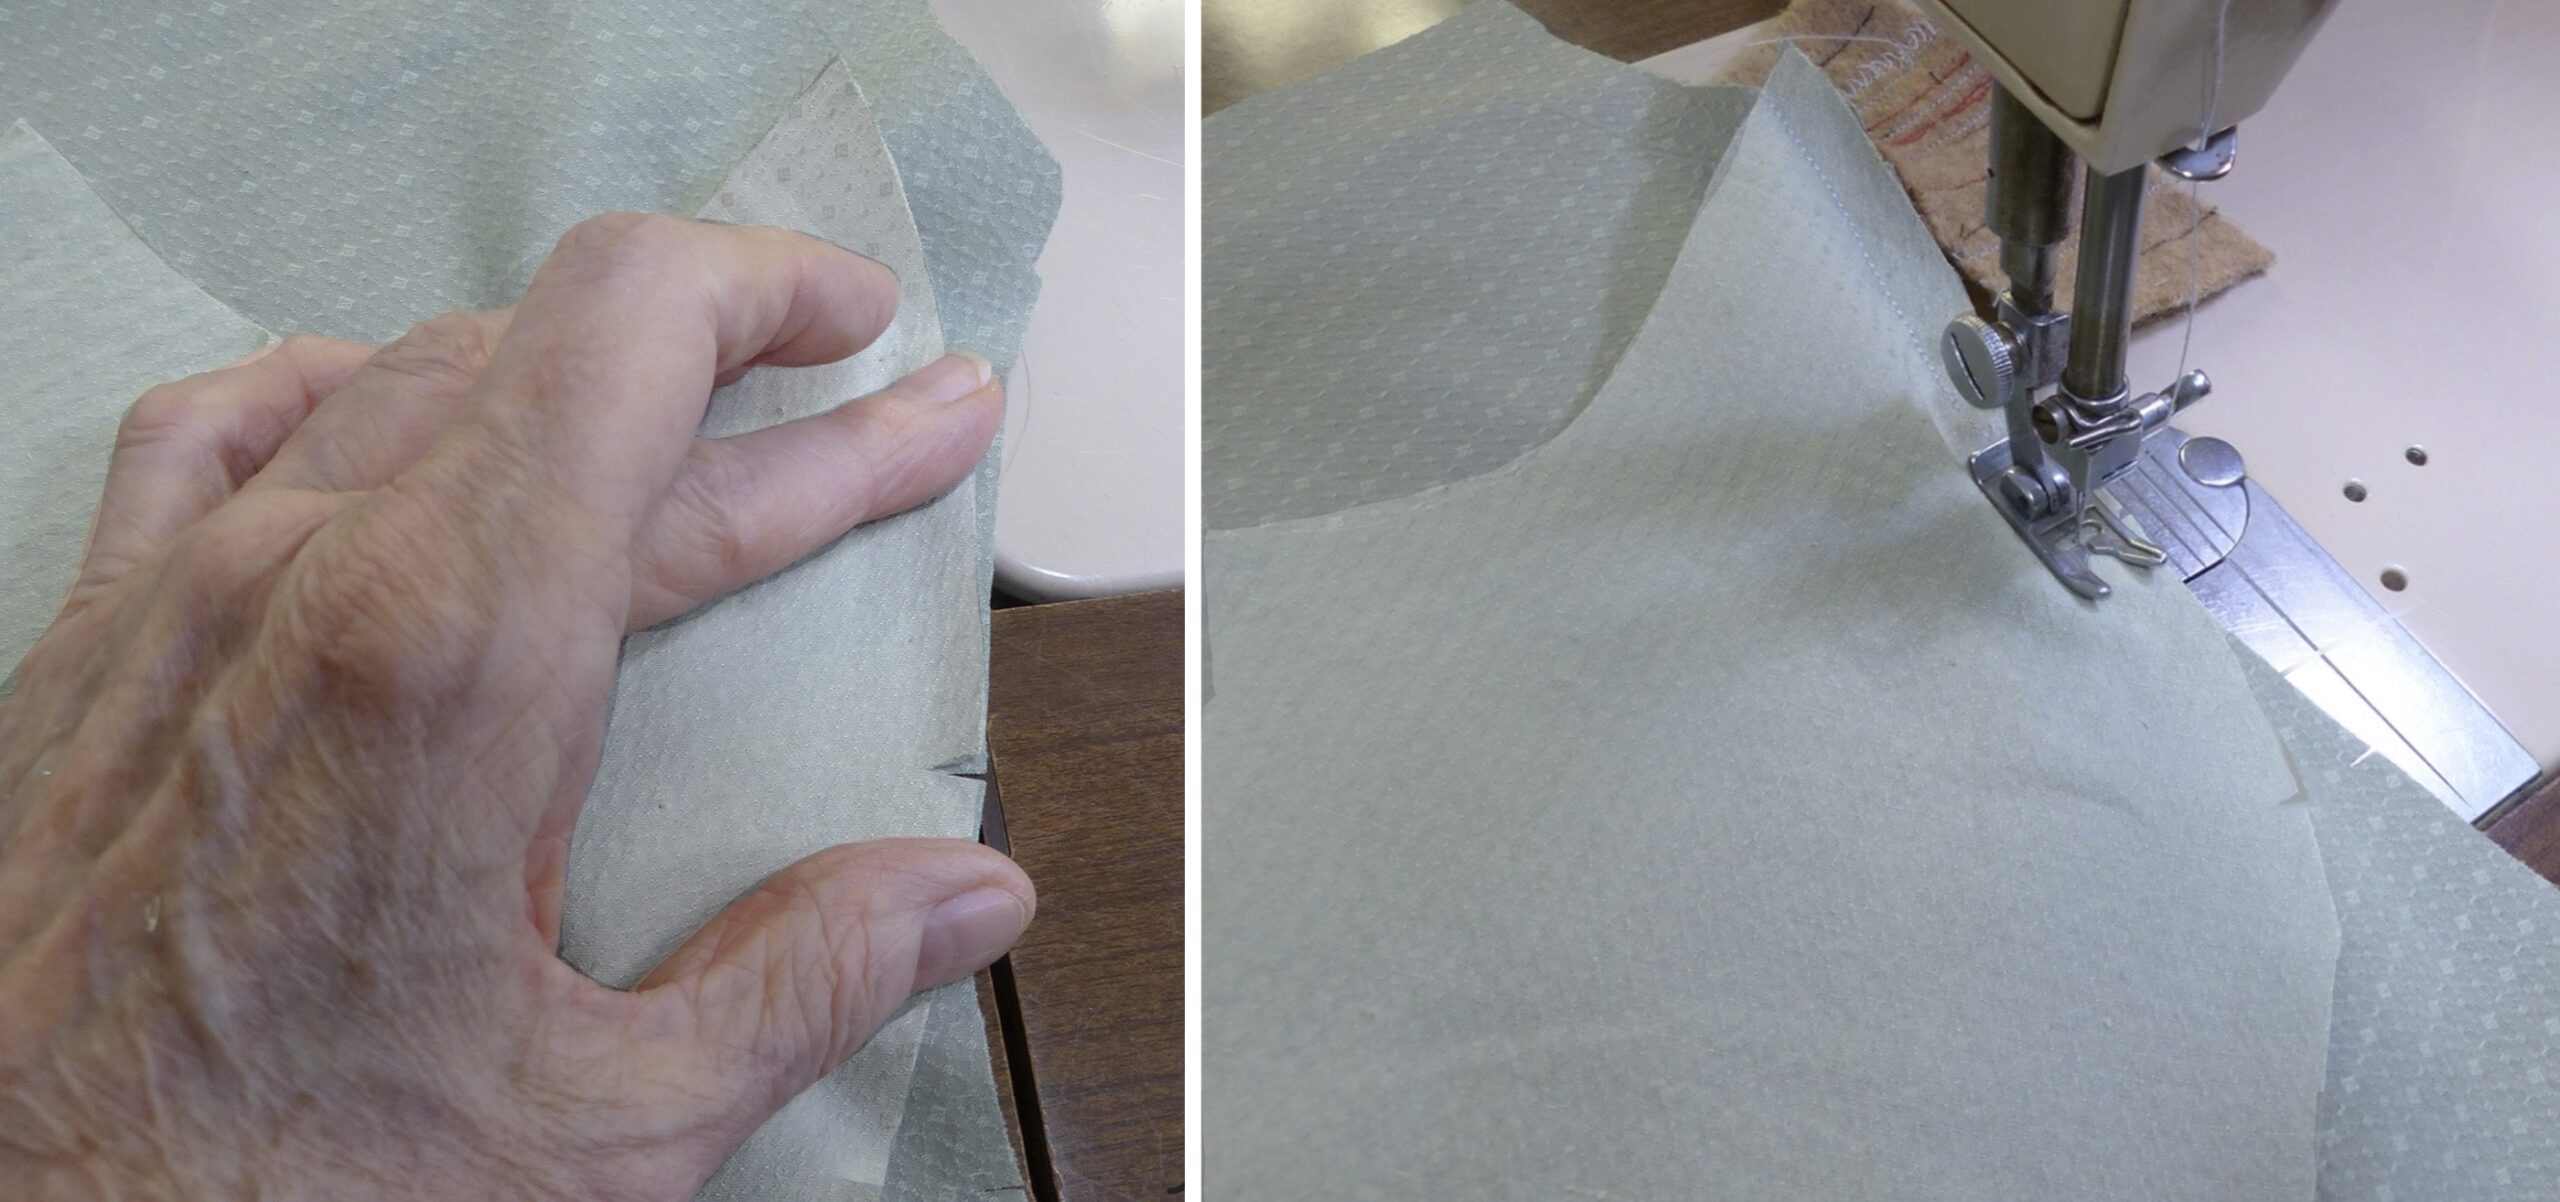
Continue to the bottom, where the pieces should exactly match. Press the seam as sewn over a ham/folded towel.
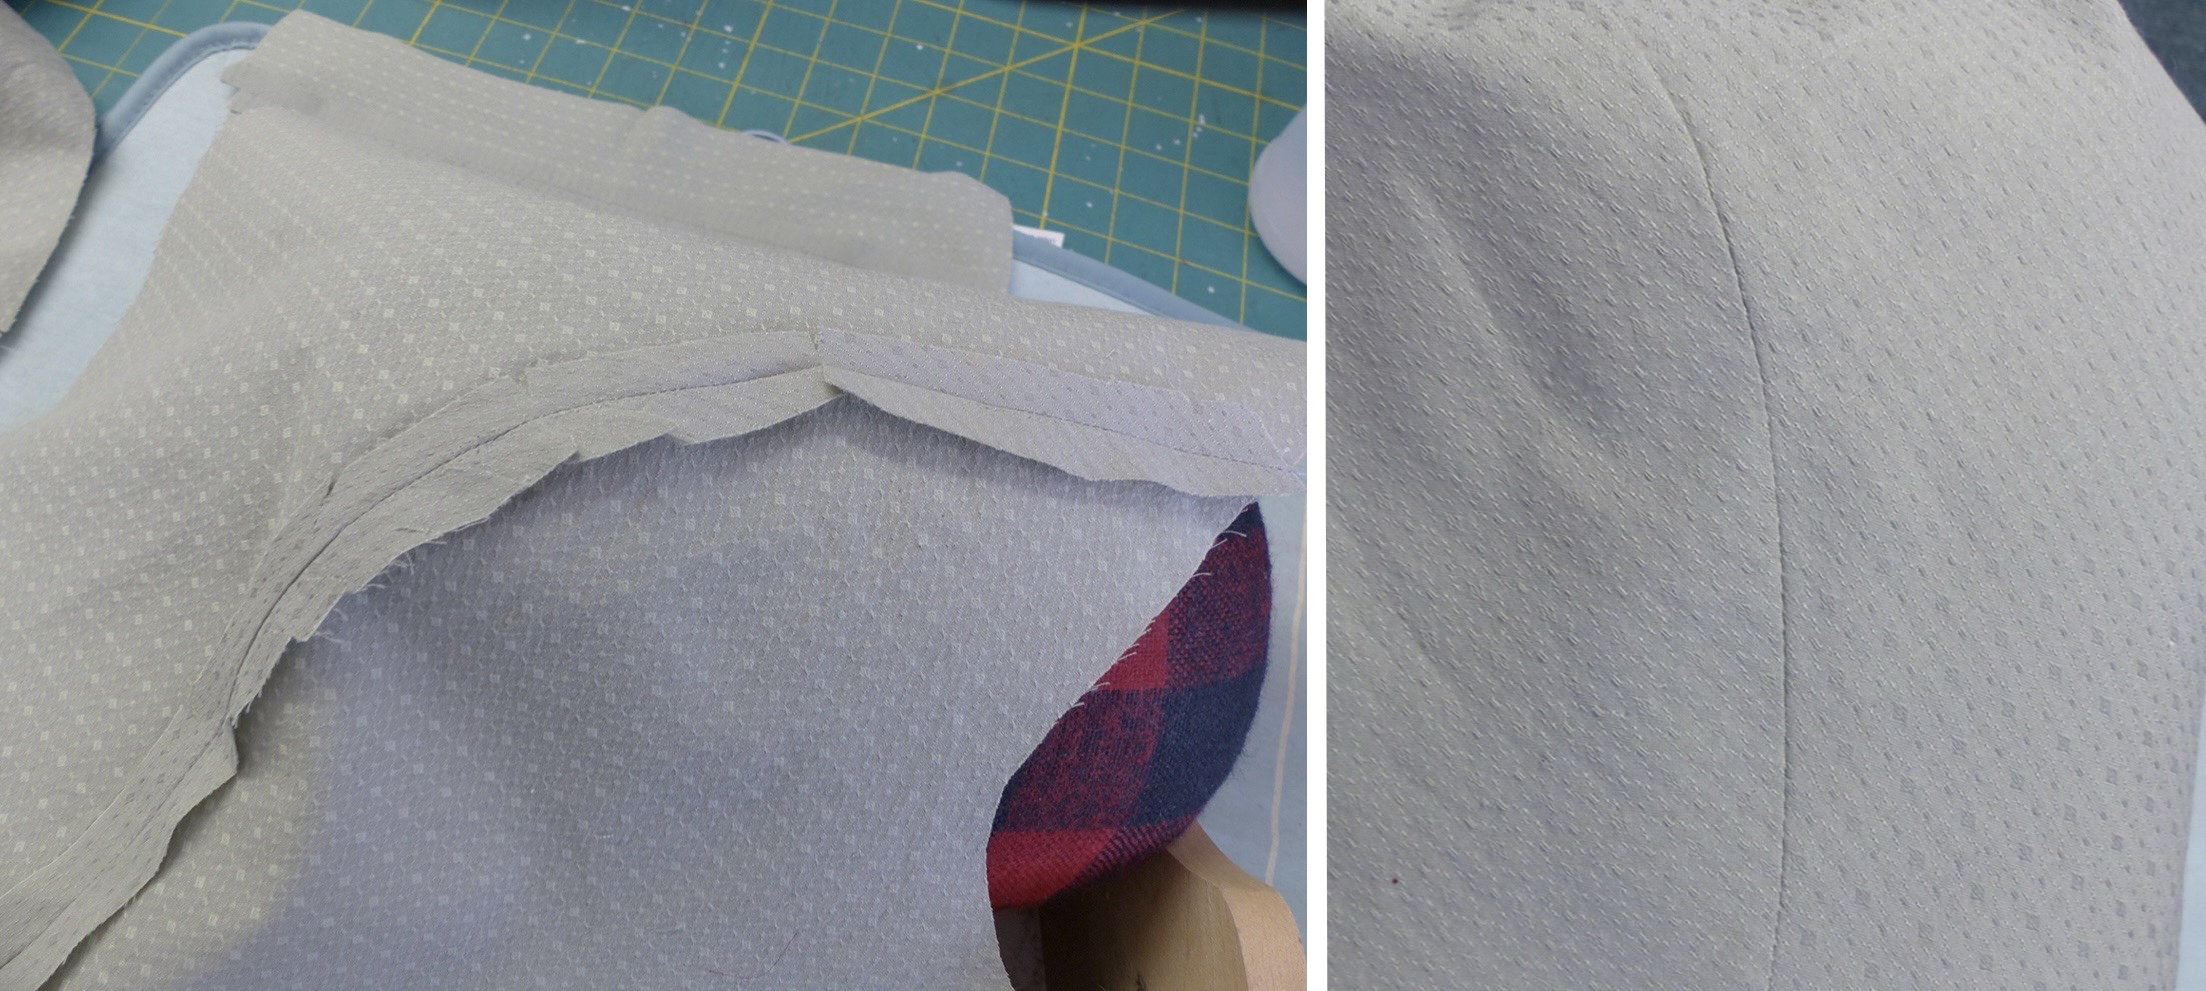
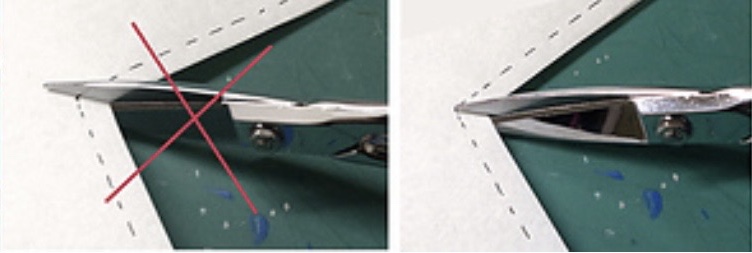
Here’s how I was taught to clip a curved seam to press it flat:
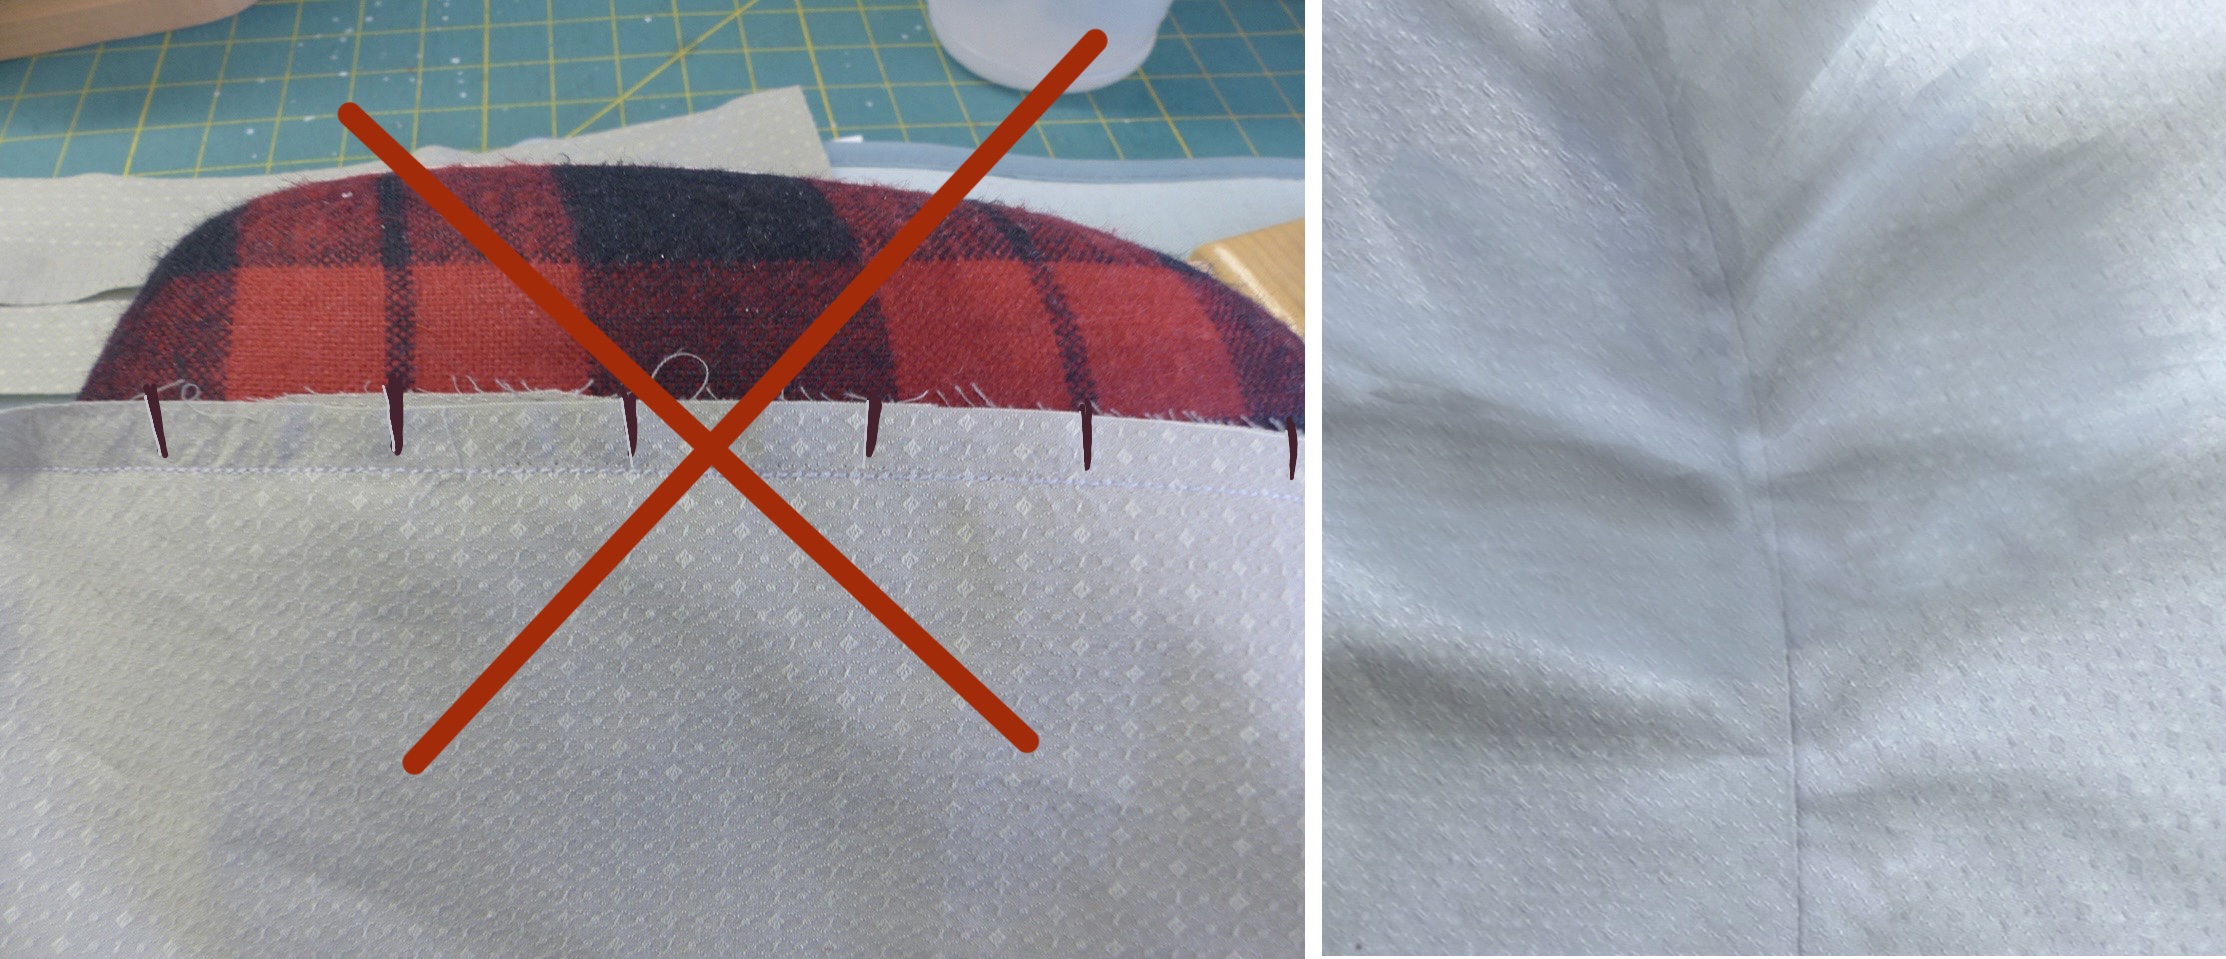
NOOOOOOOOOOO.
You’ll end up with flat sections between puckers.
Instead, start to open the seam, pressing it with the point of your iron. Wherever you see the fabric under tension, make a diagonal cut only as deep as necessary to release it. The cuts are rarely symmetrical. Put them where they need to go (the sets of straight cuts were the nips to align the sides).
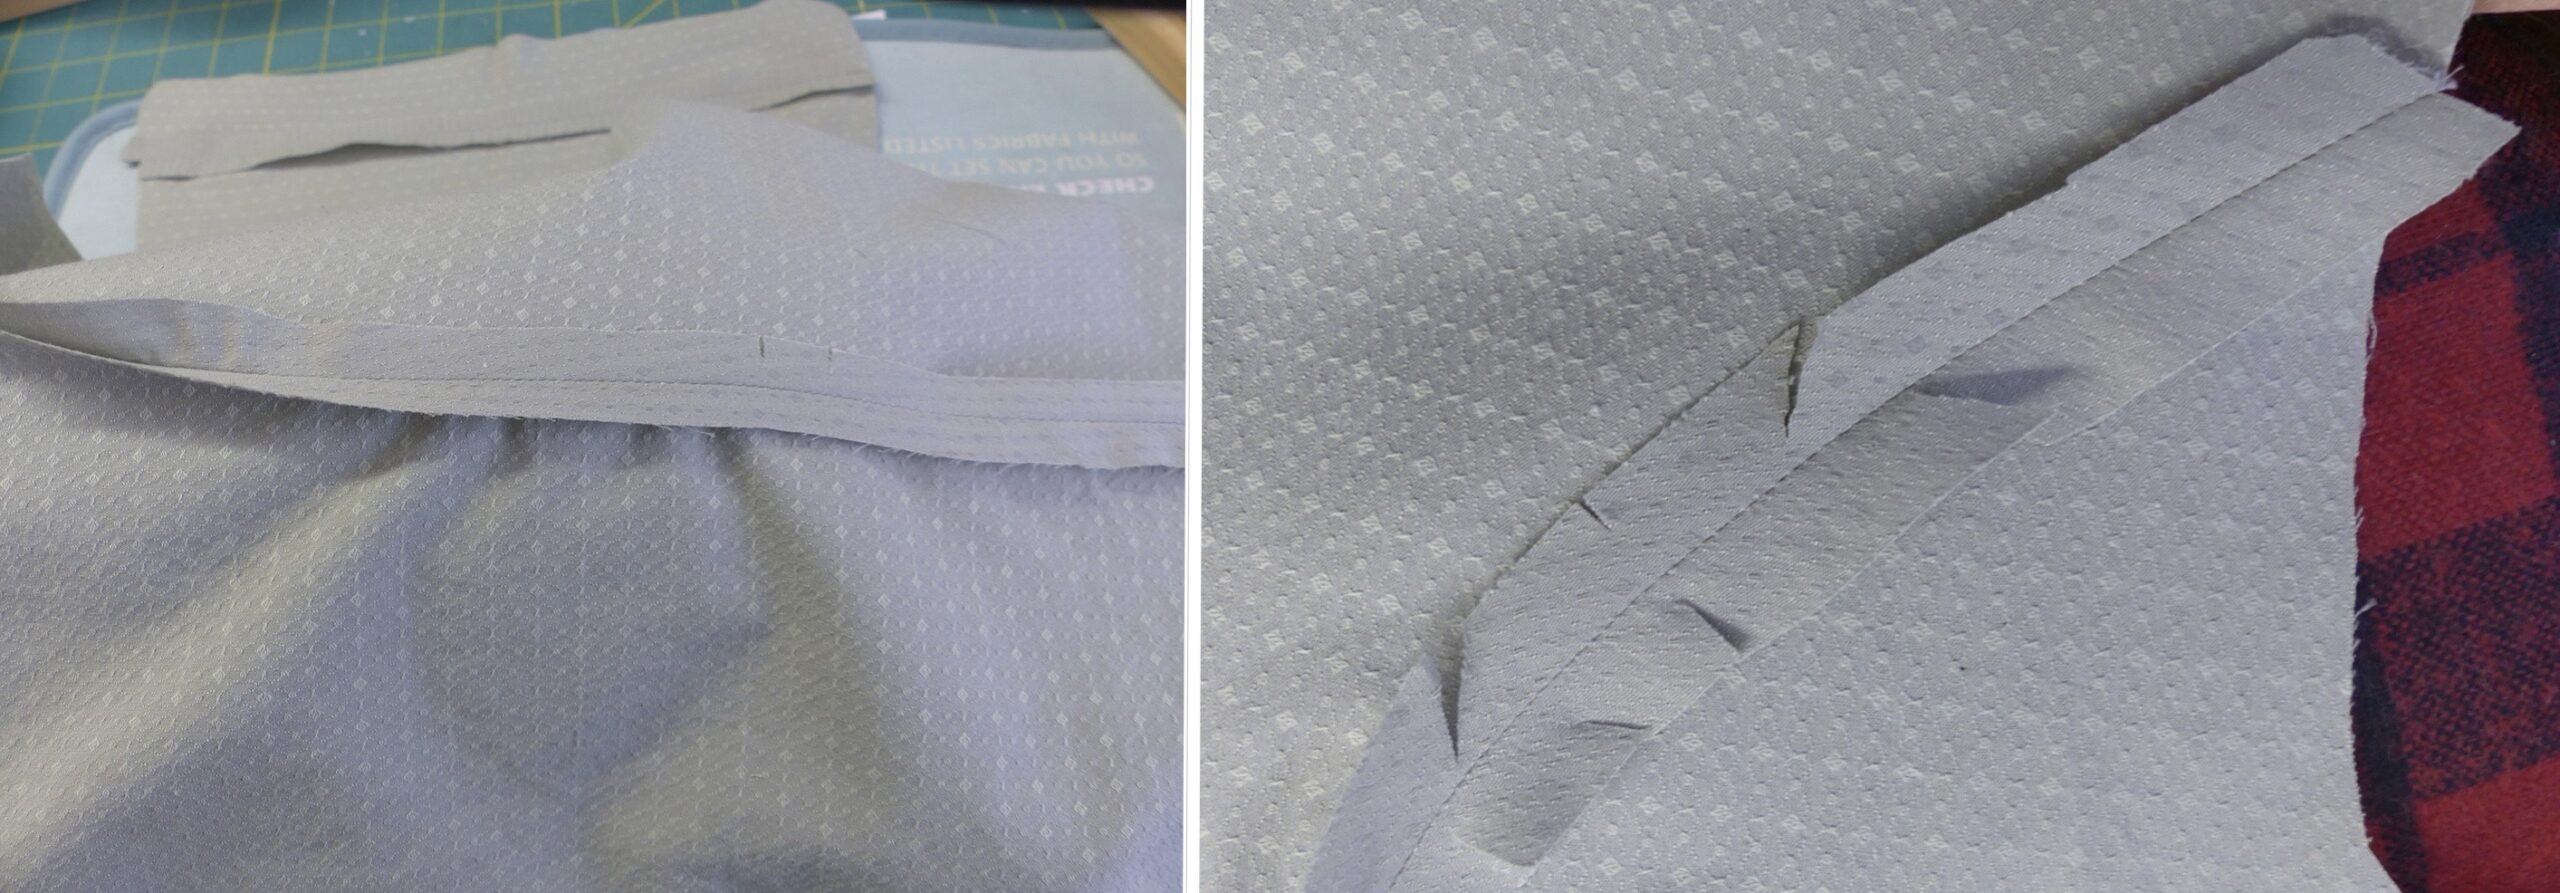
Your result will be a perfect curved seam.