This tutorial uses a flexible ruler to generate a crotch shape that matches your body; which is then modified using the template. It will serve as the base for all your pants’ blocks.
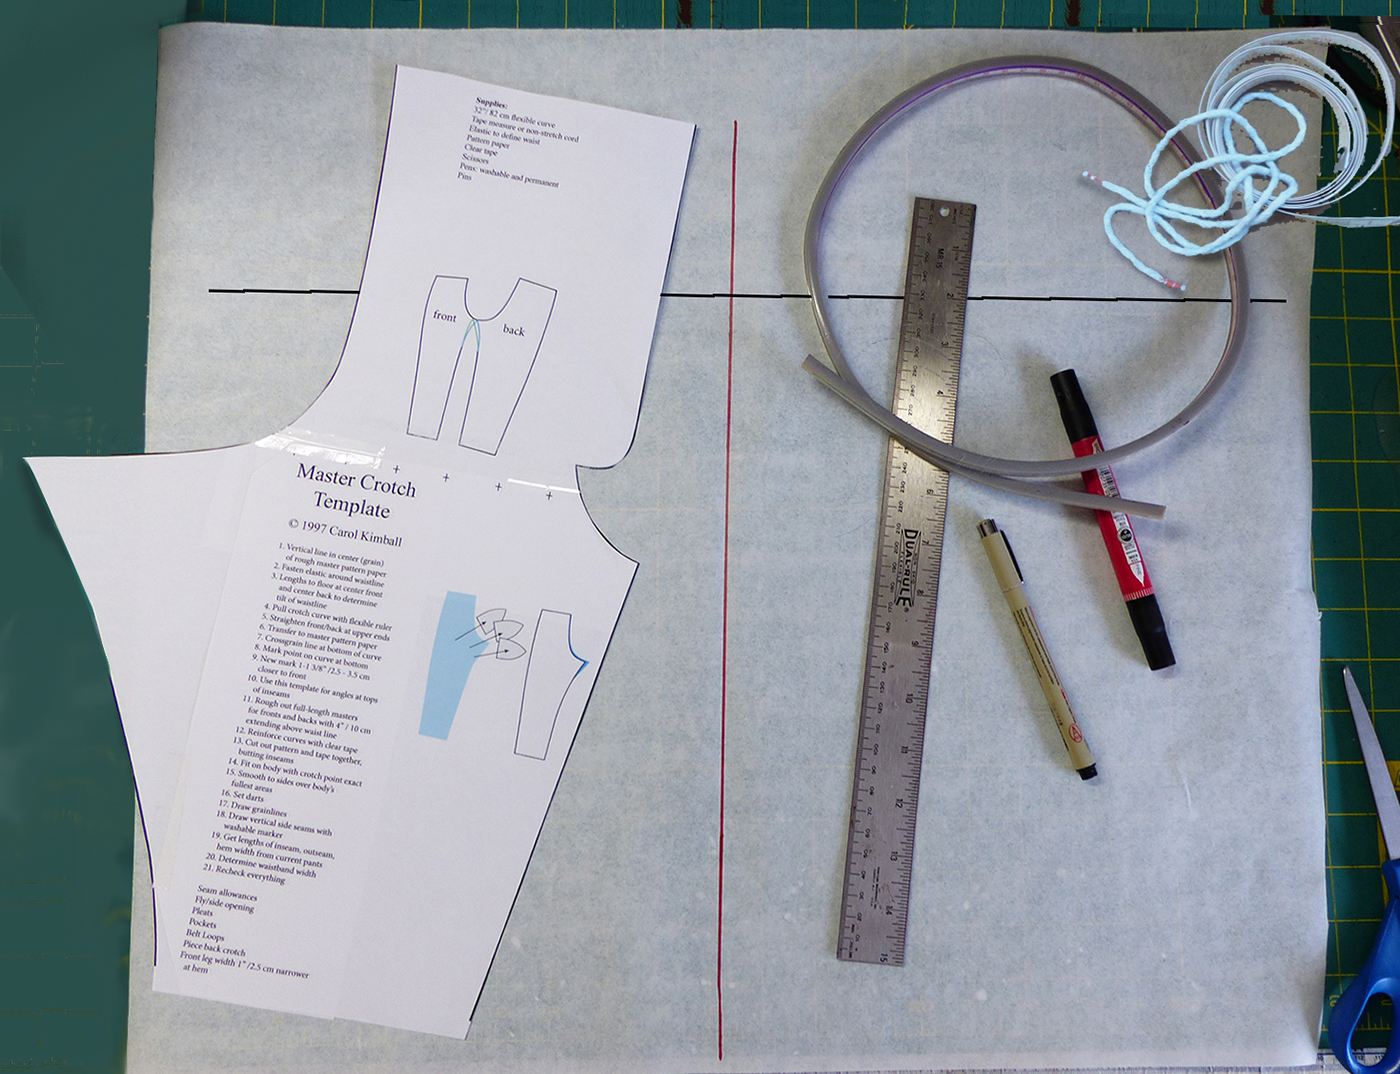
Tools and supplies: pattern paper, inseam template, flexible curve, ruler/straightedge, markers, scissors, tape, measuring tape OR non-stretch cord. Not shown: a piece of elastic or cord long enough to fasten around the waist.
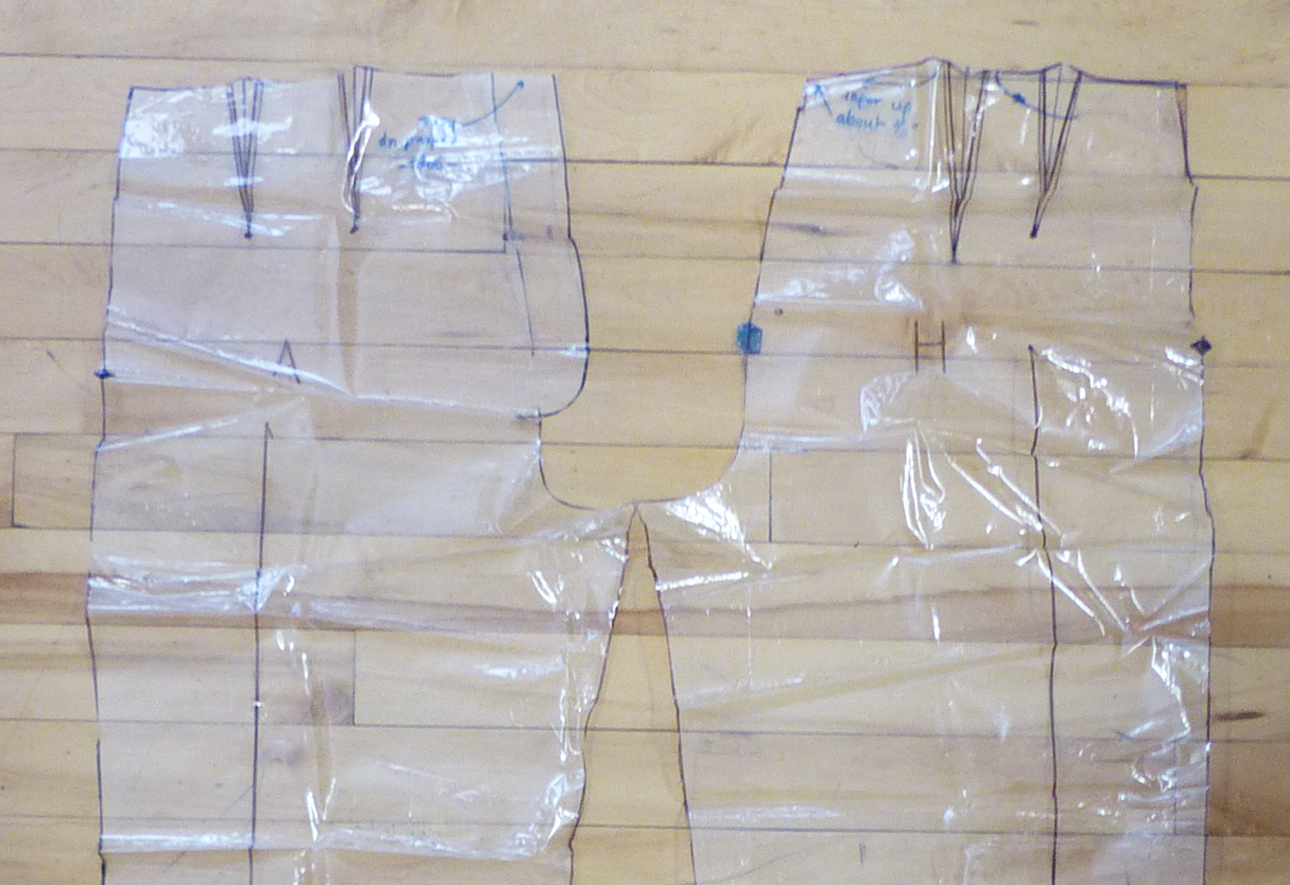
Print, tape together and trim the three pages that make the inseam template (the instructions on it were a shorthand for teaching; use the ones following instead). When you cut it out, split the outside line for accuracy.
Crotch Fit: why is it so hard?
Many pants patterns fail because they don’t have enough space for the pelvis, as in the graphic at left taken from a free PJ pants pattern. The critical areas are the shape of the lower pelvis (the bone, which doesn’t change with weight gain or loss), and the width of the body from center front to center back. We can get these with a flexible ruler that duplicates the shape of your body. “Why straighten lines, then, for the upper crotch length?” For stability: bias curves will stretch out (often during the first fitting).
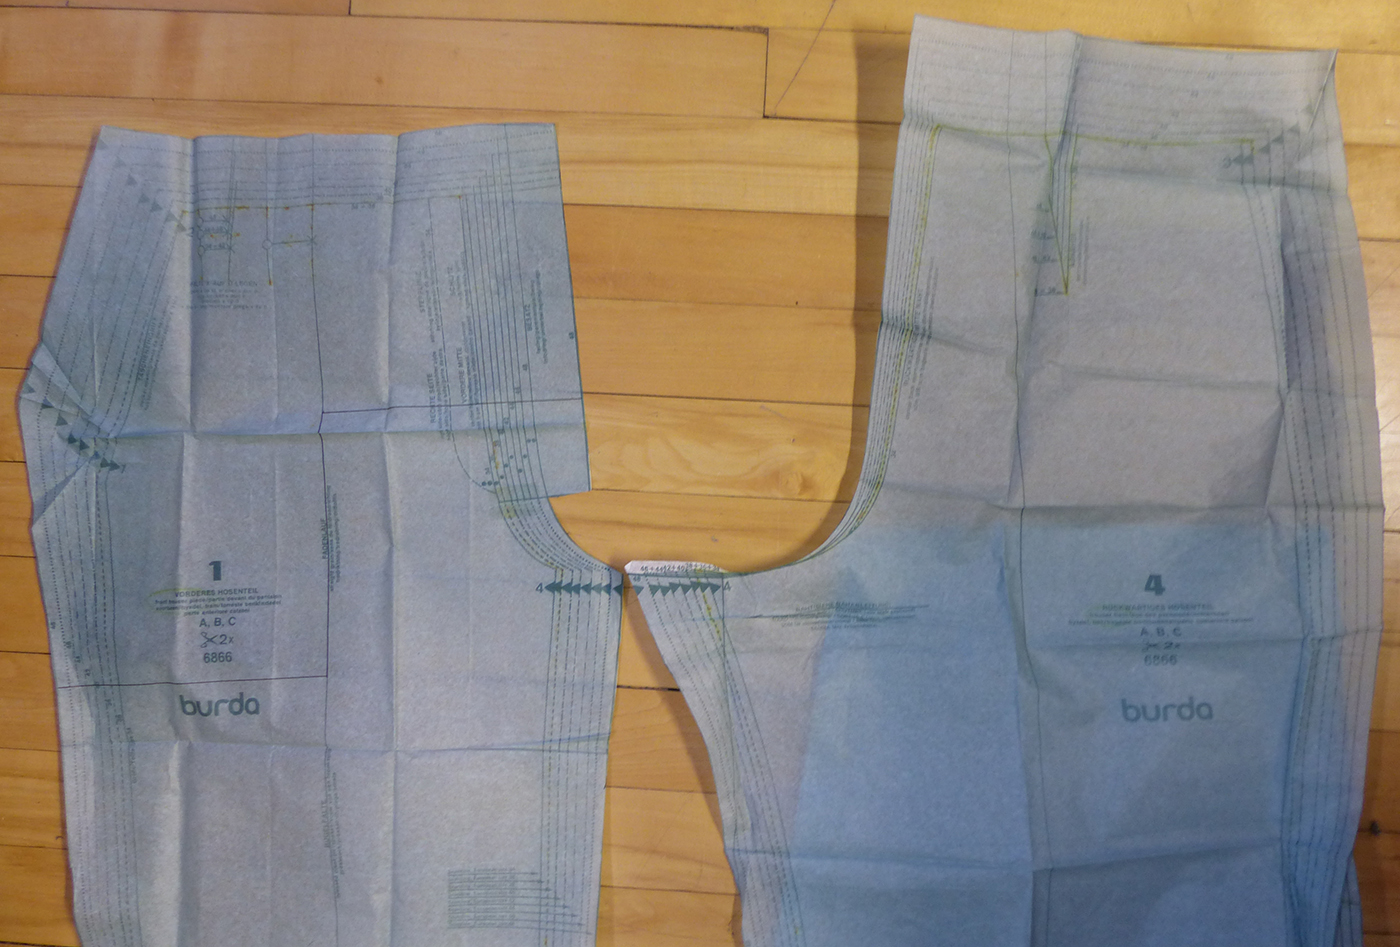
This Burda pattern has three important elements: first, there’s enough room for my body; second, the bottom back has been squared off for stability; and third, where the crotch seams meet has been moved forward (why this is important in a minute).
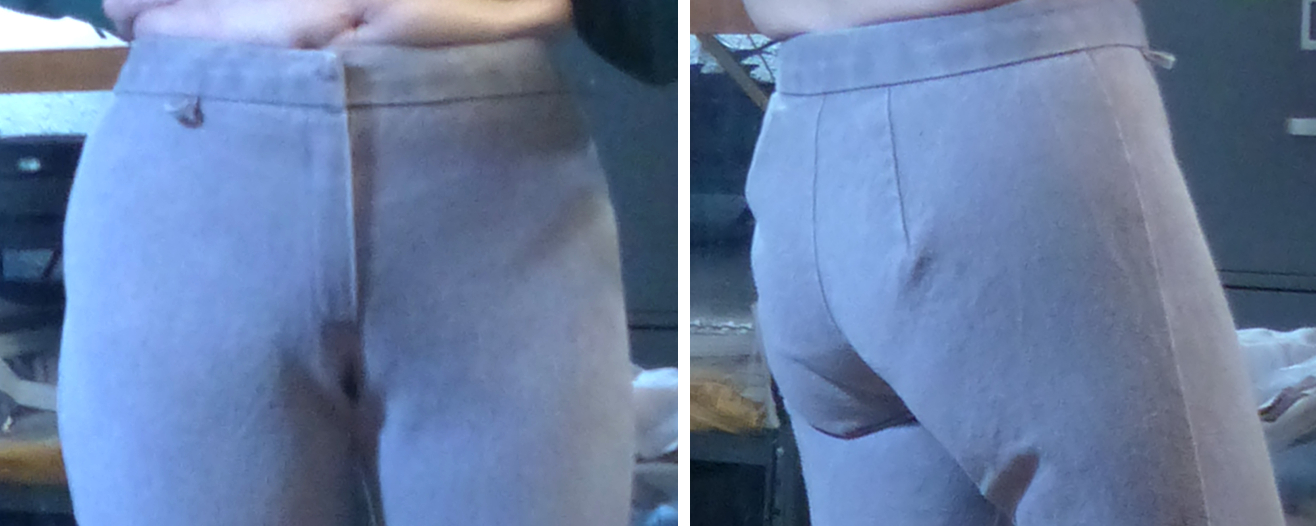
This custom pattern, ordered from my measurements from one of the Big Four (U.S.) pattern companies, has the squared-off back lower bottom, but it isn’t wide enough for my body. See next graphic. It still fit better than most pants patterns.
Pants from the custom pattern: not enough width results in the dread “camel toe” at the front. The back cups my bottom approaching a jeans’ fit, but is too tight even for those and far too snug for pants.
Plumber’s Butt:
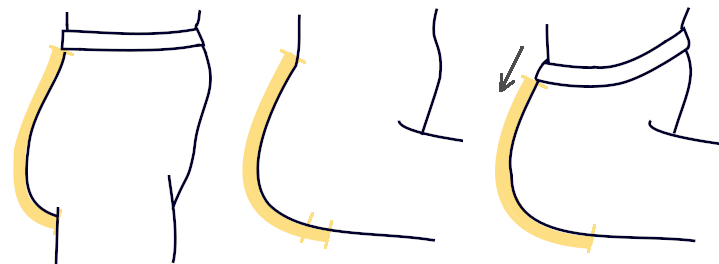
When we sit, our back crotch gets longer (you can feel this by cupping your hand on your bottom’s crease while standing, and then lifting that knee or sitting), pulling down the center back. The usual fix is a snug belt, or sewing the pants of a stretch fabric/using elastic across the back for the waistband. “You pays yer money and you takes yer choice”. As you build successive pants you’ll be able to see how changing parameters changes the fit, and decide what you prefer.
Baggy Butt:
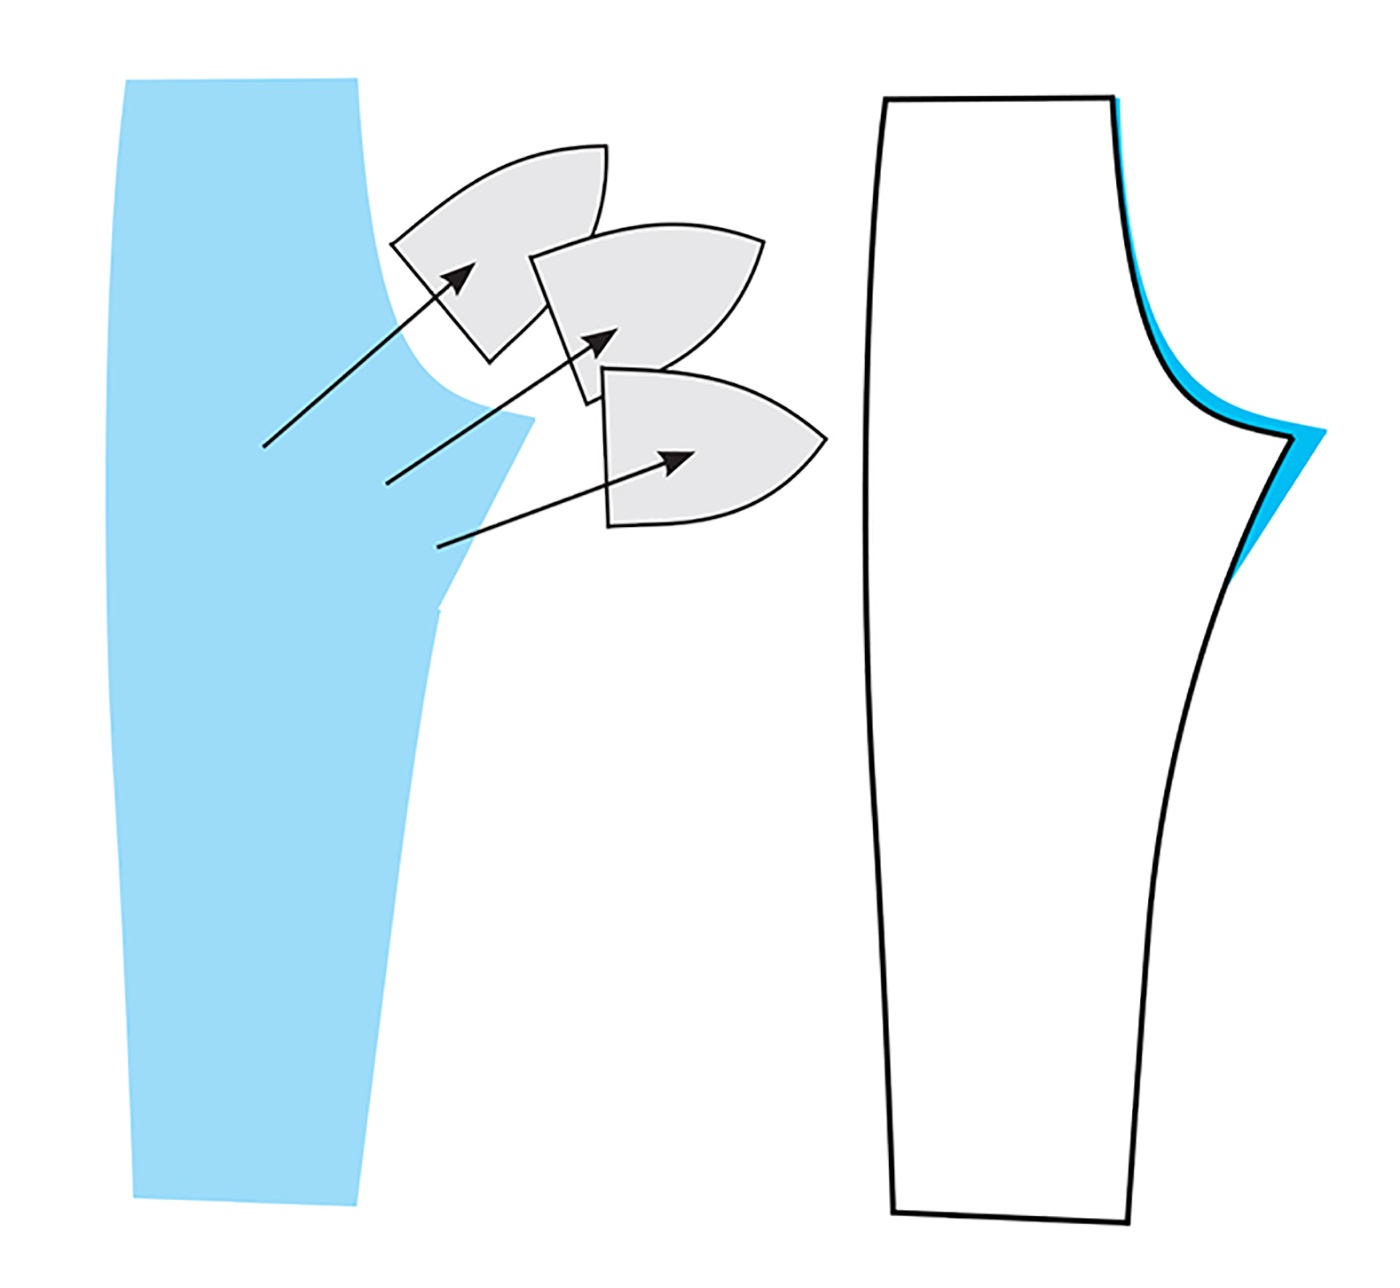
In couture (and some older commercial sewing patterns), up to 1/2″ // 1.25cm is added to the leg inseam between the crotch and the knee to provide more ease when sitting (this works but is a nuisance). Many European patterns cleverly solve this by moving the point where the crotch seams meet forward, on most bodies 1 1/4-1 1 3/8″ // 3-3.5 cm. This puts the front edge closer to the grain line and throws the back towards the bias, which naturally wants to stretch out. This helps as long as the fabric recovers.
The back crotch fork is the triangle sticking out, with two fragile bias edges. As the garment is worn, these often stretch out, resulting in baggy butt. A couture/bespoke tailoring solution is to press out the crotch fork: after cutting, take a steam iron and gently move the fabric out from the center (lay them together, press the top layer out, flip over and do the other to match). Use common sense: you don’t want the fabric paper-thin. Lay your pattern back over and trim off the excess (the amount you take off is going to vary with each fabric) It’s not much trouble for great results, not just when the client picks up their garment, but for the years they’ll be wearing them.
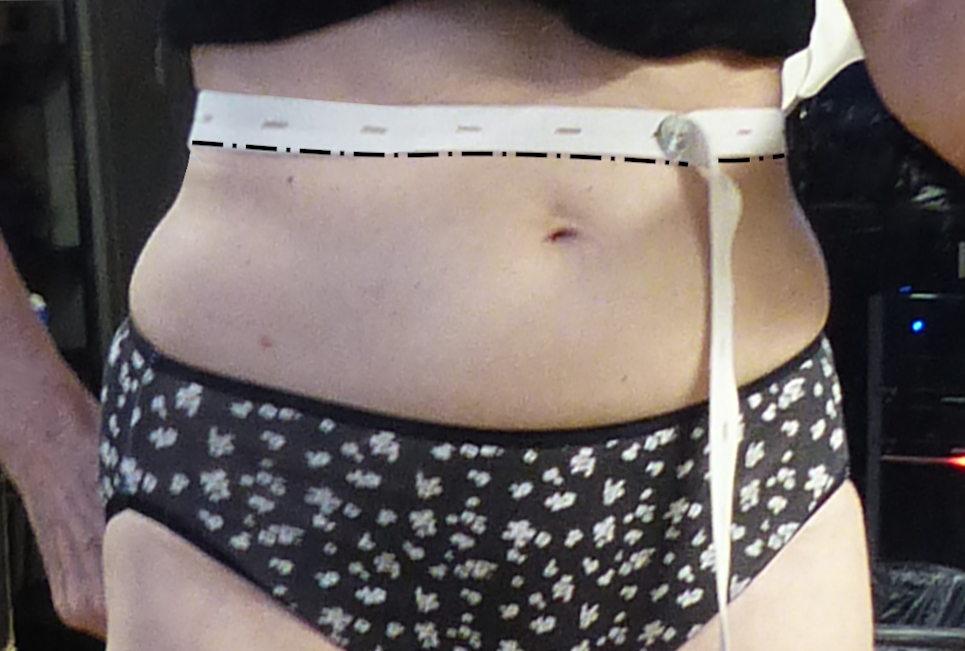
Fasten elastic (or a cord) at your waist and twist and wiggle until it settles. The bottom of the tape is your natural waistline (we can raise or lower it later). Its circumference is usually NOT parallel to the floor. If it angles up or down, that’s where your waistband must sit for your pants to fit correctly.
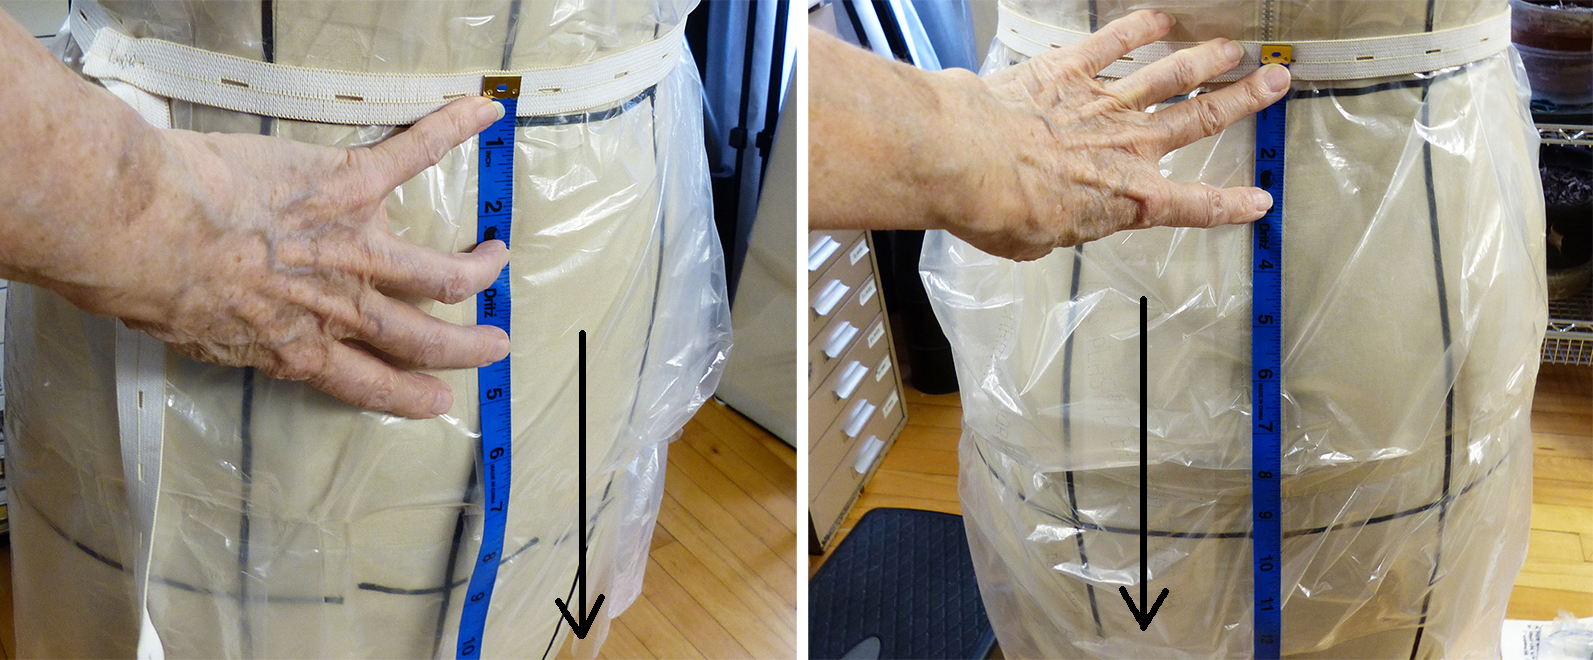
Measure from the elastic to the floor at center front and center back. You do not need to use a tape measure; a non-stretch cord is fine. All we care about is the difference between the front and back lengths. This deals with the shaping of your body and is not the same as your waist tilt.
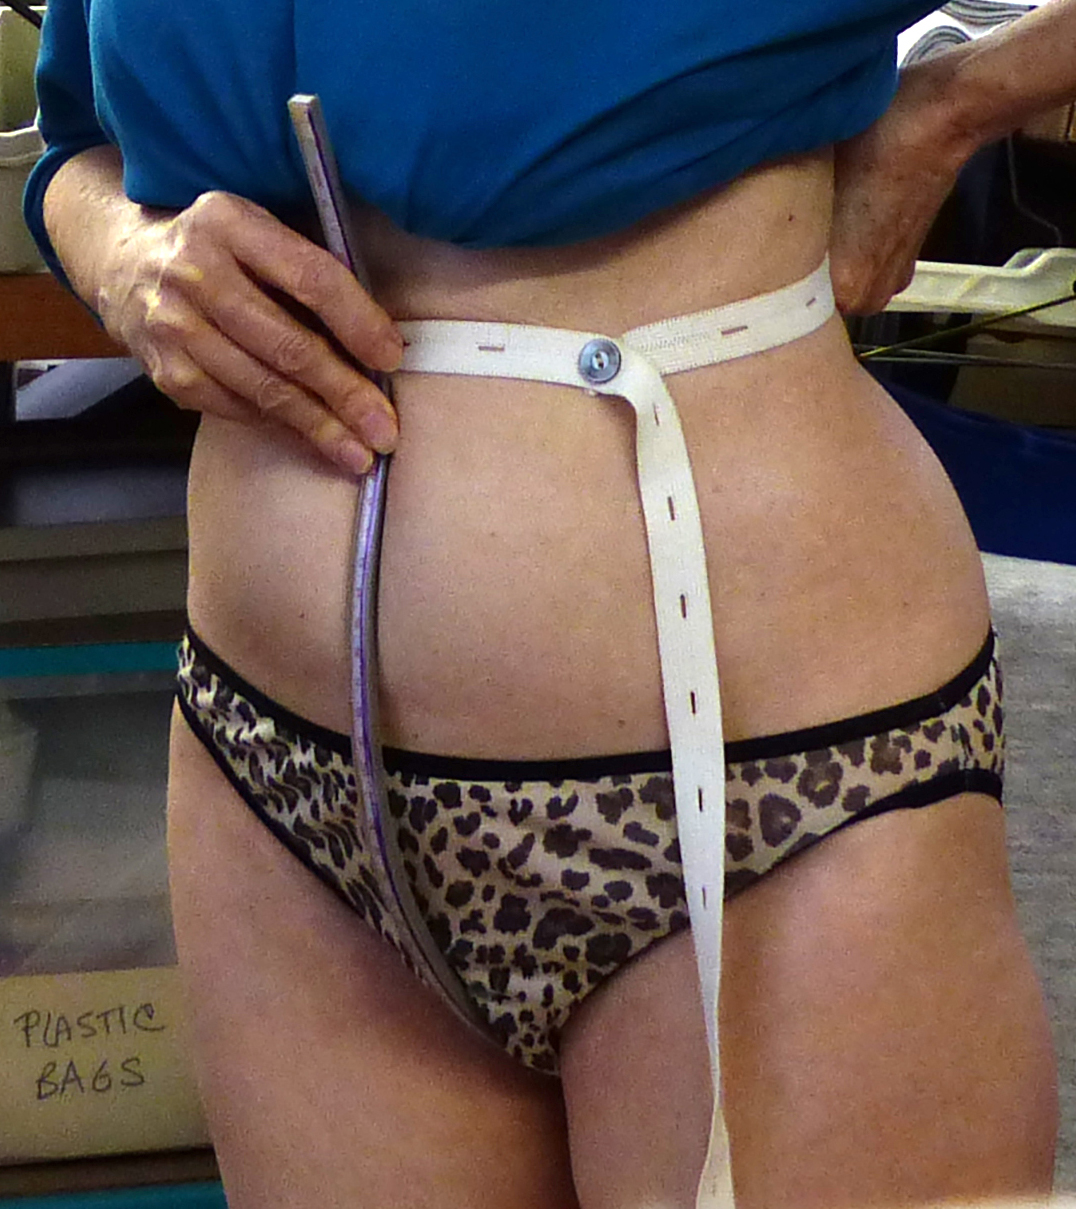
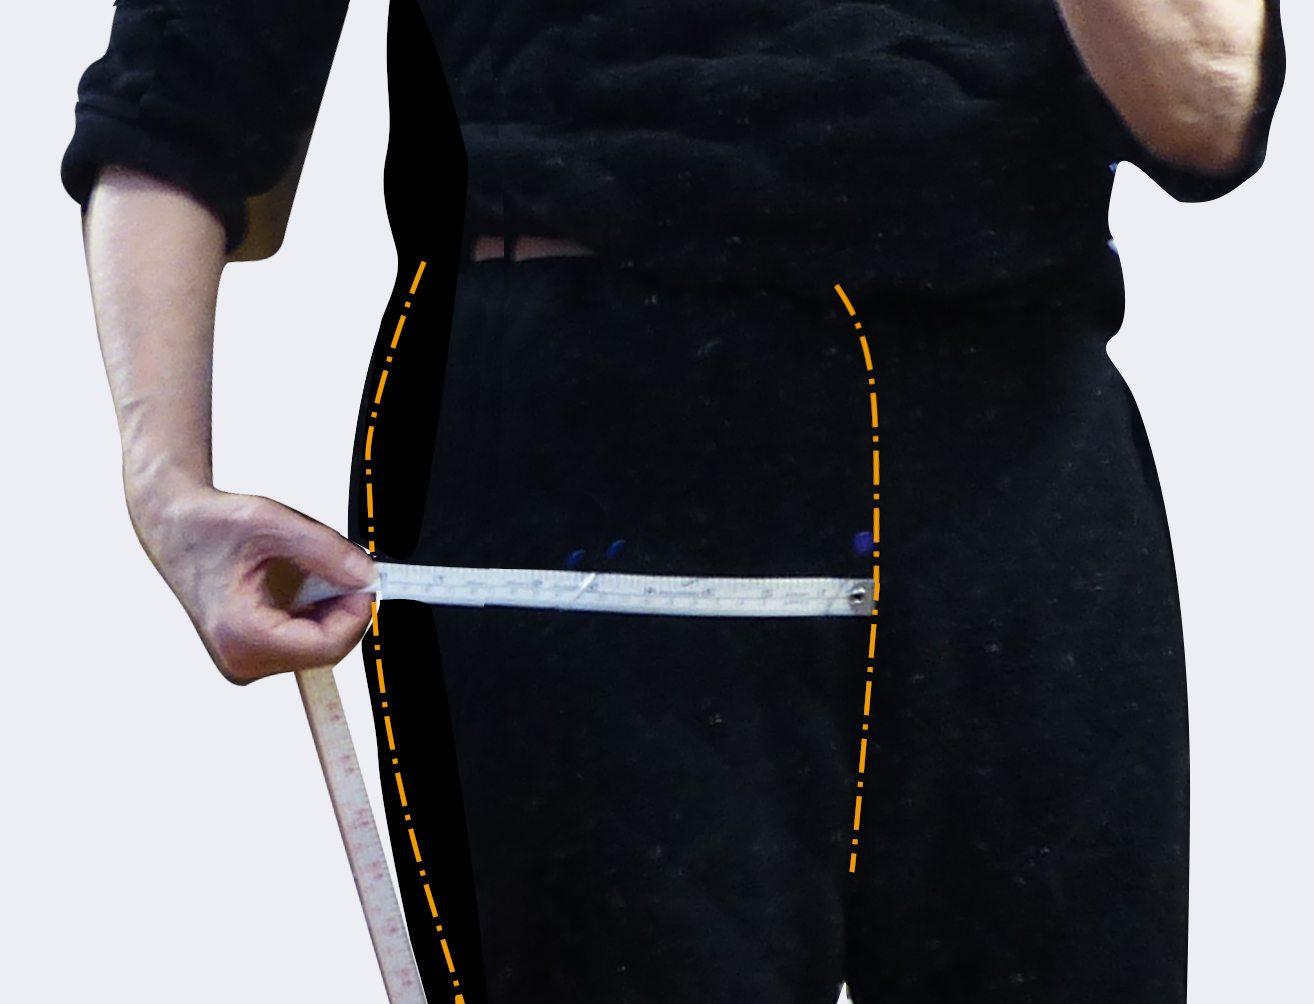
Place the end of your flexible ruler at the elastic at your center back, and bring the ruler to the front, comfortably close to your body. Mark both ends with painter’s tape.
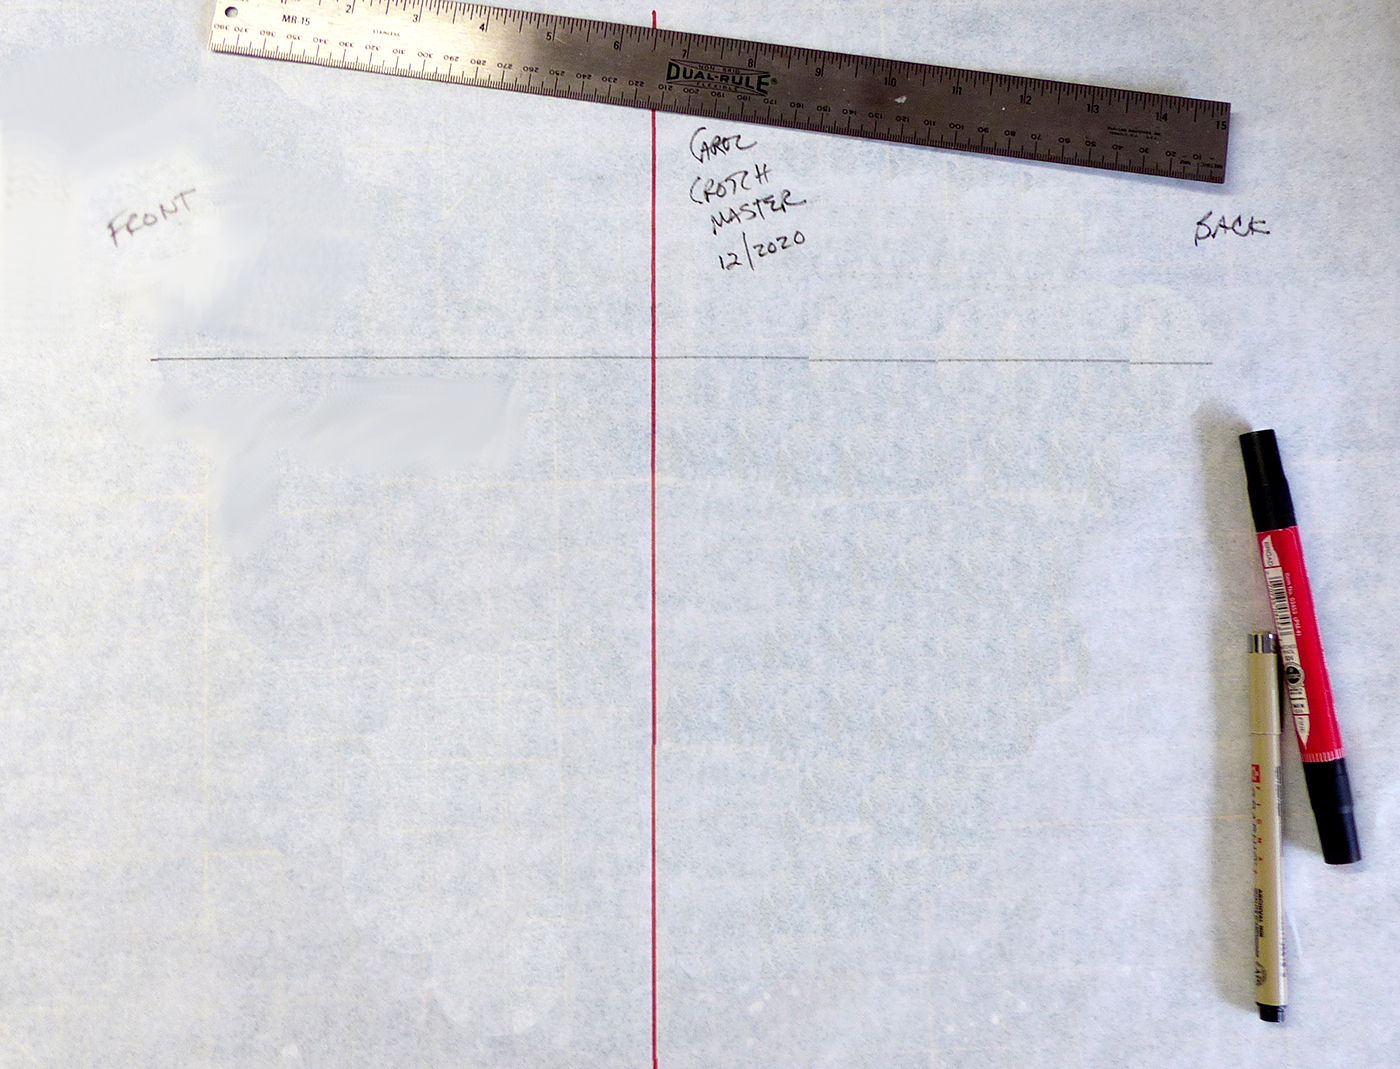
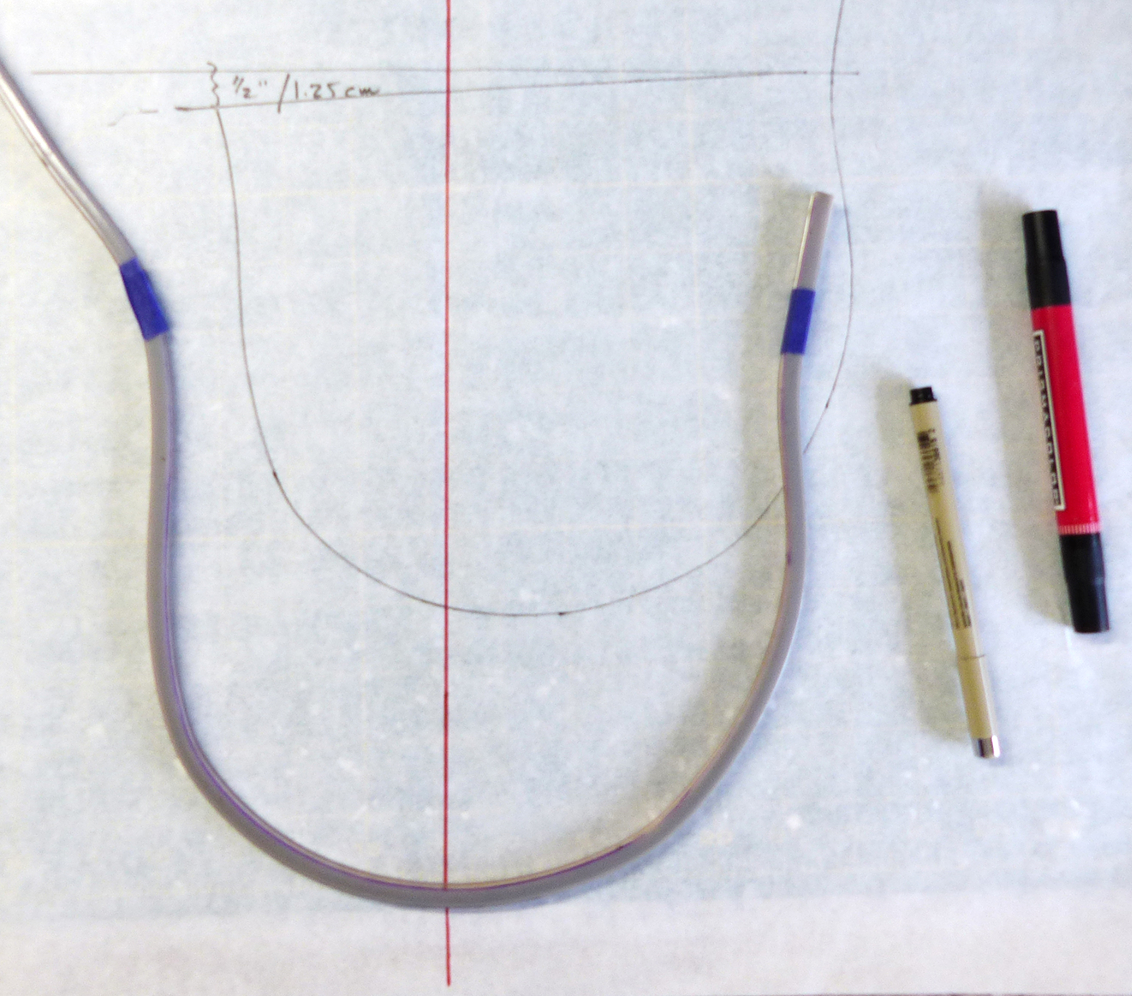
Creating your Crotch Master: begin with a generous piece of pattern paper. The size should be your waist to crotch plus 10″ // 25.5 cm top-to-bottom, and 22″ // 52 cm side-to-side (if your paper isn’t wide enough, add another piece). Draw a red line* vertically through its center and another perpendicular about a hand’s width from the top edge. Label. *Vertical red lines are critical for placing pattern pieces on grain. This is not a grain line but a reference only.
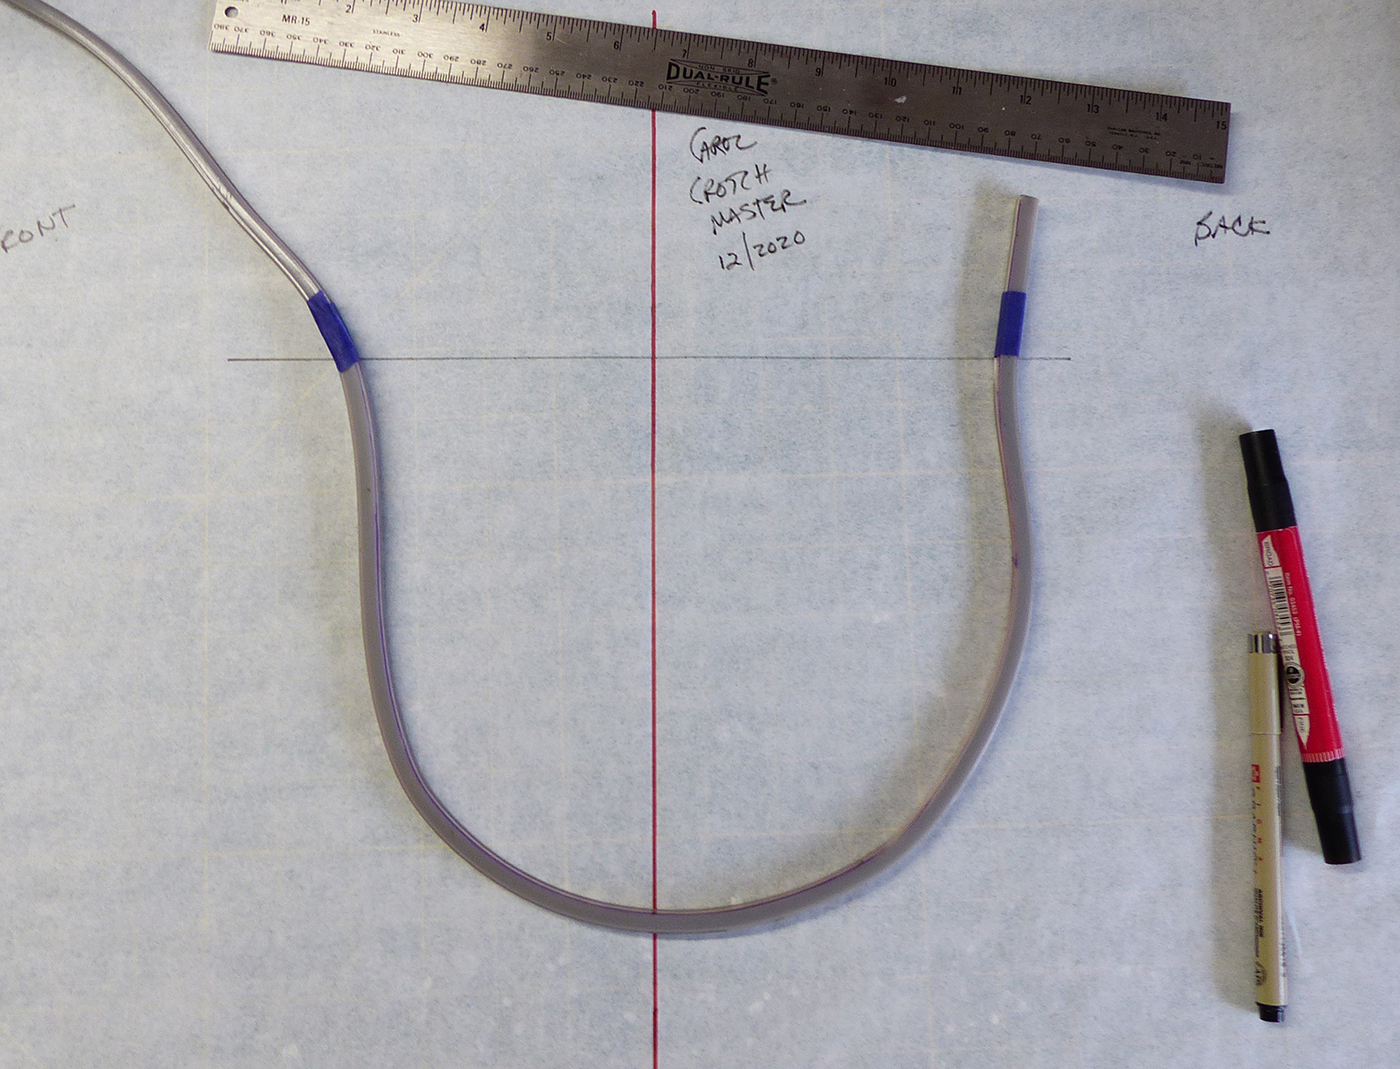
Step out of your flexible ruler and lay it on the paper with the taped marks on the cross line.
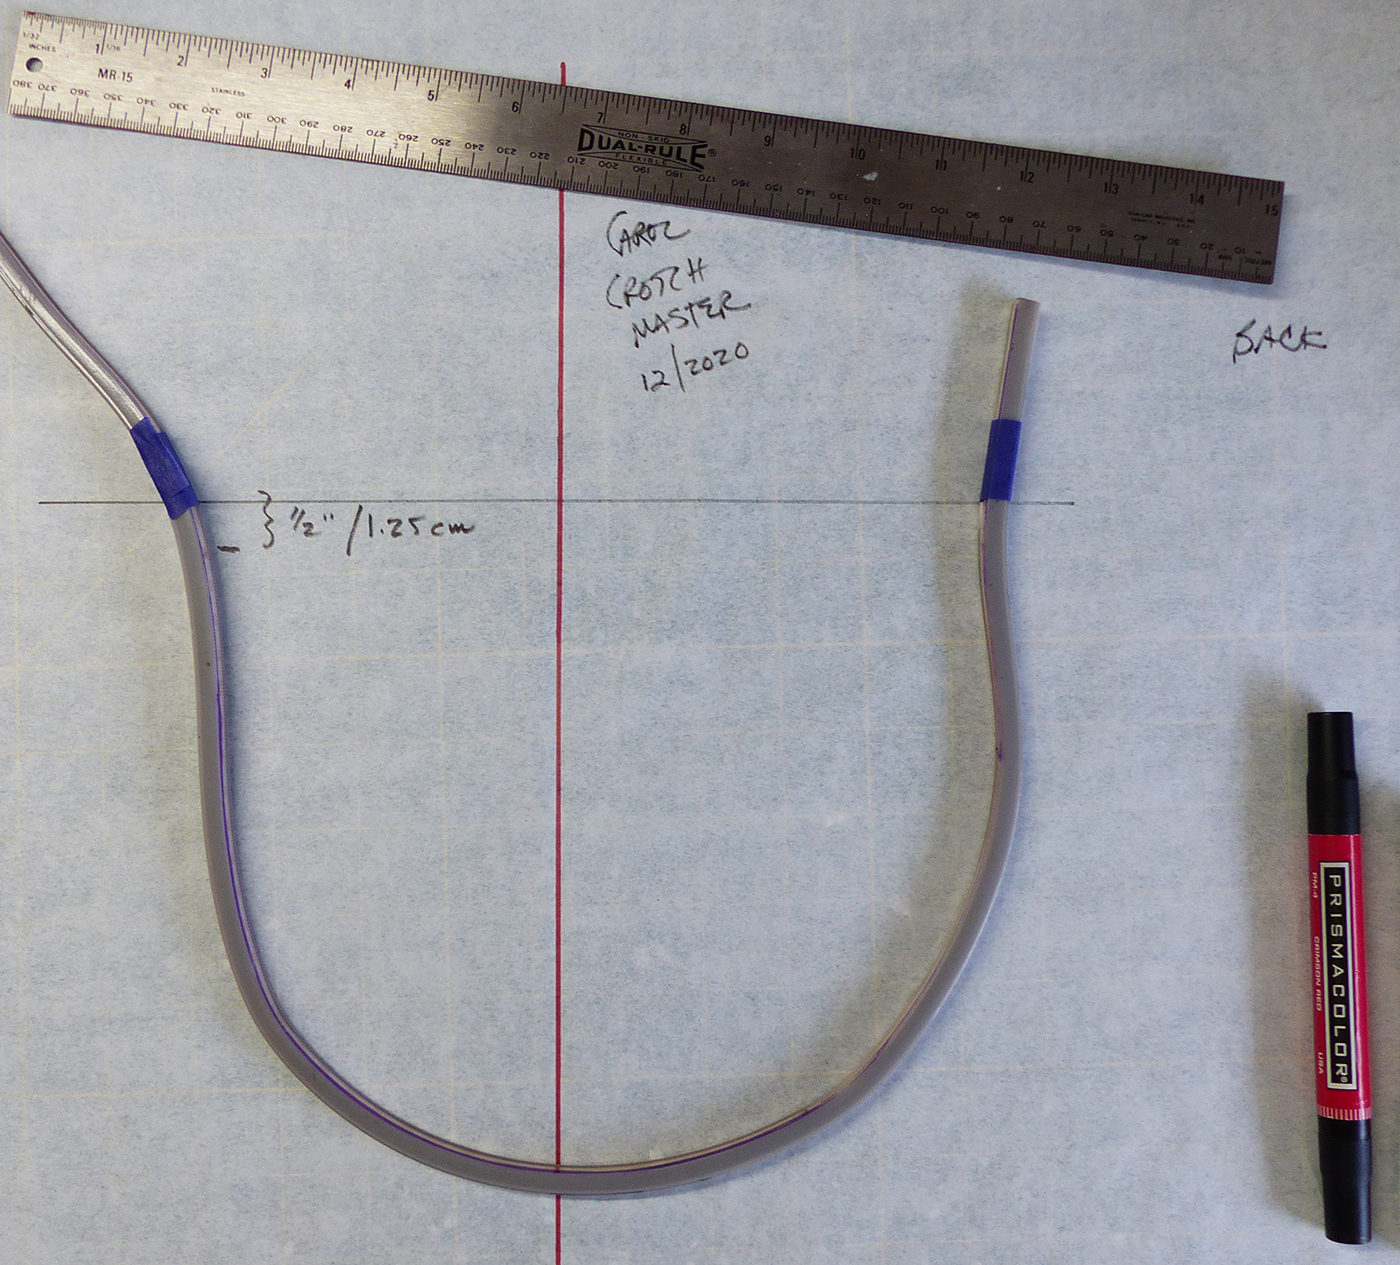
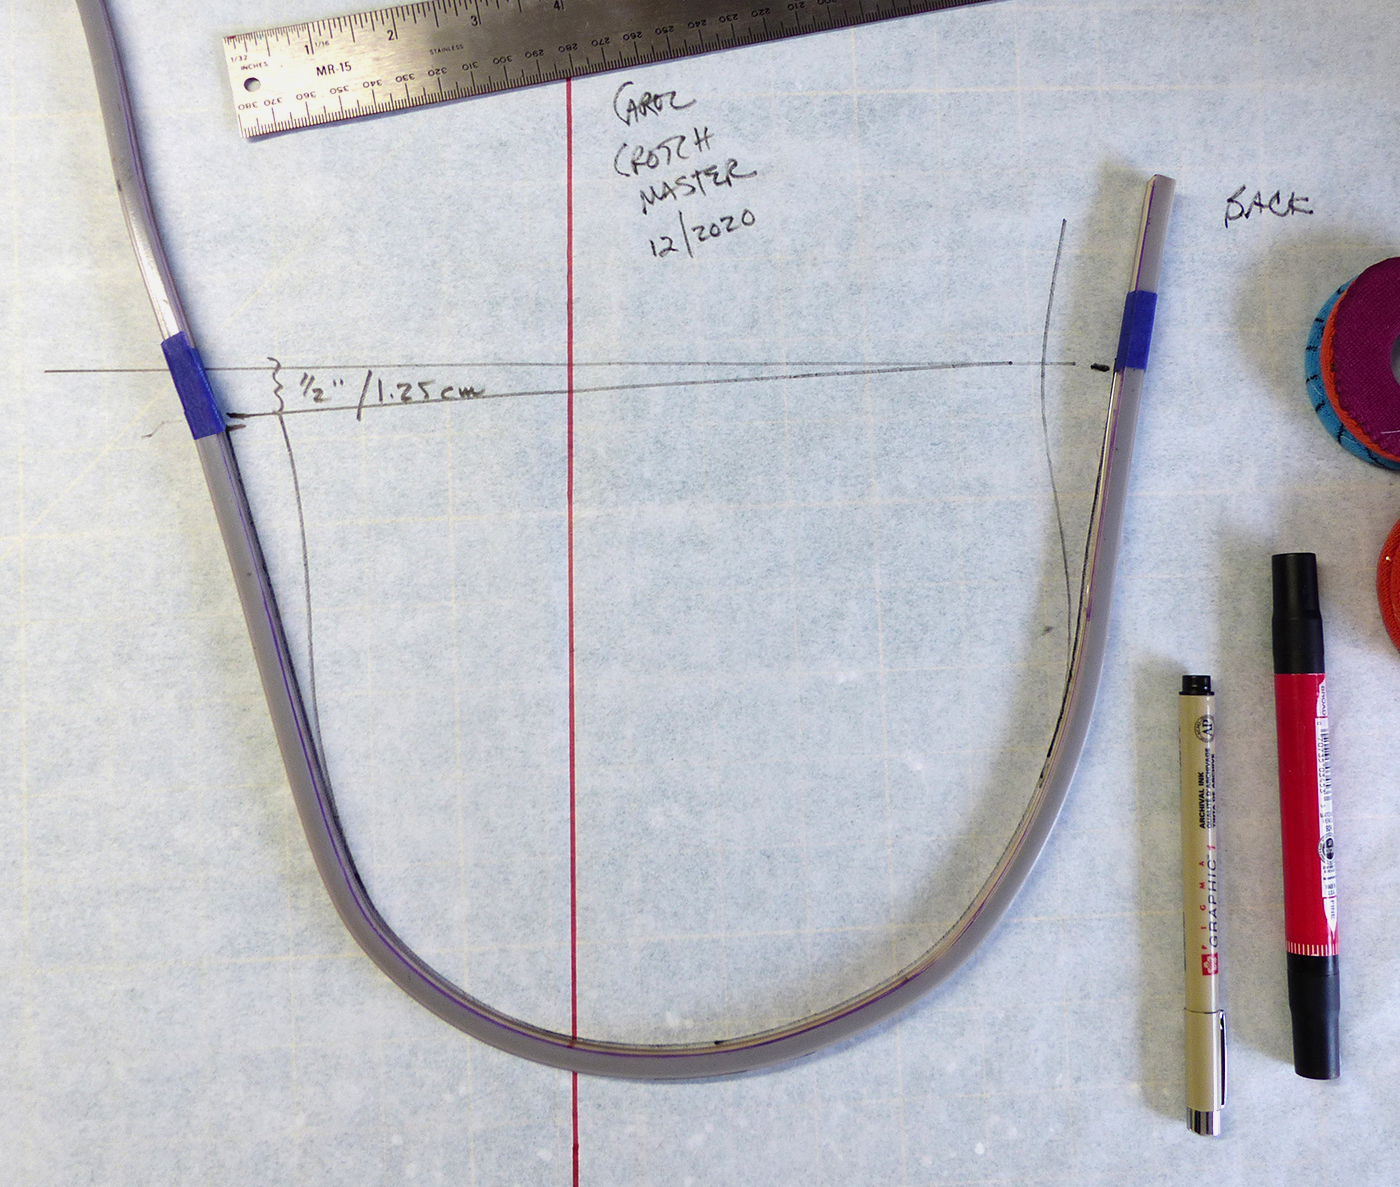
If you had any difference in your waist-to-floor measurements, adjust the crossing line now. My center front (CF) is half an inch (about a cm) shorter than my back.
Reset your flexible ruler. It doesn’t matter if it’s centered on the red line.
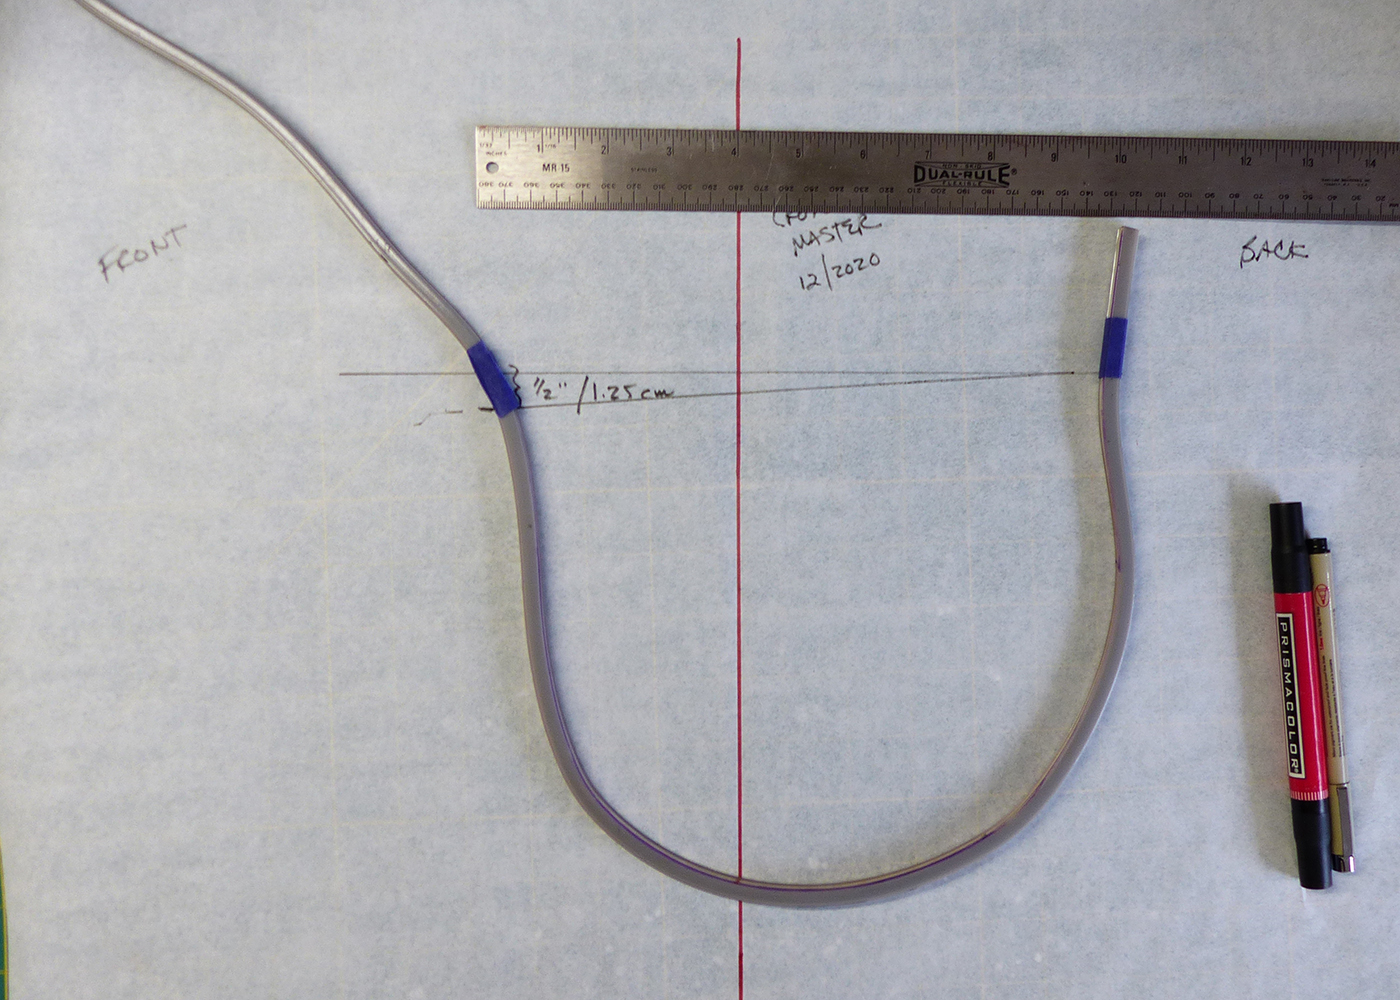
Draw a line on its inside. (The flexible ruler has been moved down so that the line shows; but leave yours in place)
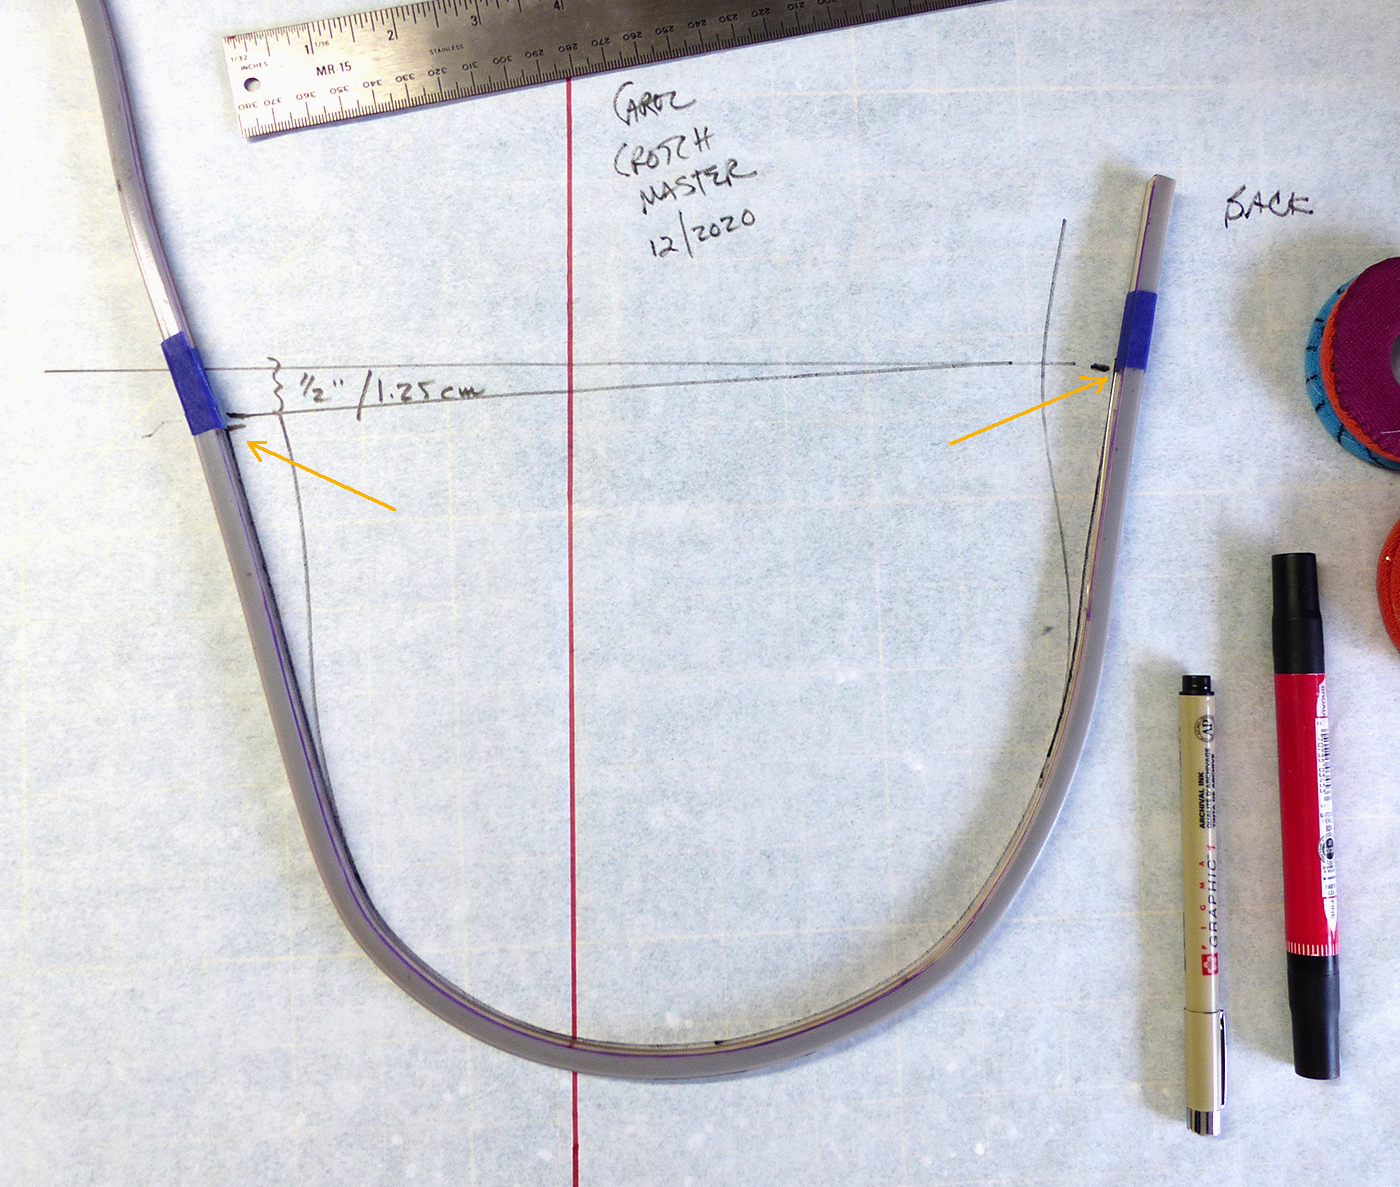
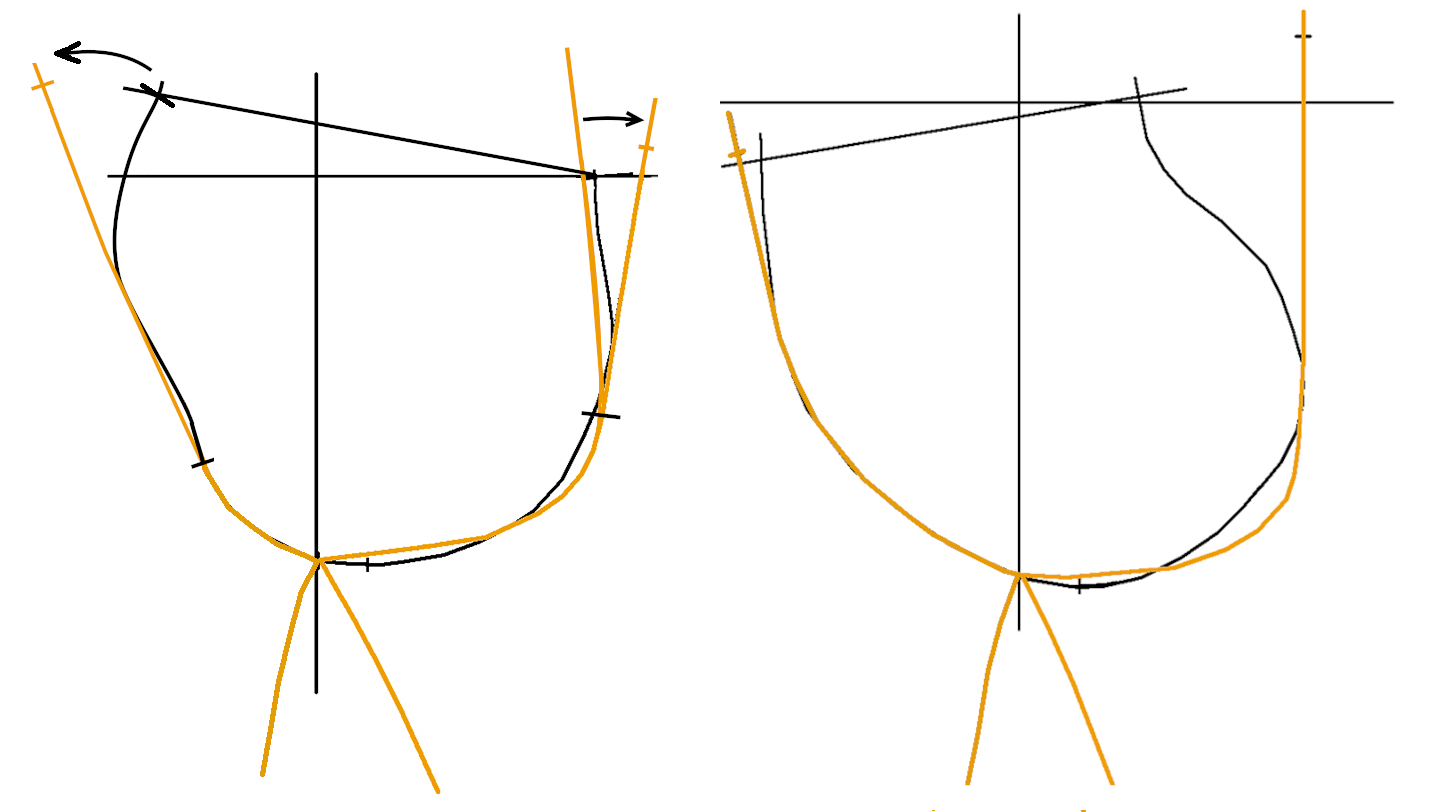
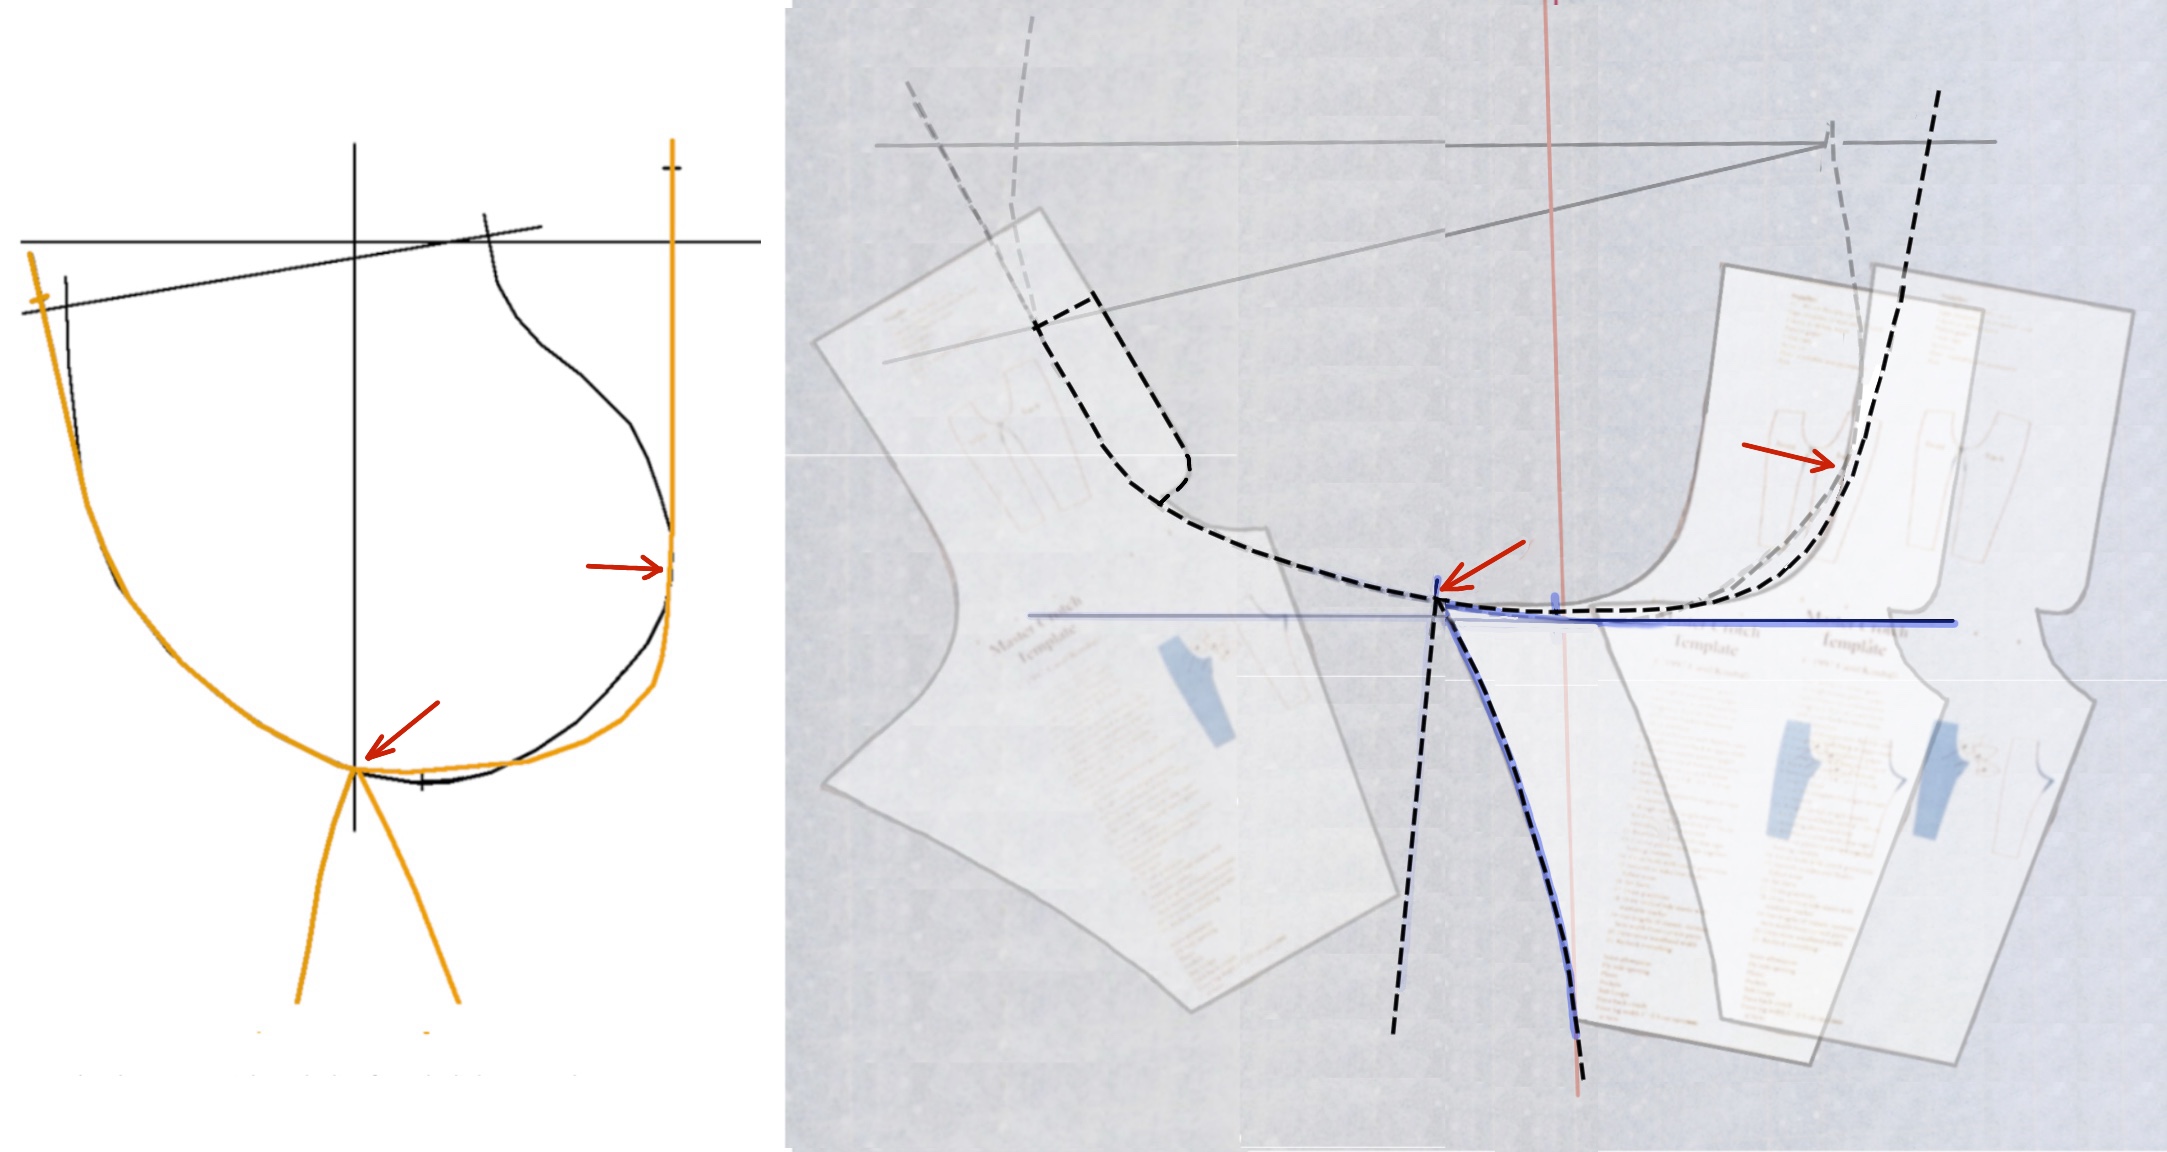
Leaving the bottom third of your curve unchanged, straighten the upper parts of the legs and redraw the inside line.
This changes the position of the cross lines on your master (we’re going to fix that in a moment). Gently set the flexible ruler aside.
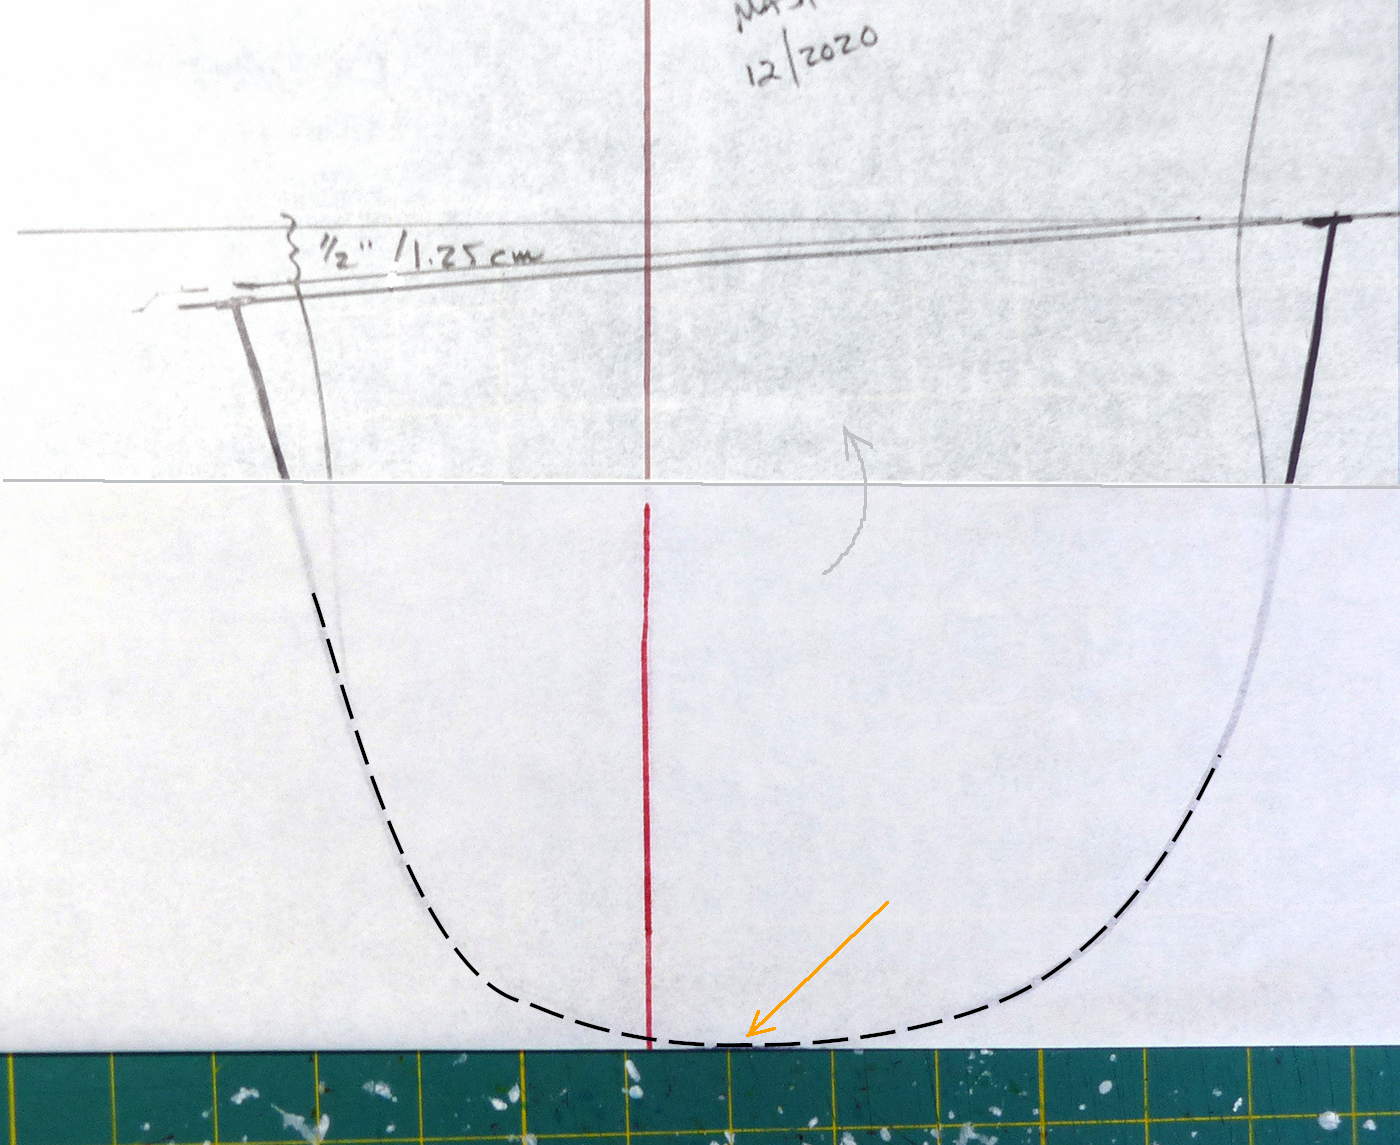
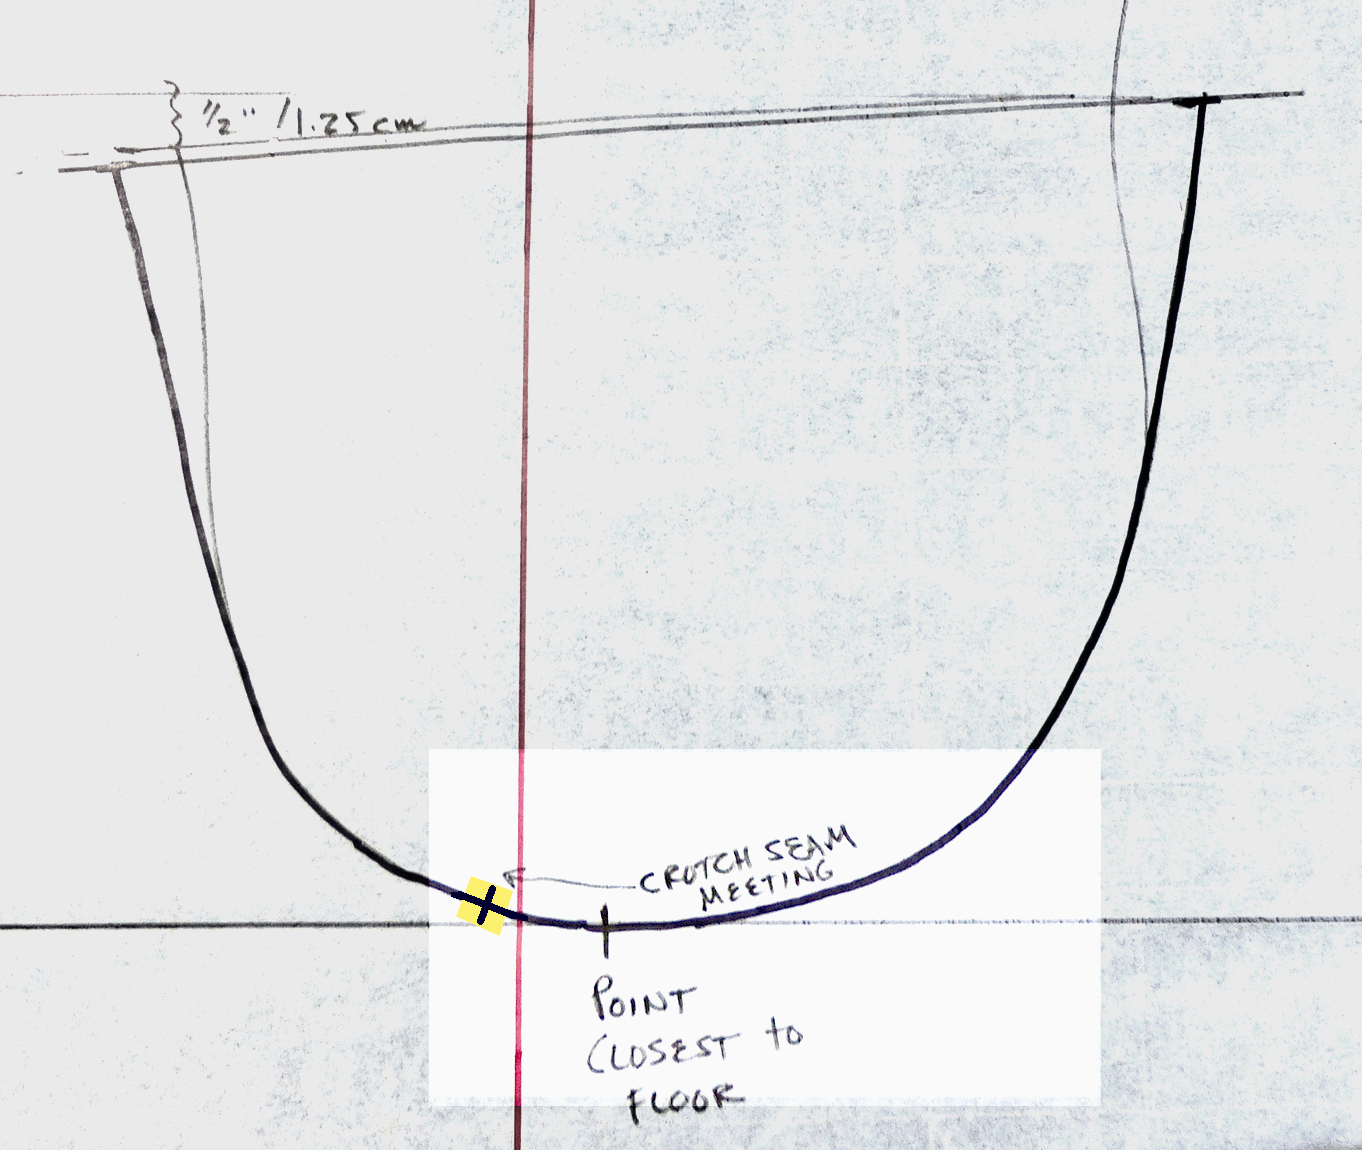
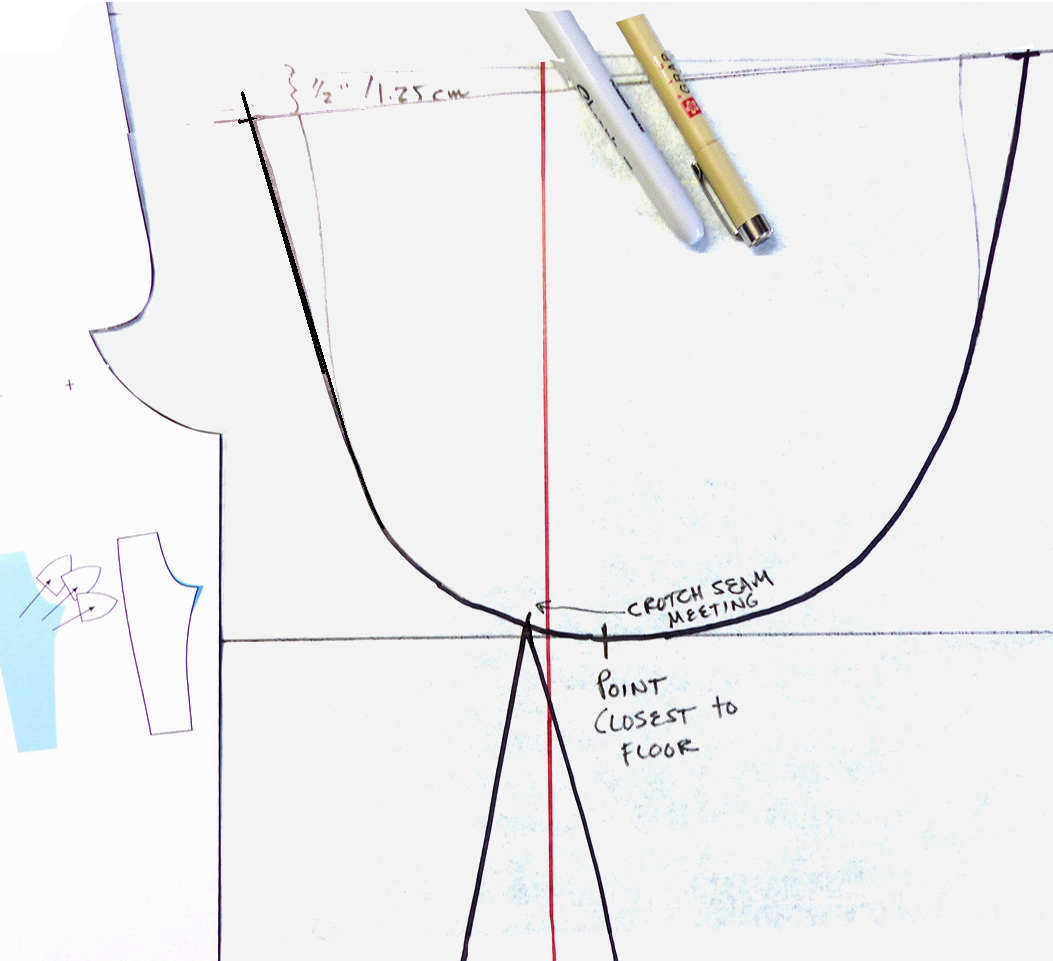
Fold your vertical line up on itself to find the lowest point on your curve.
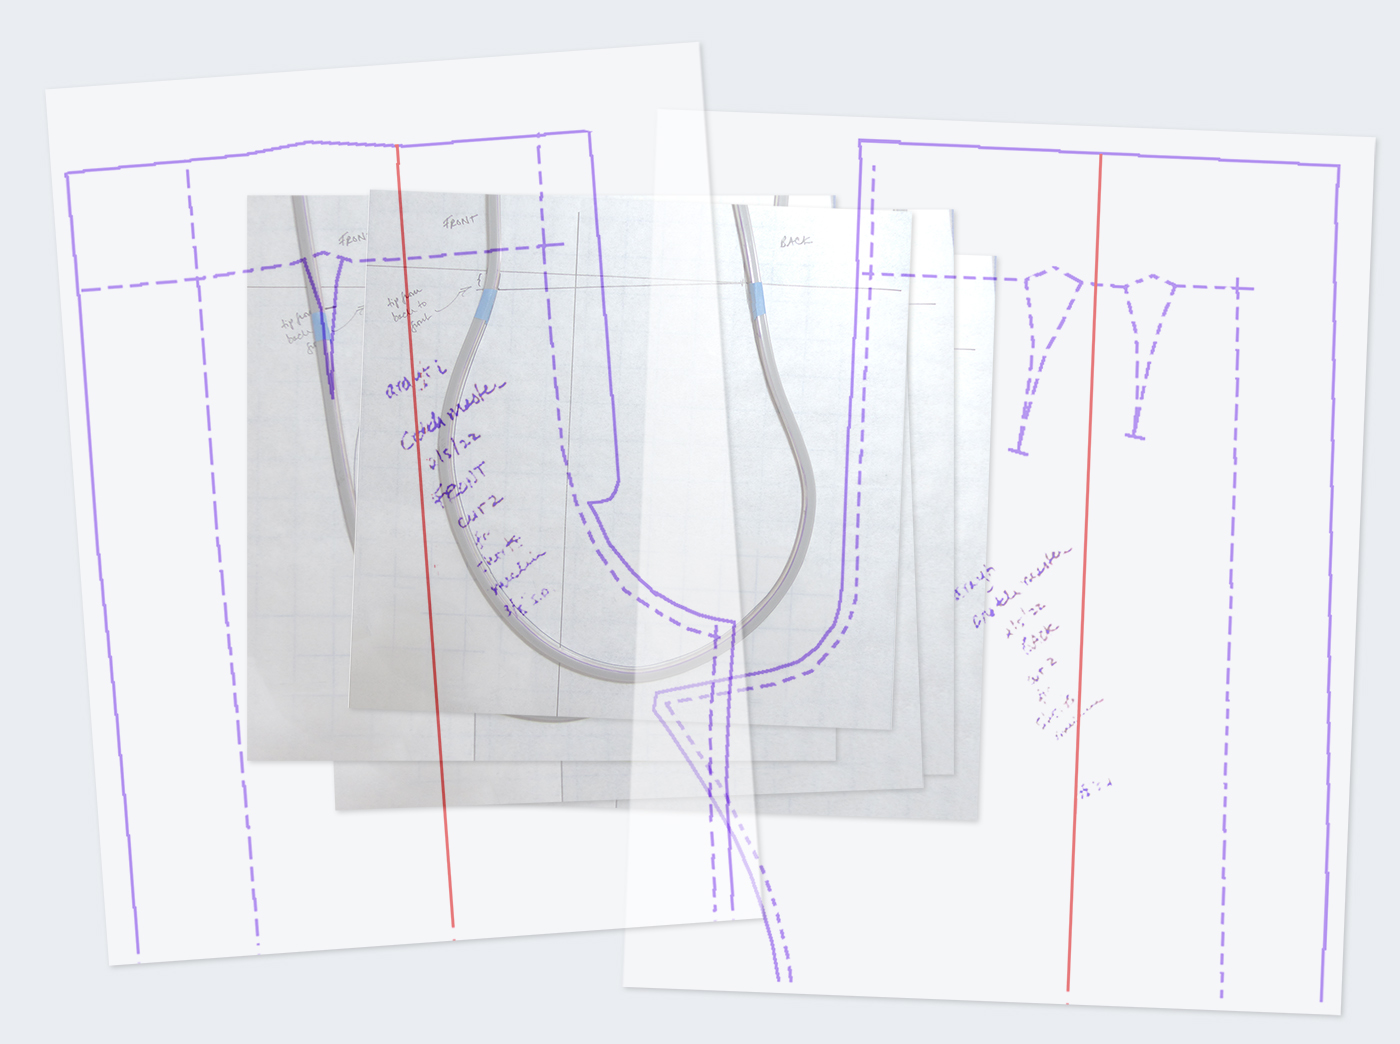
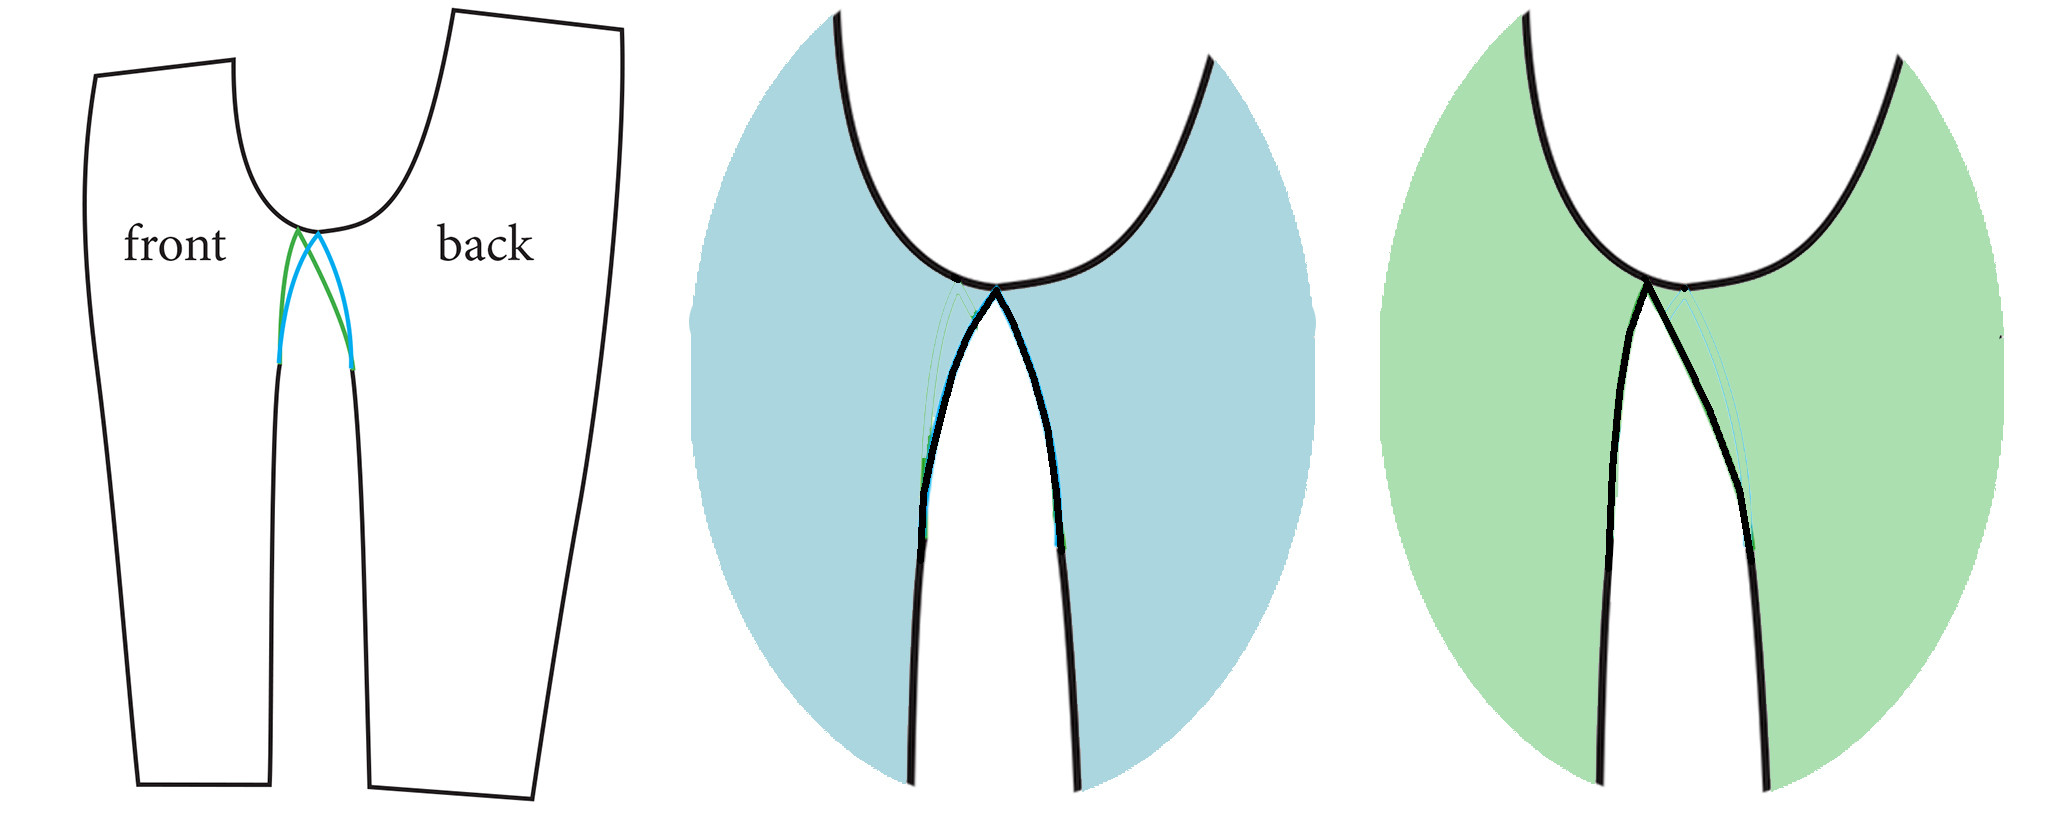
This point, closest to the ground, is where many pants have their seams cross. We’re going to move that junction forward, which does a great deal to minimize baggy bottom. The range is 1 – 1 1/2″ // 2.5 – 4 cm, with most people around 1 1/4″ // 3 cm. The critical crotch fitting area is the light rectangle; gaining or losing weight does not change this.
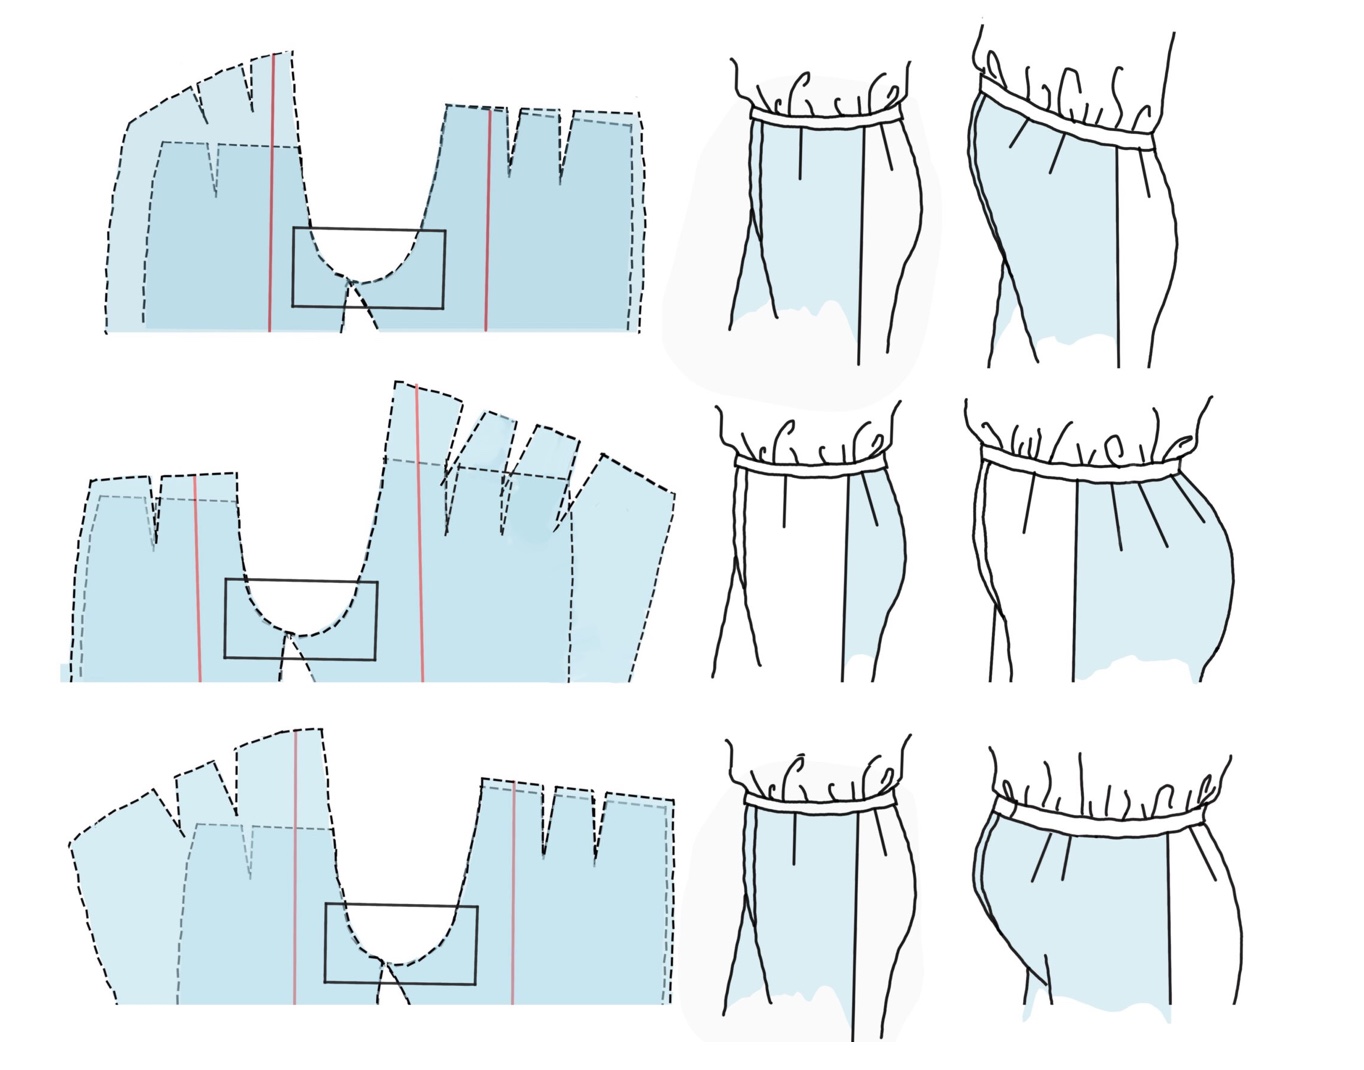
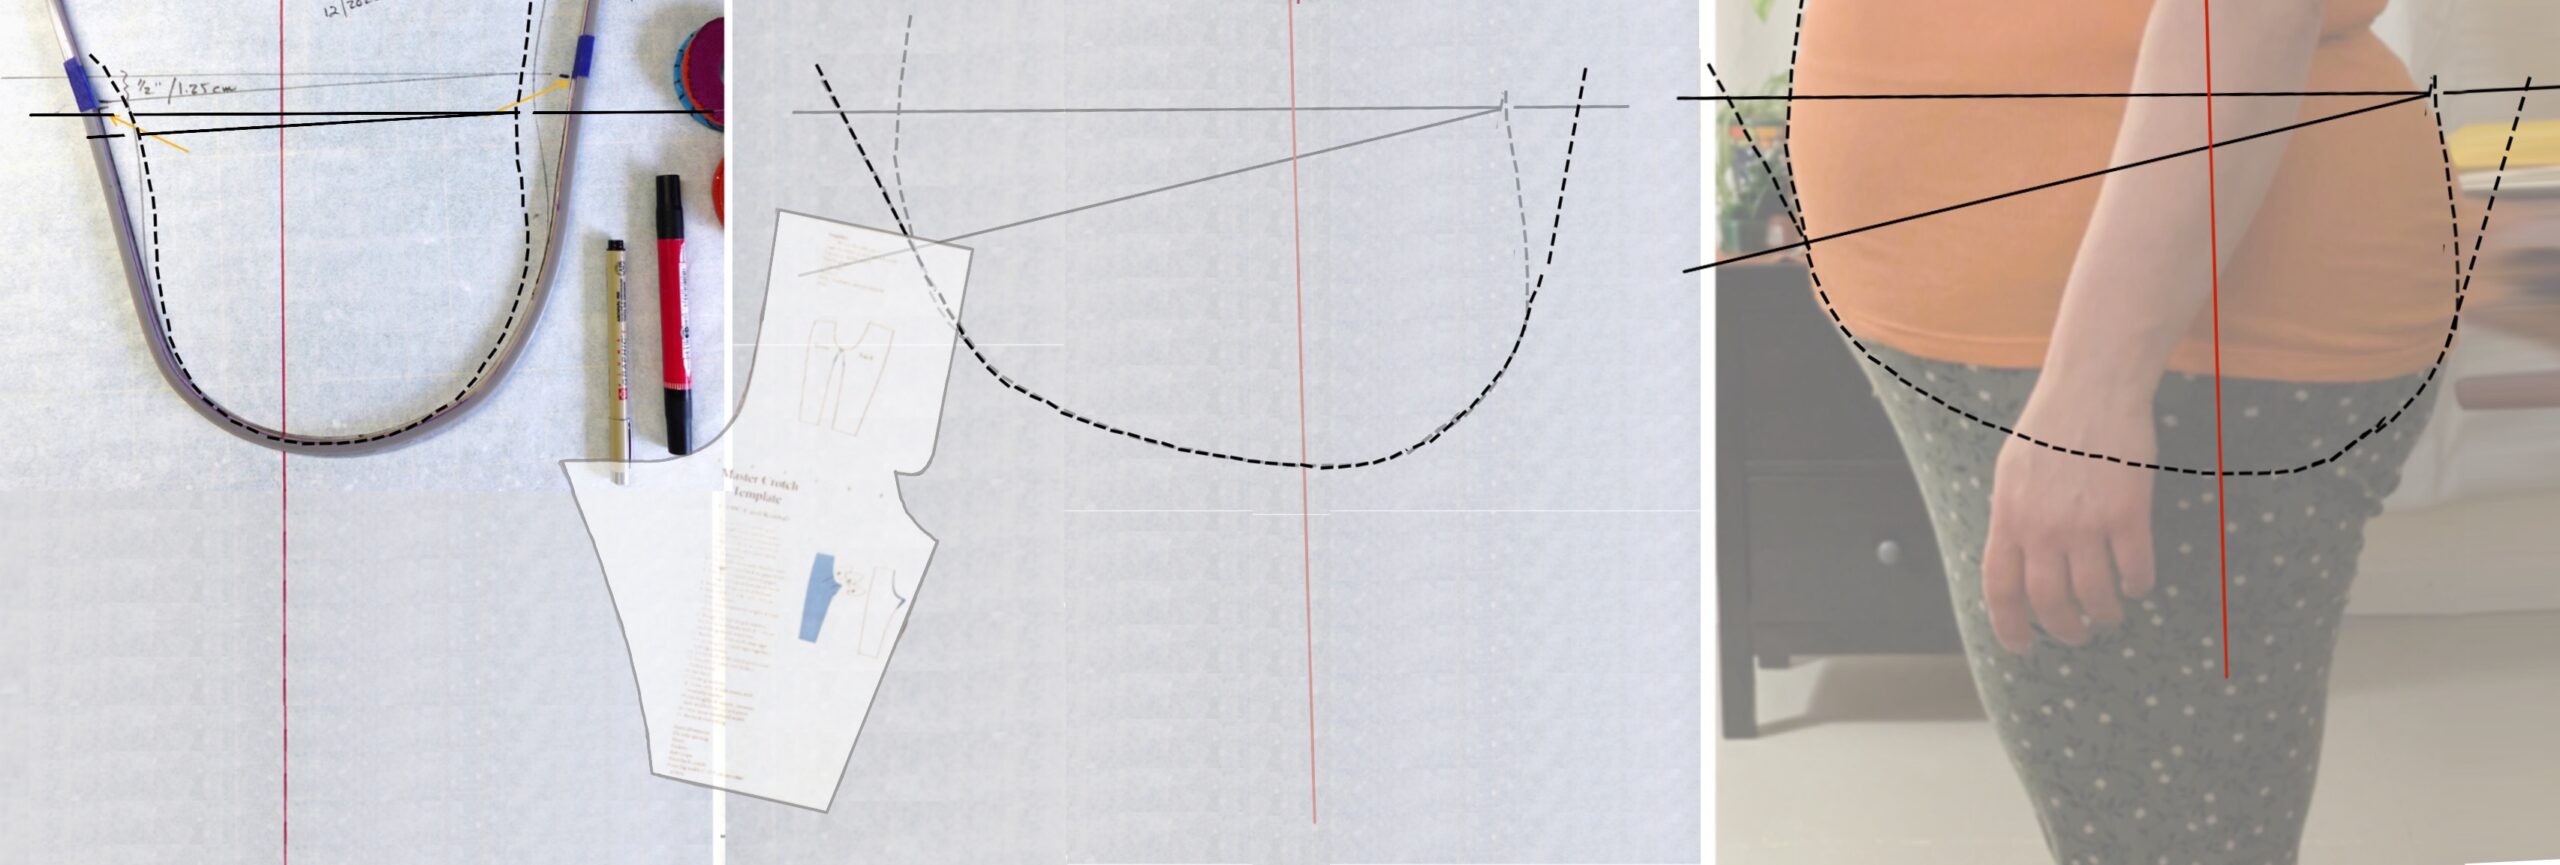
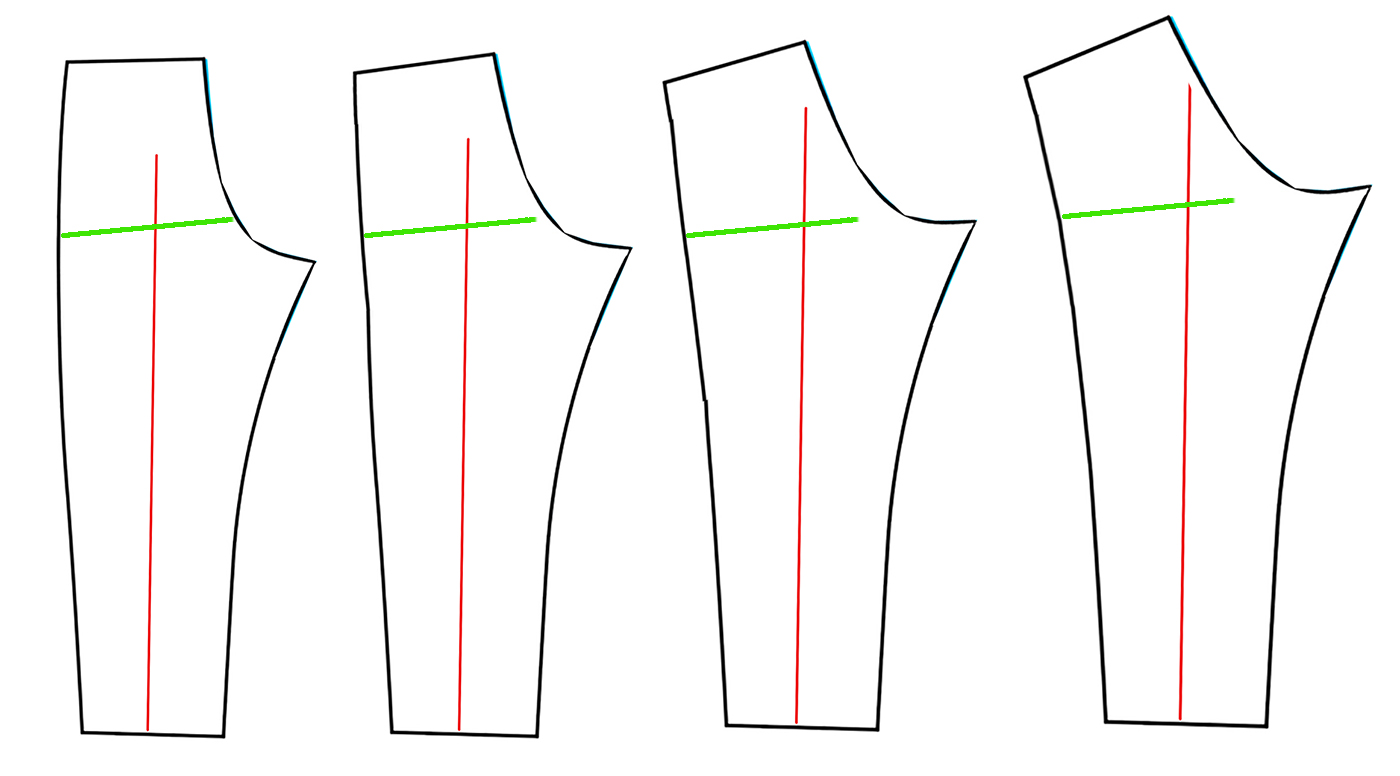
Here are three variations showing how the crotch curve remains the same even when the rest of the figure changes dramatically (it’s unlikely that the same person would put on weight in the front OR the back, but if they did, their pelvis wouldn’t alter).
A student made samples trying different placements of the crotch intersection, and even the most extreme (within the range of the lighter box above) were fine. That plus years of fitting clients is how I figured this range out. Where the seams meet isn’t visible when standing or sitting. Your first pair of pants will feel odd; when you later wear an old pair you’ll immediately be able to tell how much this helps.
the next step is to modify your crotch curve using your template.
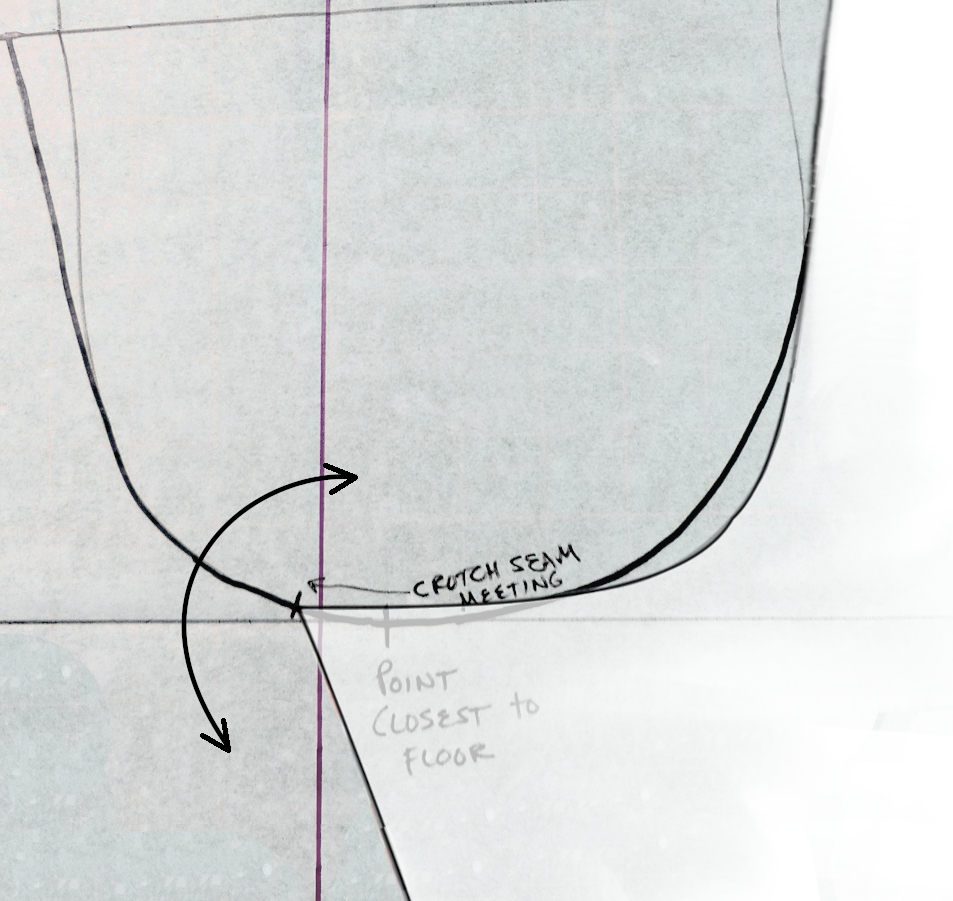
Place the point of the template’s back crotch fork on your new mark and pivot it until its edge and that of your crotch line more-or-less split the difference.
Any of these lines would work. Draw the back crotch line and inseam (the short curved line going down from the crotch point).
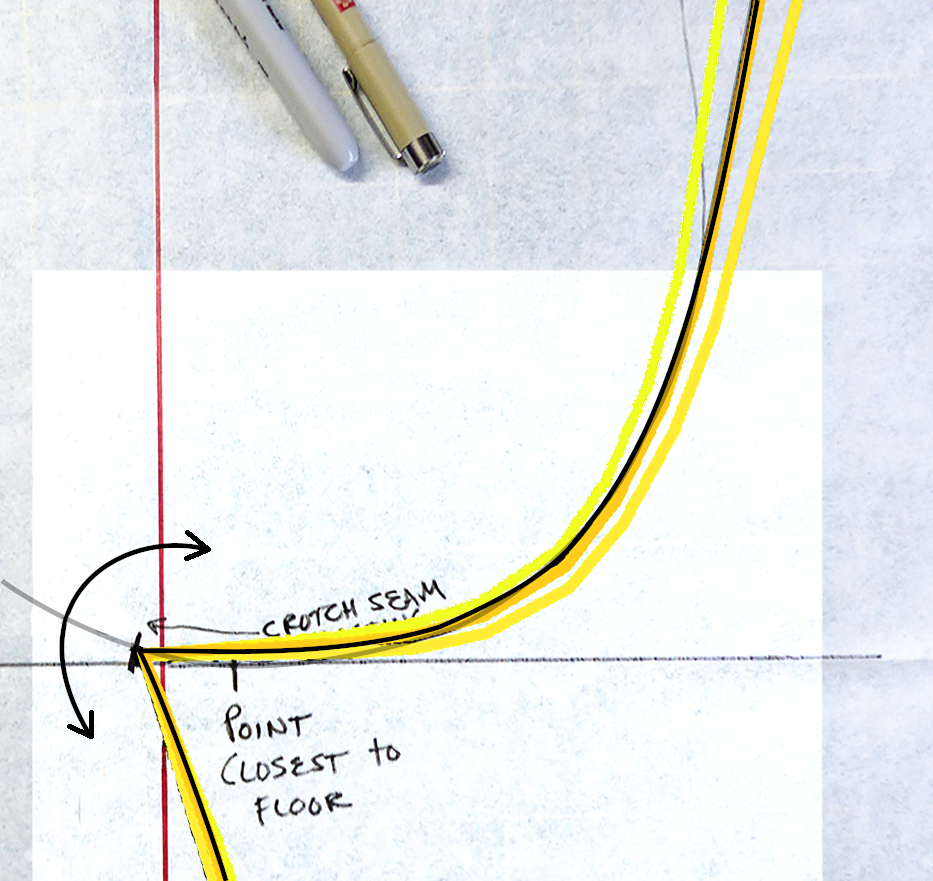
Repeat, using the front area of the template; track again with flexible ruler to the ends of each section.
The lines for two other bodies. If either crotch curve has cut into the stomach or bottom, straighten the line from the light rectangle area up. The wedges at the tops will be darted out.
”My pelvis is wide enough that the template doesn’t seem to fit. Help!”
Front first:
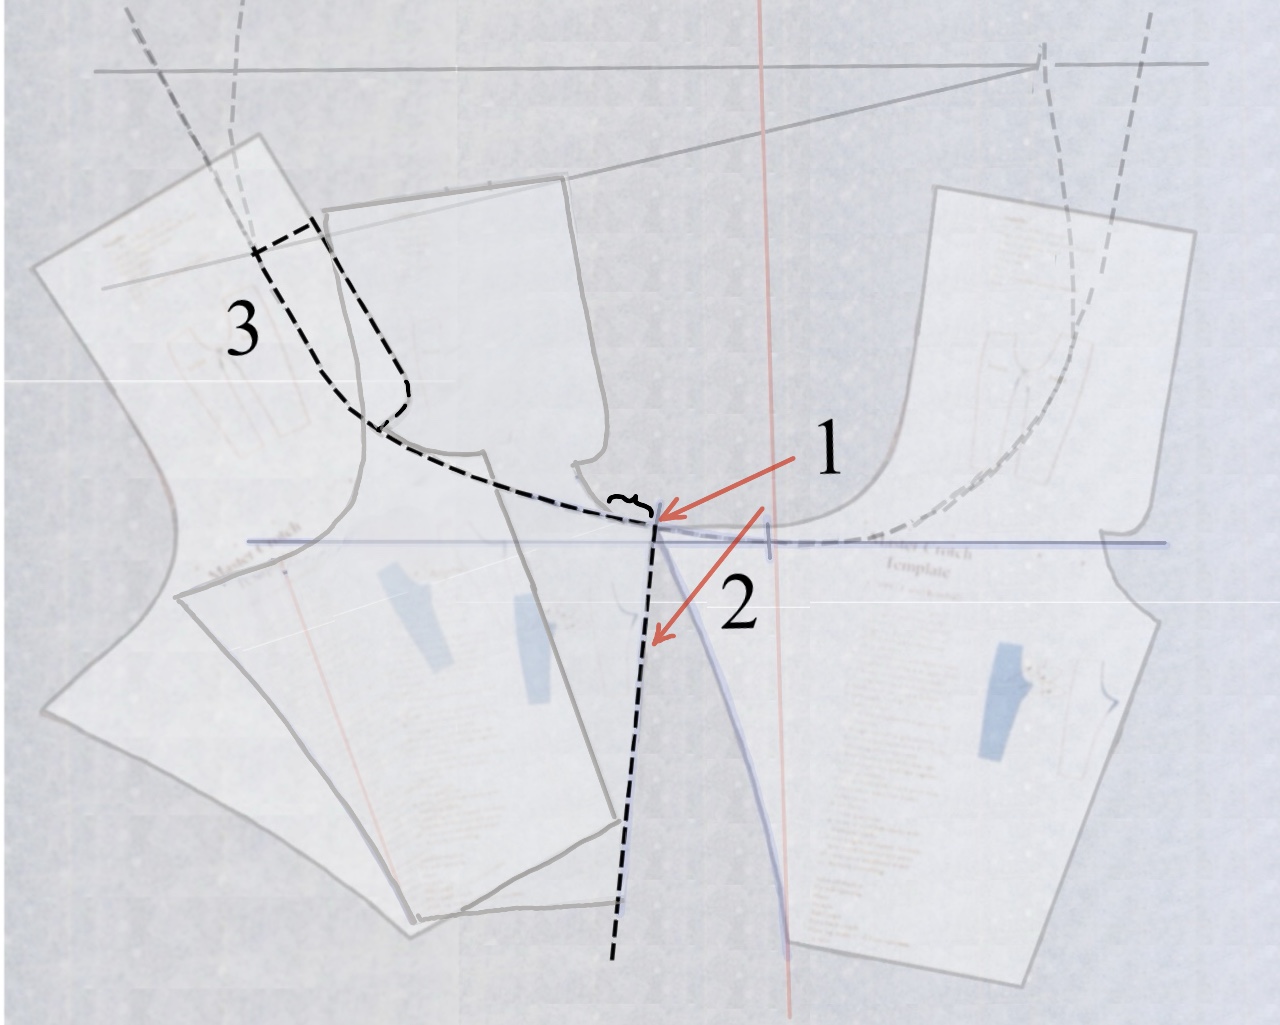
1. Position the template touching the crotch seam intersection, with as much of it aligned as possible (it may be short). 2. Draw the front inseam from this point down. 3. Extend the front crotch rise on the line you’ve established. Draw the fly at the top (this one is very short due to the tipping of the waistline). While it’s possible to insert a zipper on a curve, getting a good result depends on several attacks of hand sewing and is generally not worth it.
The back is much as shown earlier.
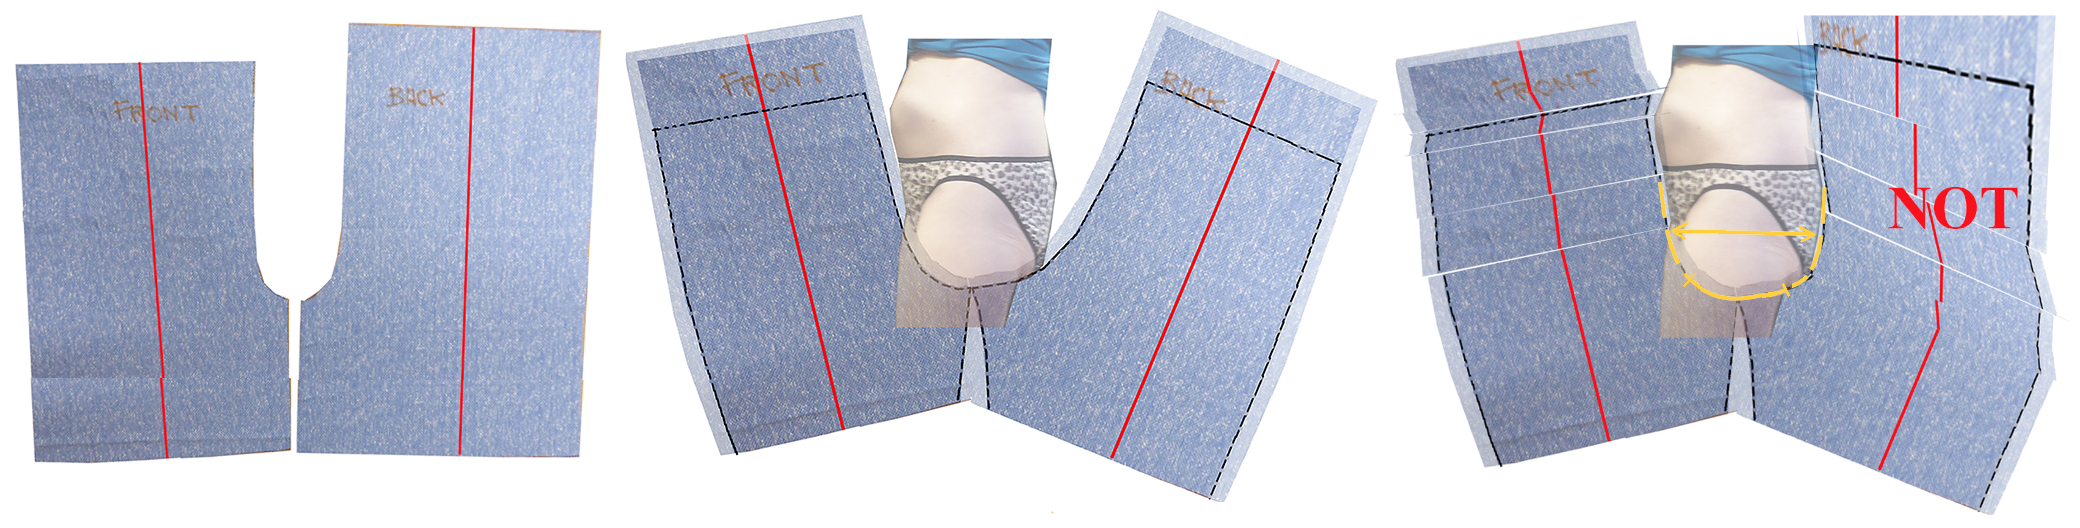
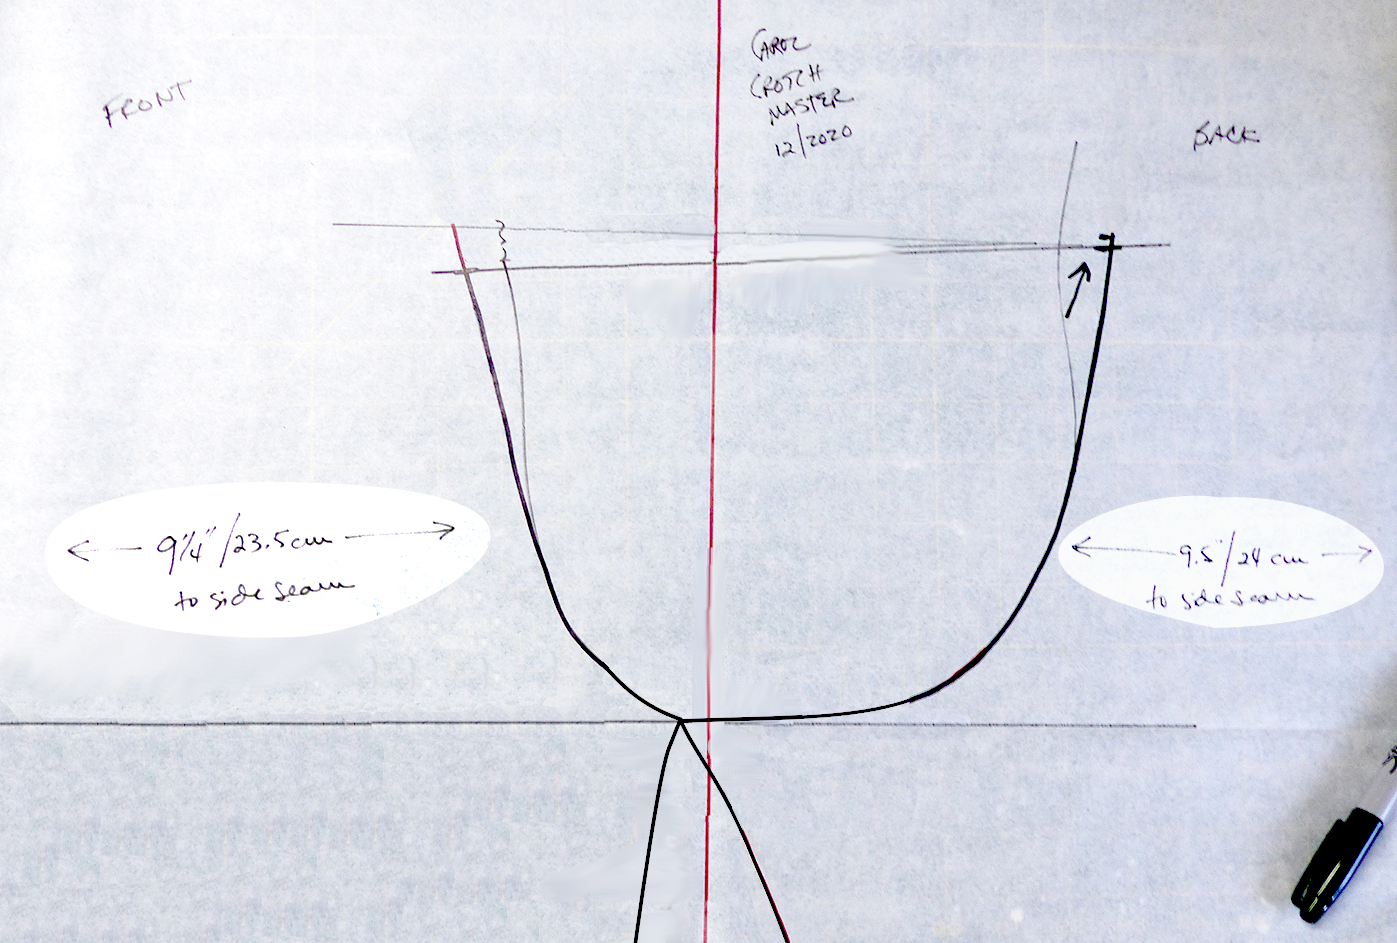
I first noticed the rounded-off rectangle for the bottom in a Burda pattern. It’s far more stable than the fragile curve most of us have. Yes, I tried to make a curve work, with painstakingly slow and careful effort. I achieved a smooth seam, which went wonky starting at its the first laundering and got baggier thereafter. Use the curve from the template.
It begins with its point touching the crotch seam intersection and usually cuts through your back curve in a couple places. It must slide far enough over (to the right, here) to be outside the fullest part of the bottom back.
Get the width from your CF to your side seam.
Note it on your crotch master. Repeat for the back.
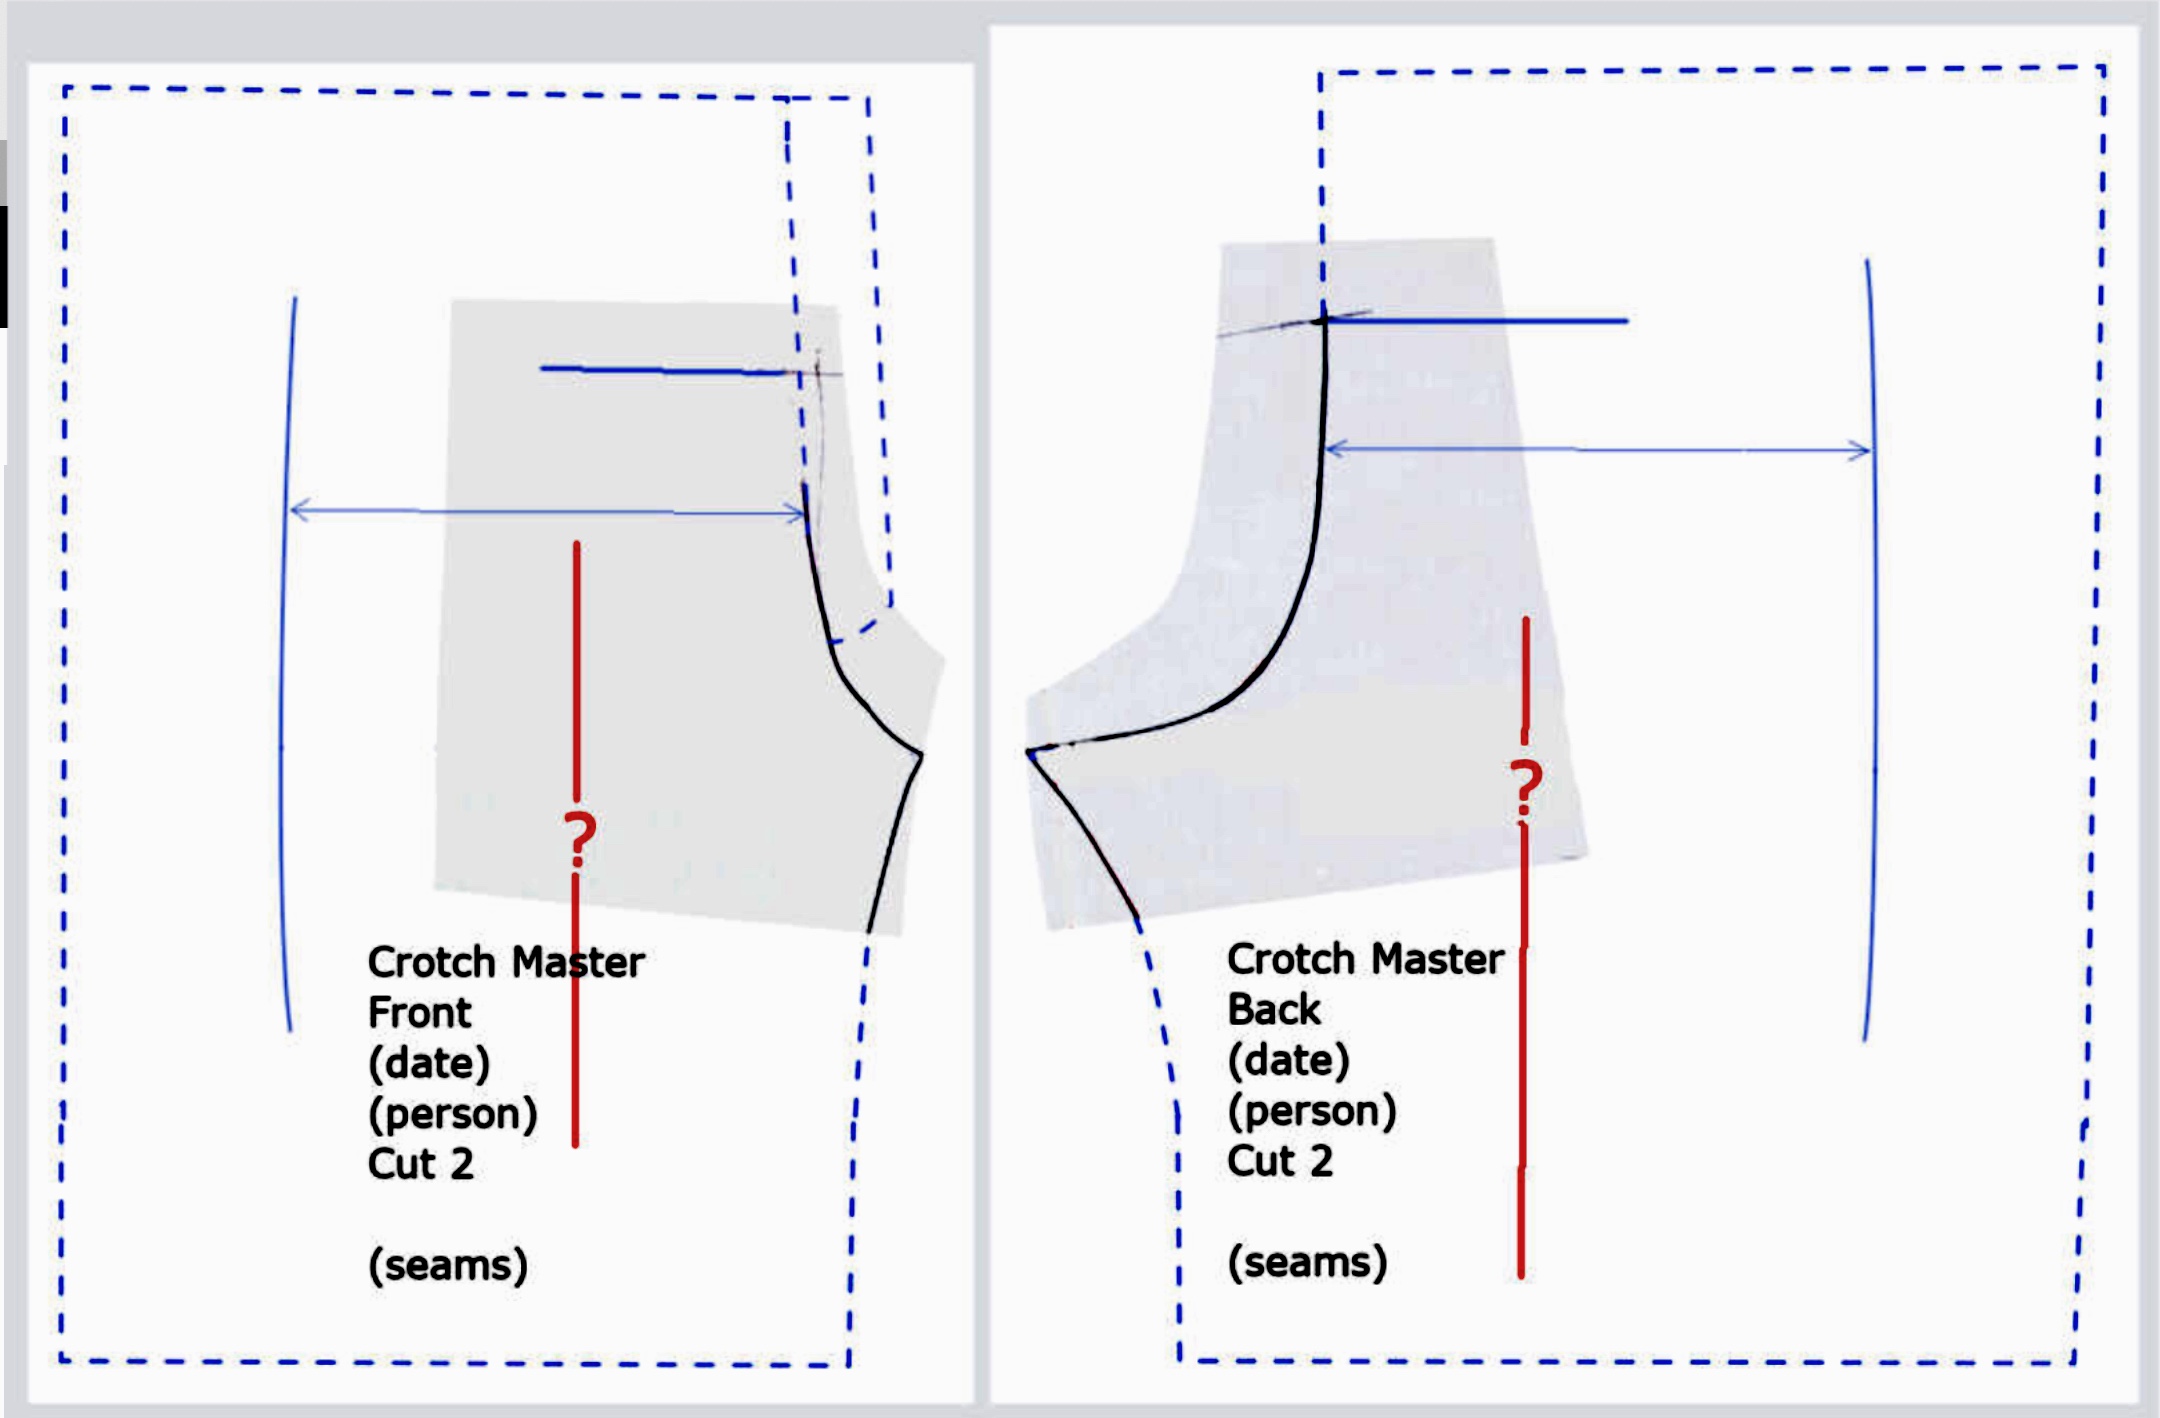
Trace a front and back on separate sheets of paper, allowing a hand’s width allowance above the waistband sewing line and the same at the side seams. Use your paper template to add an extension at center front for a zipper in your muslin, even if you plan on a side or back closure eventually. It makes getting in and out of it much easier than trying to pin it accurately each time. We have to estimate the grainlines for the muslin; when the pants are folded together from mid-thigh to hem, the grain is usually along the crease. We’ll look carefully at where they need to go once we’re in the muslin. If the grainlines aren’t vertical, the pants’ legs will twist.
These pants backs have the same length of inseam and outseam, but increasingly fuller bottoms. Those whopping big seam allowances will automatically adjust for any crotch tilt without having to guess at it now.