
A tip from the Industry: chain your pieces together by sewing directly off one and onto the next. Clip between to separate. No danger of a wad of threads when you start a seam! For stopping and starting, I use a little pad of felt.
Immediately press every seam as it was sewn and then press again to open it or put it to one side. Every time.
Cut two plackets (grid shown in half inches / 1.2 cm):
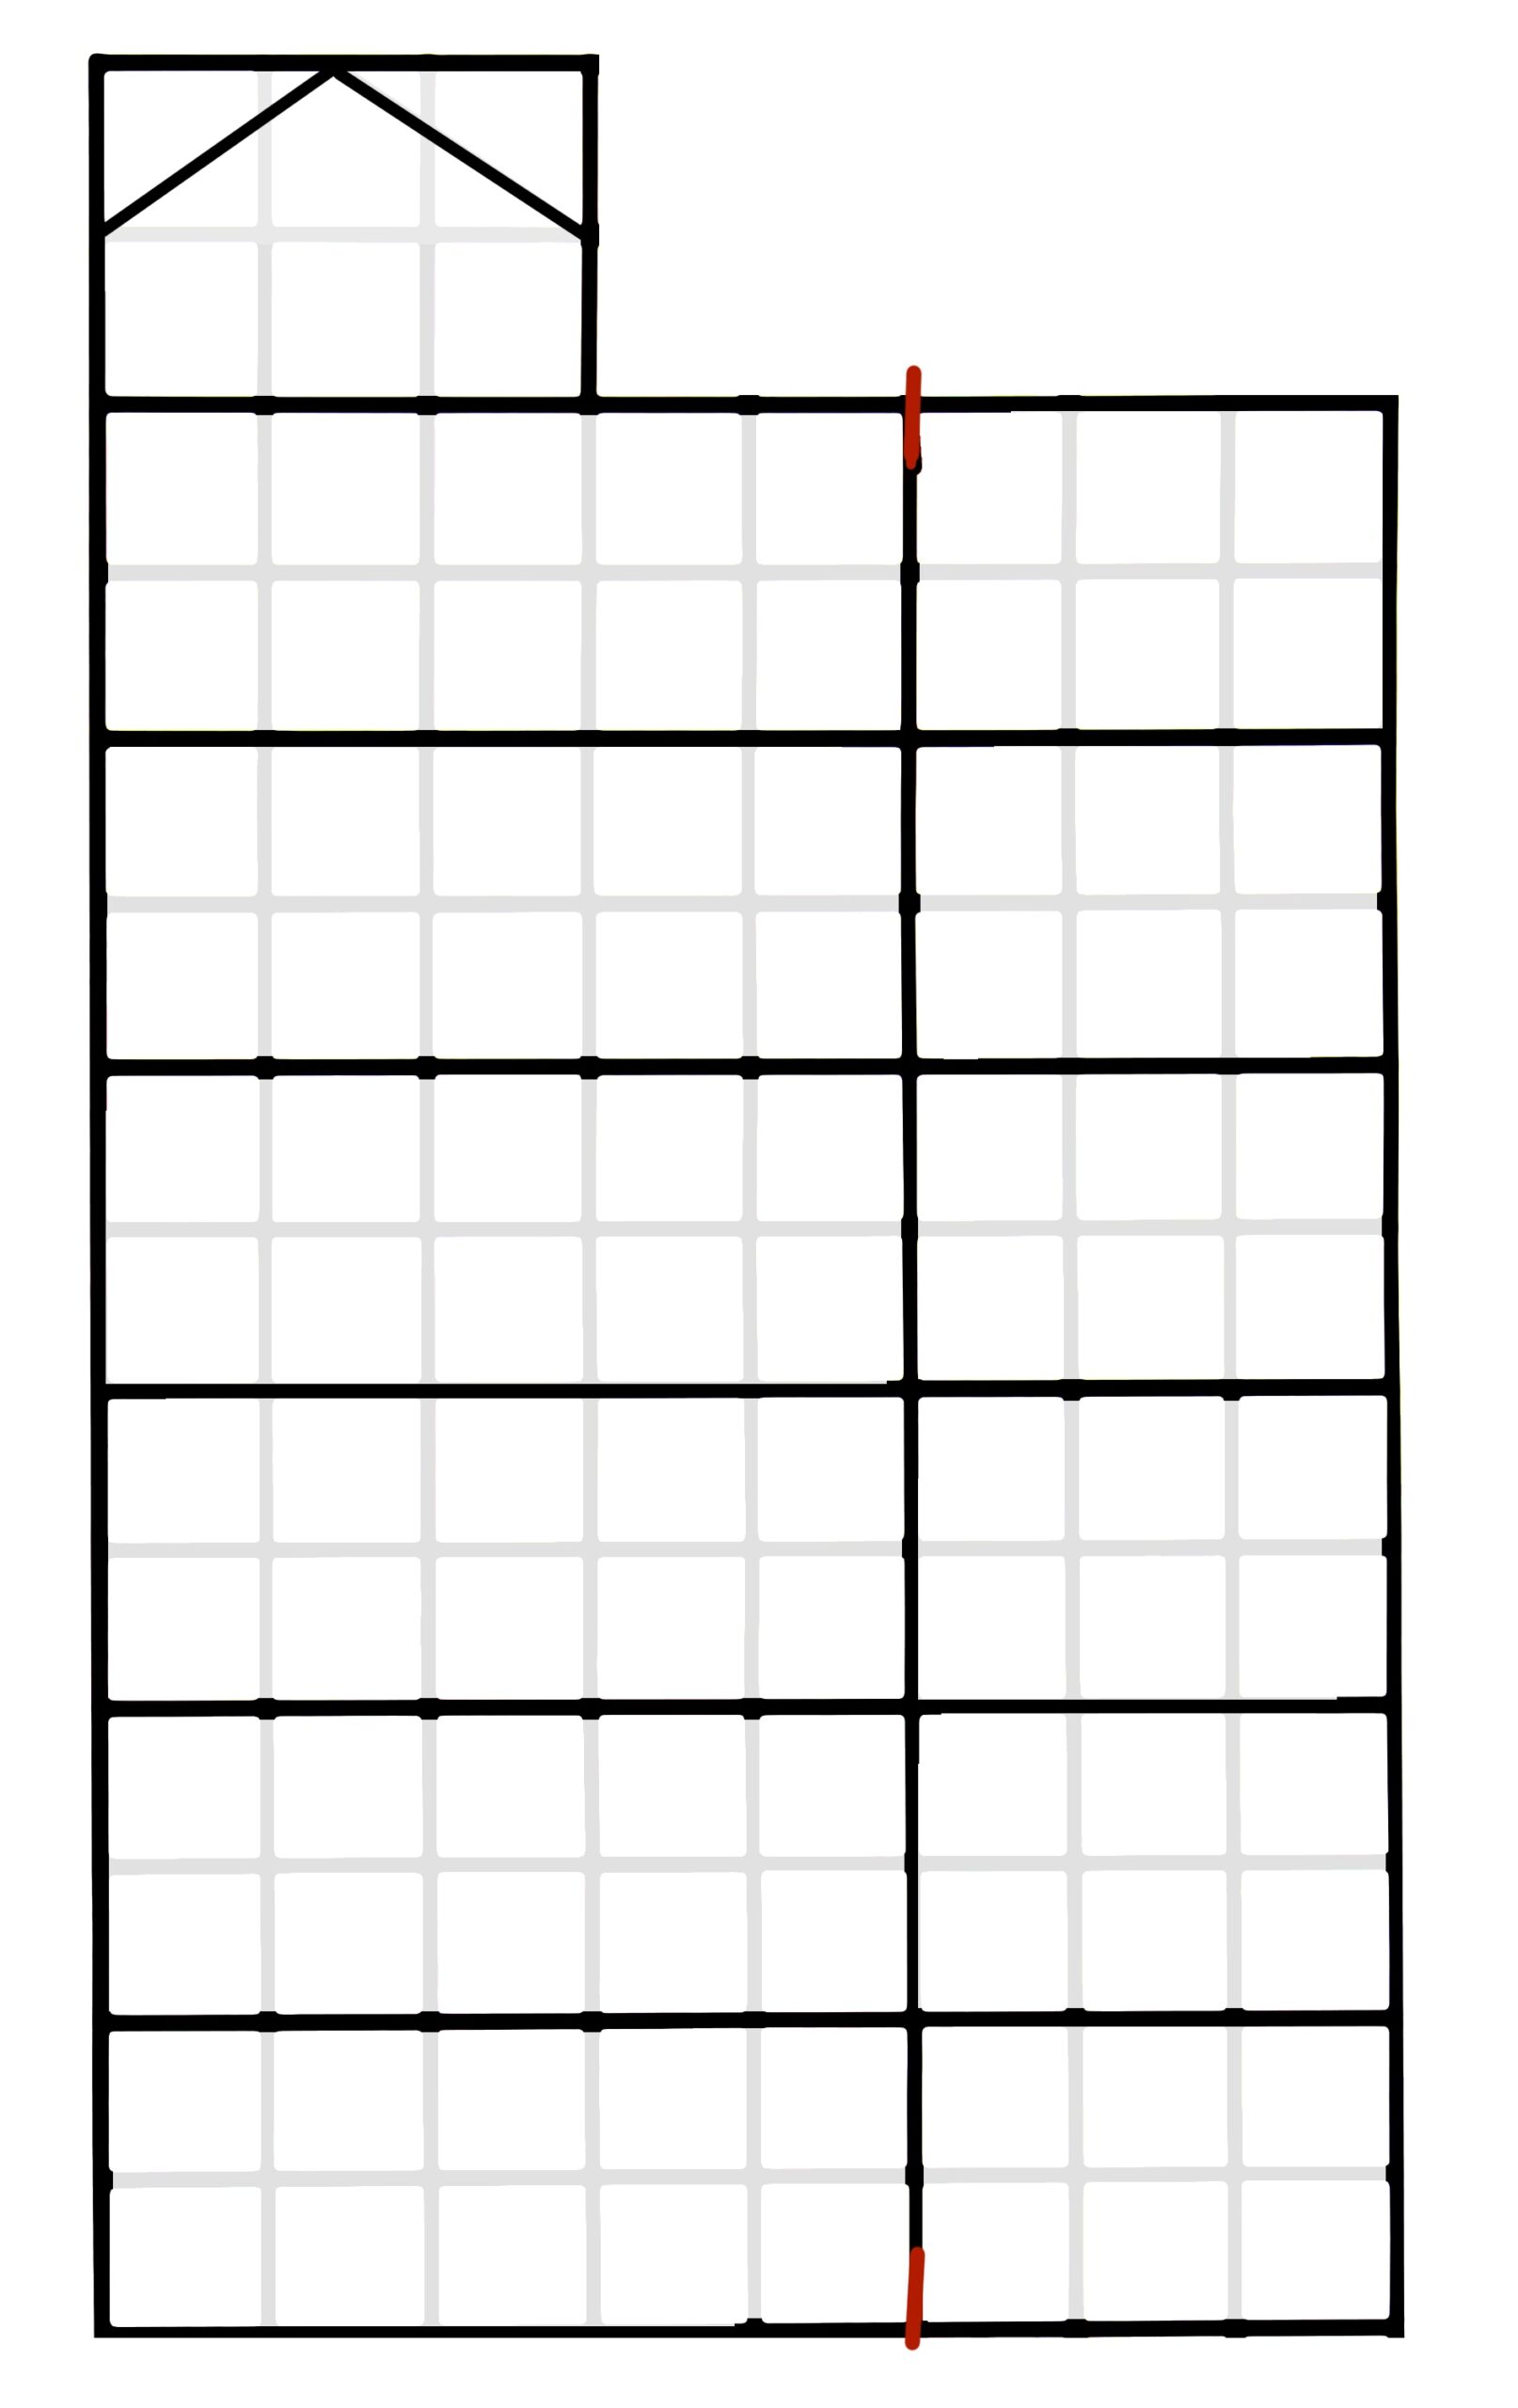
Total size is 7”x4” / 17.8×10 cm.
Sew and press one step, then repeat for the other sleeve, chaining as you go.
Fuse lightweight interfacing to the wrong side of a piece of your sleeve fabric and cut out two plackets (mirror images).
Place nips at edges at red lines.
Chalk lines on the plackets 1/4” / .6 cm either side of the nips.
Lay sleeve right side down. Place placket on sleeve right side down (right side to wrong side), aligning nips with the marks on the sleeve for the placket. The wider section of the placket goes to the wider part of the sleeve.
Once the plackets are correctly positioned on their sleeves, it’s fairly mindless: sew, press, fold, etc. Just follow the instructions.
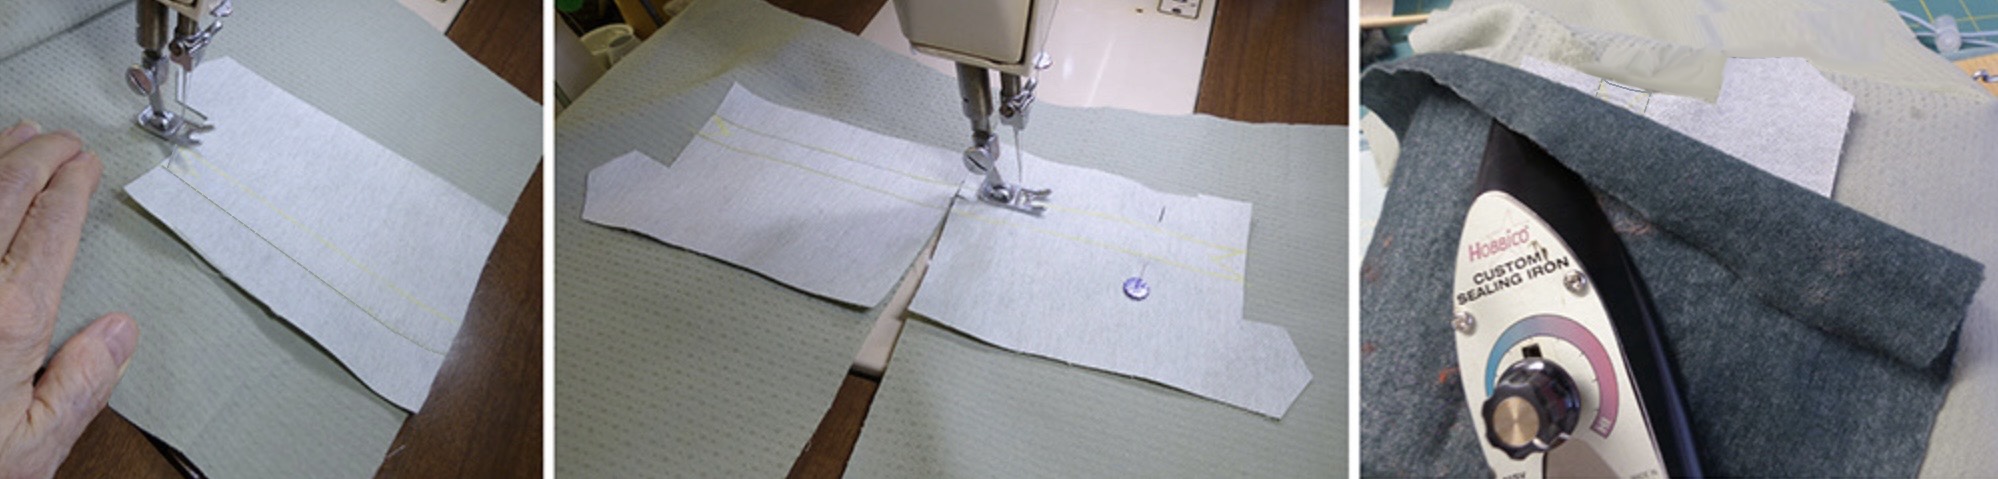
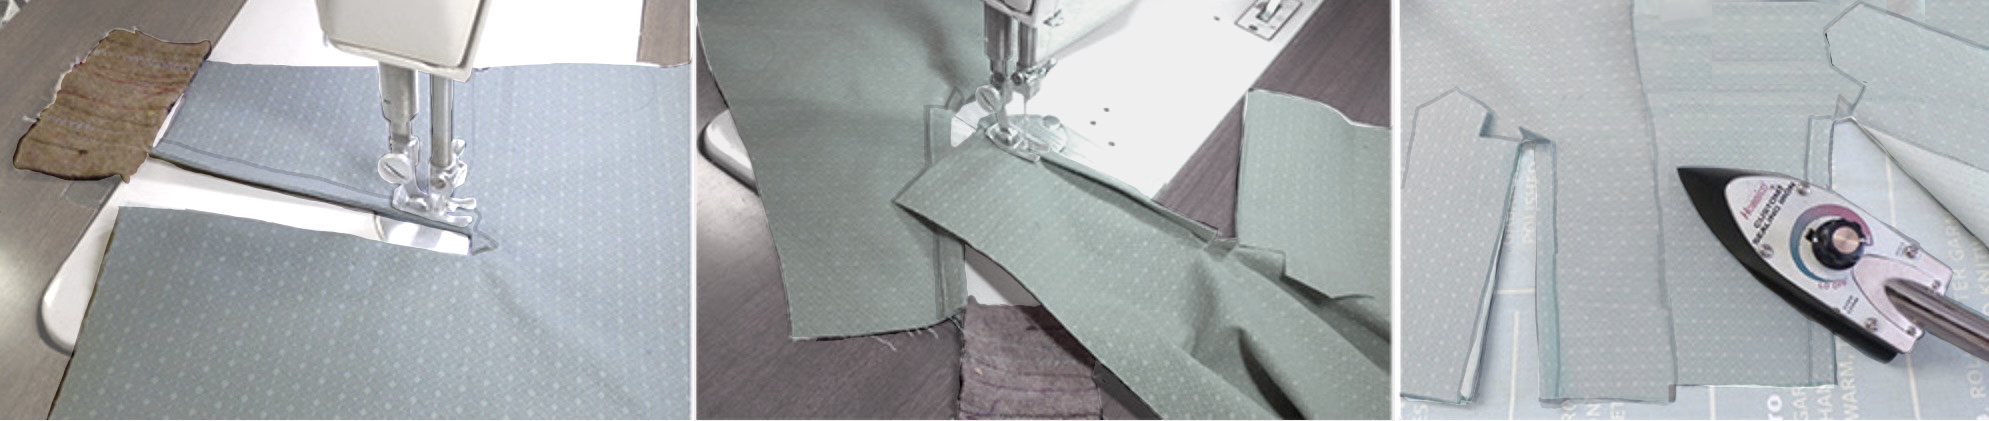
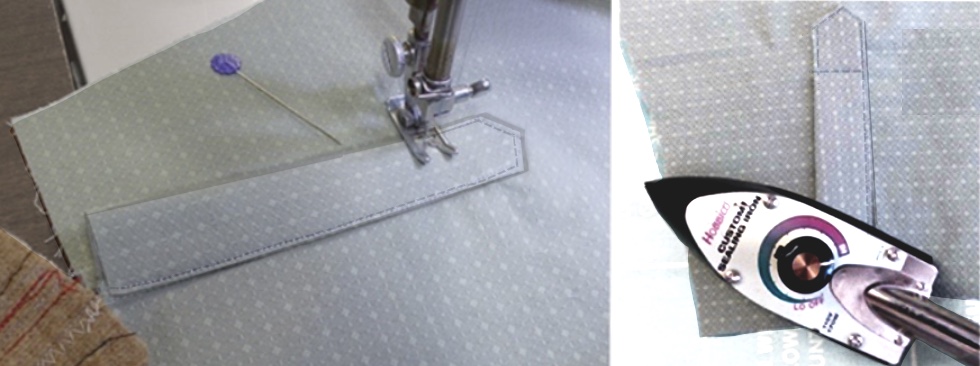
Sew on one of the chalked lines from the hem to the upper edge of the placket, backstitching at each end. Raise the presser foot and move to the other line; sew to the hem.
Chain to the other sleeve.
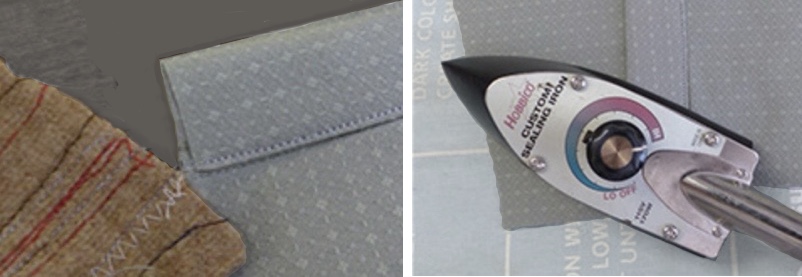
Press, using a press cloth if your fabric needs it. Mine is a piece of 100% wool jersey (not shown in future steps so that you can see what’s going on). A spray bottle was used for moisture. You can also paint water on with a clean brush (as couture does).
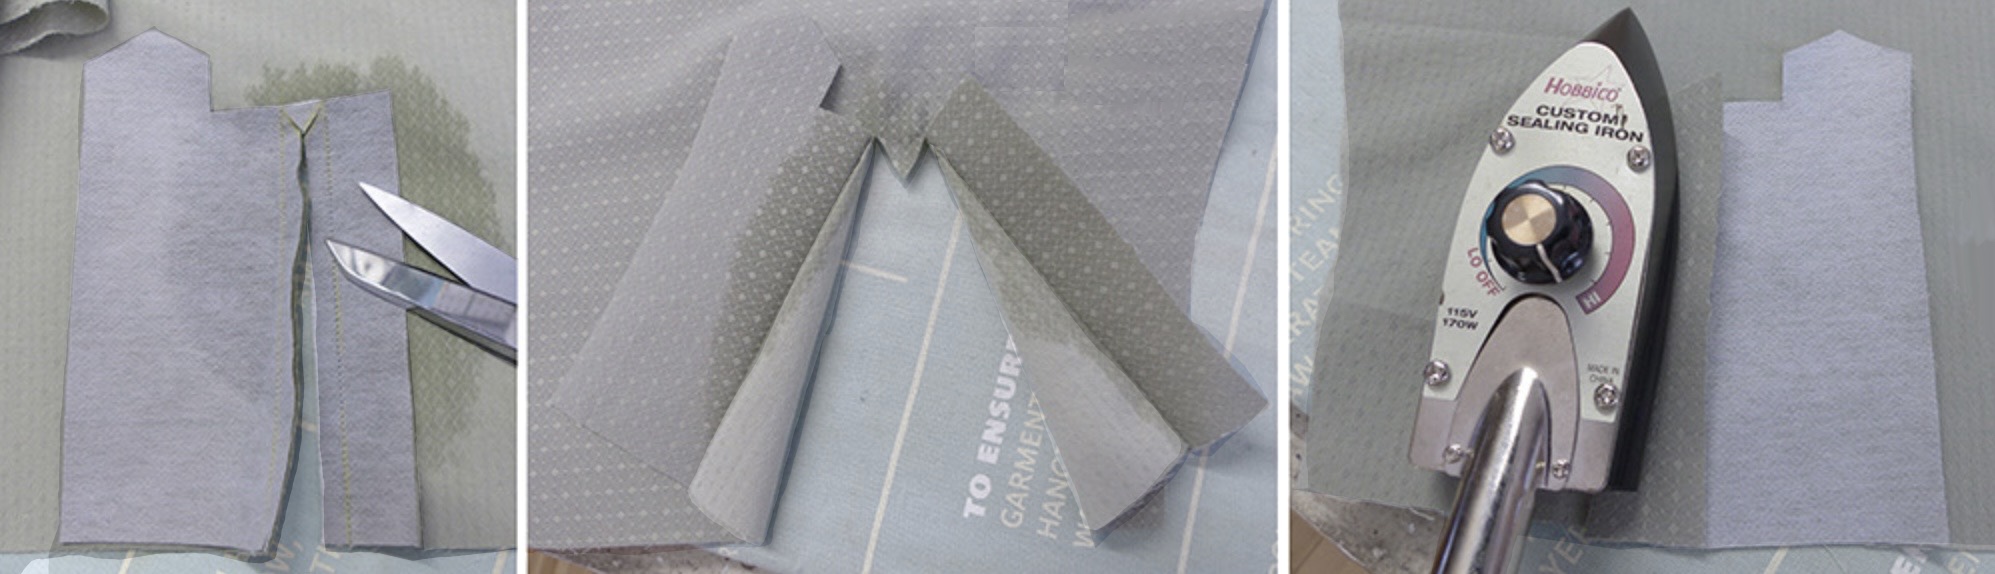
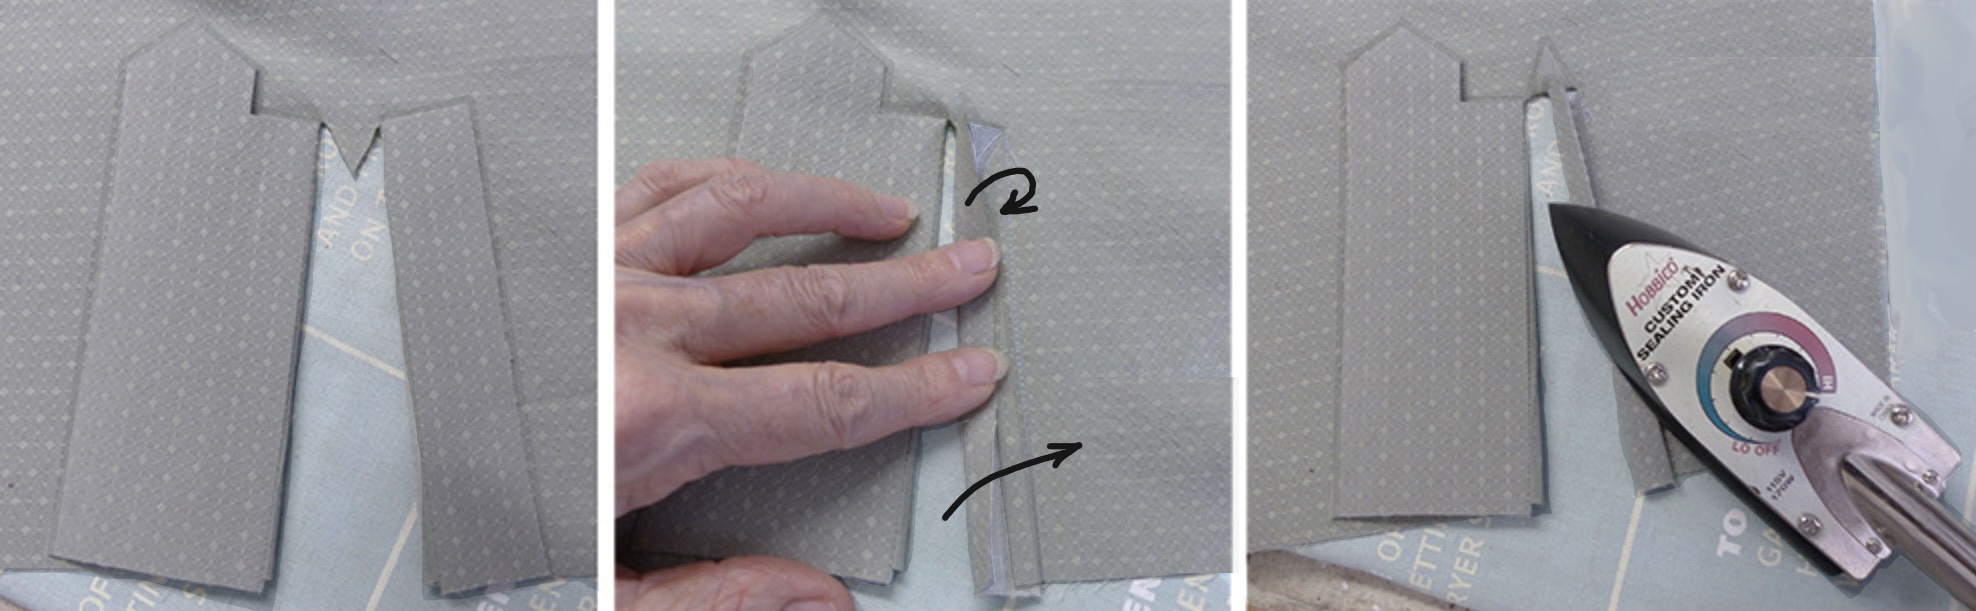
Cut from the hem right up the middle to a scant finger’s width from the top, then make two angled cuts to (but not through!) a few threads from the top of the stitching. The placket’s triangle will come free. The raw edges curled when hit with the spray.
Press as sewn.
Flip the sleeve over and carefully open the slit.
Press each side flat (so that the sleeve fabric is its original position but the placket pieces are to the side).
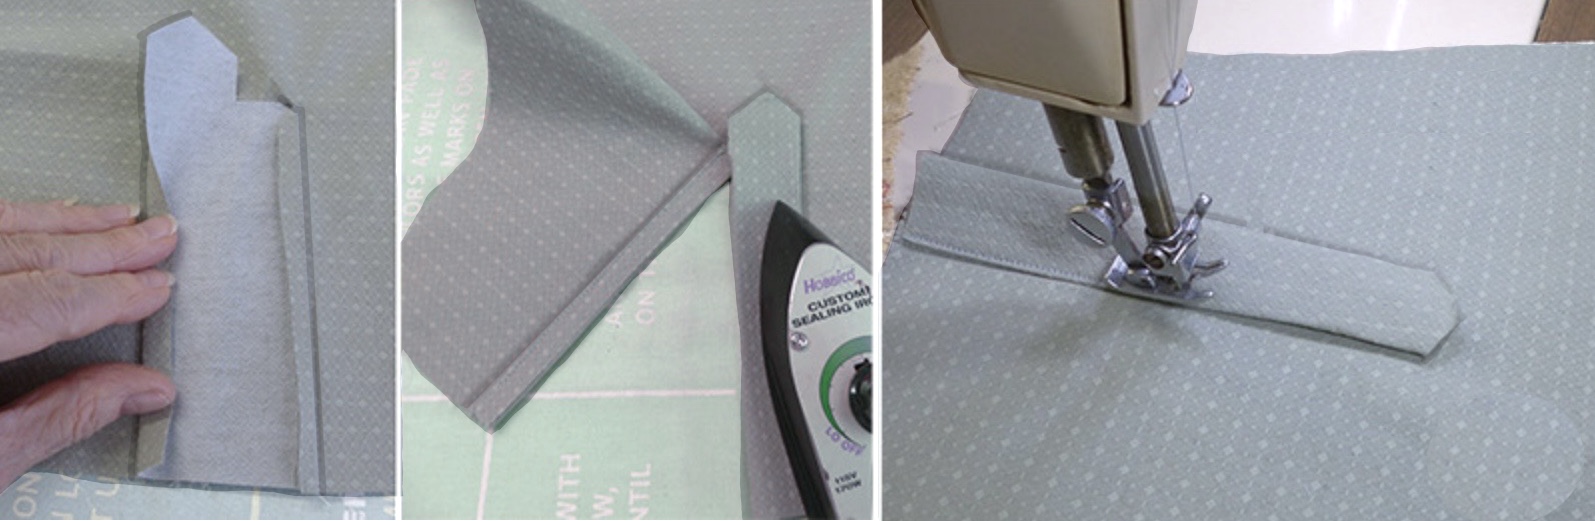
Press each side back on itself. The little ear in the middle goes down.
Fold the narrower strip on itself, raw edge to stitching, and then once again.
The little ear now goes up.
Press.
Narrowly topstitch the length. Both ends are raw; they’ll be covered in a following step.
Rather than butt into the other sleeve, raise your presser foot and take a little jump to start the next.
Press.
Fold the outside edge of the bigger placket piece and press.
Fold to cover the stitching, press again (the top edges of the angled bit are still raw).
Stitch this edge about 2/3rds of the way up. Leave the needle and foot down.
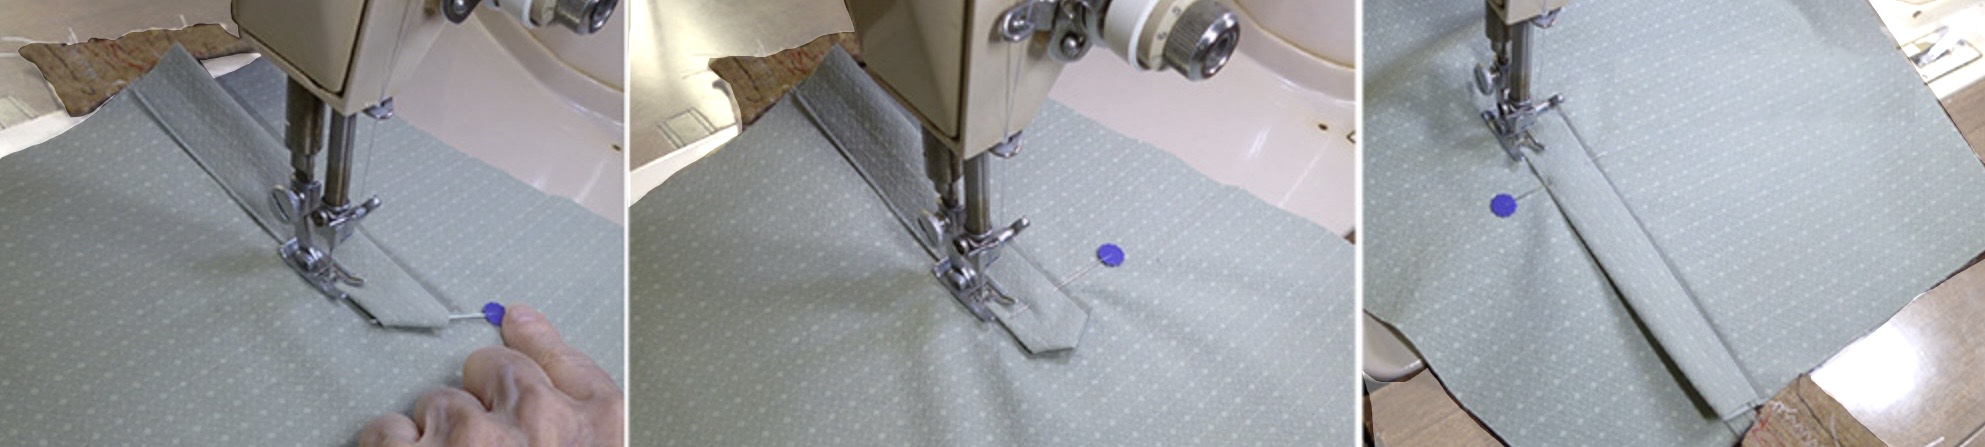
Roll the raw edge of the narrow top of the strip over a needle, then repeat for the other angle. Pin.
Edgestitch to the top corner, pivot, sew, pivot, sew. Continue down the side (it will be open lower) a generous thumb’s width – not quite to the pin shown.
Stop with the needle down. Raise the presser foot and pivot.
Sew across the strip and backstitch to finish the placket. Press.
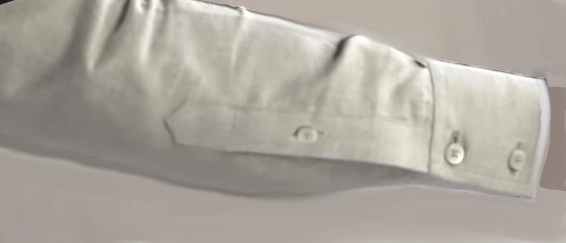
Plackets can be made longer, with a button in the middle. If so, work the buttonhole before attaching the cuff.
Reference:
How to Make Men’s Clothes
Jane Rhinehart