Developing a pattern and sewing customized compression sleeves for people with leg swelling due to lymphedema or venous insufficiency.
This project spans the U.S.
I am in Denver, middle of the country, and the woman these are being developed for, J, is in Seattle, on the north end of our west coast, as is my friend L who brought this project to me.
L and I have worked together for many years. Our group created and mass-produced masks in the early days of the pandemic when commercial ones were not yet available and sewn ones were the best option.
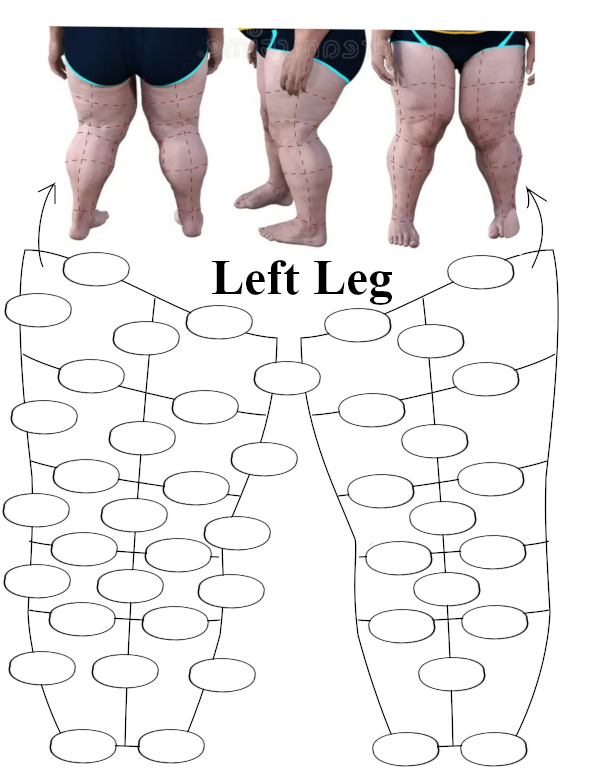
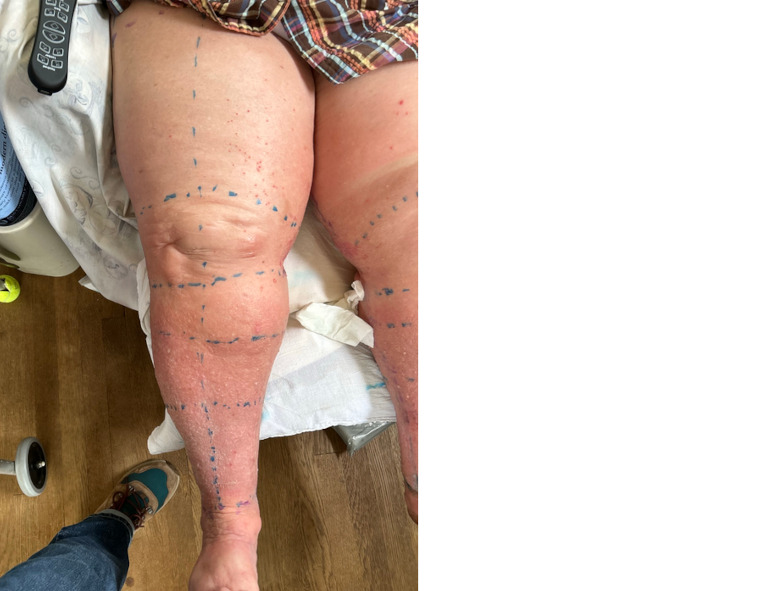
(The base image was grabbed from the internet; the person we’re building this for has given her consent to use her photos to help and encourage people).
(next three from L)
SCD Sequential Compression Device, gradient compression stockings; inelastic compression leggings, lymphedema pumps
The primary goal is to contain and minimize swelling.
There are commercial compression systems for people with this condition. They tend to be expensive, cumbersome, and difficult to adjust for those with limited mobility. Those are aimed at and underwritten by insurance for people in care facilities with professional staff to do the maintenance. We wanted a solution that worked for those at home.
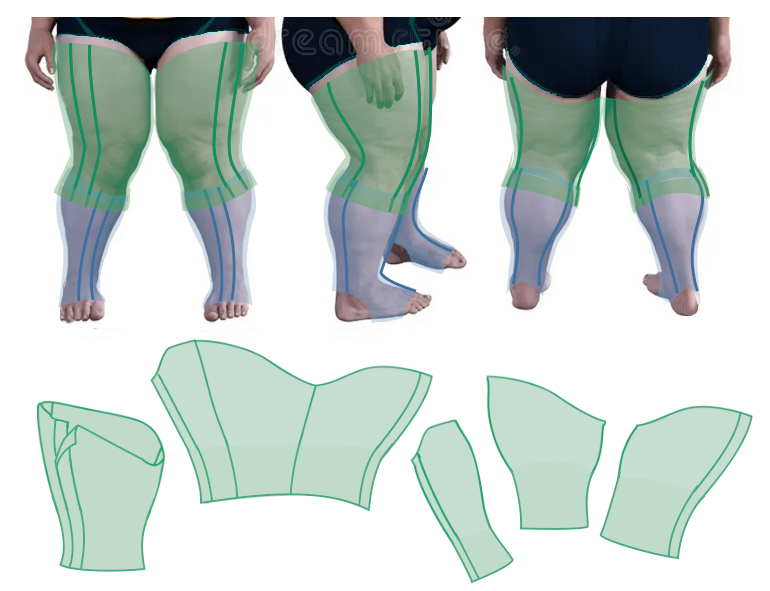
What we’re working on is compression leggings in two sections per leg, each split along the side front edge so they’re easier to get on/off and adjust. They overlap, as without compression the popliteal fossa around the knee balloons out, yet are not connected so each can rotate around the leg without diagonal creasing.
These are related to sports or exercise leggings made of stretchy fabric. The closure is Velcro, which ordinarily I fight shy of, but here it comes into its own. The edges can be peeled apart and reset to accommodate the shifting circumferences of each leg.
The sleeves must be machine washable, so they’ll have their own lingerie-style bag to pop in once the Velcro is mated.
They’ll be supported vertically by boning. For my corsets, which tolerate machine washing, I use spiral stainless steel, but decided to step down to lightweight plastic boning here, as these garments are going to spend much time damp due to lymph oozing and we don’t have to support weight (breasts). We opted for a single wickable layer rather than bulk up with lining, etc. that adds to time and expense for increased pieces as well as uncomfortable bulkiness. My friend L, the RN who came to me with this project, says that leakage diminishes markedly once compression is applied.
When the mockups have been field-tested there will be a production run so that the sleeves (particularly the uppers) can be swapped out often.
The thigh and calf sleeves overlap but are not connected. When both are wrapped she won’t be able to bend her knees, but the thigh’s Velcro flap can be peeled apart from the bottom to walk to/use the bathroom. When both sections of her leg were wrapped, the areas around her knees immediately ballooned out , so there must be uninterrupted coverage to prevent swelling of the popliteal fossa.
Lightweight boning will be used to maintain vertical height. Same as how it works in a corset. Machine washable! Velcro must be mated before laundry; needs dedicated lingerie-style bag.
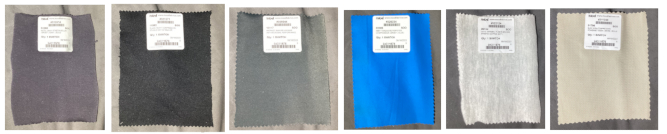
For fabric, we want wickable with some stretch though not as much as for exercise wear.
We found several sites on line and after a phone call, ordered swatches and then fabric from Mood in New York City. @arayti had visited and been impressed by them, and had fabric drop-shipped to me to build clothing for her.
They are fast and reliable.
L and I researched swatches, made arbitrary decisions, and L called Customer Service at Mood Fabrics. They promptly drop-shipped swatches to me.
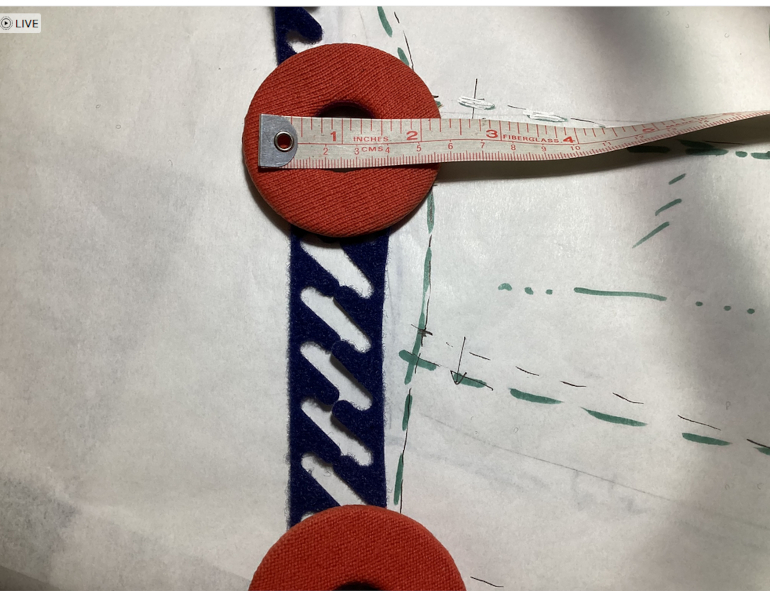
We conferred on FaceTime, comparing stretch. I had a high-compression knee-high sock (here, on my forearm) and sequentially pinned each of the swatches into a cylinder and tried it on the other arm.
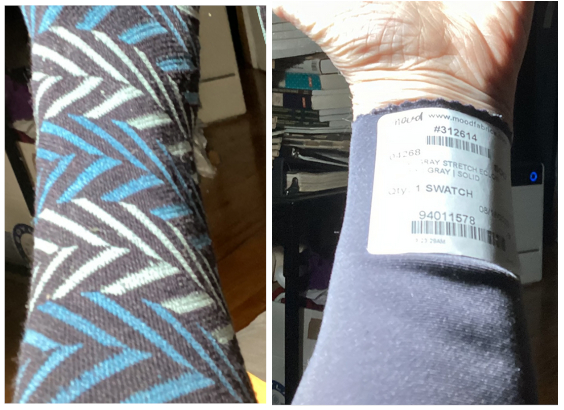
We chose two, and L ordered two yards of each to be shipped to me.
Developing the pattern:
It was immediately obvious that this needed to be a tutorial available for anyone who sewed to customize.
First, if J could come to my studio, how would I create a custom pattern for her? Next, how would I set this up to be done long-distance by willing hands? L sews (better than she thinks) but has limited pattern-making experience.
The pattern was designed with three vertical seams, offset for comfort (as on garter belts). The seam allowances will be sewn to the outside to minimize chafing.
How do we convert a pattern with conventional seams to what I’ve designed? Let’s take a short side trip.
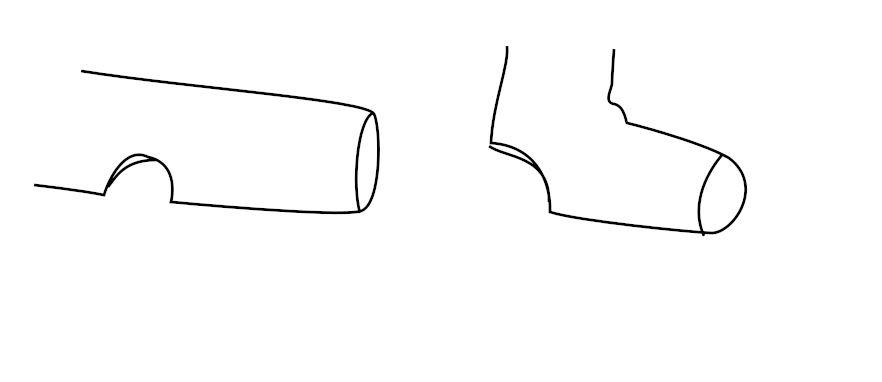
Messing with vertical seams – how to convert a pair of stretch-fabric pants to leggings with no outseam
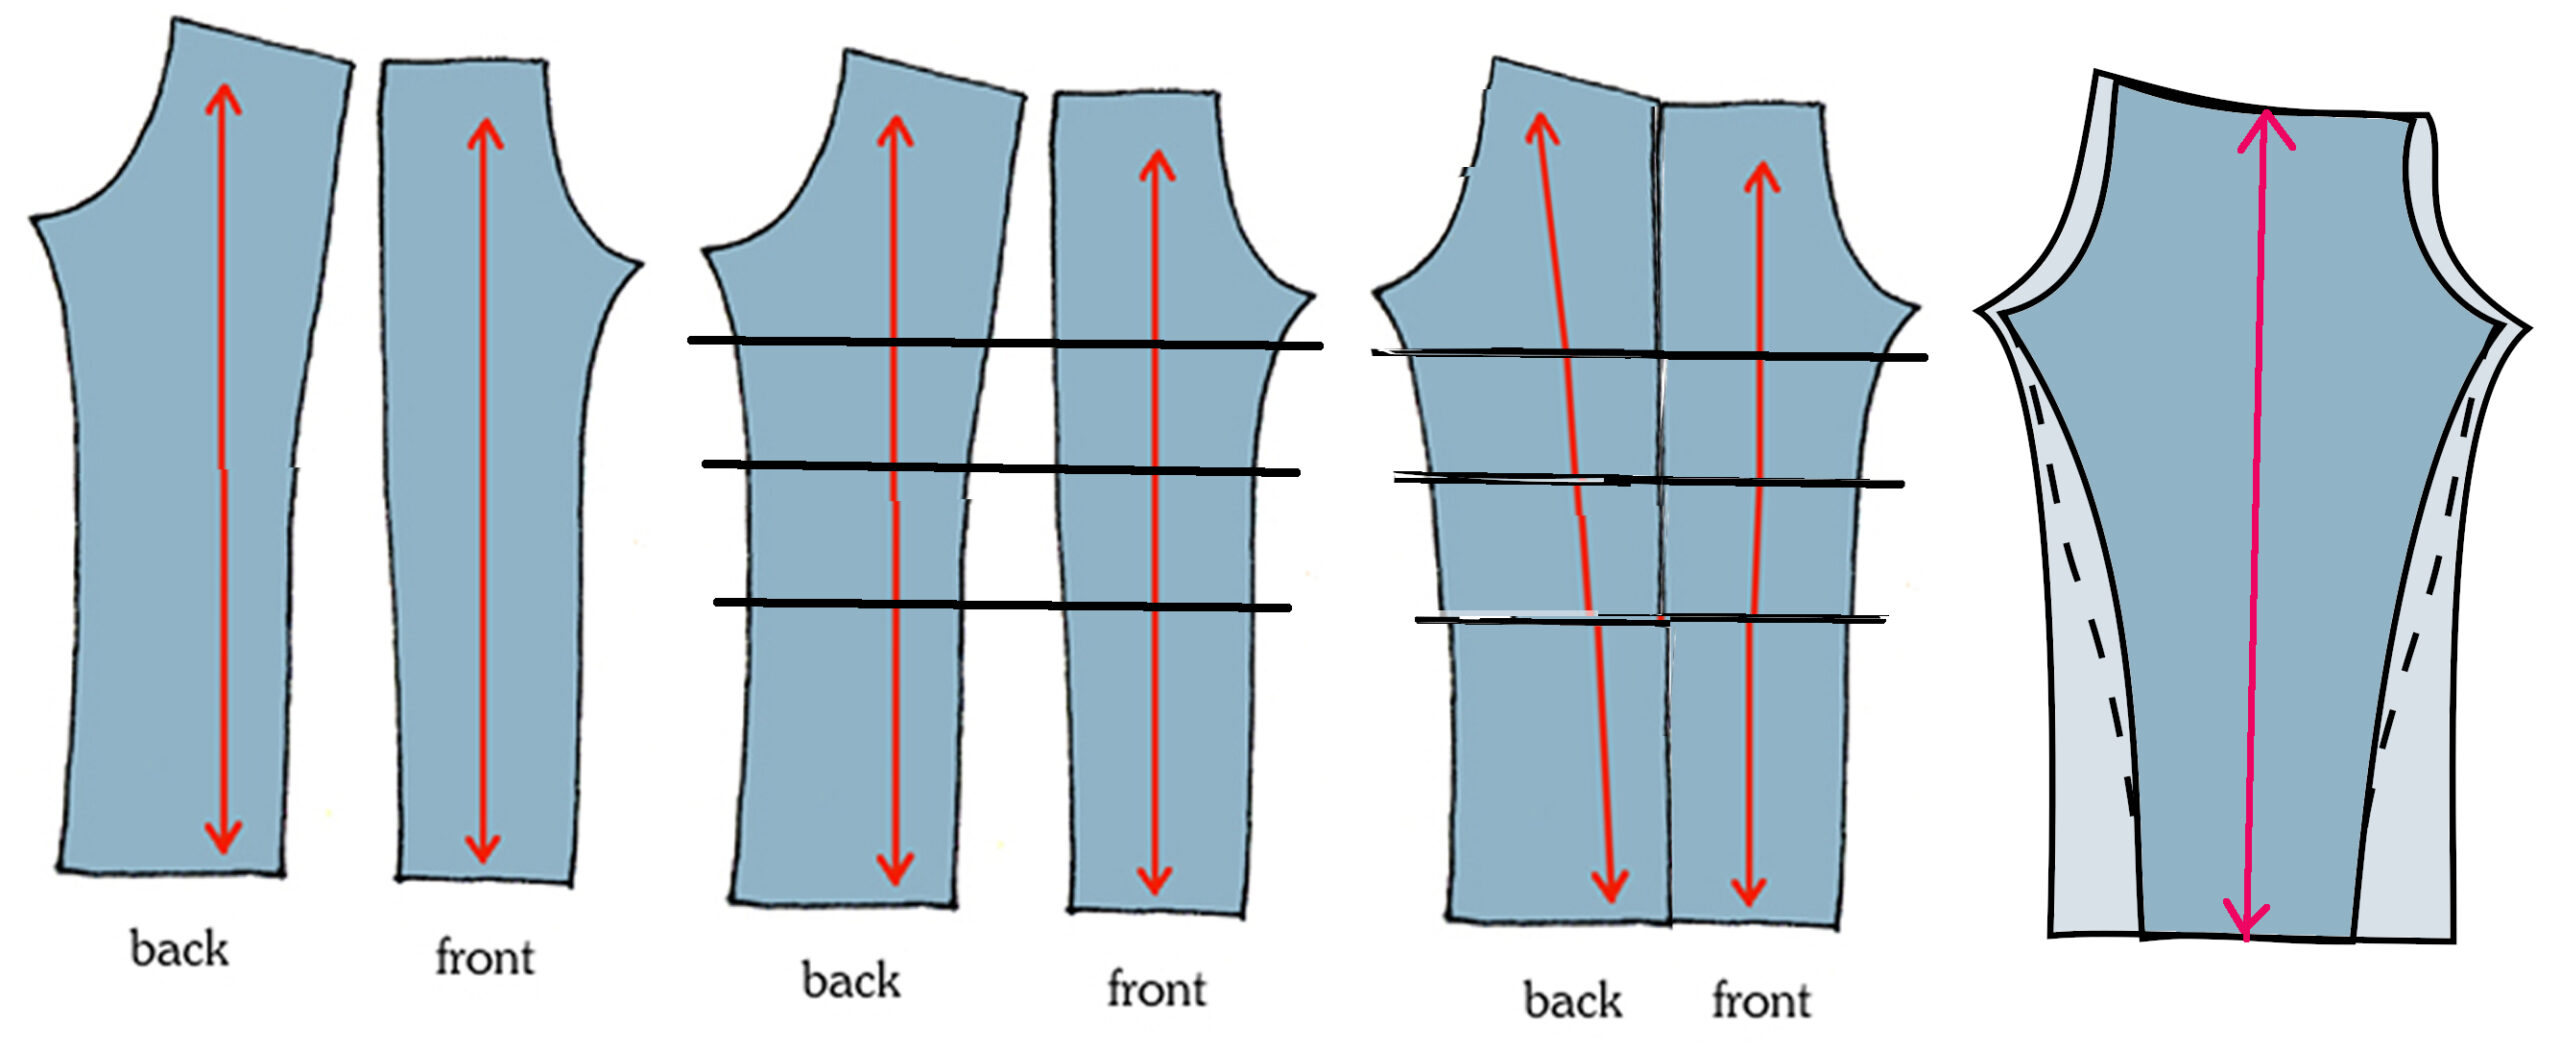
- Your pattern is easier to figure out if the pattern you trace from is made for stretch fabrics. You can use one for wovens if you’re very careful to check the circumferences as shown below.
- These diagrams have had their seam allowances taken off. Always make alterations from stitching line to stitching line.
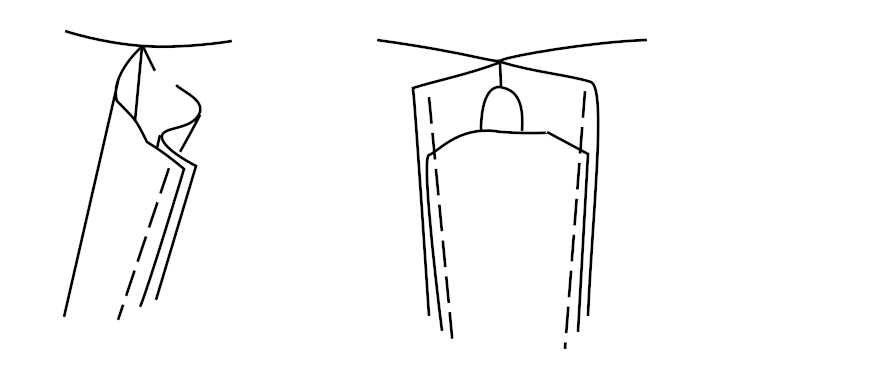
- Butt the pieces, section by section, together along the outseam. You may have to tip the crotch pieces at the top. The stretchiness of your fabric will make this work.
- Trace off your pattern, smoothing the lines.
- Use the steps in the next section to figure how much to skinny in your pattern.
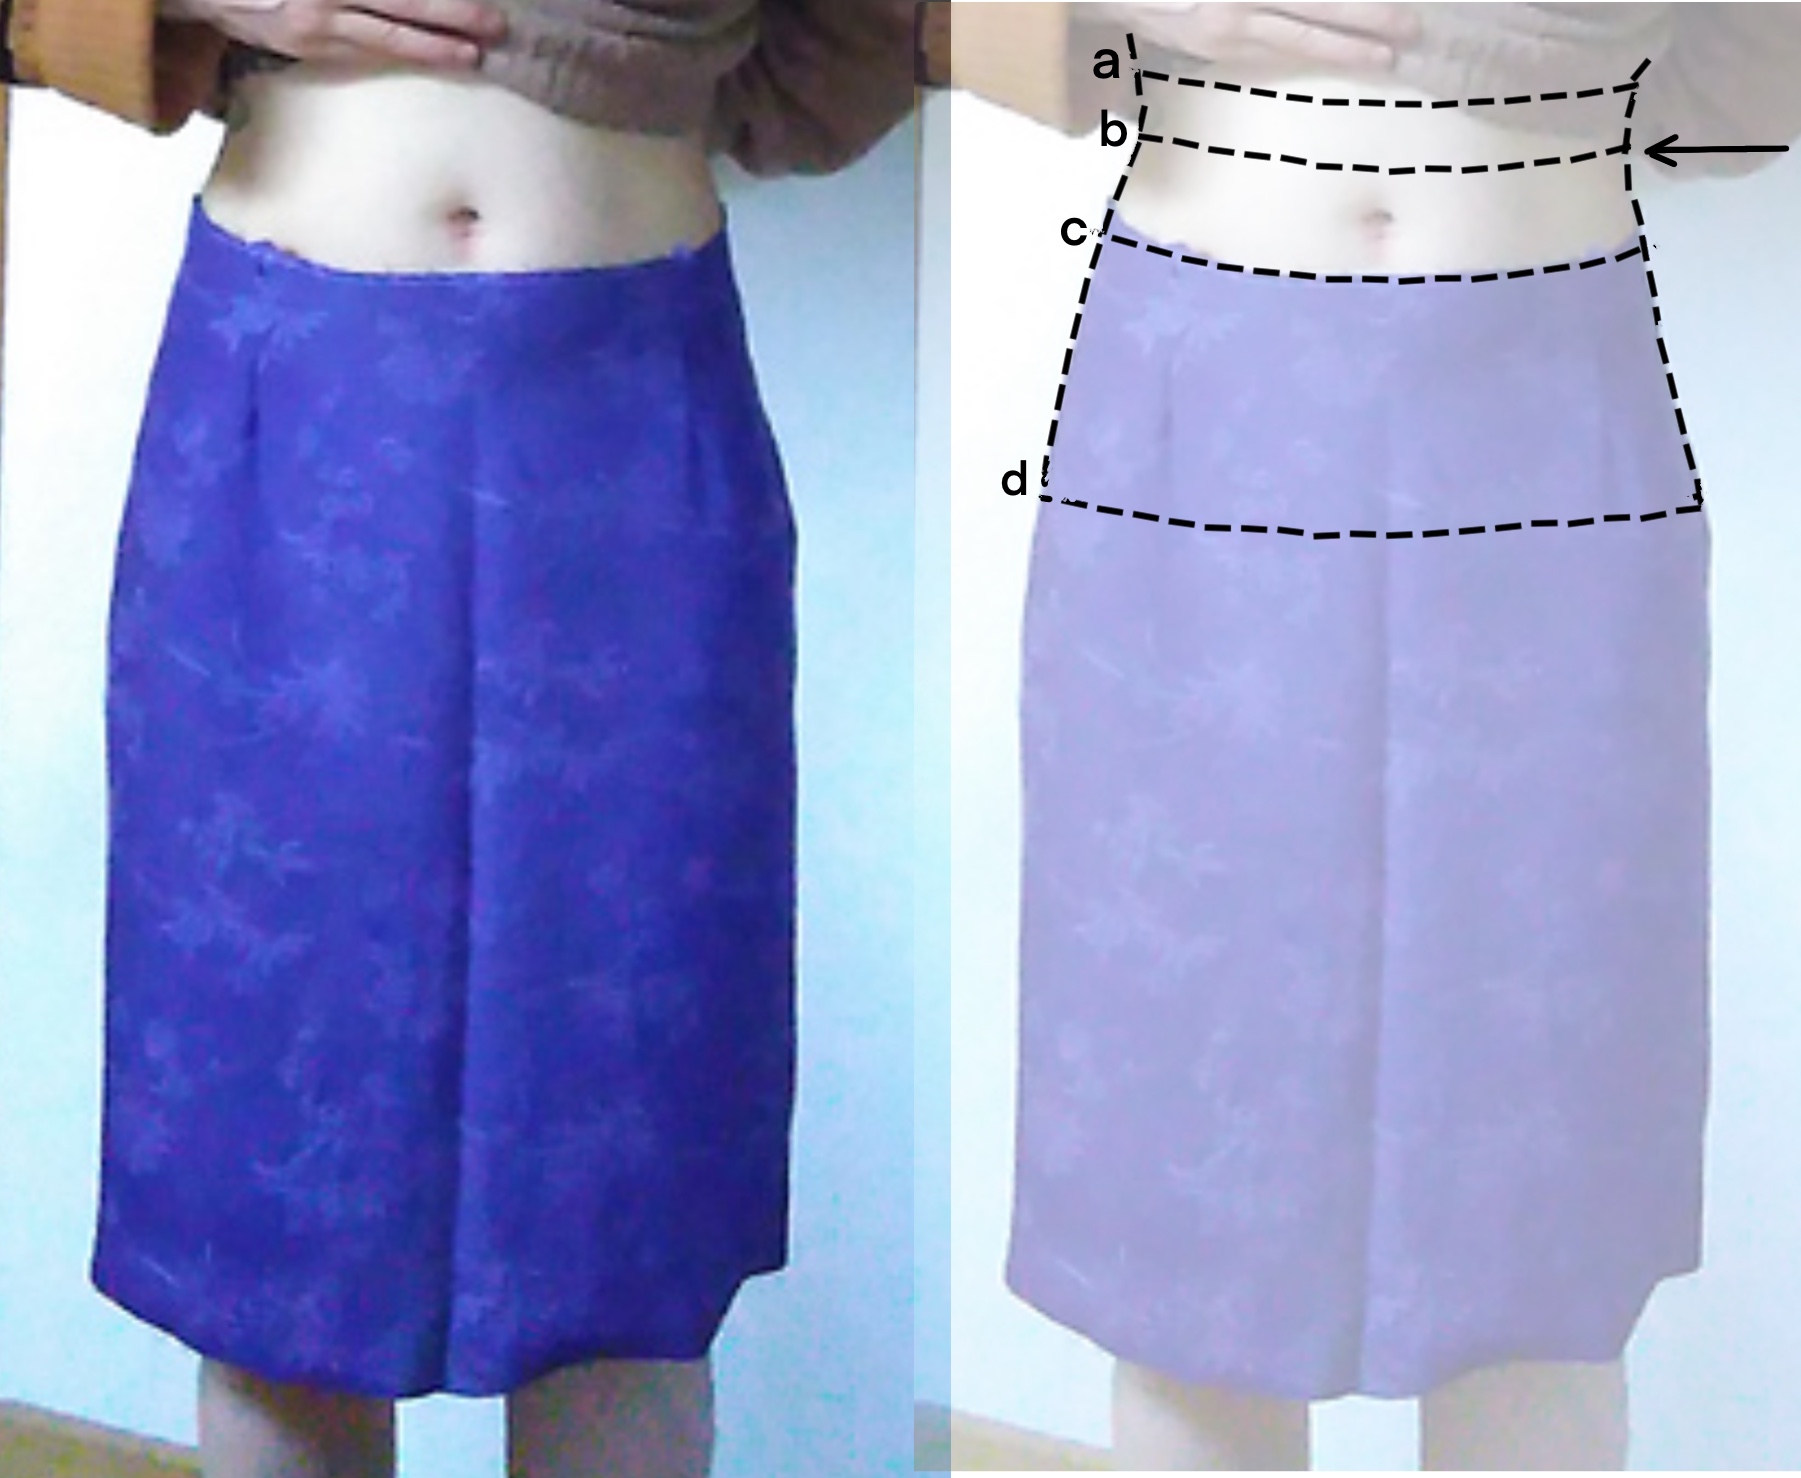
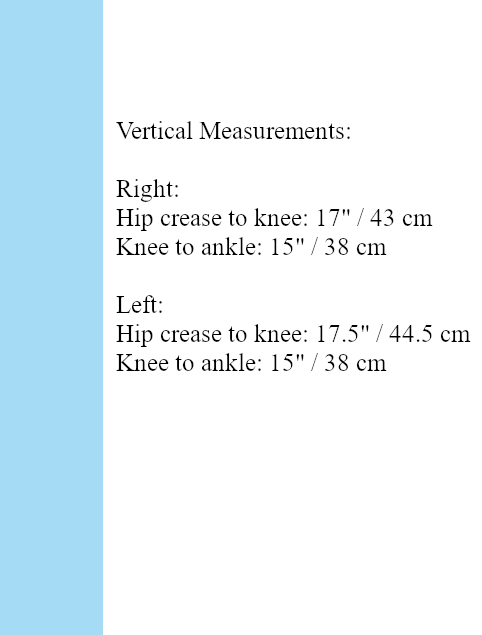
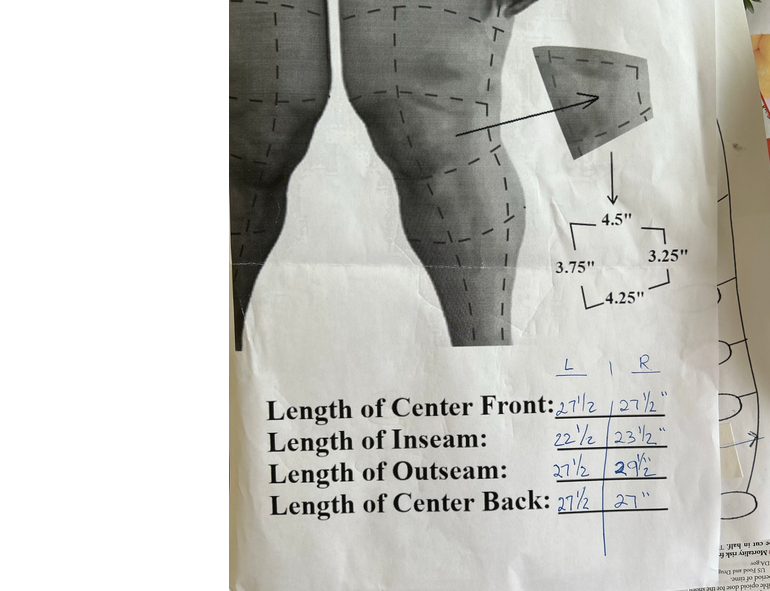
To determine/check the lengths of the dashed lines below:
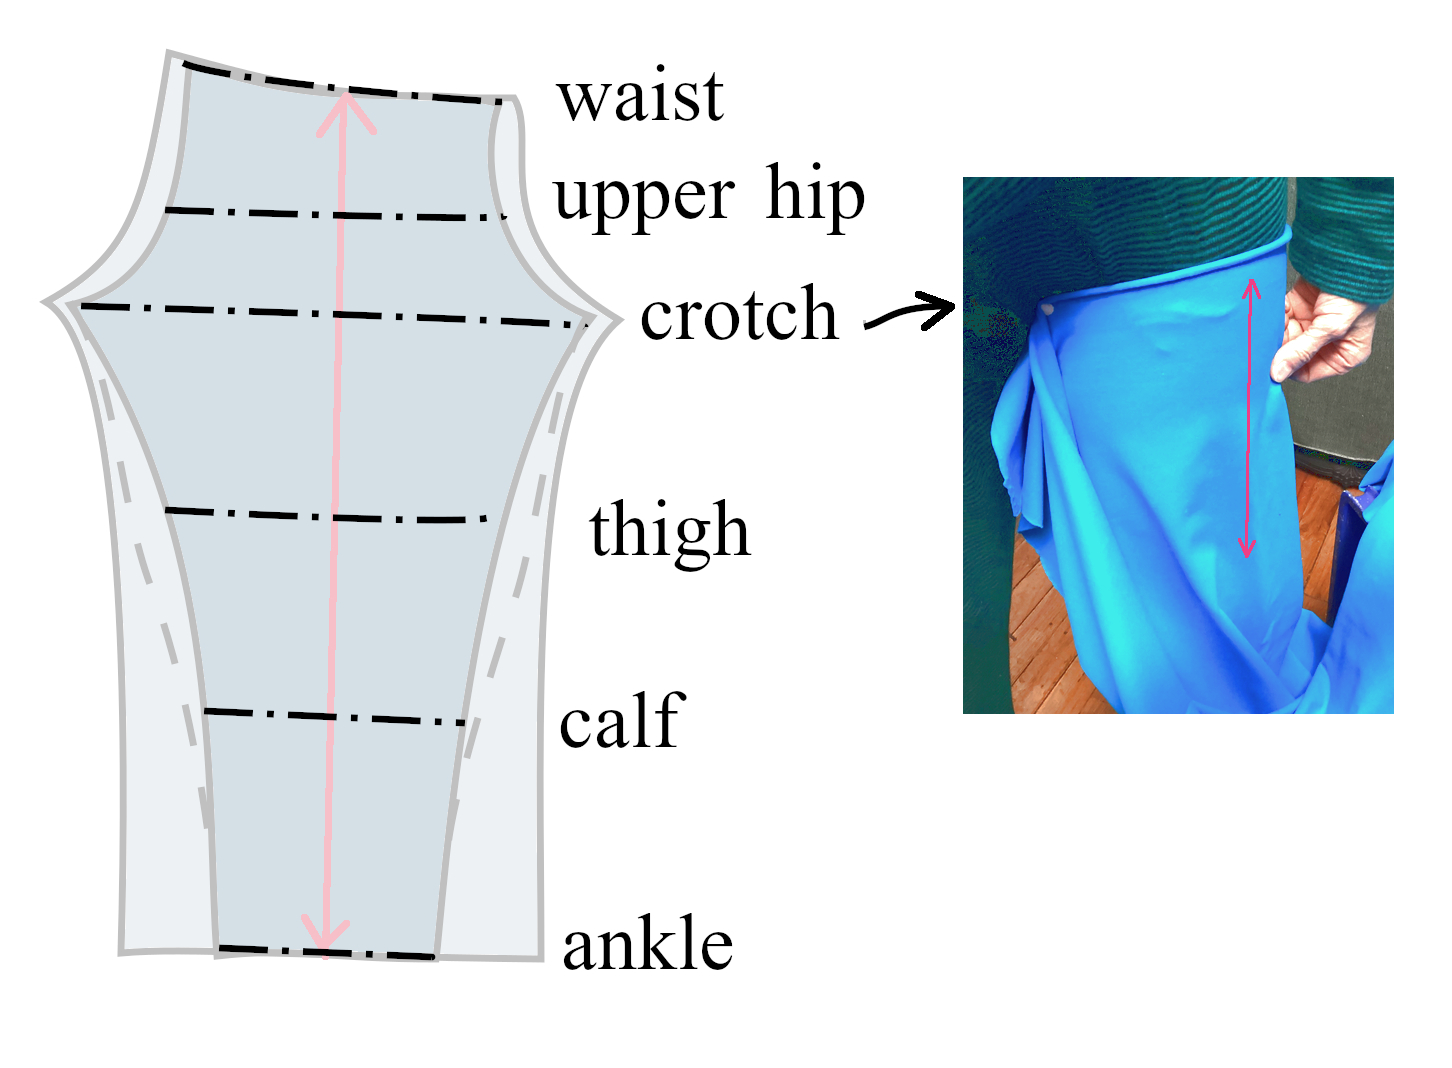
- Figure out if you’re going to lay out your pattern on or cross-grain (many stretch fabrics have their greater stretch vertically, so are laid out cross grain so that the greater stretch goes around the body).
- Wrap your fabric around your body, and use that center front to center back length for your waist (half the total circumference).
- Upper hip is again CF to CB.
- Crotch, thigh, calf and ankle are the full circumference. Full thighs will NOT run in a straight line from crotch to below the knee; there will be a curve (dotted line). Be sure you can get your foot through at the ankle!
If the fabric for your next leggings has a different amount of stretch, you will need to grab these measurements again.
Unless there’s a stirrup under the arch of the foot to hold the leggings down, your vertical measurements stay the same.
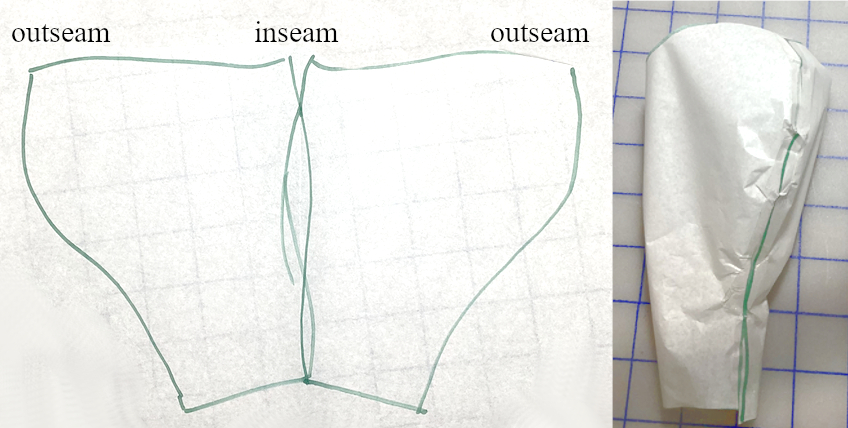
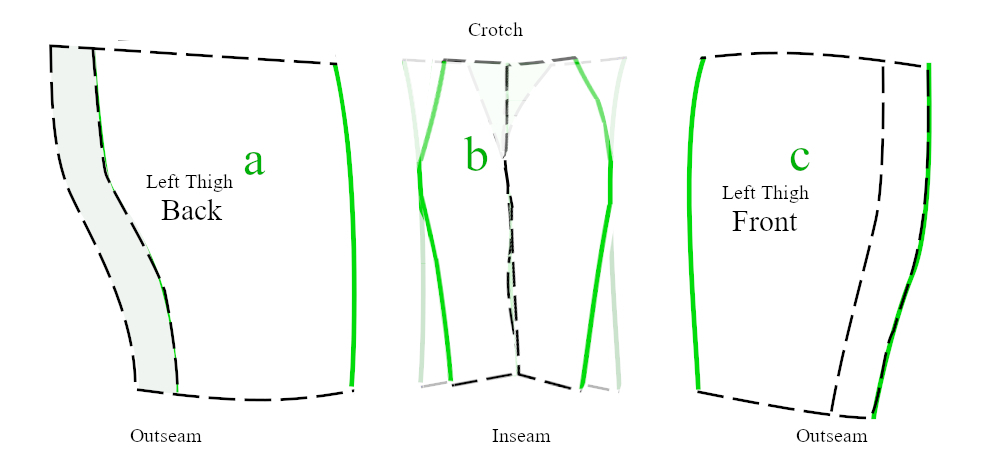
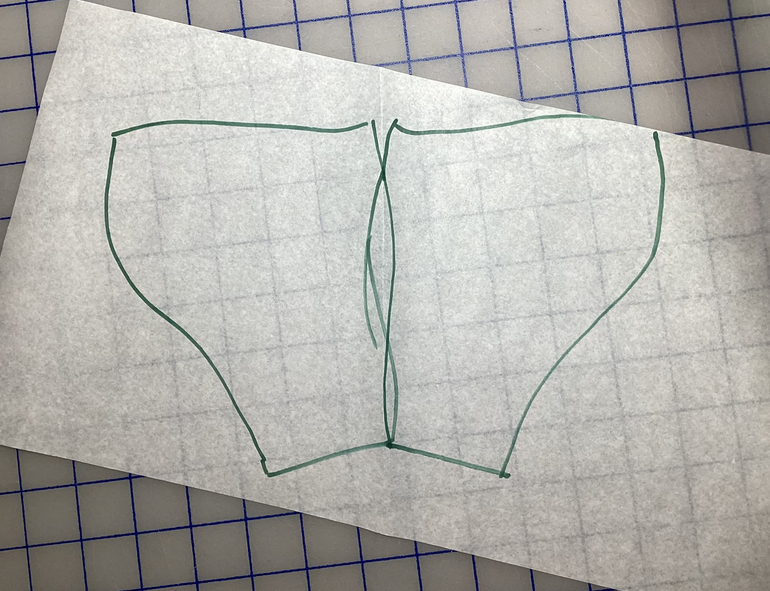
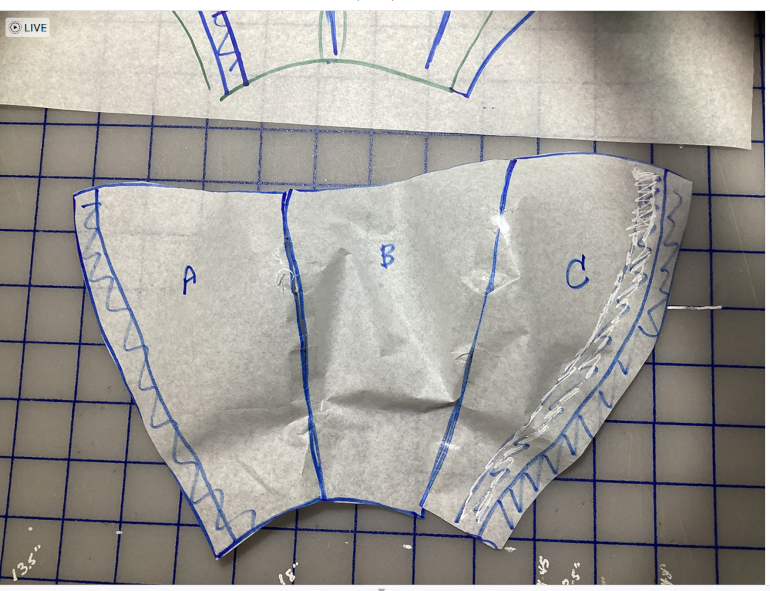
Here’s a little version of J’s pattern to show the theory for moving the seams. I drew out a rough of her pattern and flipped it on the inseam, then cut out and roughly taped it together. There is a huge bulge along the outseam. These rough pattern pieces have no seam allowances, which is why the paper is butted.

The pale blue is the original pattern.
- The former outseam is moved over to the top side of the thigh (Velcro section has a squiggle down it)
- The altered pattern is split into third (dashed lines)
- Each section is traced off, and the seam allowances curved out (these will be done more carefully on J’s pattern)
- An underlap for Velcro is added to C
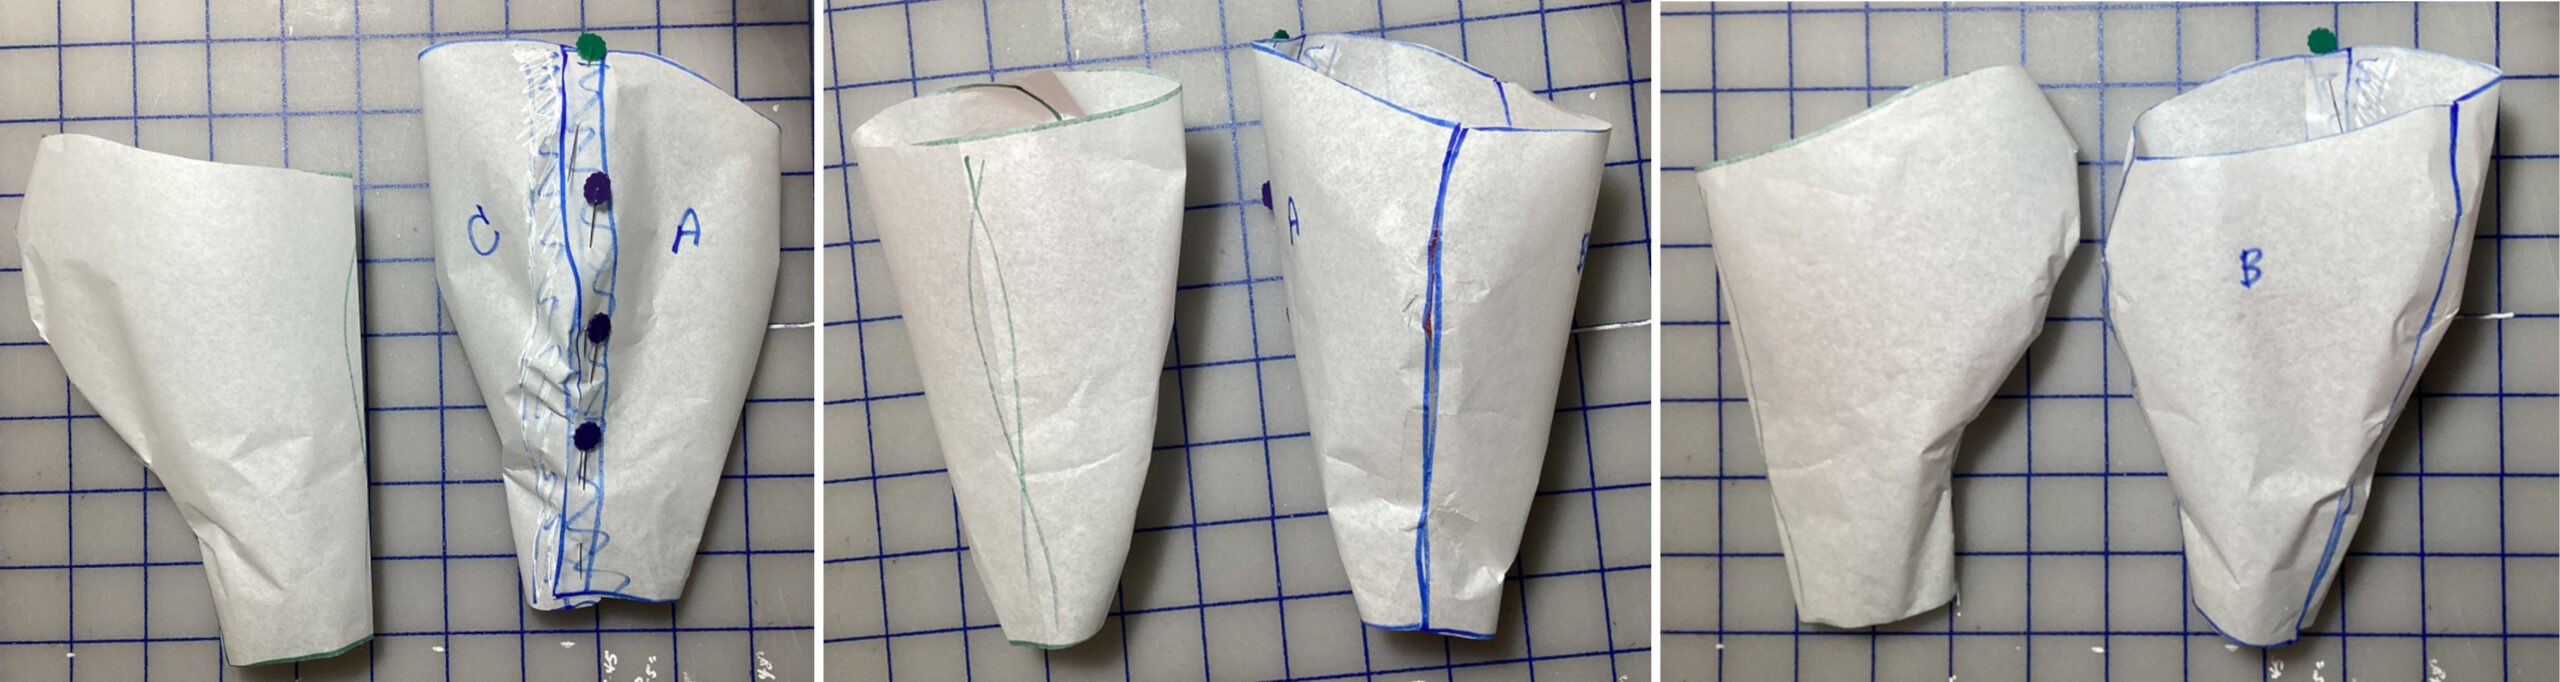
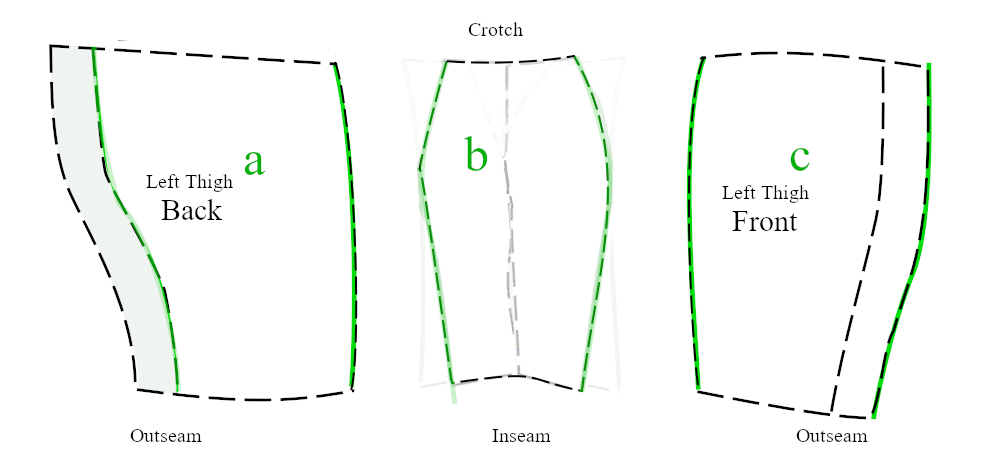
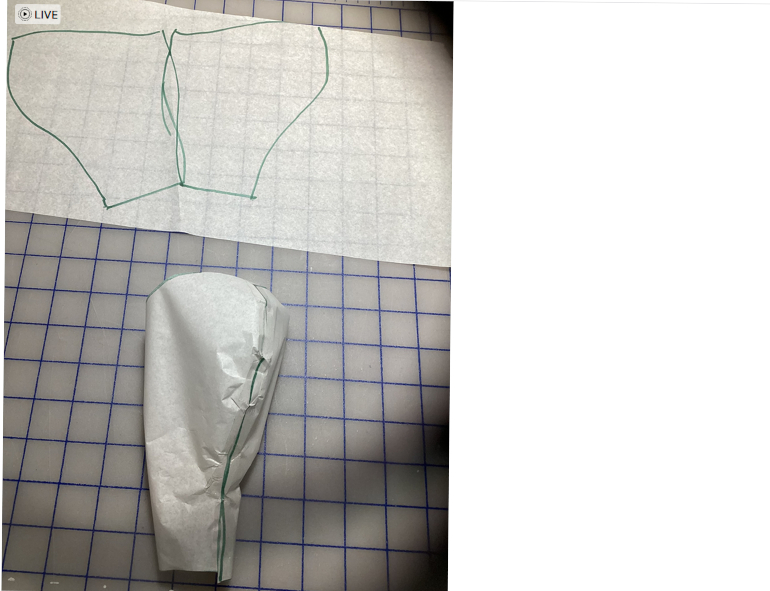
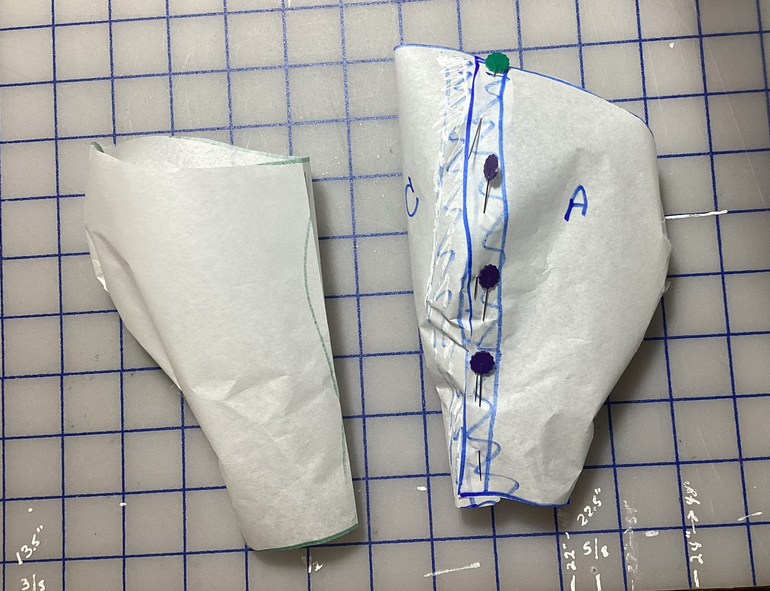
The three segments have been traced off, cut out, and the internal seams taped. The Velcro area has been overlapped and pinned. Even in this tiny paper model, we can see that the great bulge on the outseam has been redistributed.
This reassures me. I am now ready to continue to grid out/work up the main pattern pieces. There will be:
- Three pieces for the left thigh
- Three pieces for the right thigh
- Three pieces for the left calf (changed to two)
- Three pieces for the right calf (changed to two)
Current Game Plan:
- Work up the current full-sized gridded patterns, splitting them into thirds and adding seam allowances, registration marks, etc.
- Lay out all pieces on fabric
- Work up a calf-to-above-knee section for myself (to check the curve of the seams and see how stiff the Velcro is)
- Lay out, cut and sew my trial mock-up
- Field-test my mock-up
- Cut out and sew one complete leg for J. It will be the larger one. Ship it to L.
Details of (3) to come next.
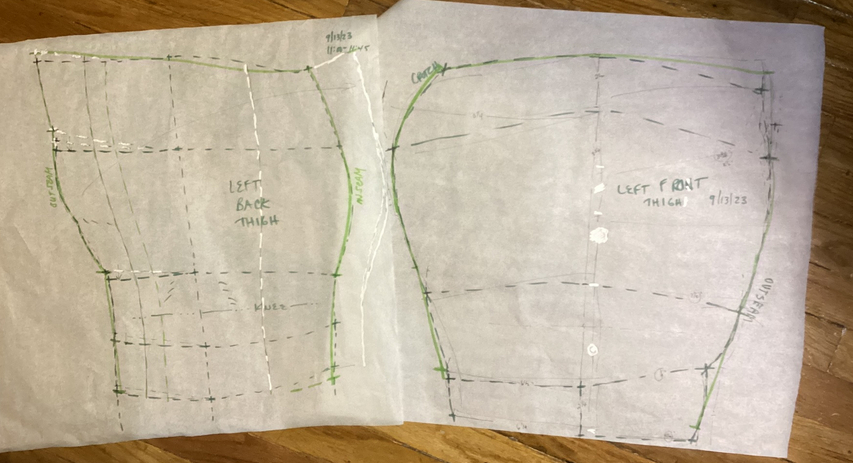
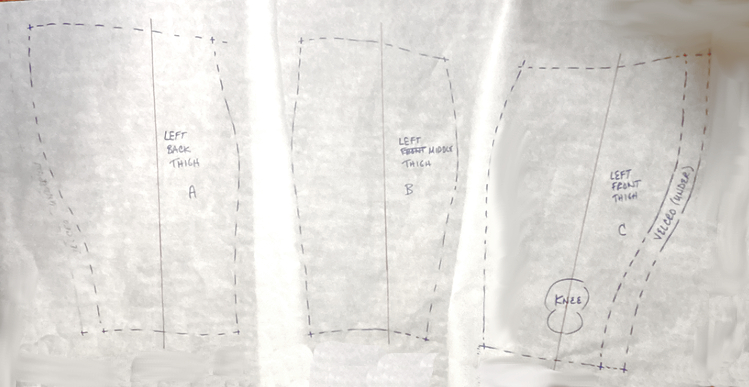
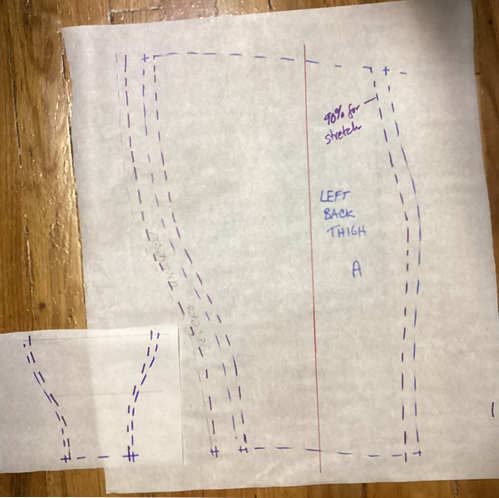
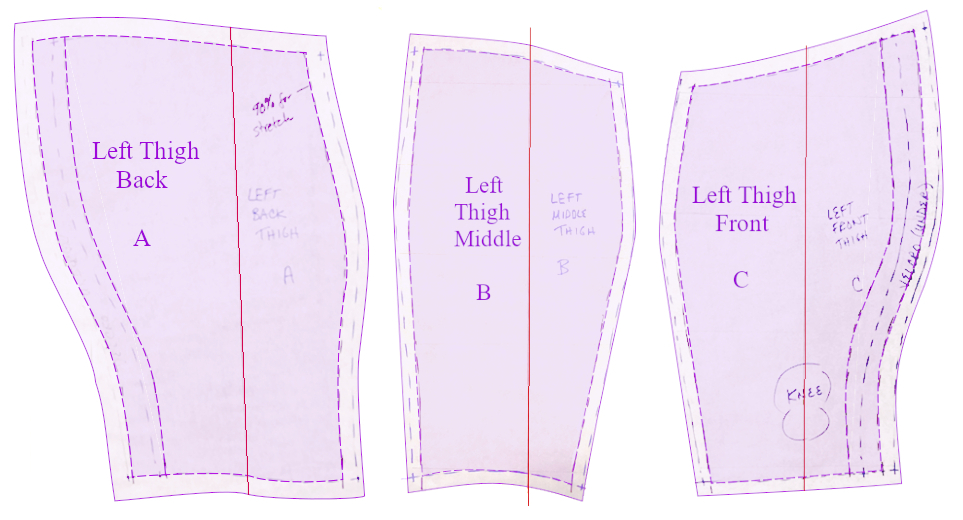
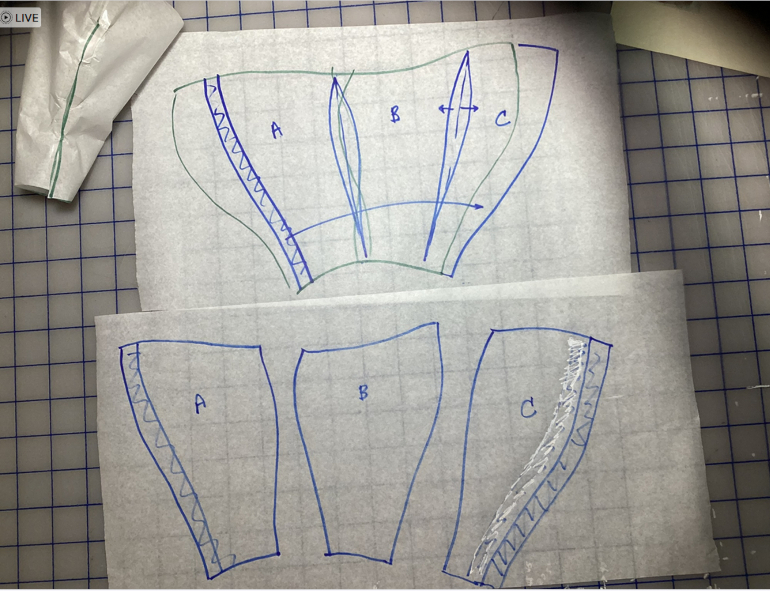
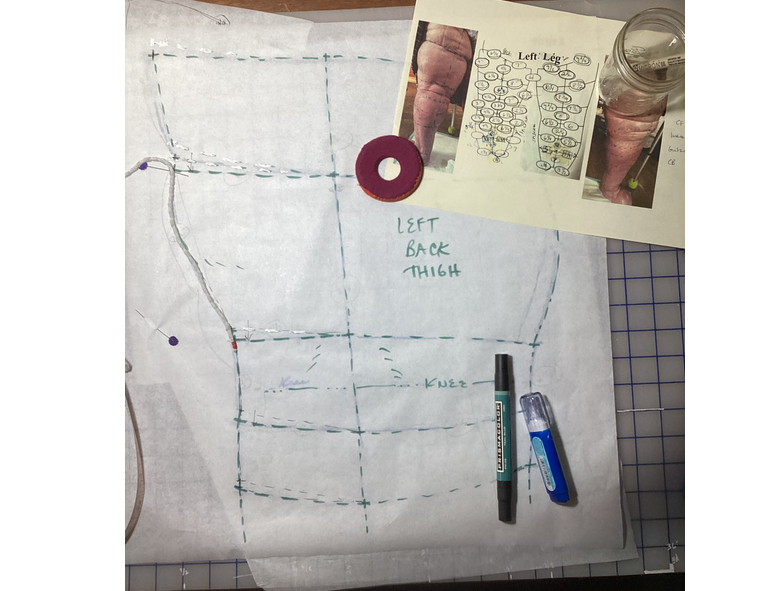
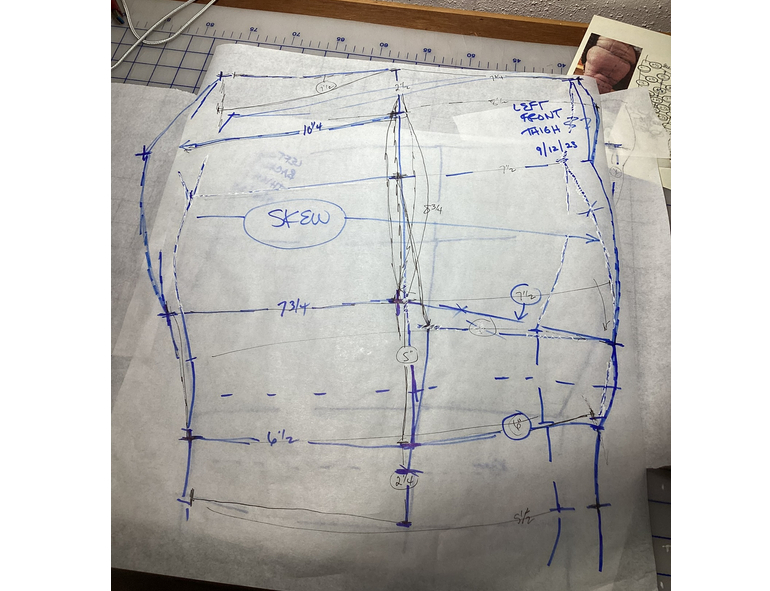
Here are J’s actual-size patterns. Their inseams and outseams are each the same length (they have been reconciled with each other). We are going to follow the same sequence as we did with the little paper mock-up.
Her front thigh is considerably more swollen than the back.
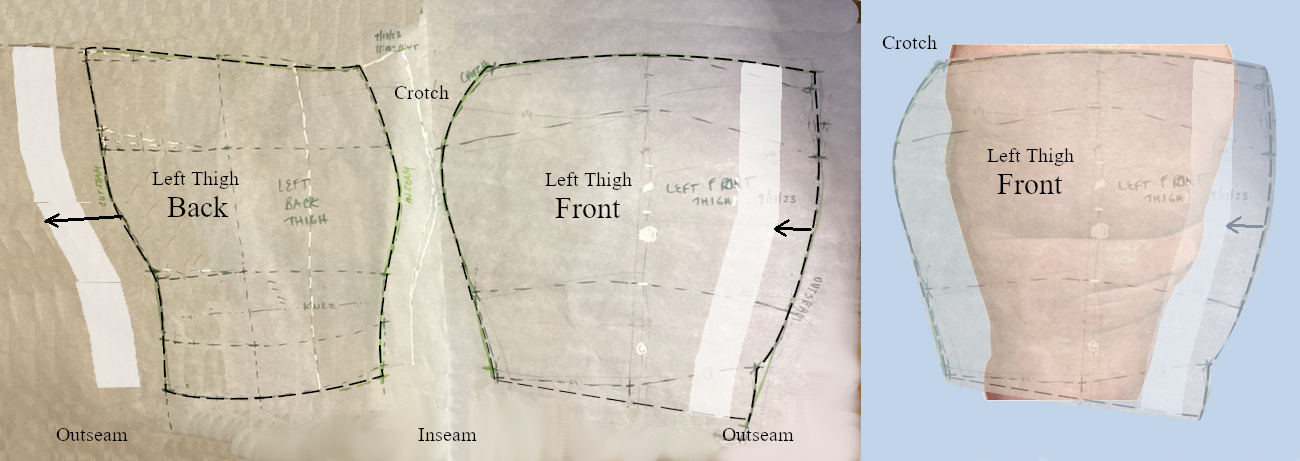
The dotted black lines are the seam allowances.
The lighter strip is where the opening with the Velcro will go. The outseam has been shifted to the front on both pieces.
Double-checking with her pattern on my body (hers is shown here) confirms that the adjustments have been made on the correct side of the correct pieces.
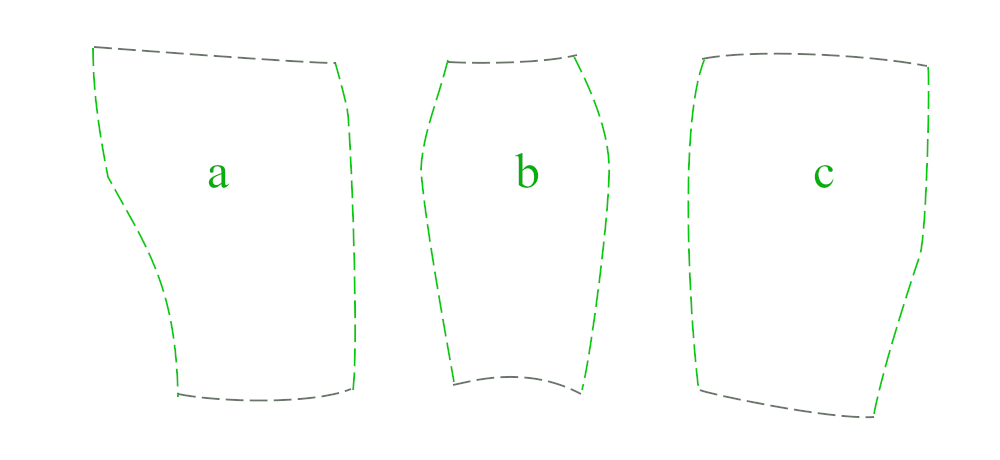
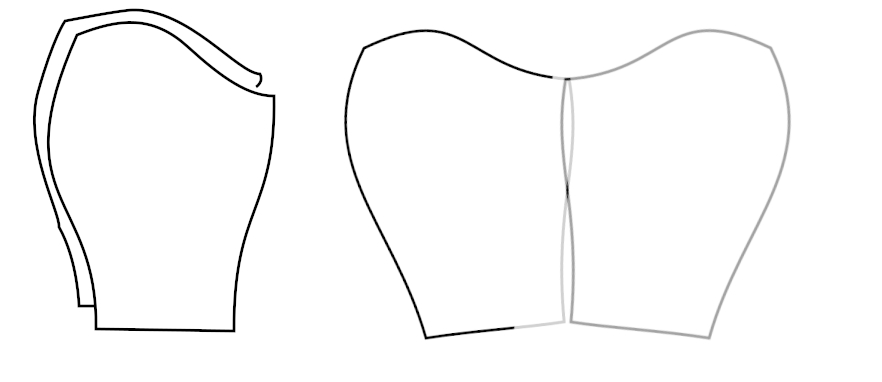
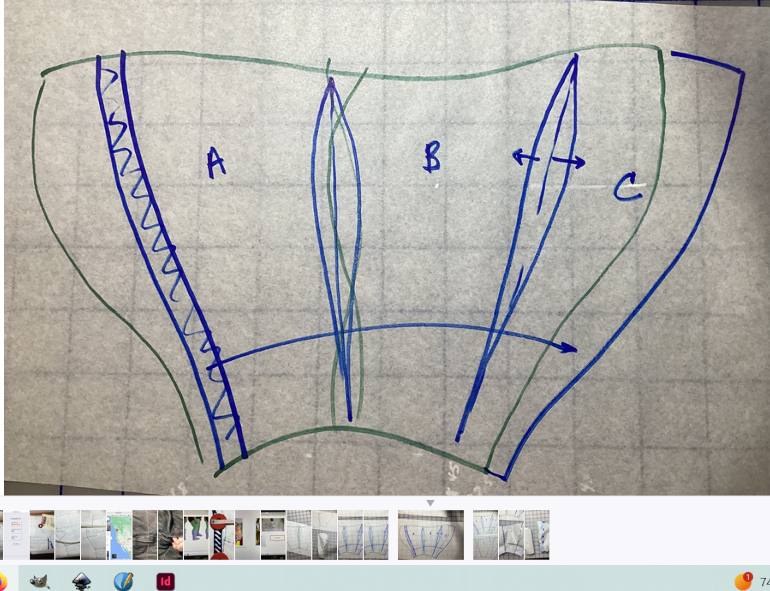
Corrected Pattern Lines. There are no seam allowances.
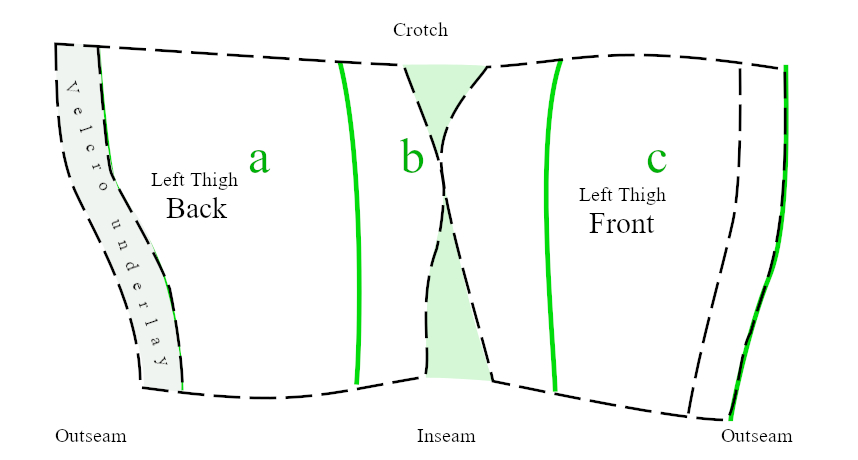
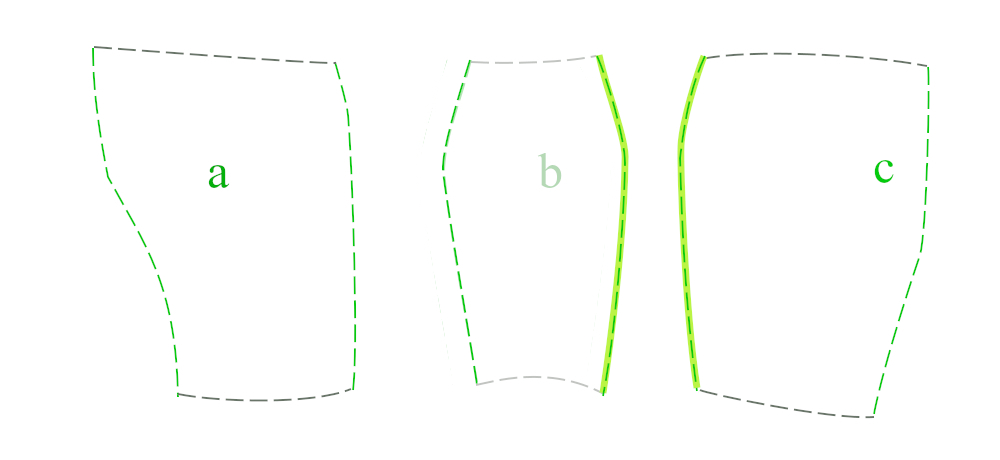
Here’s our pattern split in thirds. We will take out the green wedges and shift around the fullness at the upper thigh.
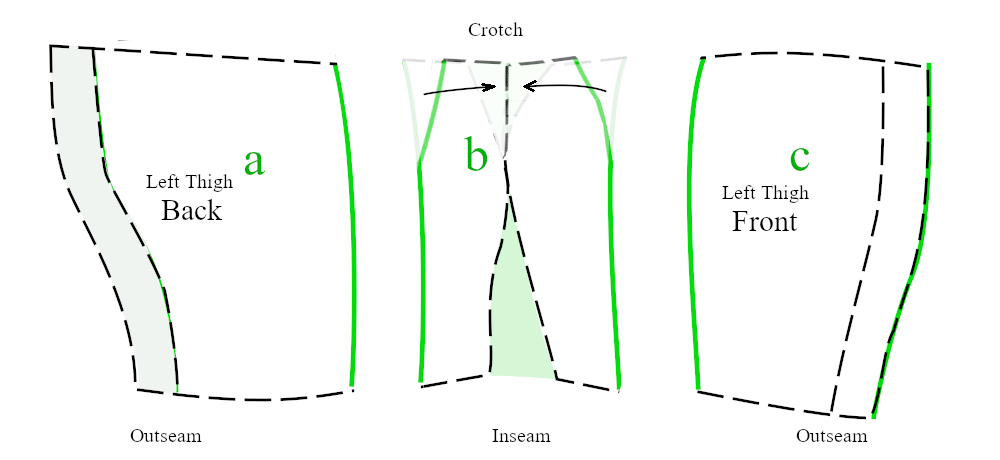
First, we shift the b upper pattern pieces towards the center.
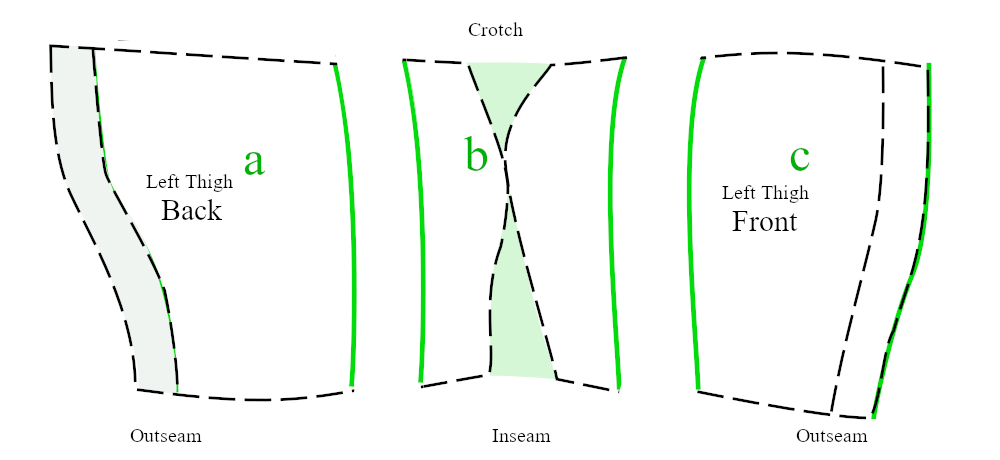
Then the bottoms. We’ll clean them up when we pin-track them a couple stages later; they’re good enough for now.
These pieces would work. They’ll be happier if we split the difference on their curves. I’ve never found a student/client who couldn’t manage once they got over the terror of trying.
The pairs of green lines are what we’ll be playing with.
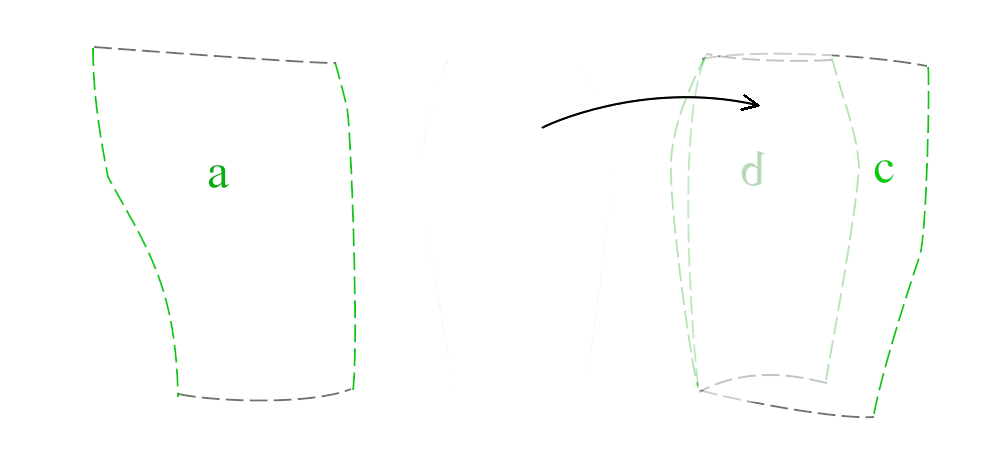
Flip b over onto c.

Redraw the seam line, splitting the difference.
The corrected seam lines.
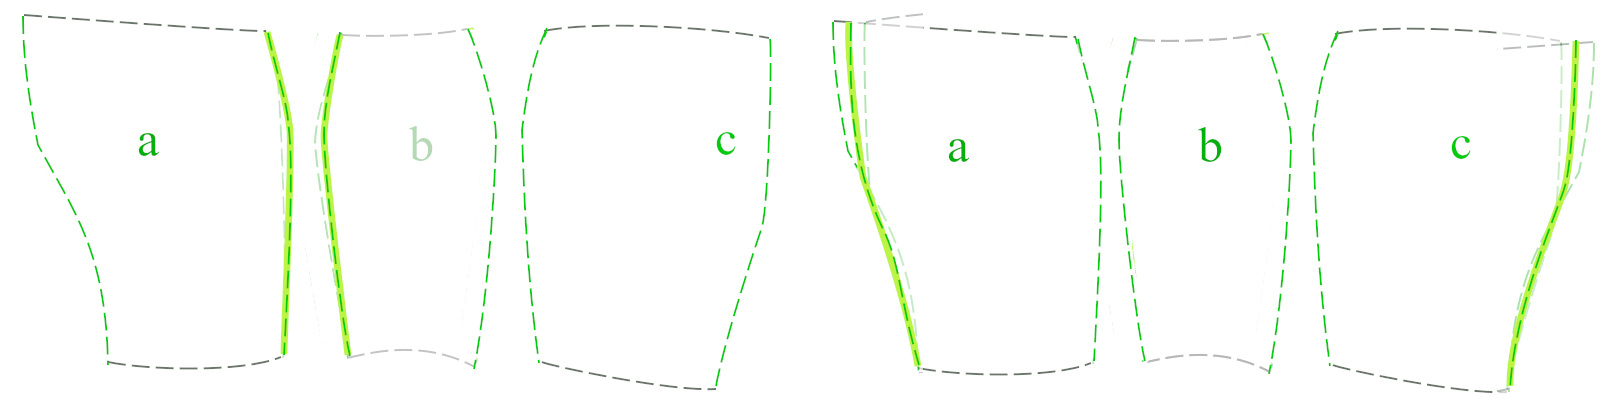
Repeat for the other two sections.
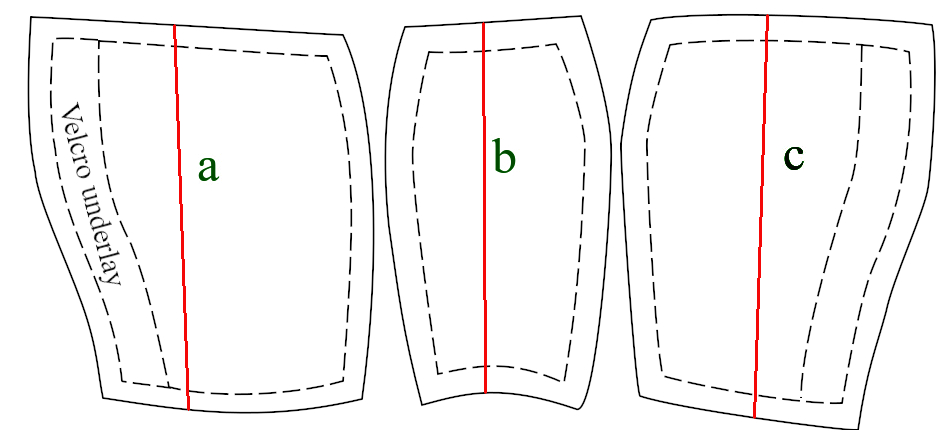
Add the extension for the Velcro flap, then the seam allowances and the grainlines.
This sleeve would fit smoothly if cut and sewn from a woven fabric. However, we must accommodate for the stretch. It’s possible to do by mathematical formulas, but manipulating the fabric with the pattern pieces is as sure, and much faster. We are only going to modify the sideways measurements, the ones that go around the body. We are not going to cut the fabric yet.
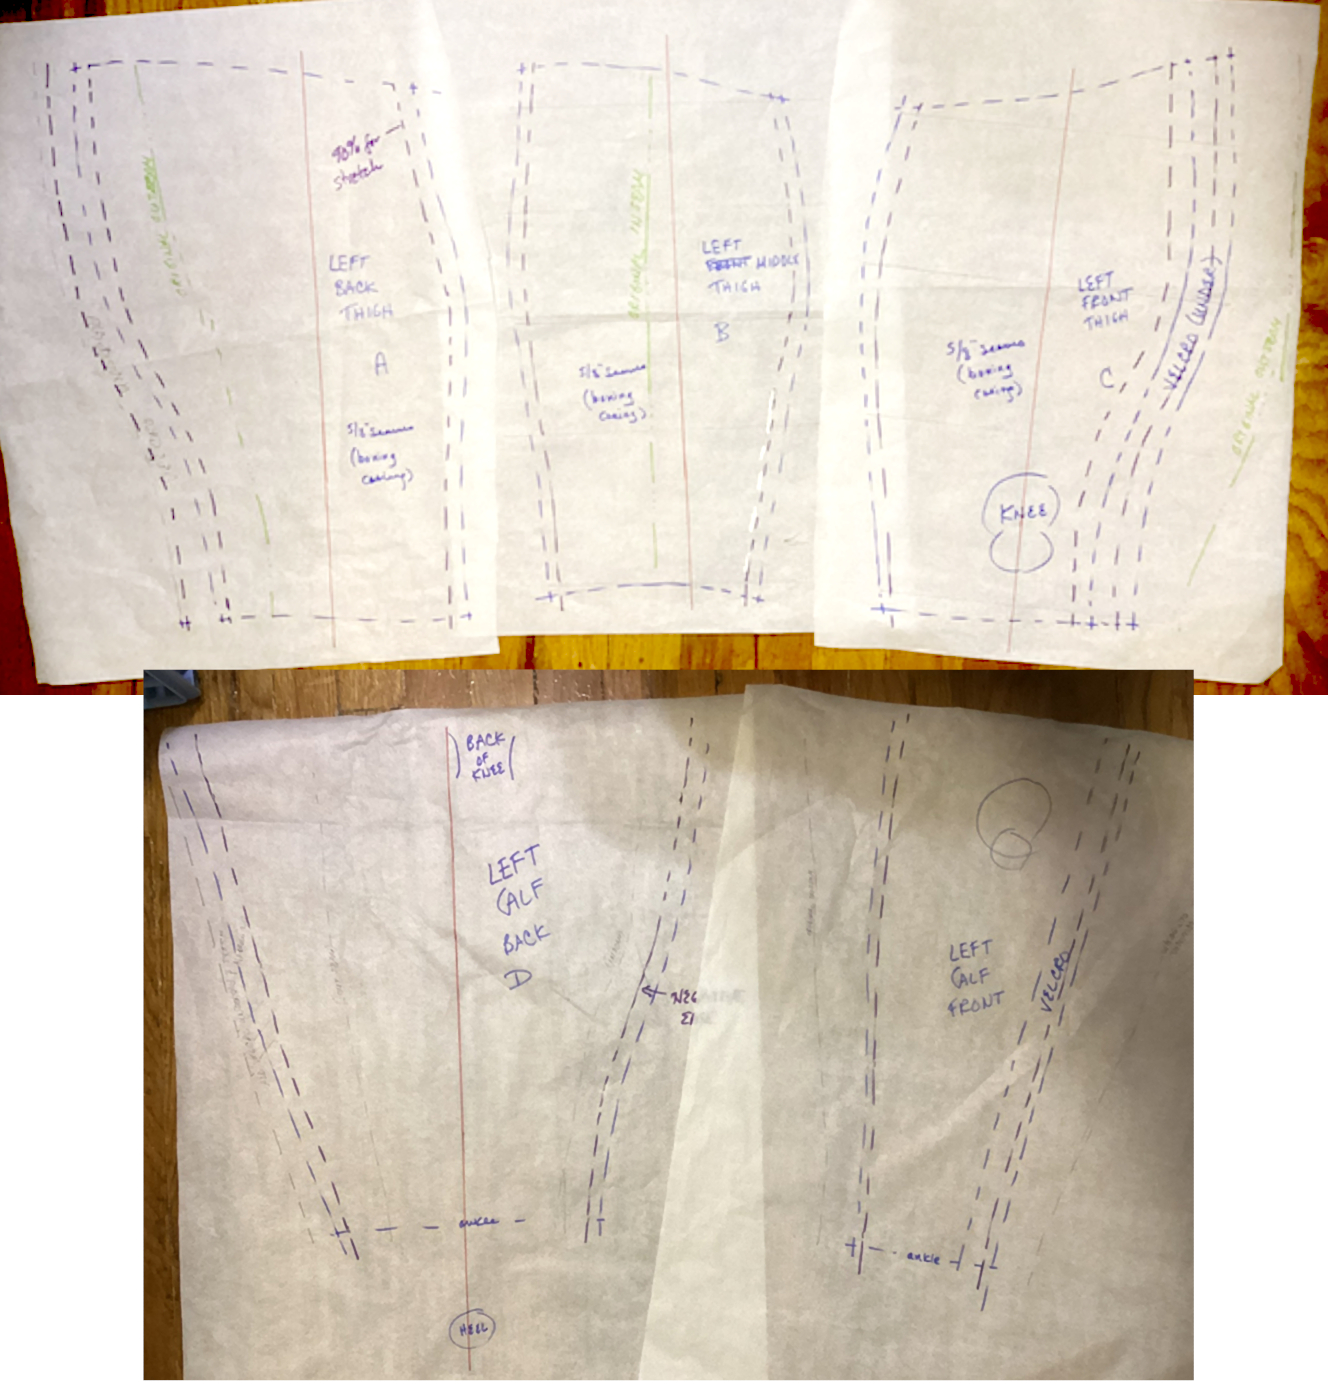
Here are shots of her actual pattern pieces:
Next is to adapt this pattern for stretch fabric. This method can be used for any garment.
Back in the 90s, I had sewn donsiderably and was doing commission work on patterns and design. Prior to then, the only stretch fabric available outside of industry wholesale was white t-shirt jersey.
When stretch Lycra for exercise wear started to hit the fabric stores, I hustled right down and bought myself a pattern that would tell me how to handle this stuff, a stretch needle, and several chunks of fabric.
For the first bra, I made no modifications to the pattern (KwikSew? early days for them, too) though it didn’t have shaping where I’d expect to see it in a standard bodice. It was not as comfortable as I’d expected, cutting into my shoulders and being tight at the top of the side seam.
I redrafted the pattern and was delighted with the result.
That weekend, I was visiting a friend who suggested I bring exercise wear so we could “guest” me with her class. After, she was admiring my top and leggings, so I stripped them off and she tried them on. We were surprised that they fit her well, too.
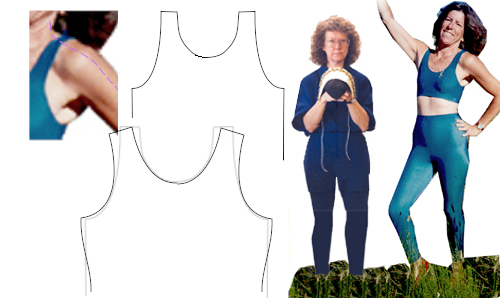
(the shot of me holding a French Hood commissioned by the Denver Art Museum has been Photoshopped in to show our comparative heights/body types)
I am much shorter, with narrow, sloping shoulders and a curvier build. She is tall and slender, with wide, square shoulders, and a far longer torso/pelvis/legs.
When arayti began sewing for herself, we were careful to draft the correct curves and angles into her tops. See how the ribbed fabric lays smoothly over her shoulders:

In the clothing industry (“the rag trade”), when developing a line you start with the actual fabric(s), testing for shrinkage, etc. as part of finalizing the pattern, much less cutting into the goods.
“I am confused by two-way or four-way stretch – what gives?”
What’s important is your pattern takes the fabric’s stretch into account. Test both horizontally and vertically as the stretch is usually different. You can use either an on-grain or cross-grain layout as long as your pattern was built for it.
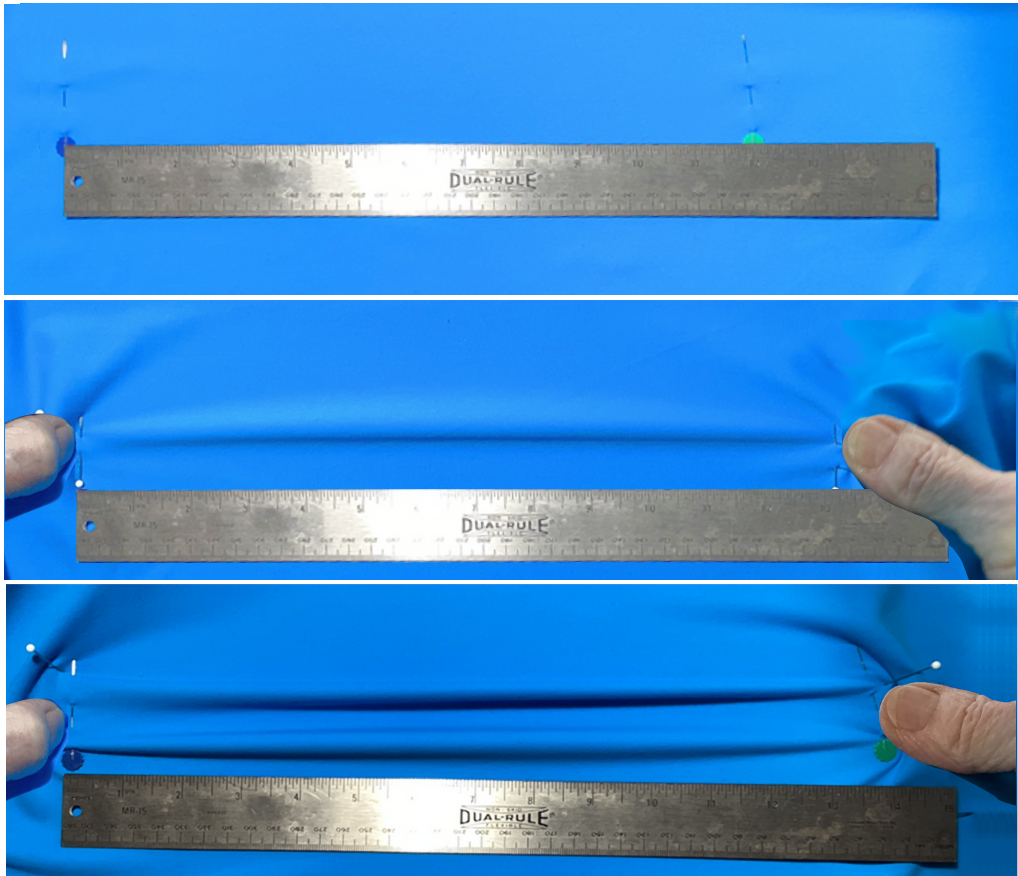
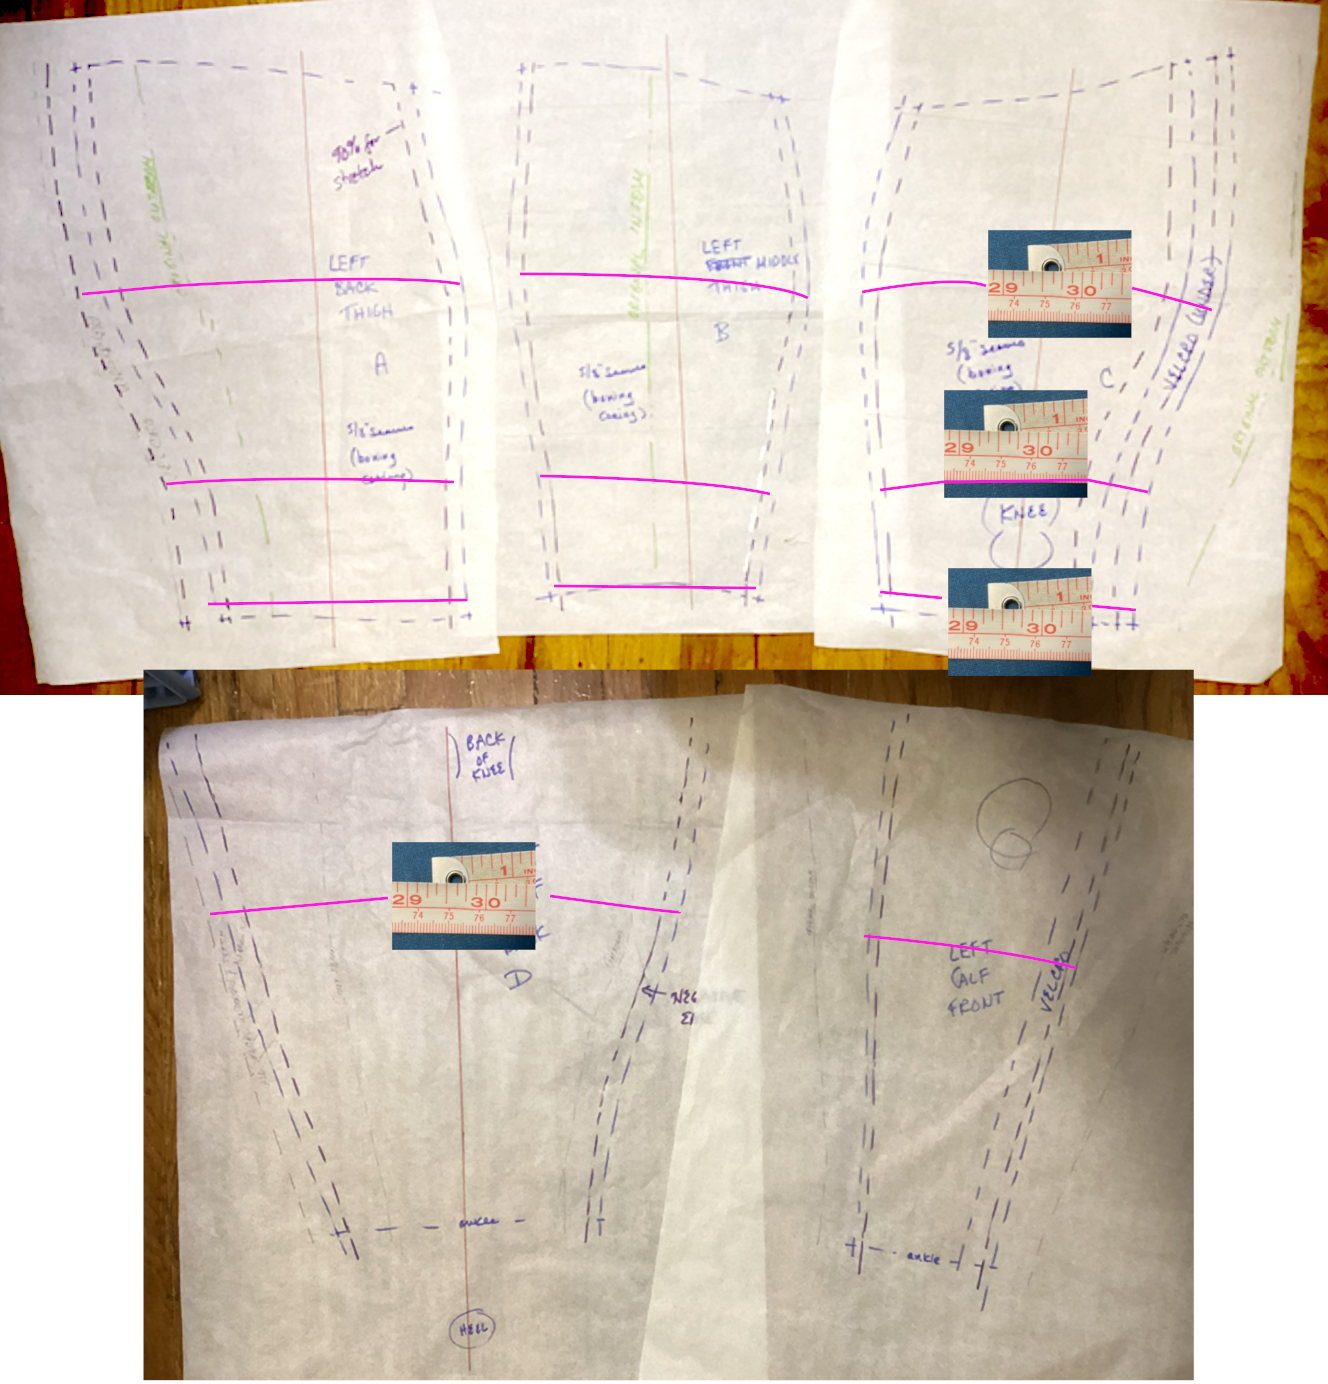
Out in the middle of the fabric, I put two pins 12″ apart and played Goldilocks, stretching the fabric slightly, moderately, and hard.
I liked best 12″ stretched to 13 1/2″, which is a 90% reduction in width. We are leaving the vertical measurements unchanged.
It would be convenient if we could draw our new sewing lines an even distance in, but it doesn’t work. Compare the difference in the width on the test in the inset block.
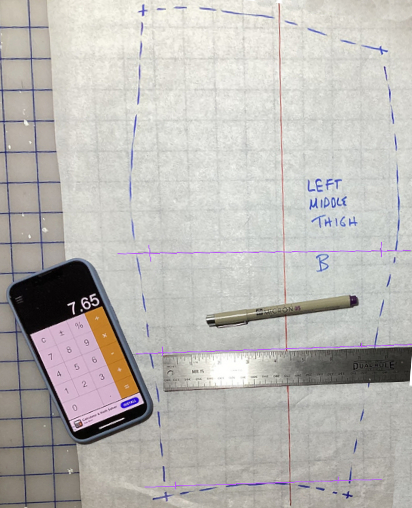
Measure perpendicularly to the grainline (slide your ruler up or down to get to a reasonable number) and multiply this by your percentage. Draw new sewing lines, splitting the extra evenly at the sides.
The underlap for the Velcro was added after the reduction.
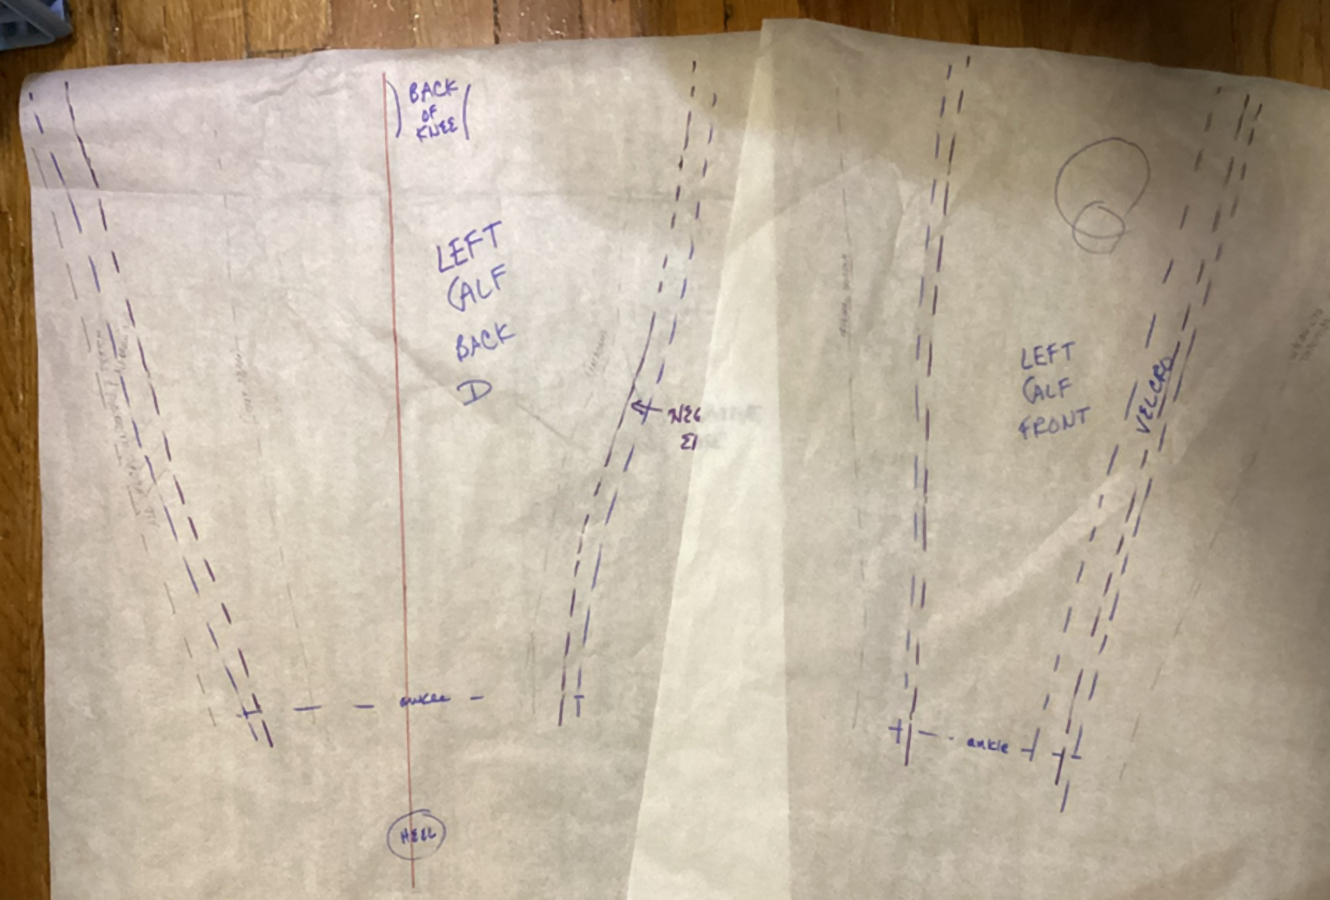
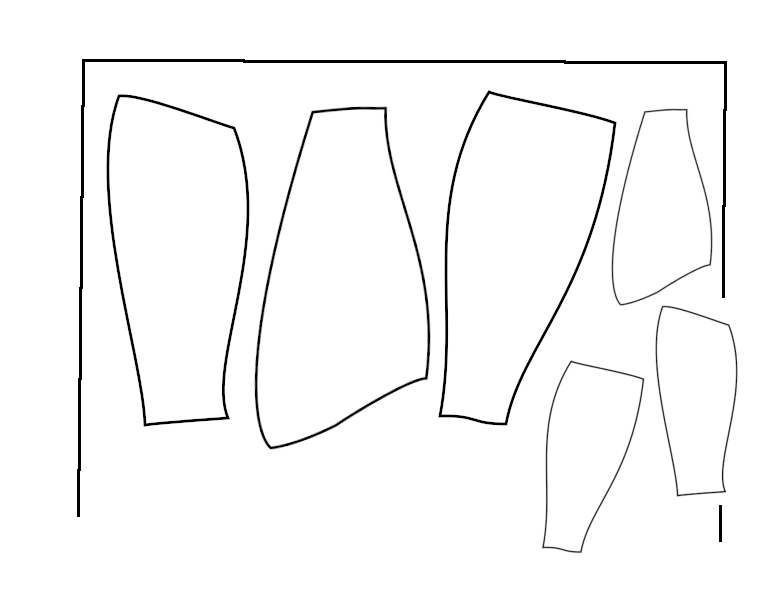
Left calf pieces, narrowed for stretch. The cutting lines haven’t been done yet as we may get a fresh set of measurements (yes, the thigh pieces will need to be redone).
I had planned on three sections for the calf, but it looks like two will be enough. The inseam and outseam sewing lines have been shifted to the top of the leg. They are offset from the seams/Velcro flap on the thigh.
On to the right leg!
Unedited below here
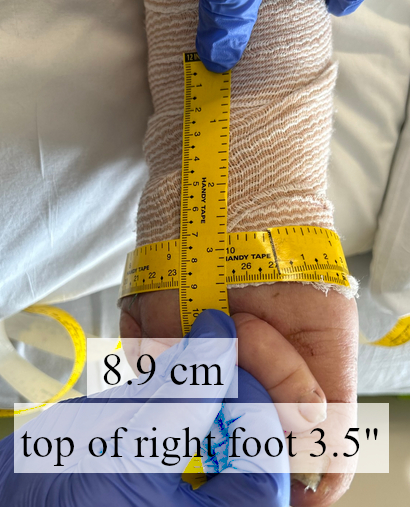
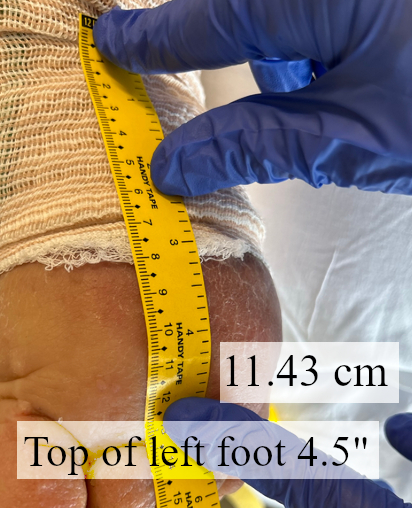
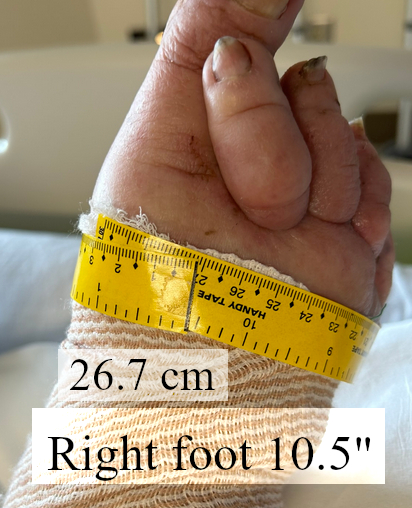
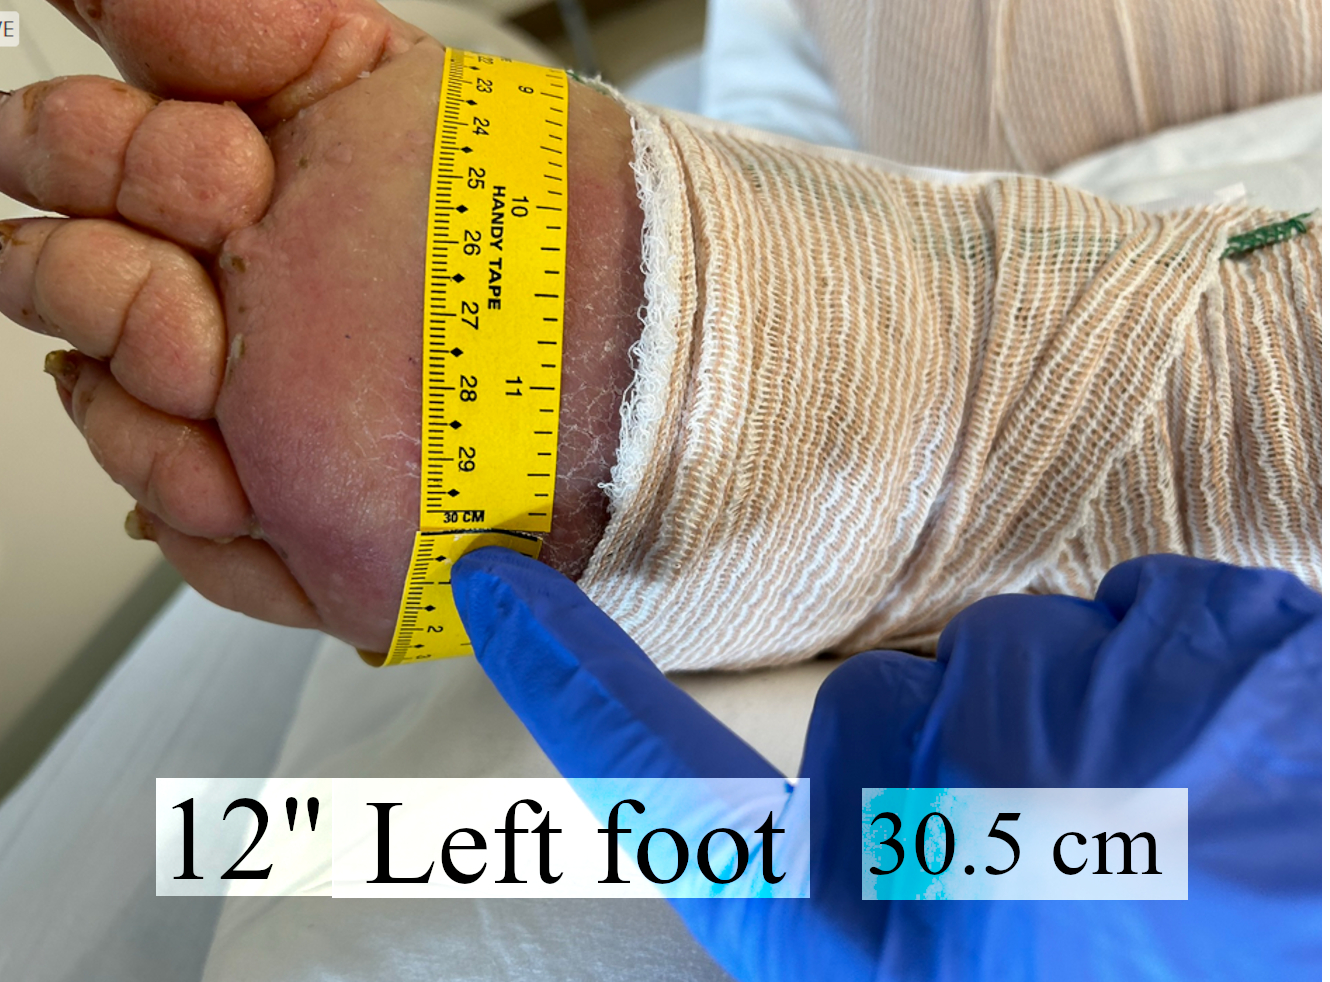
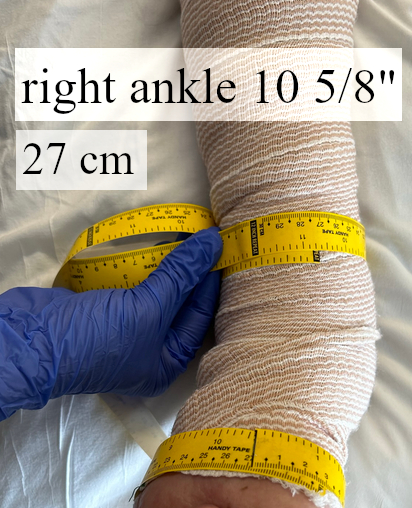
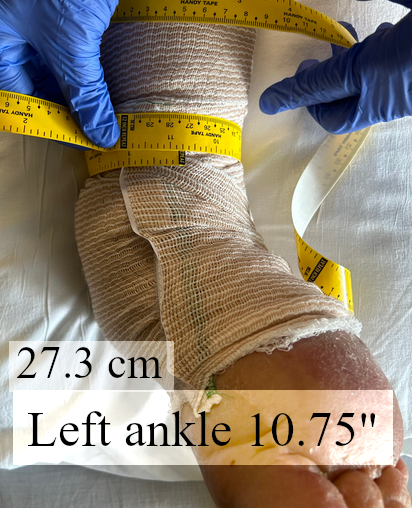
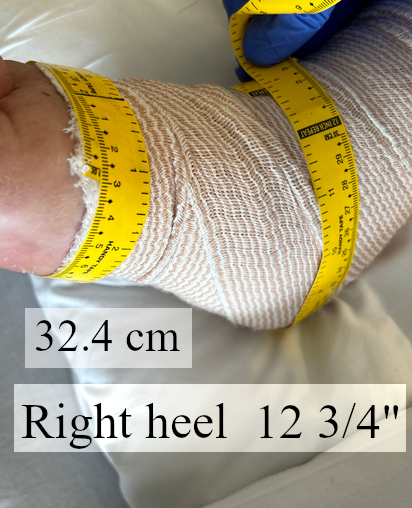
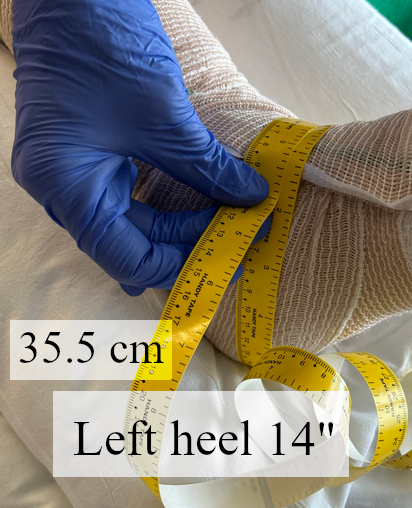
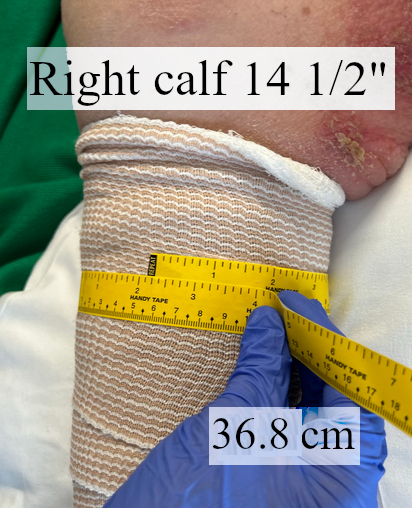


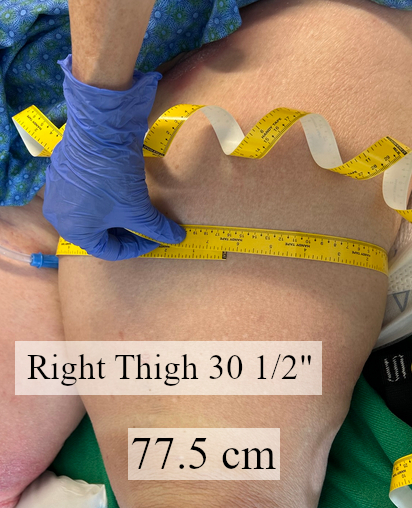
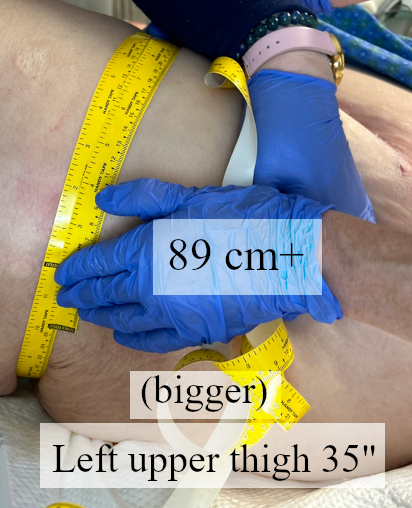
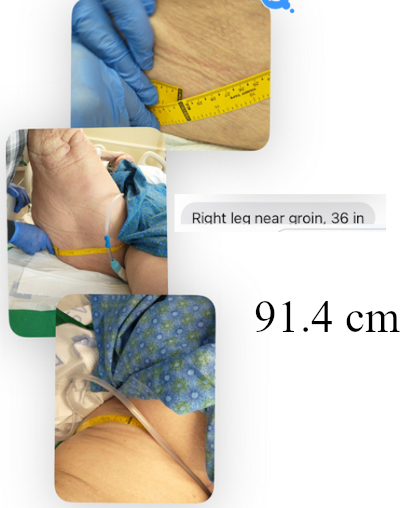
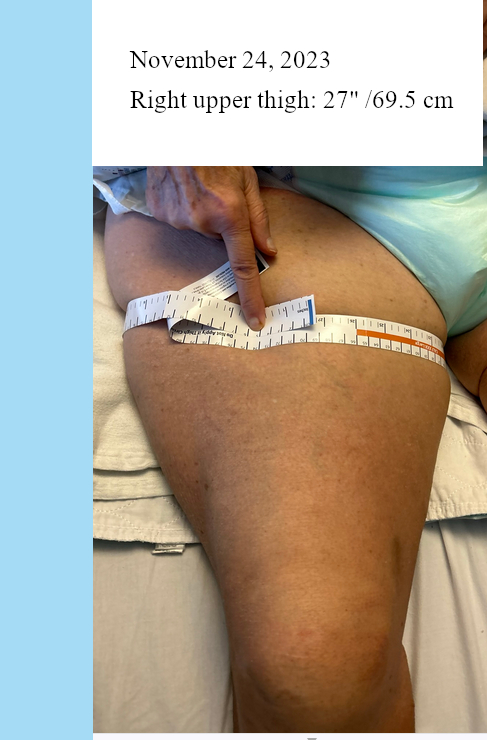
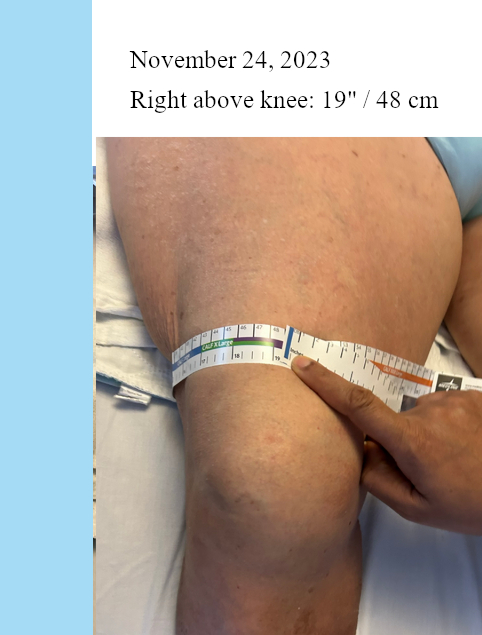
New measurements November 4, 2023
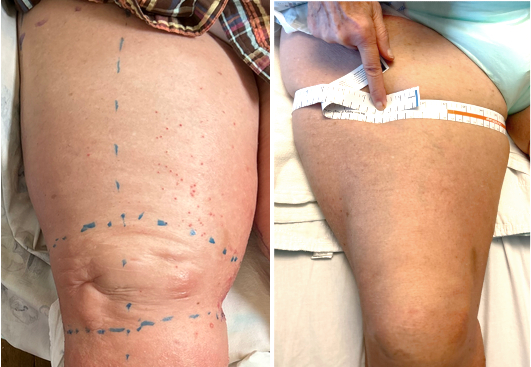
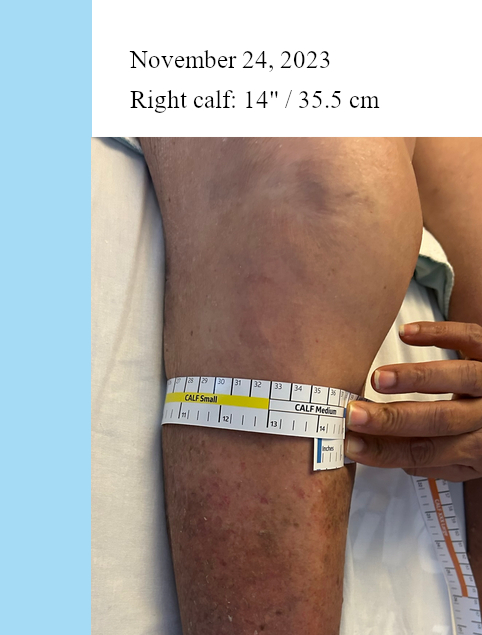
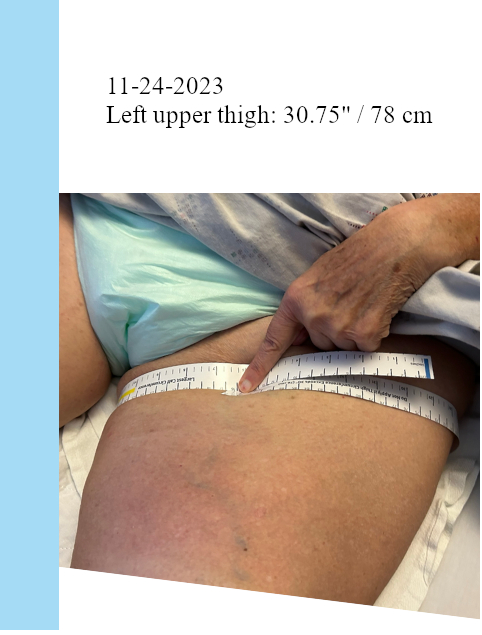
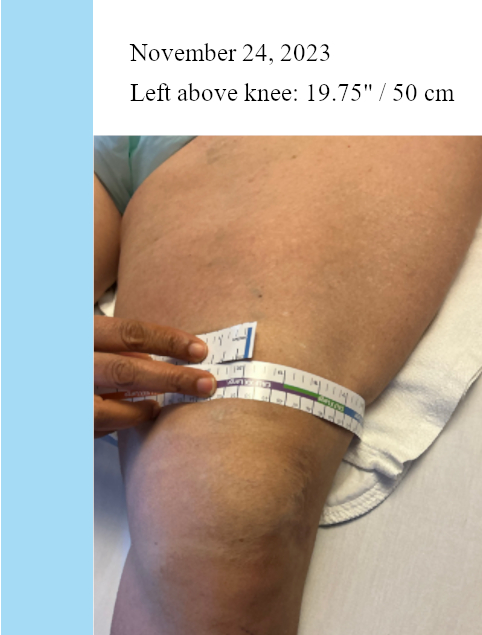
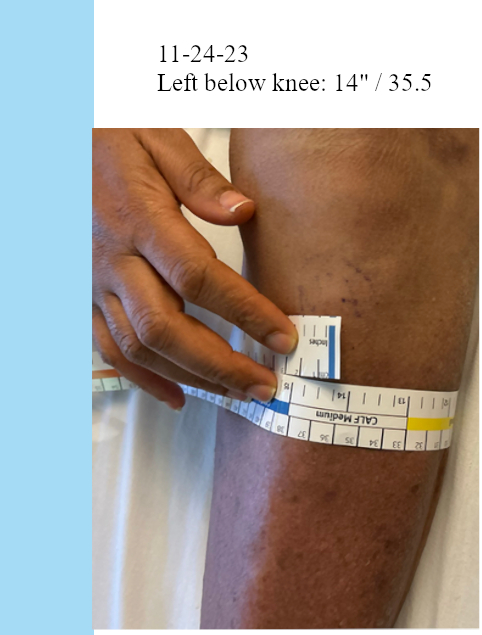

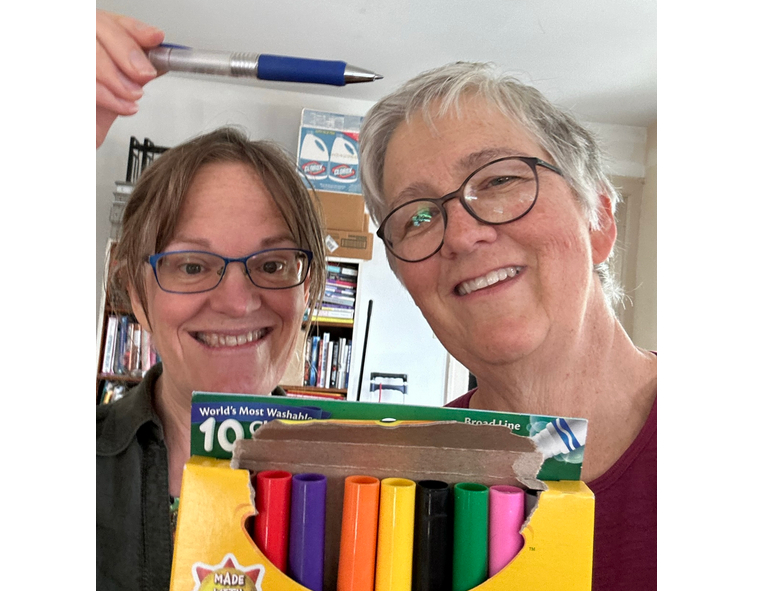
When taking measurements in my studio I use washable non-toxic markers on the body. The cheapest and most easily available are in the kids’ bath toy section.
L was concerned about where to draw the lines, so I moved them to the center front, inseam, outseam and center back of the leg. The circumferences were where the body was naturally wider or narrower.
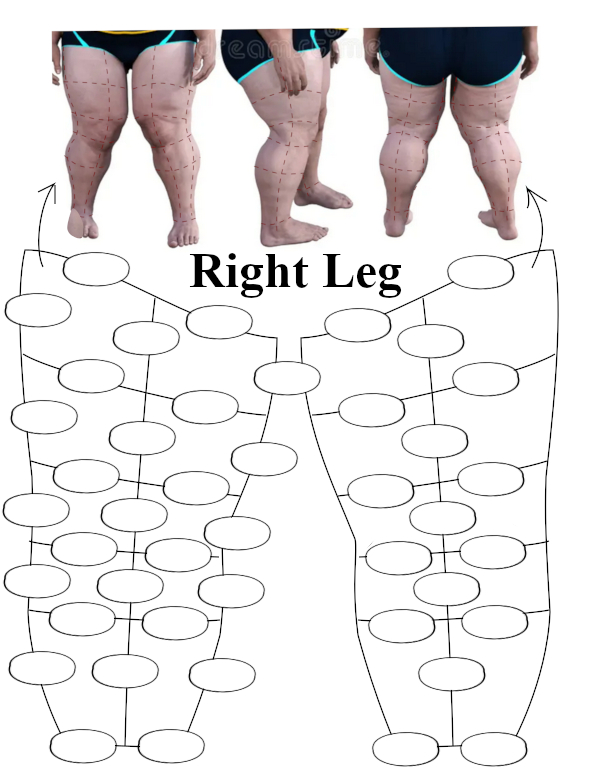
The lengths of these lines would be easy to measure. How to shift the seams on the pattern itself is coming later.
L’s sister gamely agreed to come along to write in measurements and take reference shots. This was a huge help.
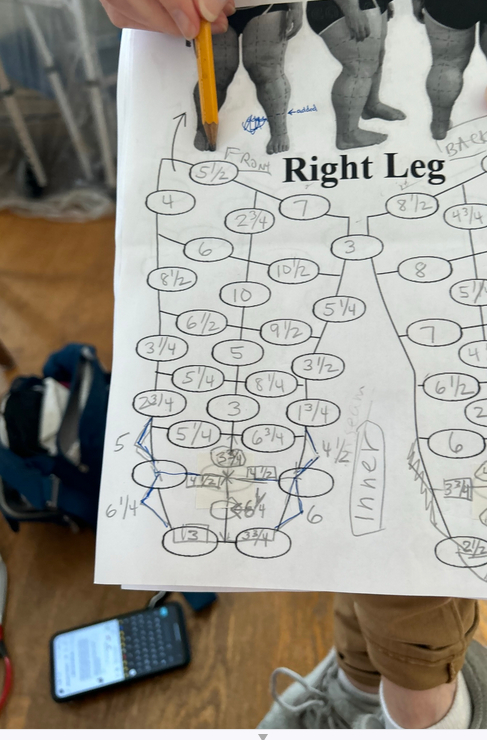
Note: this initial OCD approach was necessary as we’d only get one shot. It is now possible to much simplify the process.
Early on.
I had to keep reassuring the gals that they didn’t have to have everything squared up, as I had built in cross checks. Luckily this turned out to be true.
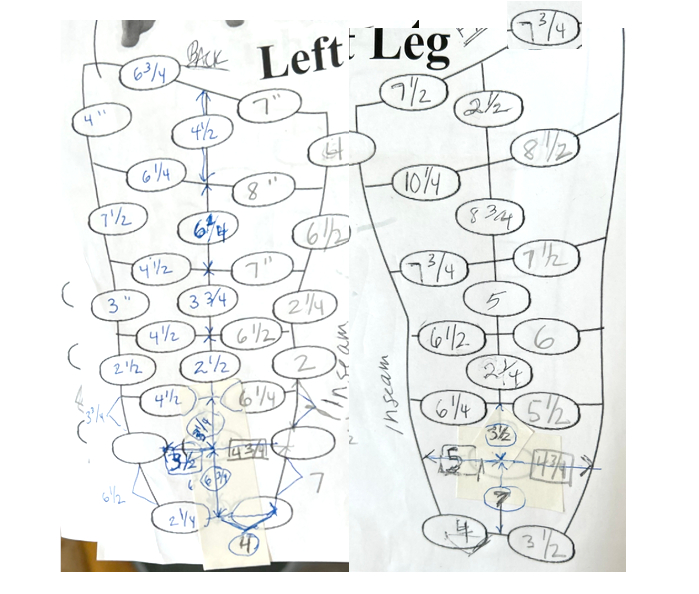
At the side seams, the verticals for each section must be the same lengths.
They don’t have to be the same shape: think of a bodice’s princess pieces.
I used drapery weight tape (visible at left) to shape into curves that matched the photos.
*********
SCD Sequential Compression Device, gradient compression sotckings; inelastic compression leggings, lymphedema pumps
Old notes
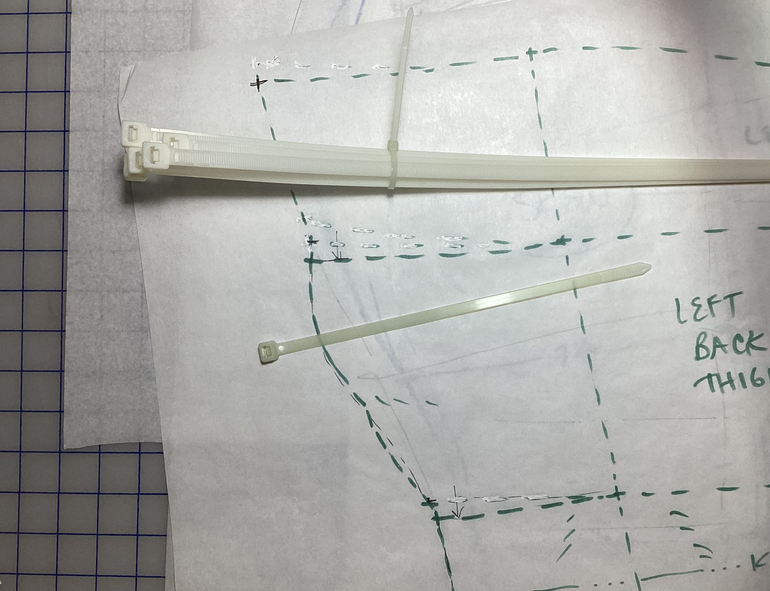
All pieces ideally need an easily changed absorbable liner BUT one with comparable stretch that compresses too … ? Building structure into it (double sets of Velcro, even the featherweight baby stuff) is counter productive: too thick, too stiff, too hard for her to manipulate Back to a single compression layer She’ll soak it out fast So, choose fabric that will wick it out and blot from the outside – Chux, puppy pads, whatever. Swap for a fresh one when absolutely necessary. Her laundry is in the basement? Inaccessible? We know there are going to be a series of these. Can she bend her left knee at all? We can start assuming no flexibility. Gaining any ground means the next ones reflect that. On extending the top so that it’s held down by constriction under the knee: no. That builds in a fresh set of problems. The thigh sleeve must have integrity to stay in place on its own As in corsetry: boning Must be light, flexible, machine washable I wash mine that have flexible steel boning, but am not sure how well that would stand up to being in a constant lymph bath. There are several plastic types; I’ll have to dig out my boning supplies and see what I’ve got. We’re not trying to support breast weight, just keep the fabric from drawing up. Weirdly, giant zip ties might work. Or industrial strapping tape, what they use to hold boxes together on pallets.
Compression
Garments

Once a person is diagnosed with lymphedema, compression becomes imperative in the management of the condition. Garments are often intended to be worn all day but may be taken off for sleep, unless otherwise prescribed. Elastic compression garments are worn on the affected limb following complete de-congestive therapy to maintain edema reduction. Inelastic garments provide containment and reduction.[2] Available styles, options, and prices vary widely. A professional garment fitter or certified lymphedema therapist can help determine the best option for the patient.[citation needed]
https://www.ncbi.nlm.nih.gov/books/NBK537239/
https://www.mayoclinic.org/diseases-conditions/lymphedema/symptoms-causes/syc-20374682
Bandaging
Compression bandaging, also called wrapping, is the application of layers of padding and short-stretch bandages to the involved areas. Short-stretch bandages are preferred over long-stretch bandages (such as those normally used to treat sprains), as the long-stretch bandages cannot produce the proper therapeutic tension necessary to safely reduce lymphedema and may produce a tourniquet effect. Compression bandages provide resistance that assists in pumping fluid out of the affected area during exercise. This counter-force results in increased lymphatic drainage and therefore a decrease in size of the swollen area.[47]
- Compression bandages. Using low-stretch bandages to wrap the entire limb encourages lymph fluid to flow back toward the trunk of the body.
- Compression garments. Close-fitting elastic sleeves or stockings can compress the arm or leg to encourage lymph fluid drainage. These garments often require a prescription to ensure that the proper amount of compression is used. You may need to be measured by a professional to ensure proper fit.
Elevation
- Compression: Helps with drainage, but the improper application can result in skin irritation and increase the risk of infection
- Greater compression farther from the torso
- Short bandaging rather than (long elastic bandages) – our system can accommodate this
Using low-stretch bandages to wrap the entire limb encourages lymph fluid to flow back toward the trunk of the body. Compression garments. Close-fitting elastic sleeves or stockings can compress the arm or leg to encourage lymph fluid drainage.
- compression therapy — wearing tailored, graduated compression garments