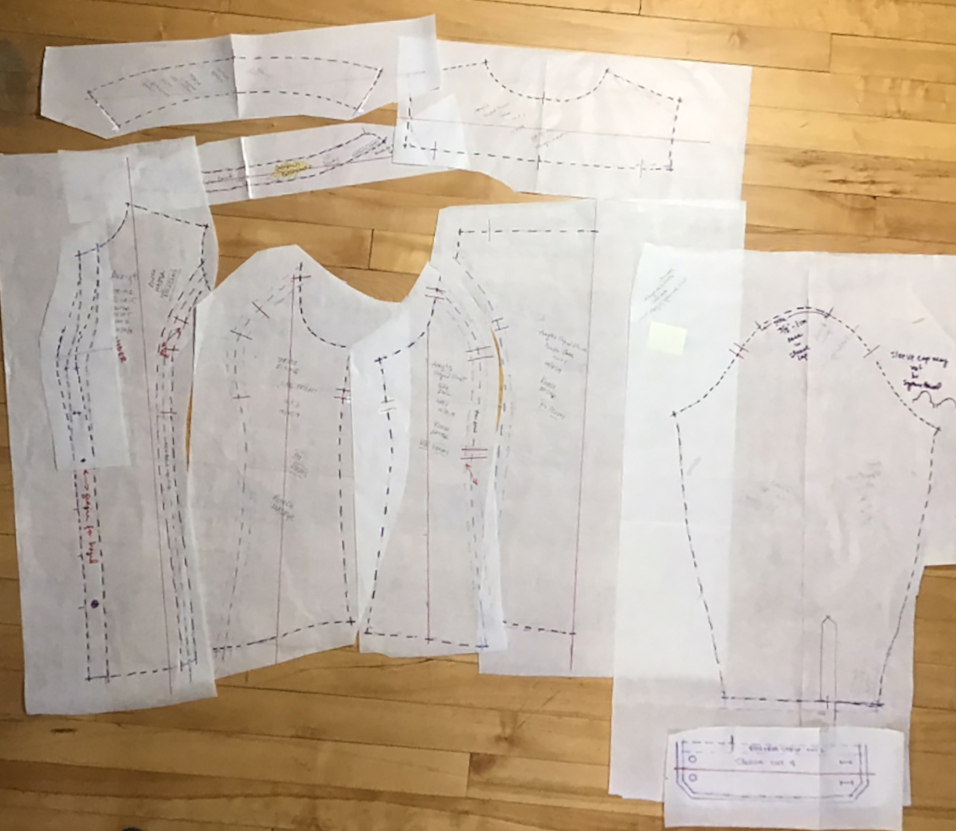
A rub-off is the industry term for making a non-destructive copy of an existing garment. It seems obvious that the way to duplicate an existing one is to take it apart. Don’t do it! It’s impossible to separate the pieces without distortion, regardless of how careful you are, and it destroys your garment. It’s faster and easier to copy the pieces as shown here.
This is an unusually complicated shirt; most you might try would be easier.
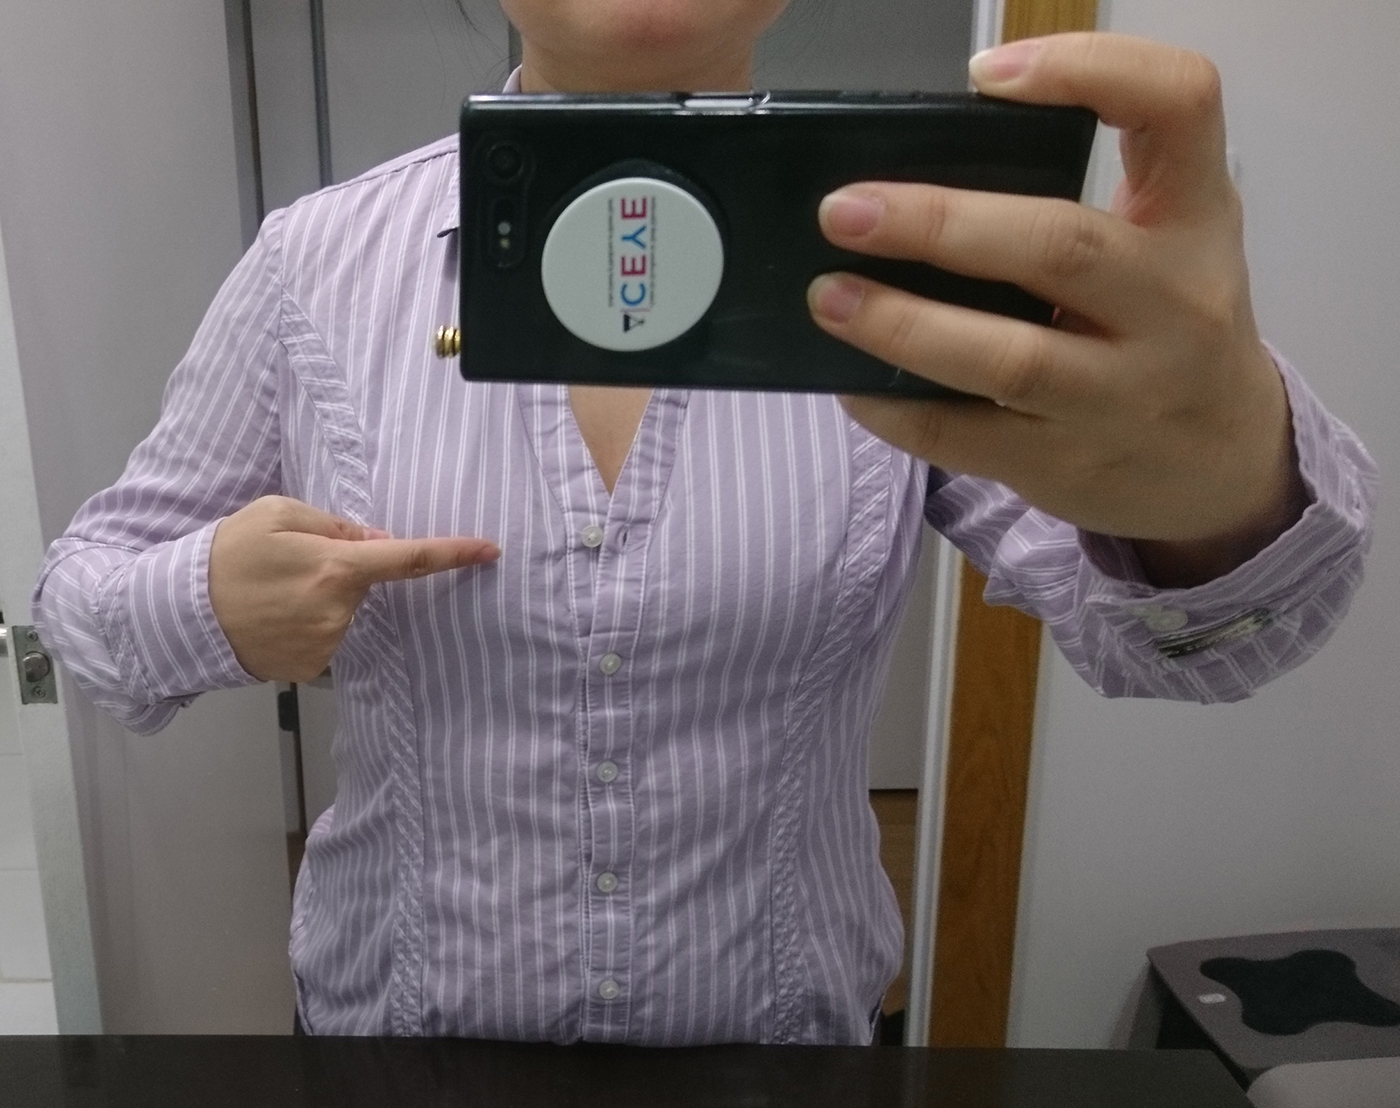
Begin by trying on and making notes of the garment you want to copy. How does it fit? Is it long enough in the sleeves/hem?
Is it too loose or too tight anywhere?
Does the collar nestle around your neck?
Do you like the shape of the hem?
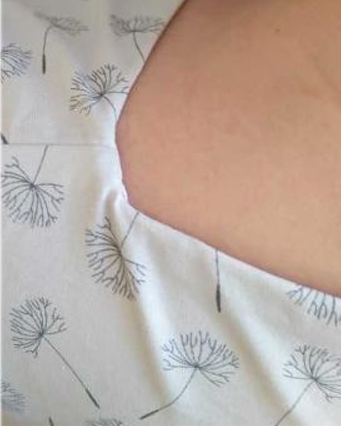
The general fit of this shirt was satisfactory other than it was too snug across the bust.
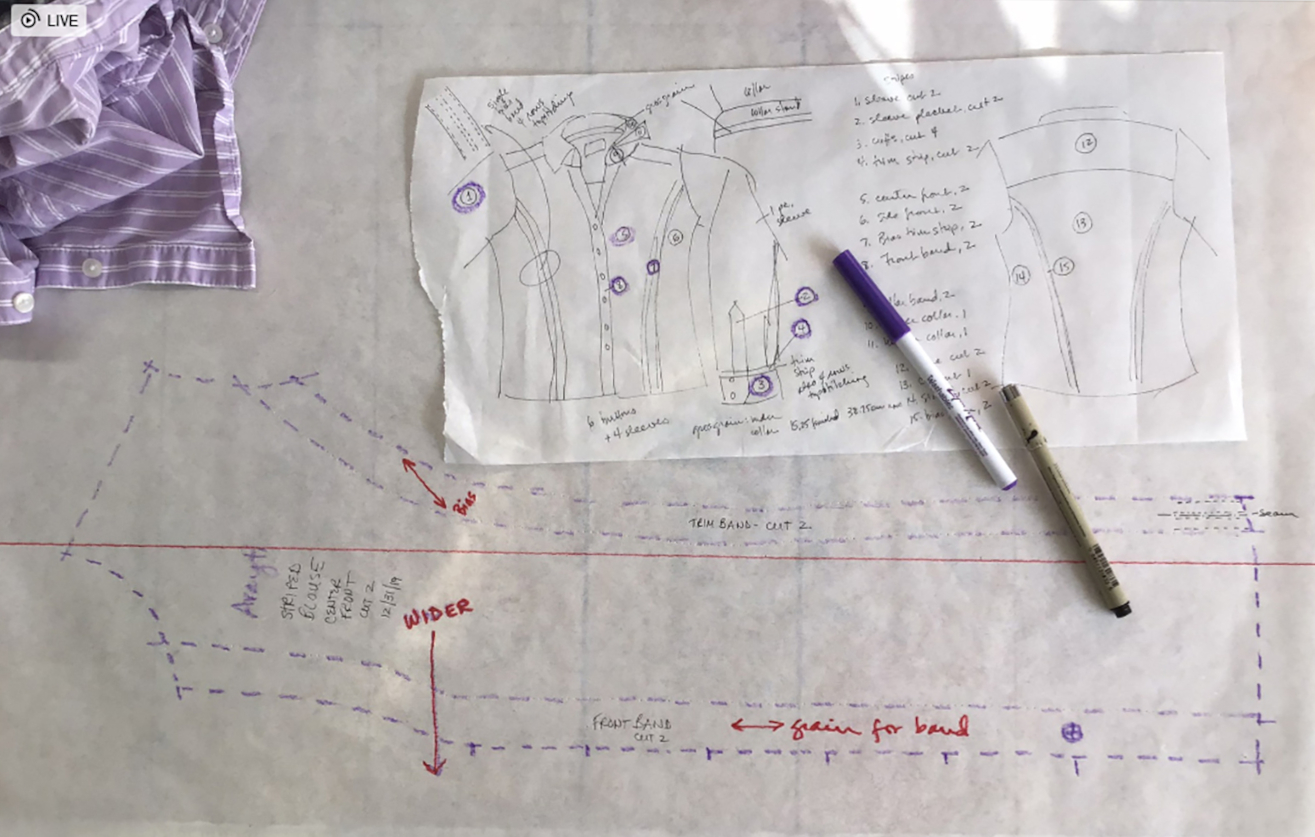
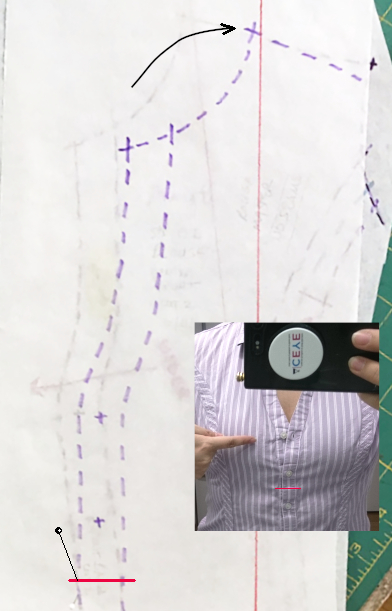
The front was unbuttoned until it lay correctly. The width and length of the gap were sticky-noted to the paper for the pattern until it was time to make those adjustments.
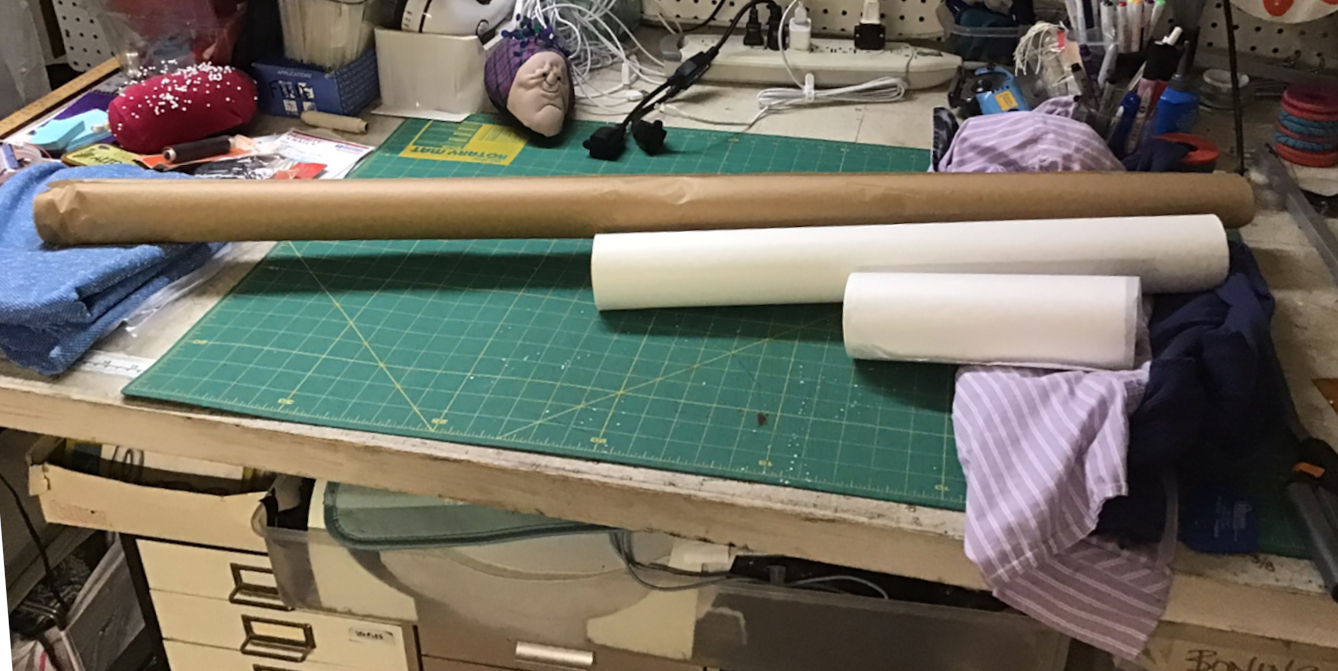
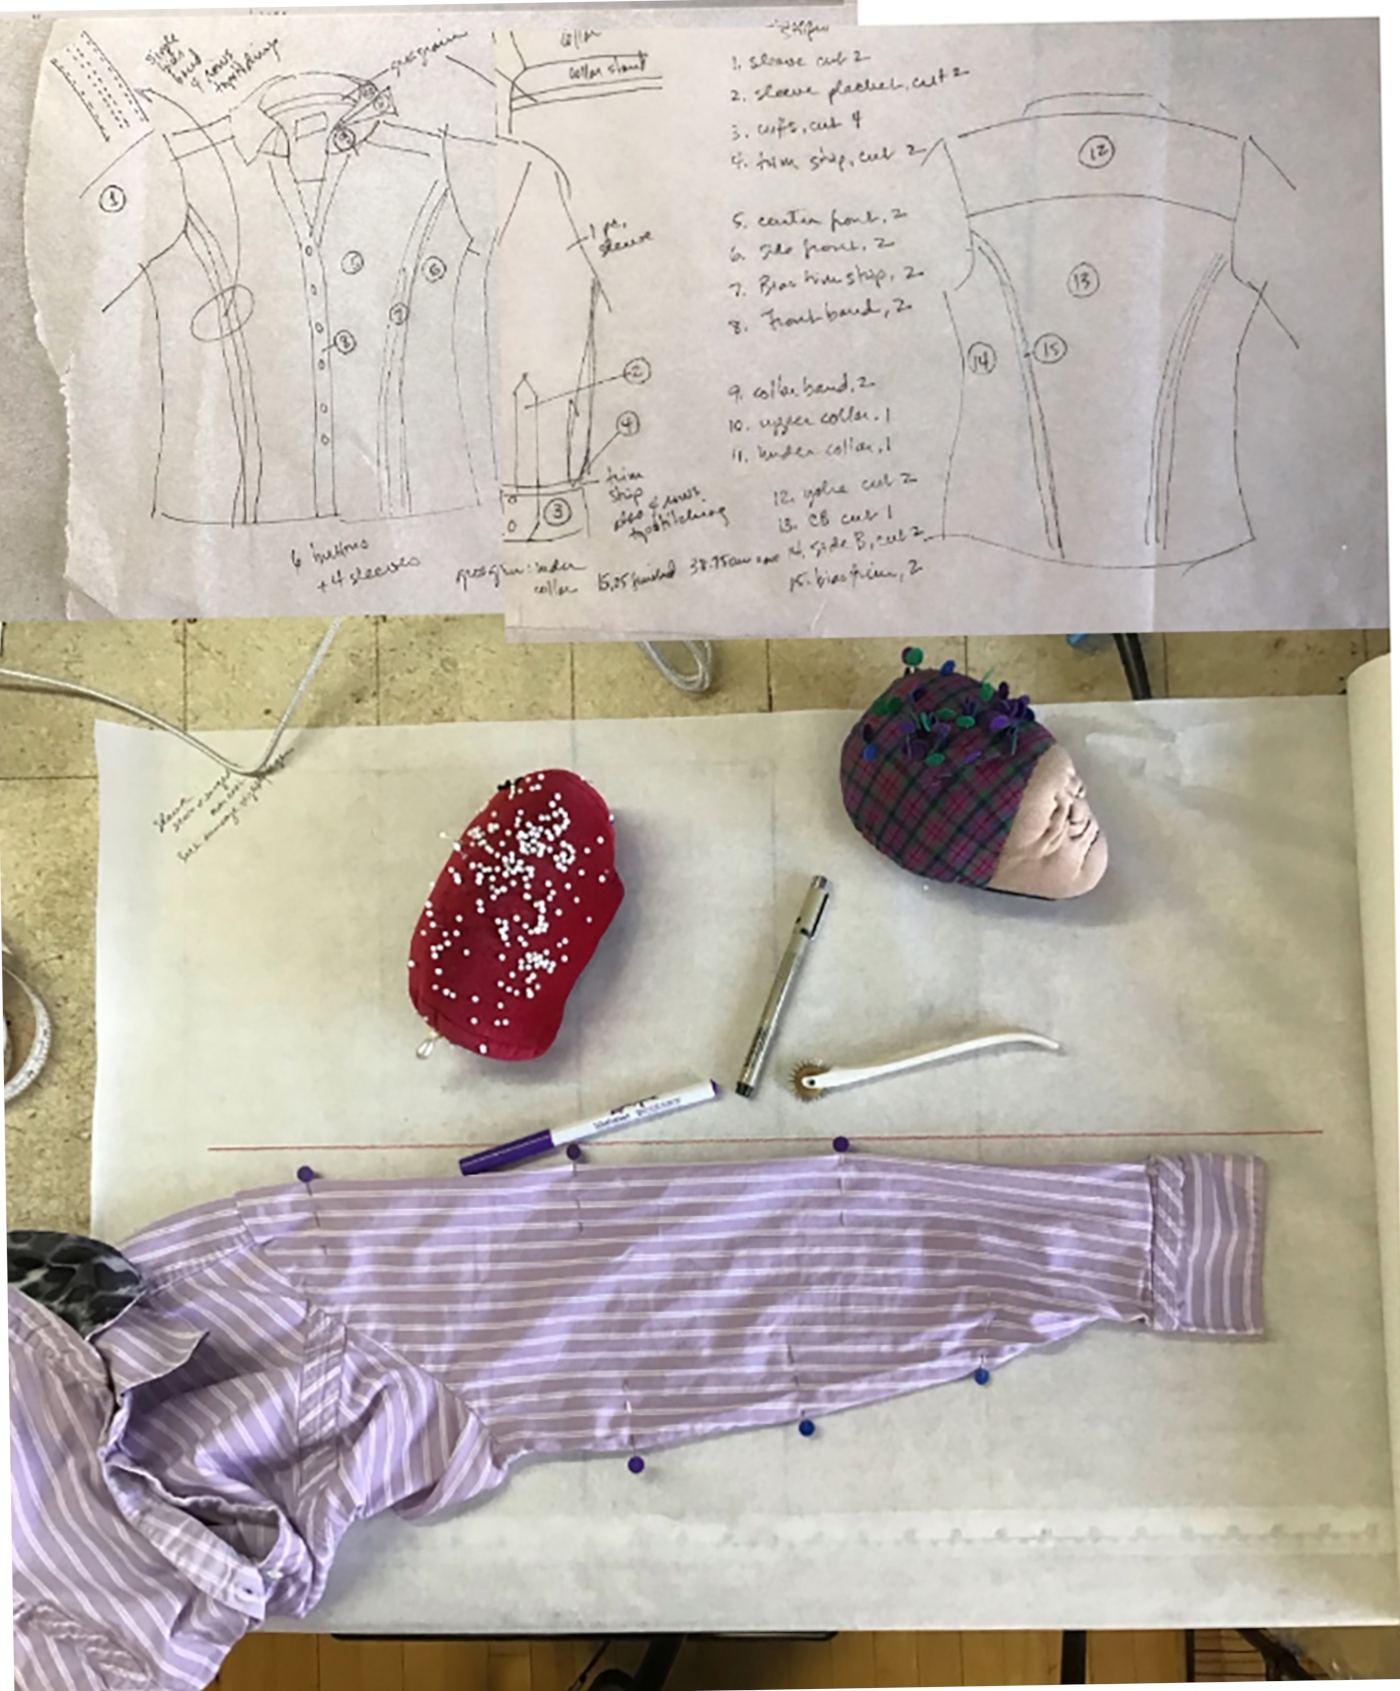
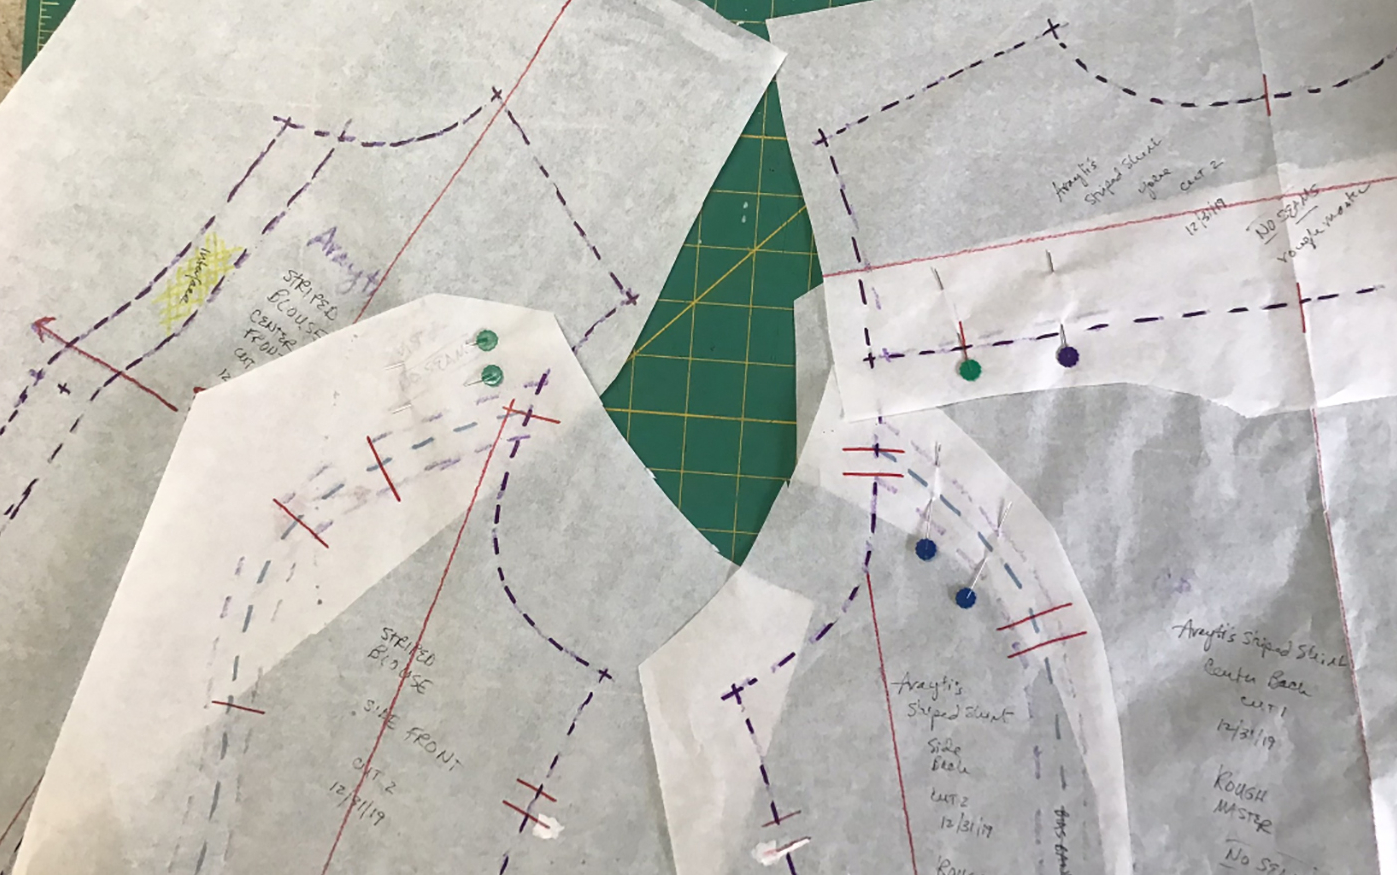
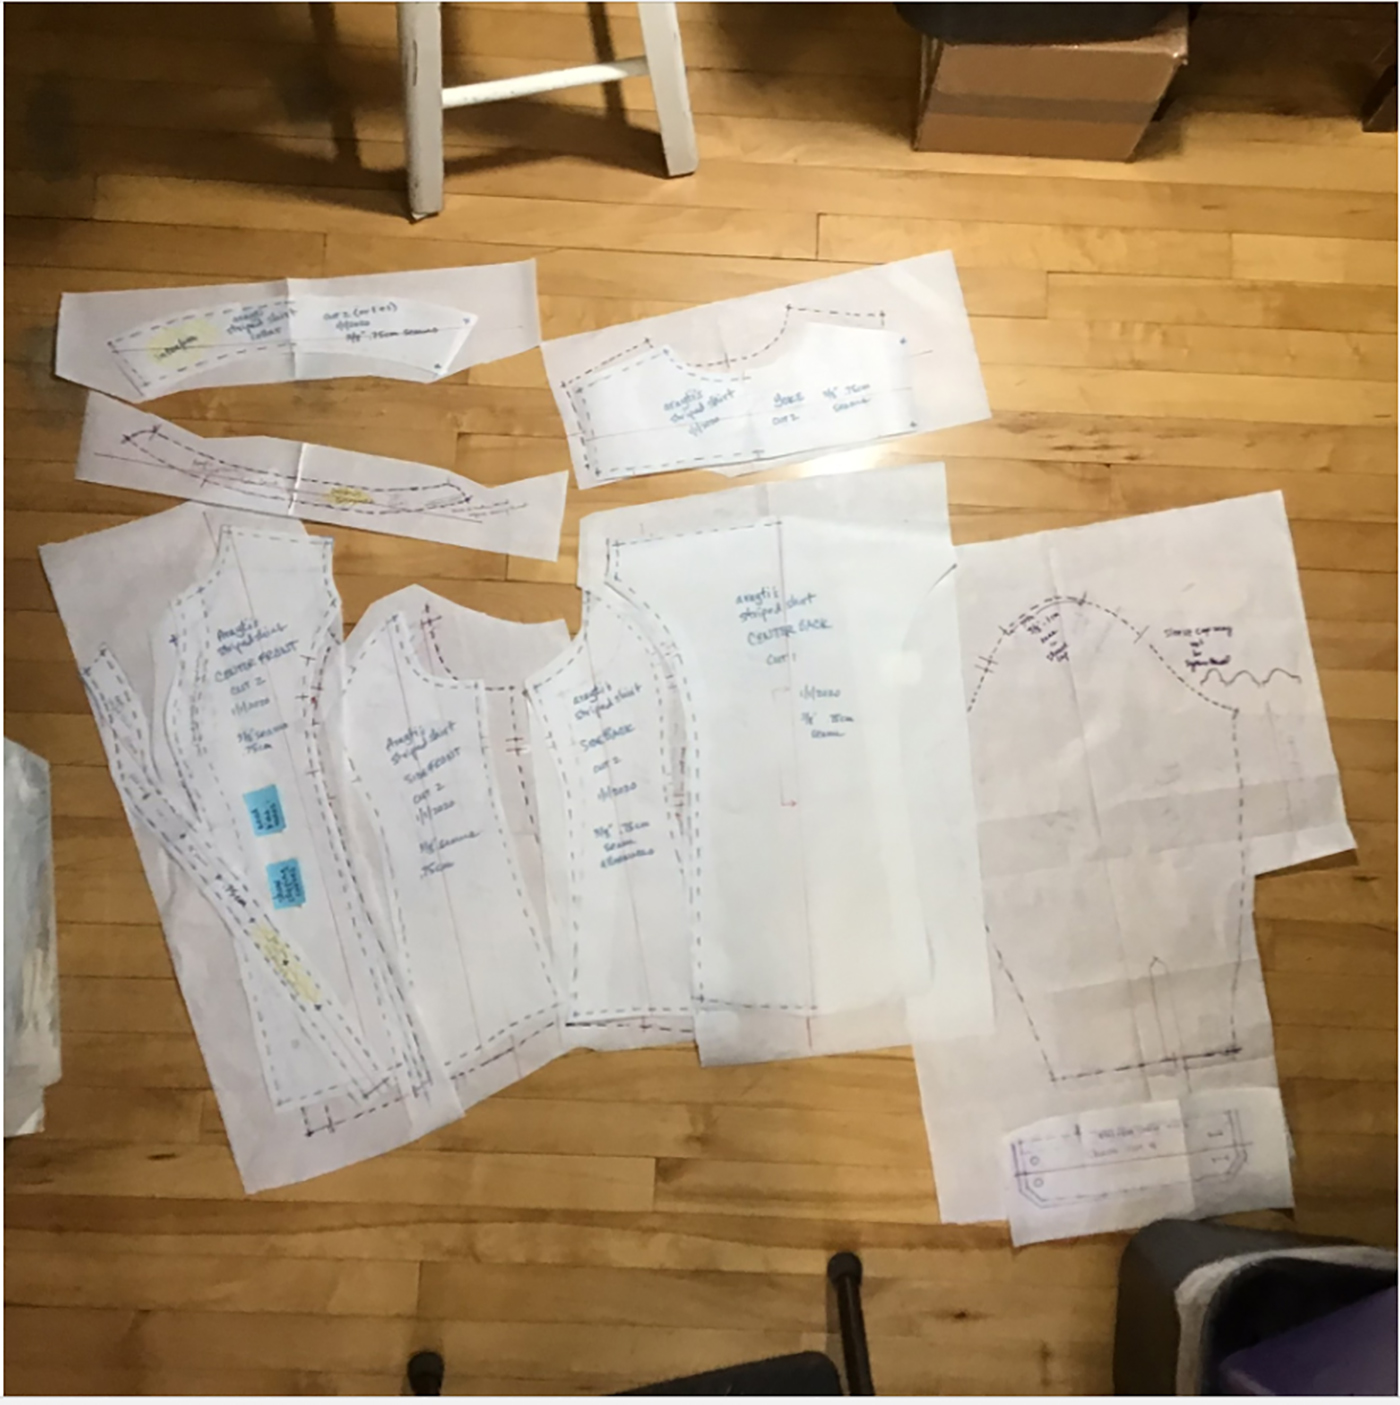
Tools and supplies: a surface that can be pinned into, short strong pins, various widths of pattern paper (the white ones are physician’s exam table paper and chiropractor’s head cover), wash-out and indelible markers, a straightedge, and the garment to be copied.
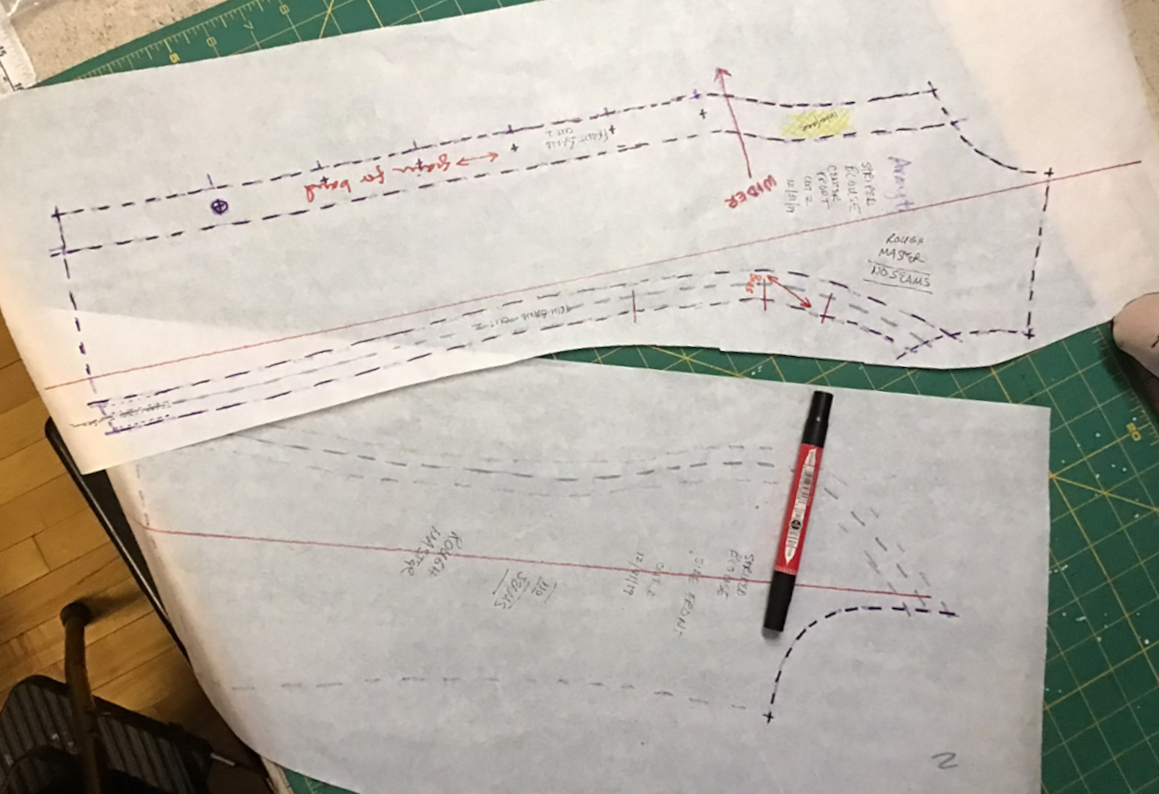
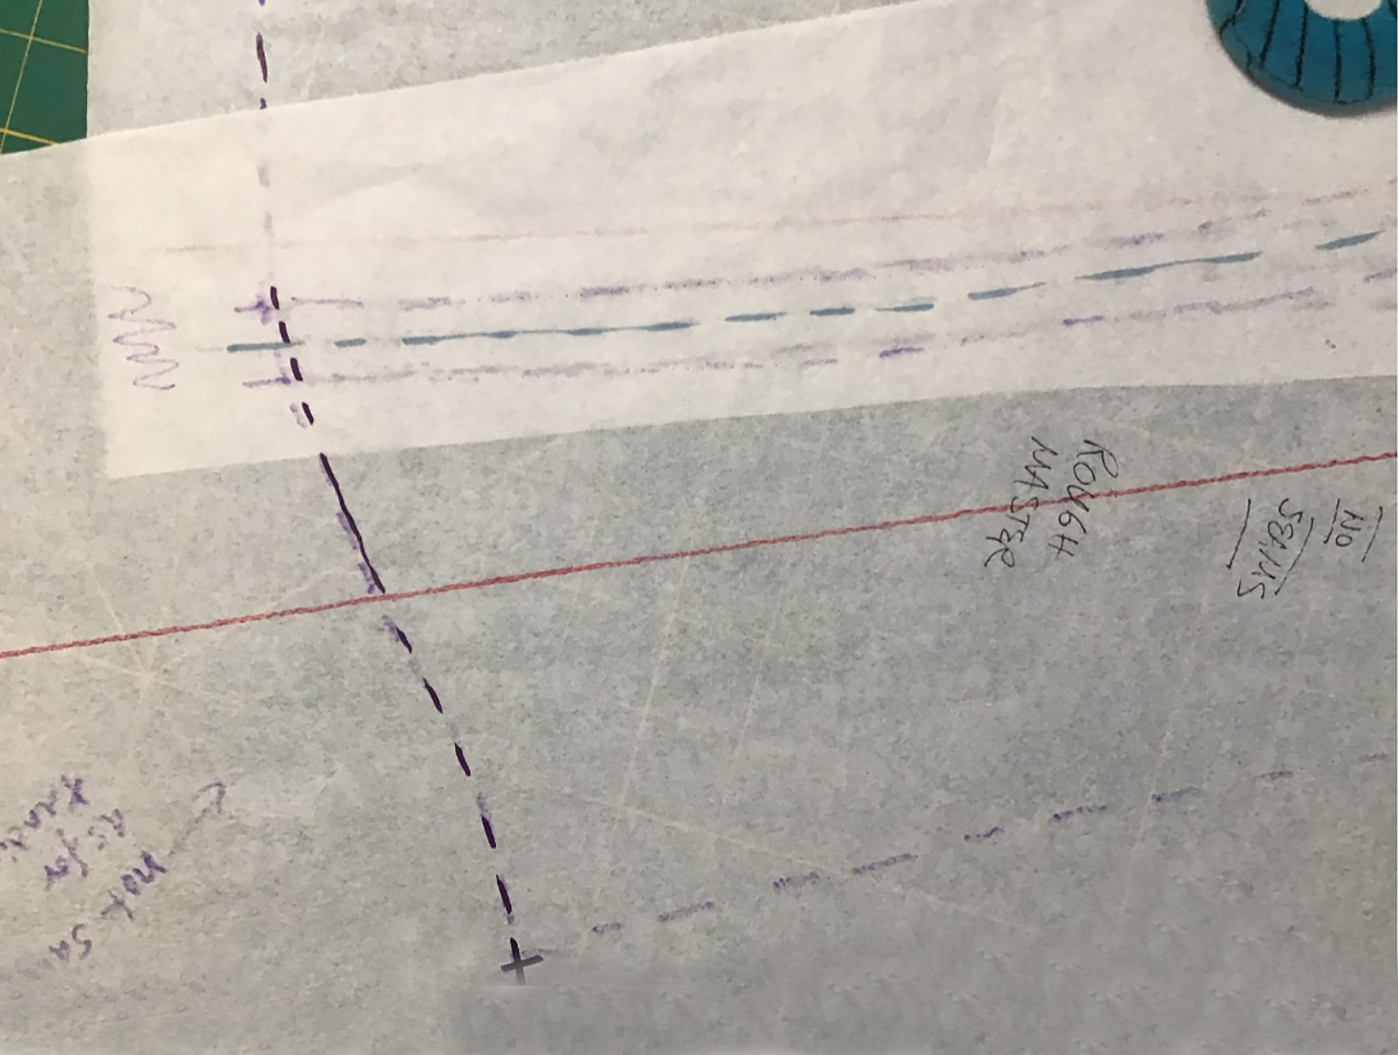
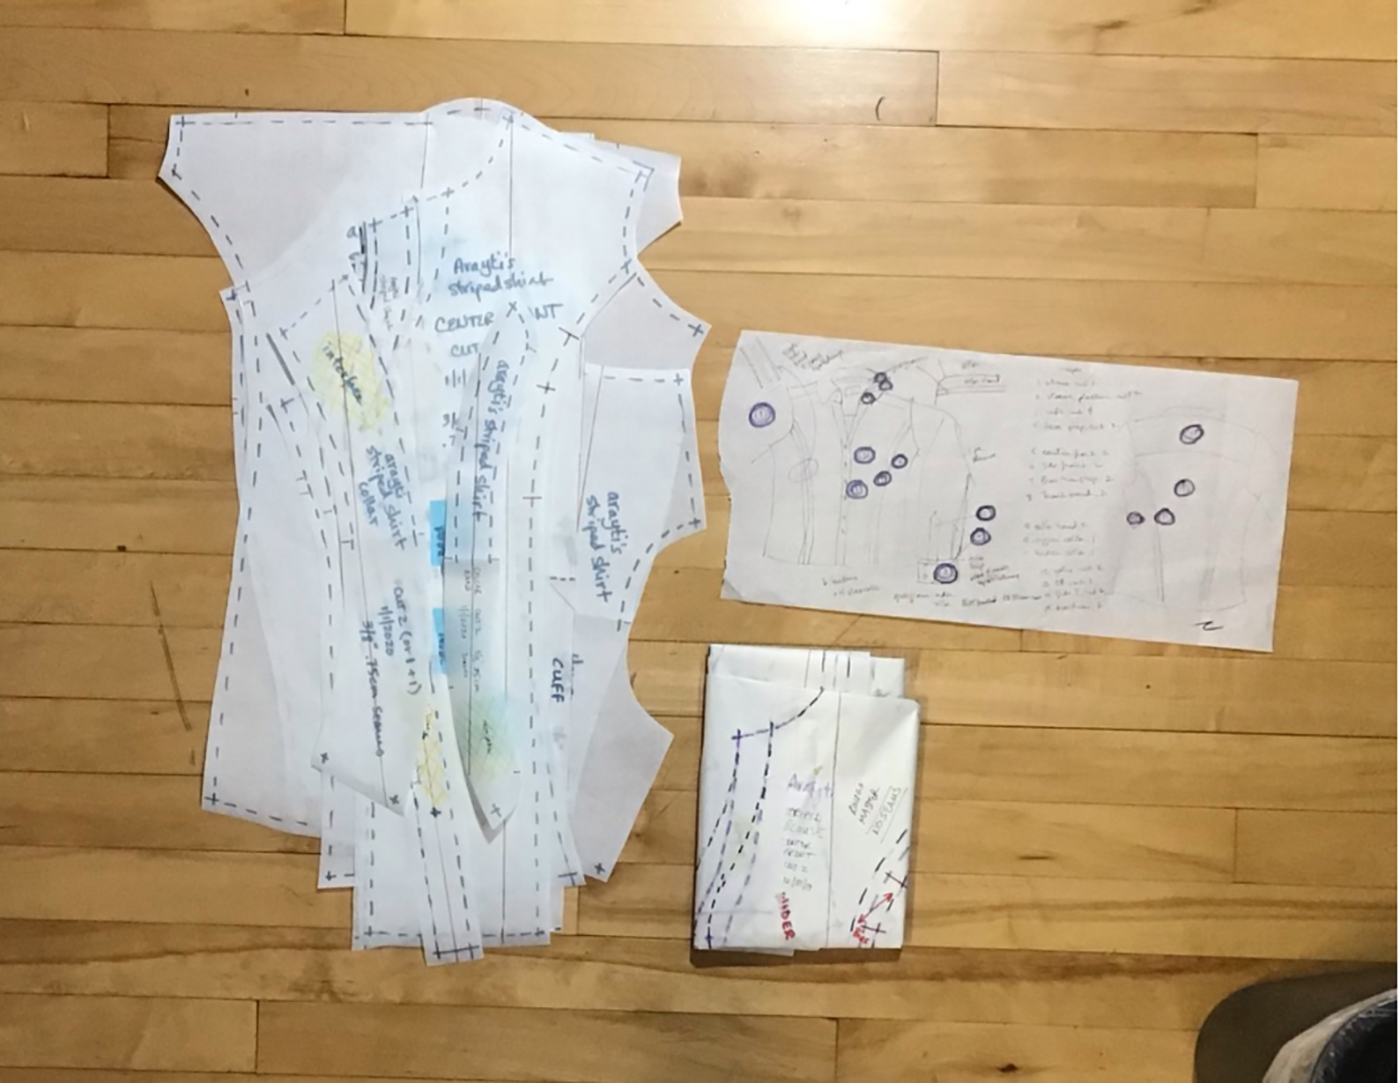
Our rough master will duplicate the original. Any desired changes (here, the upper center front) will be changed on the next iteration.
Next is a working copy which duplicates the second. If it starts to get chewed up, you can recopy the version safely in its pattern envelope.
There’s nothing sacred about your patterns. Mine have notes scribbled all over them.
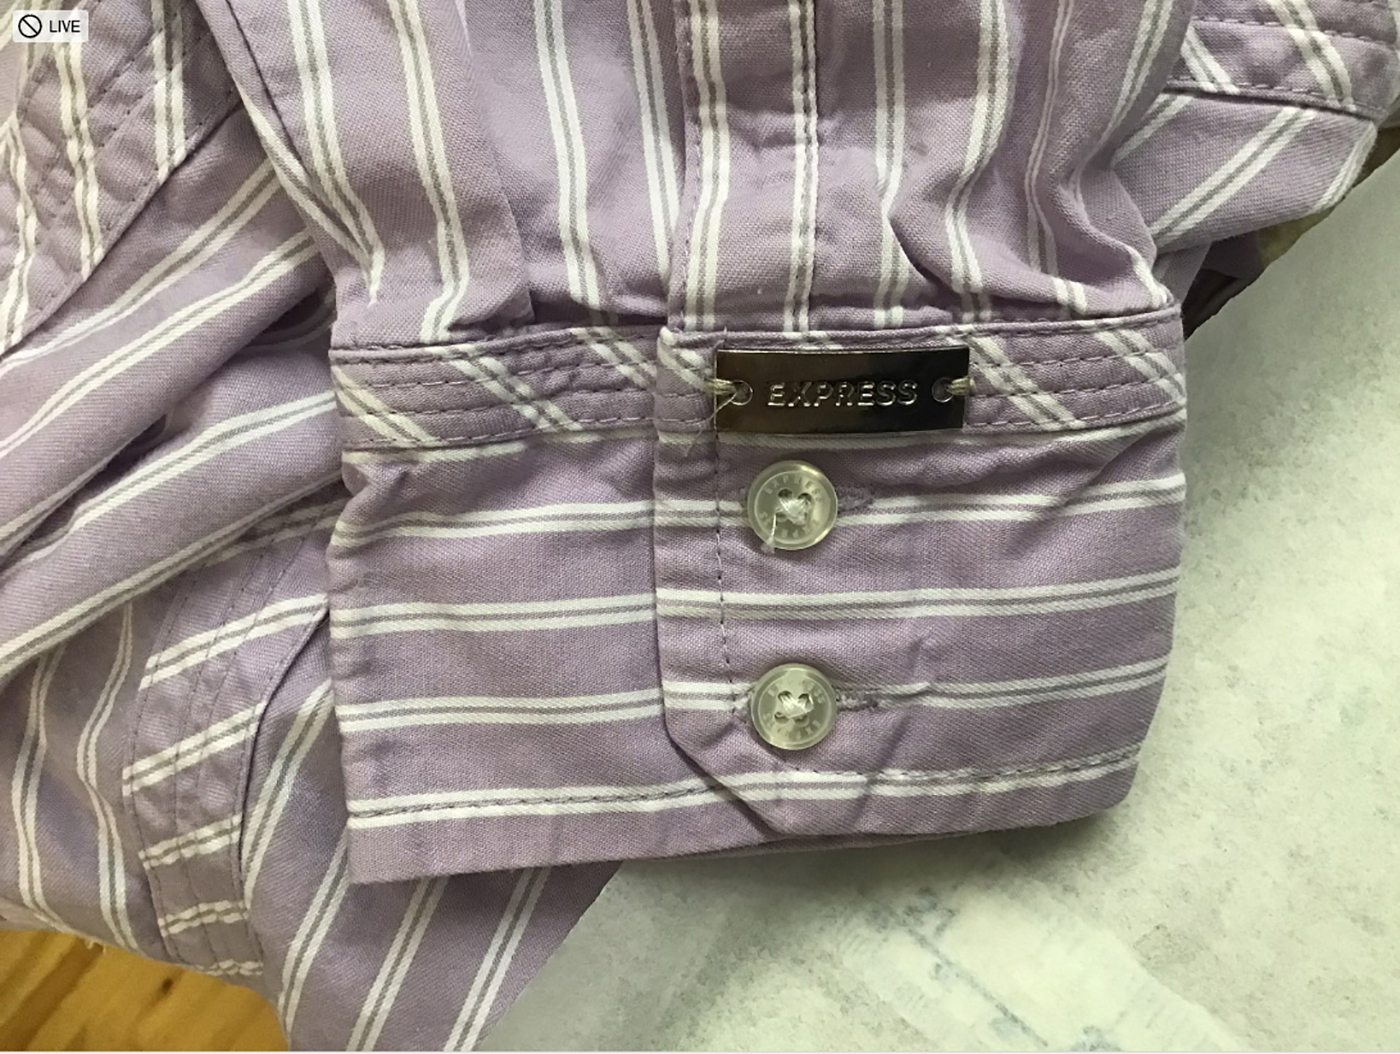
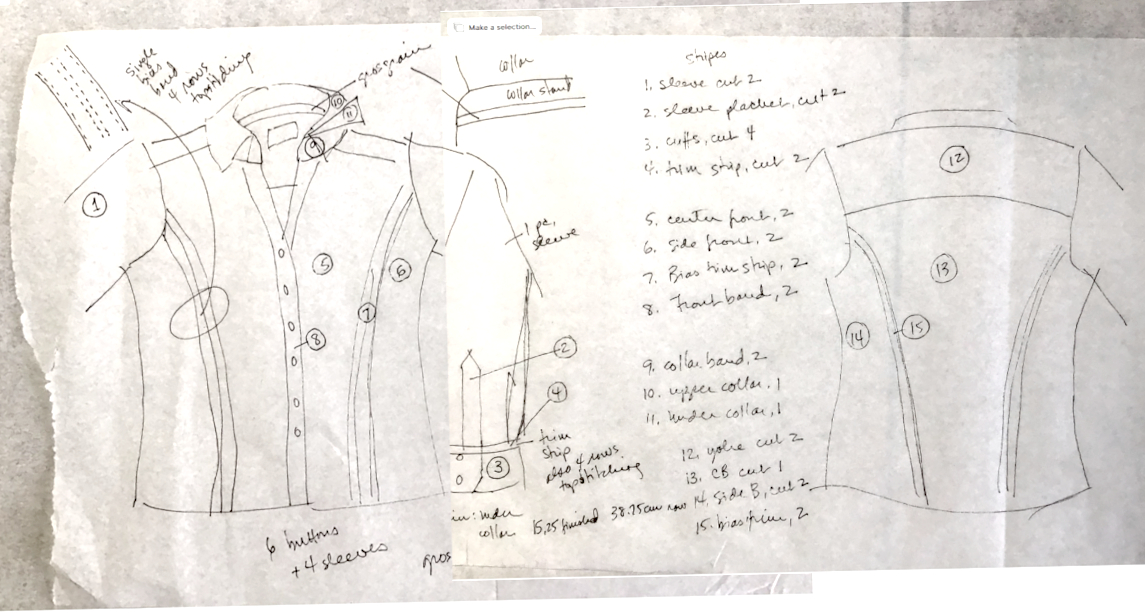
How was the garment put together? How are the seams finished – serged? overcast? flat-felled? French seams? How about the hem? Are there contrast fabrics or reinforcing tapes? Rivets? What are the closures: buttons? Snaps? Hooks and eyes?
How many buttons, and what size? Write everything down NOW.
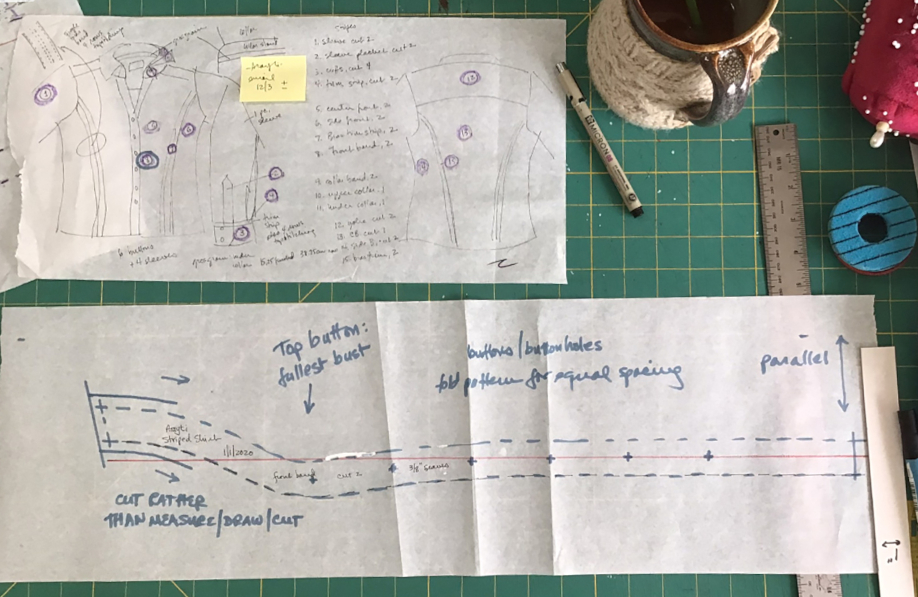
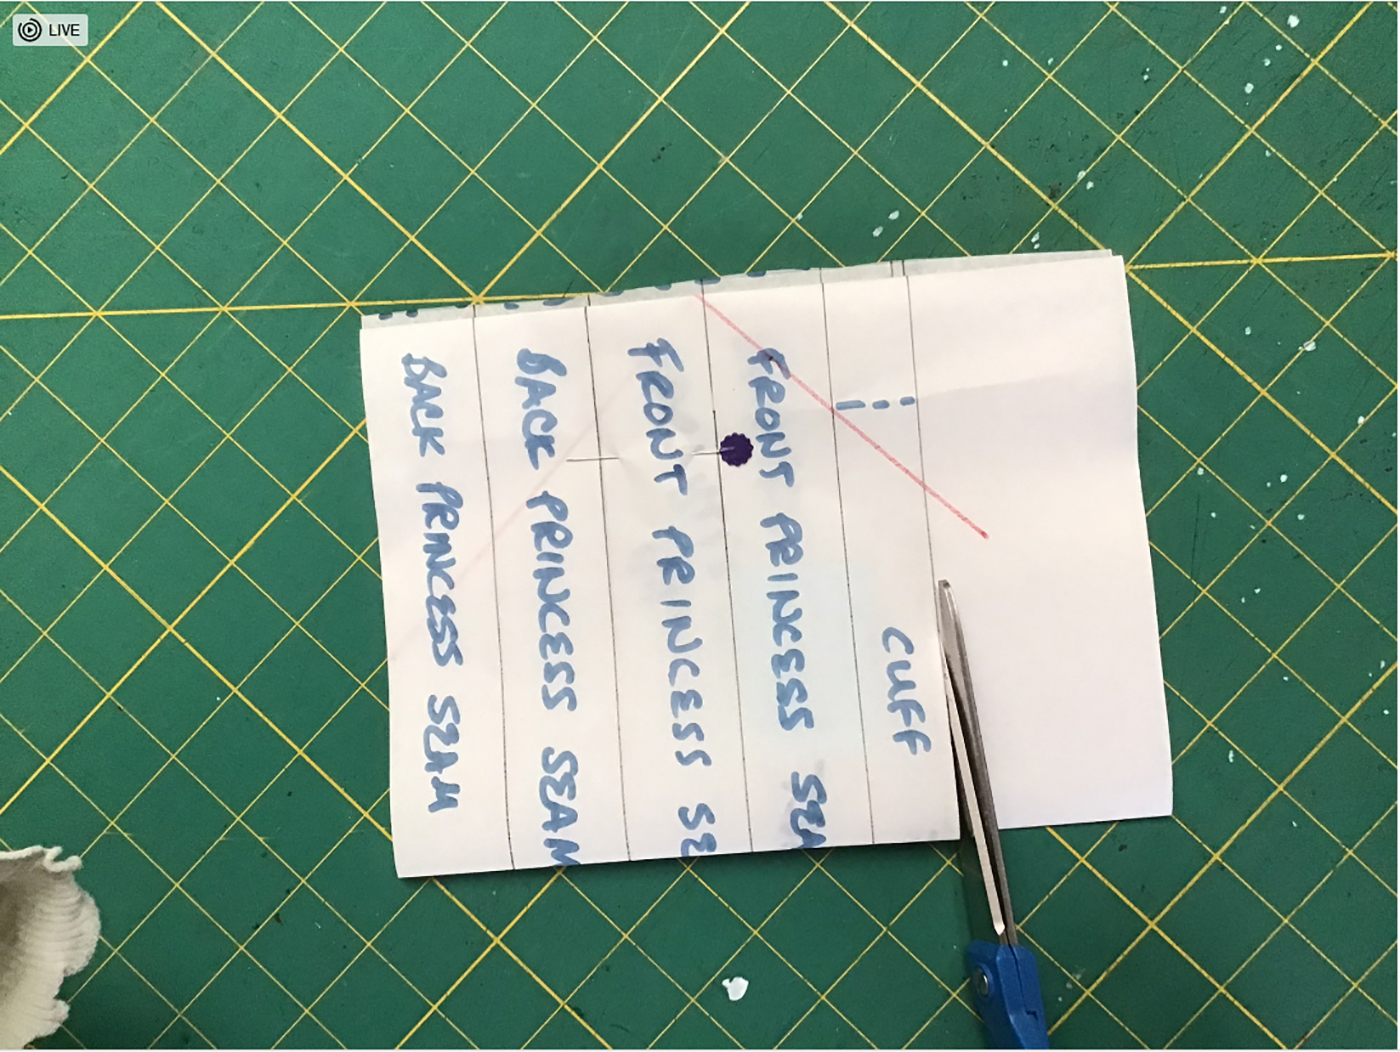
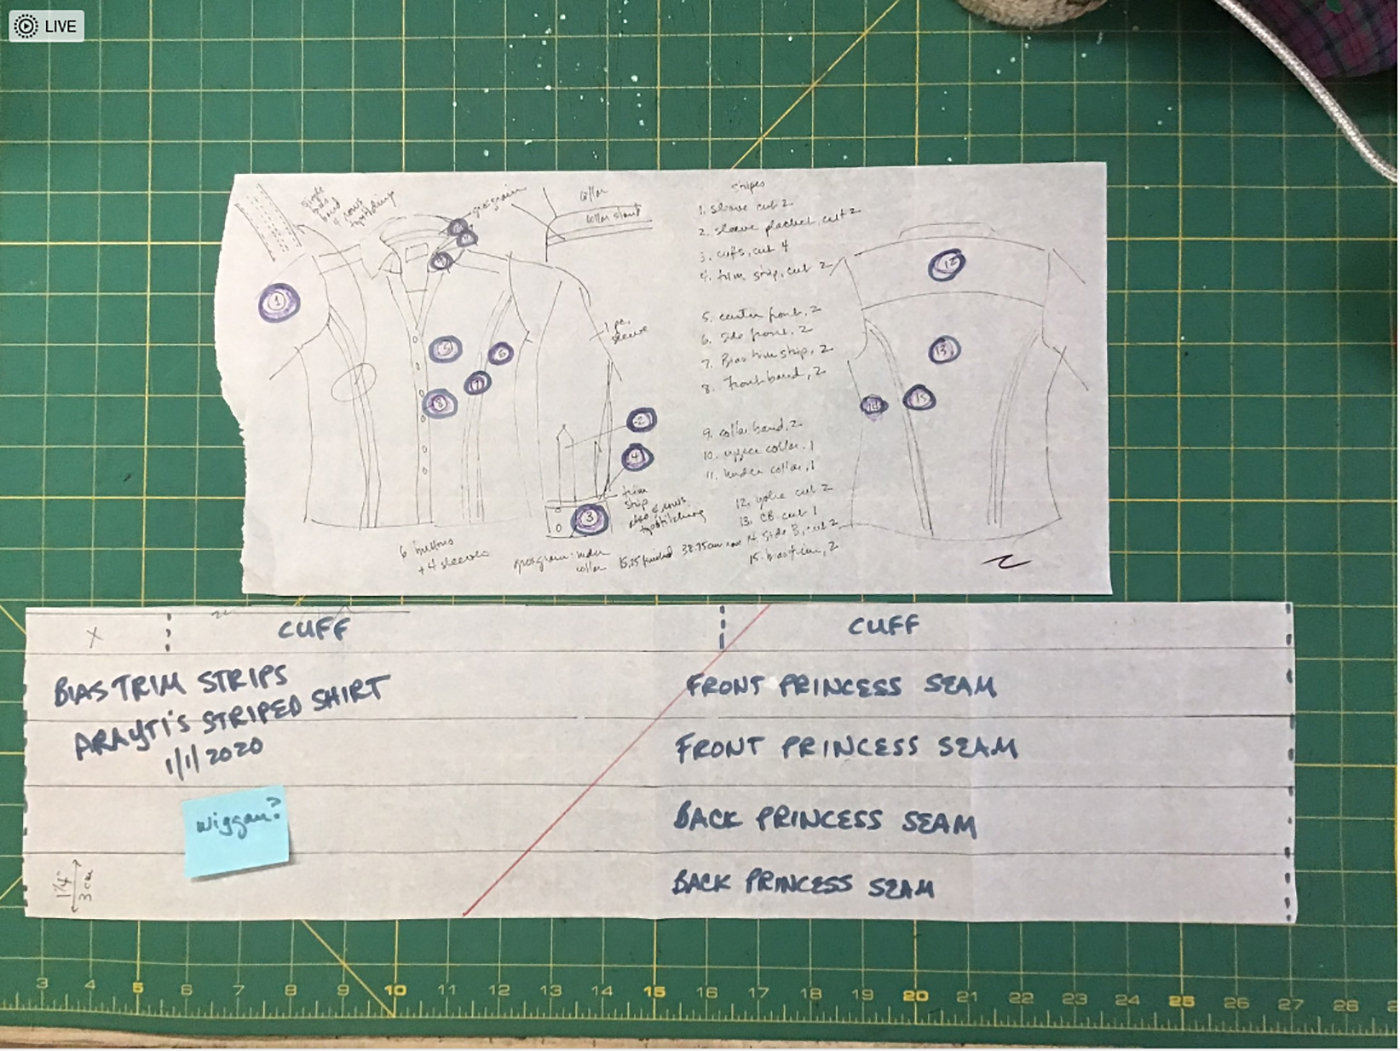
Make a sketch numbering the pieces and how many of each are needed, along with additional notes that occur to you. Will there be interfacing? On which pieces? When in the process will that happen?
This is the hardest part: take your time. It’s awful to have cut your garment out and start to assemble and discover you’ve forgotten a piece.
The next stage is to start copying your pattern pieces. Circle or check them off your sketch as you go
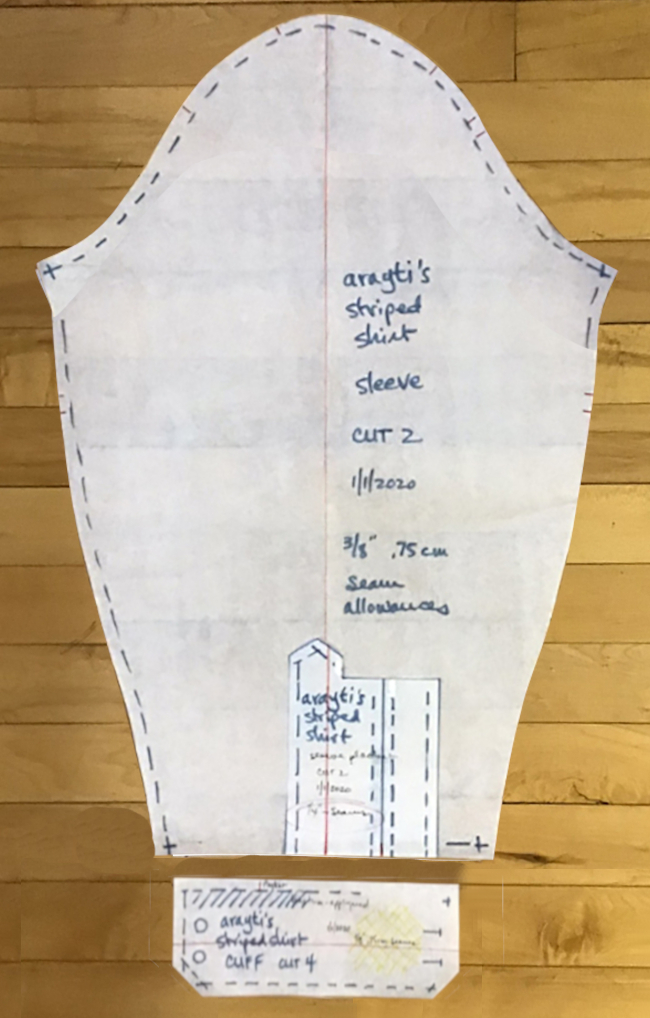
Which piece you start with is arbitrary. We’ll begin with the sleeve.
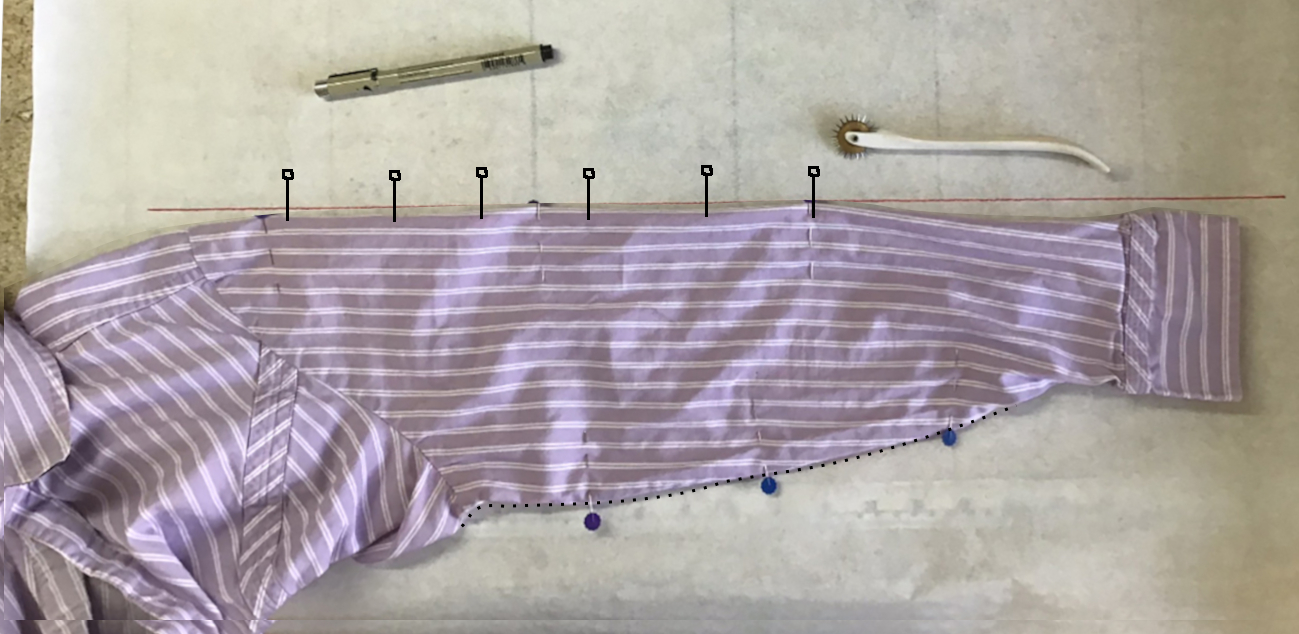
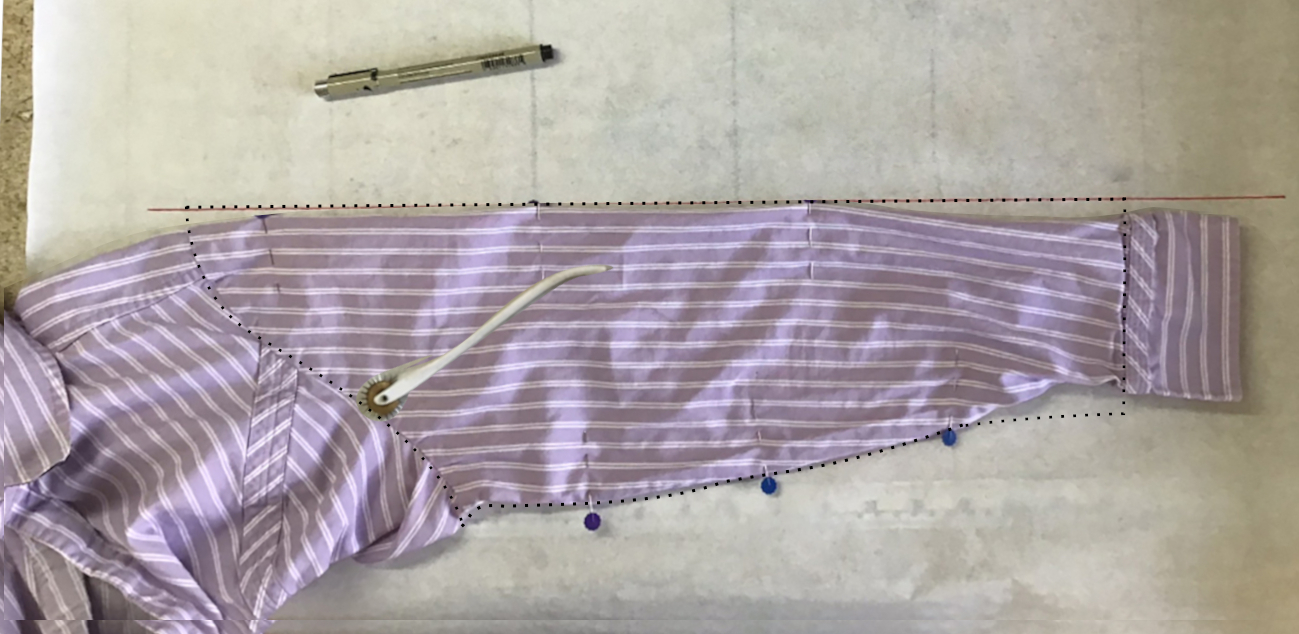
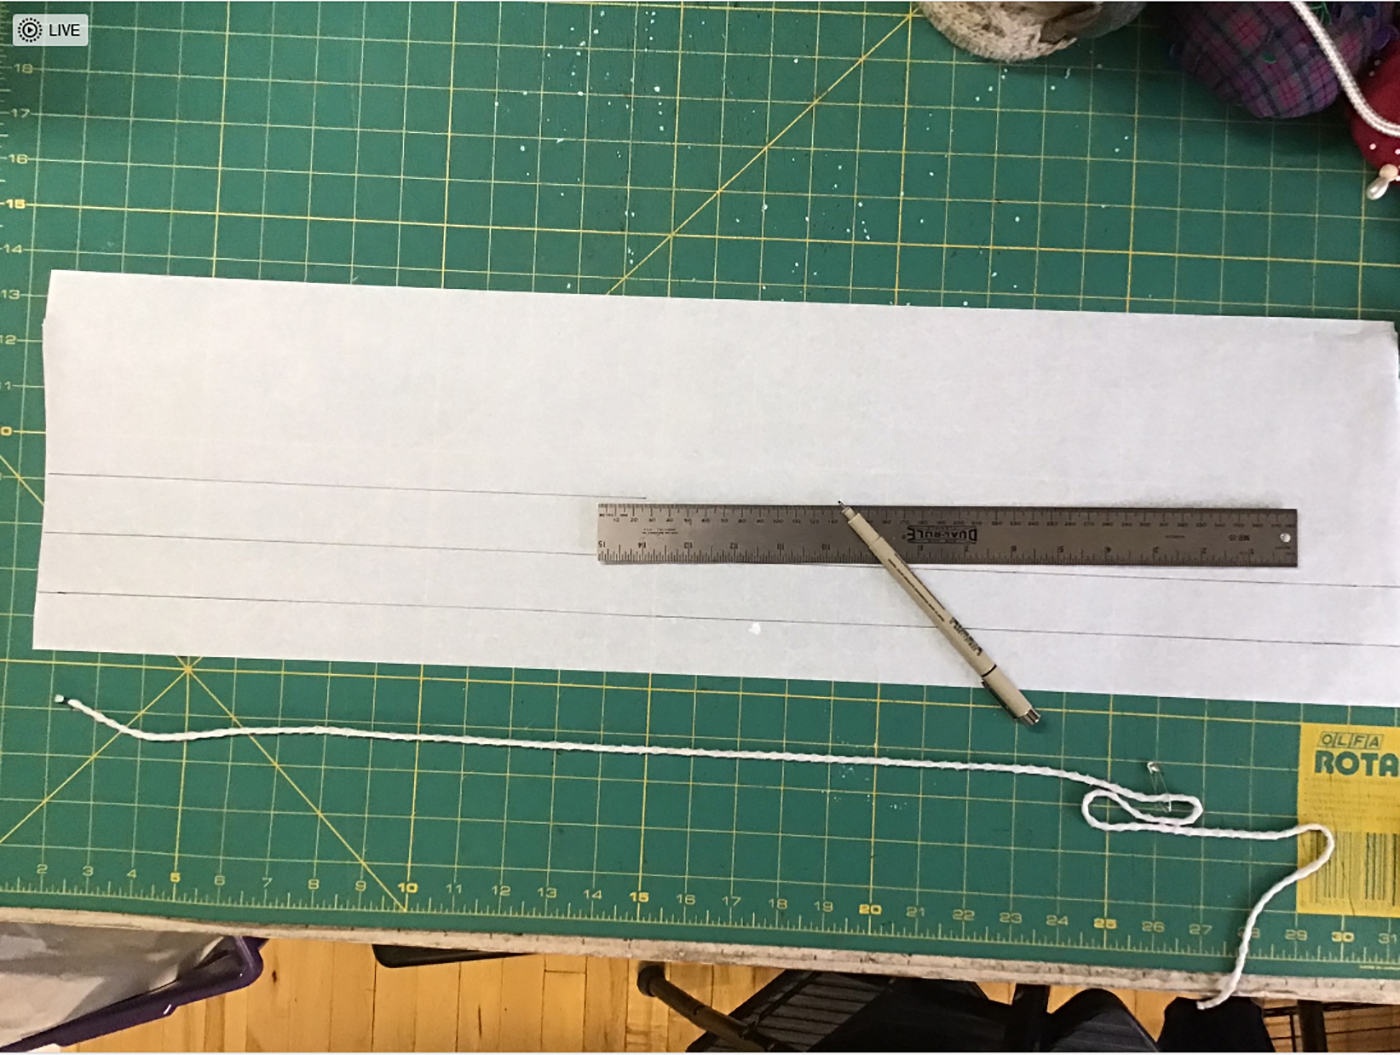
On an ample piece of pattern paper, draw a straight line down the center to show the grain (striped fabric makes lining up easy). Fold on the underarm seam and smooth up both layers.
Lay the fold on your grainline and pin to the work surface. Keep the fabric as squared-up as you can.
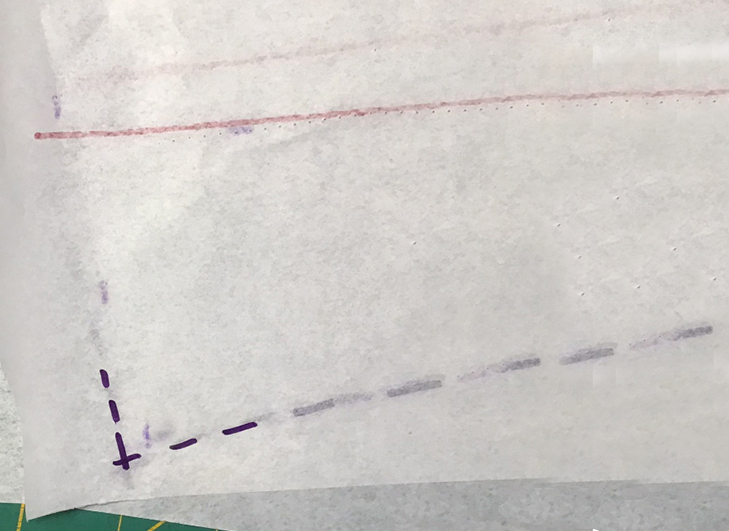
With a washable marker, draw right along the underarm seam from armpit to cuff. It will straighten out rather than curve into the cuff; you can measure how much by peeking inside at how much the pleat(s) eat up.
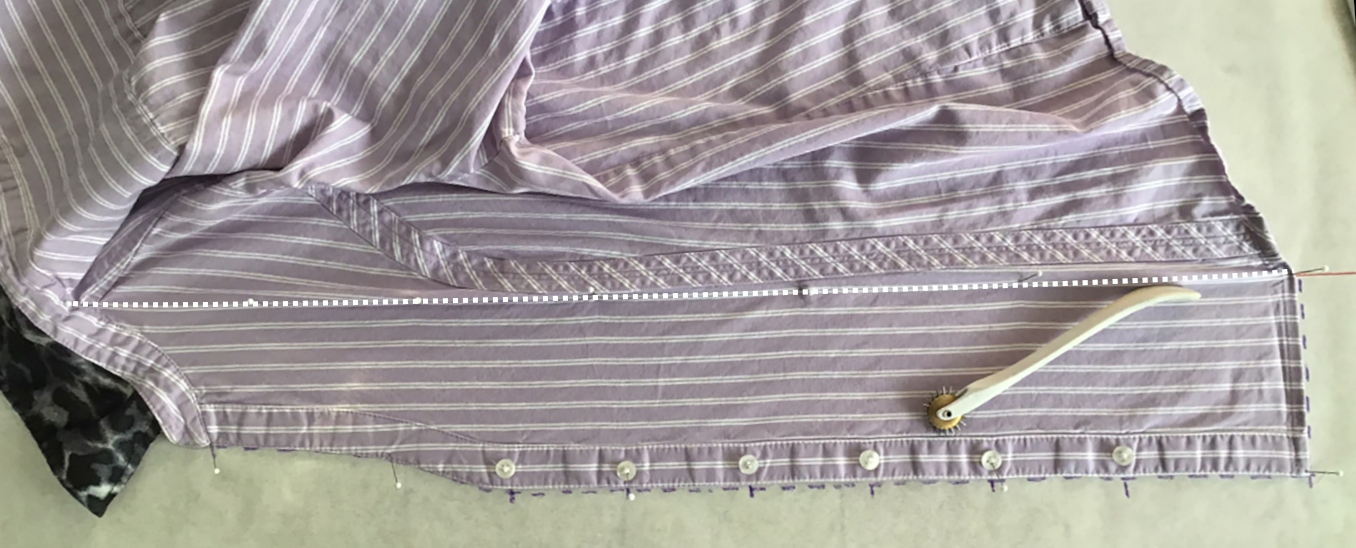
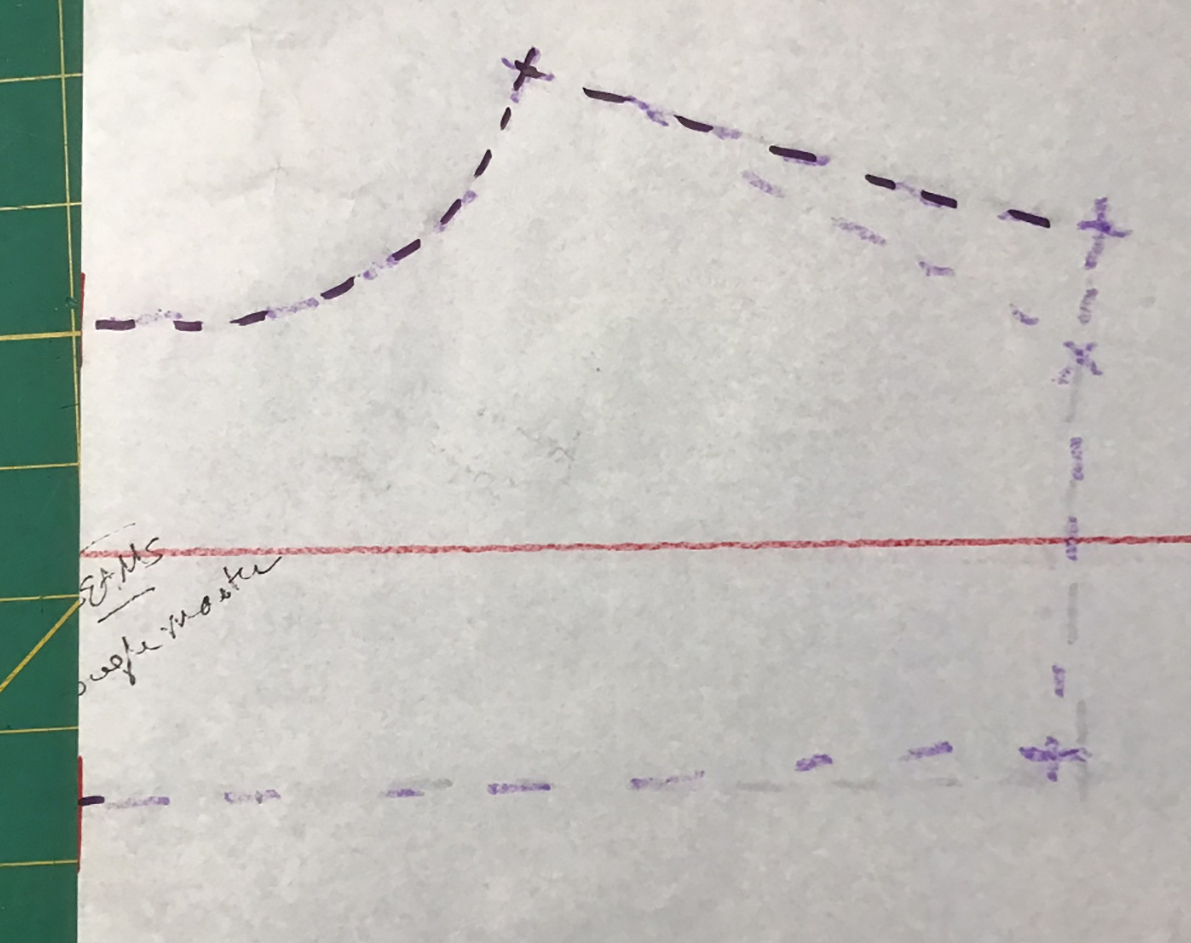
Define the armscye seam. If you don’t have a dressmaker’s pricking tool, you can poke through into your work surface with a long needle or headed pin.
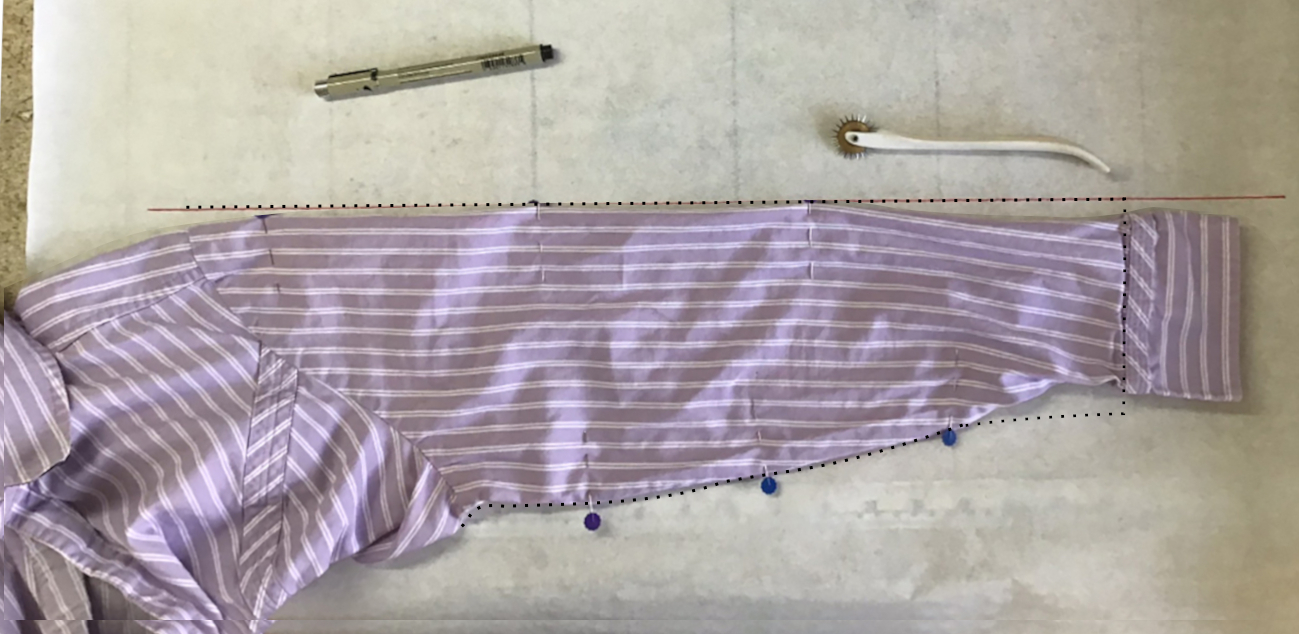
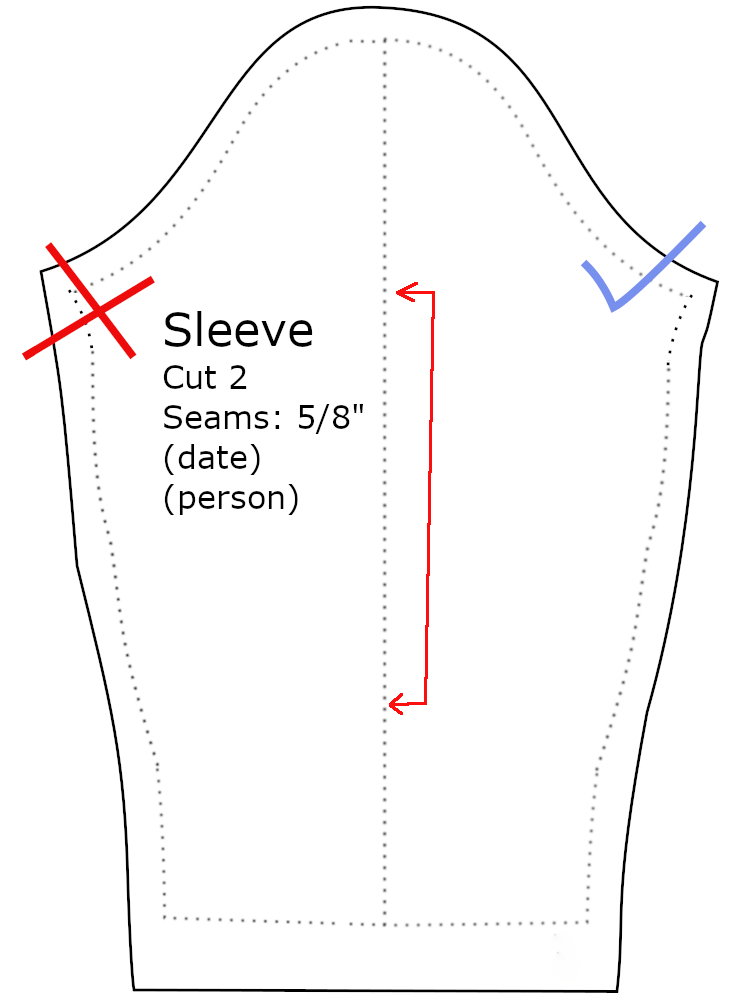
This gives you half your pattern. Later you’ll add a solid cutting line outside the sewing line (dotted here). If instead of a cuff the sleeve runs straight down to the wrist, instead of a seam allowance you’ll need a turn-up for the hem.
After tracking, reconciling the seams and adding registration marks, you’ll fold your paper in two, pin it a couple places and cut out both sides together, unless you have an asymmetric armscye. Label your pattern NOW.
Avoid turning curves into straight lines: the shaping built into your pattern contributes to why you like it.
(add a link to on how to deal with an asymmetric armscye or a tighter upper arm)
%%%%%%%%%%
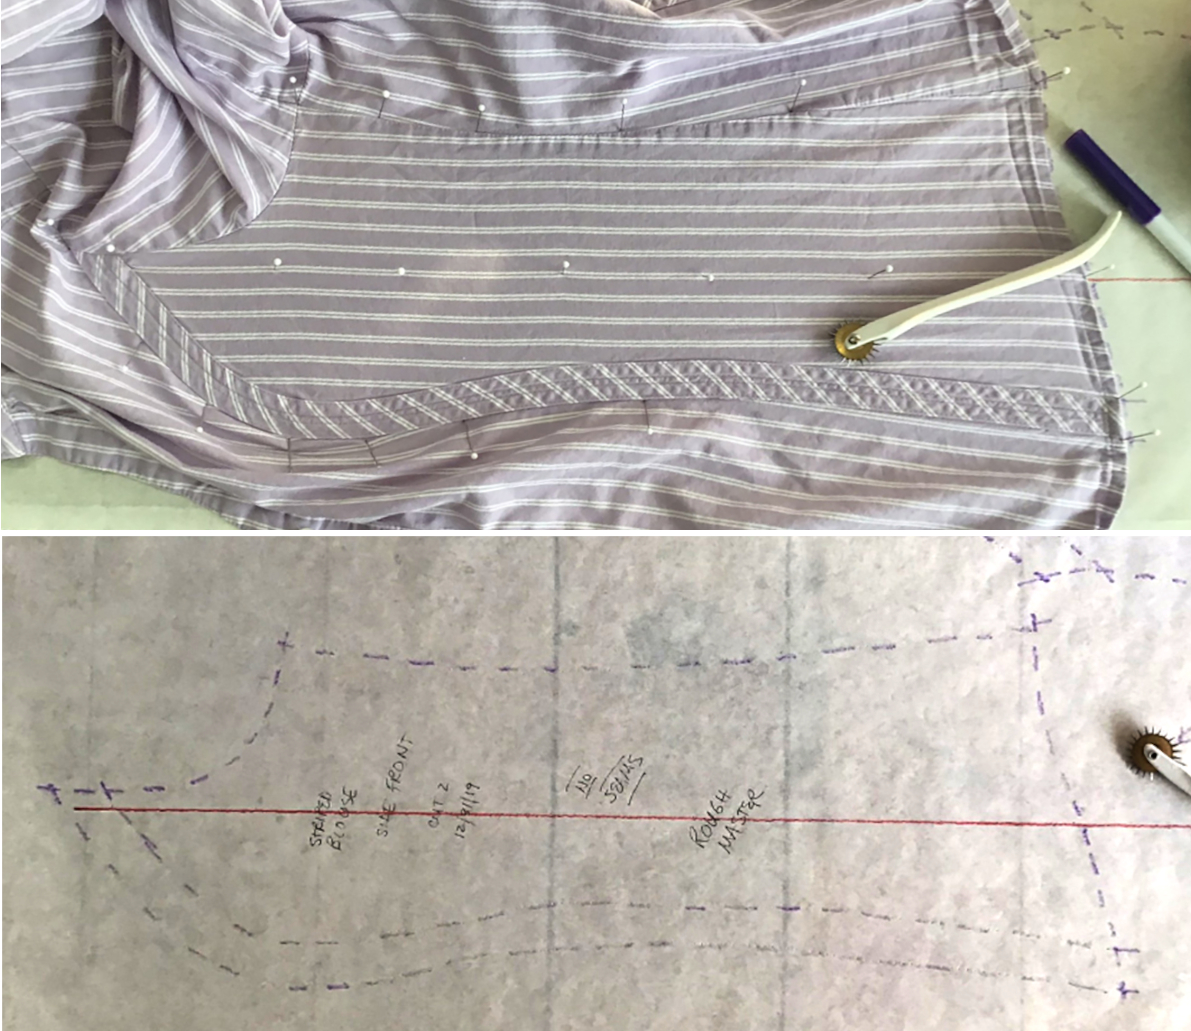
Follow the same procedure for the other pieces: determine their grainline, draw that line on a piece of pattern paper, pin out as flat and true as possible. Draw around edge or poke through to get your seam and cutting lines. Label. Mark the piece off your pattern sketch. Do not trim to size until reconciled to the pieces it will be sewn to.
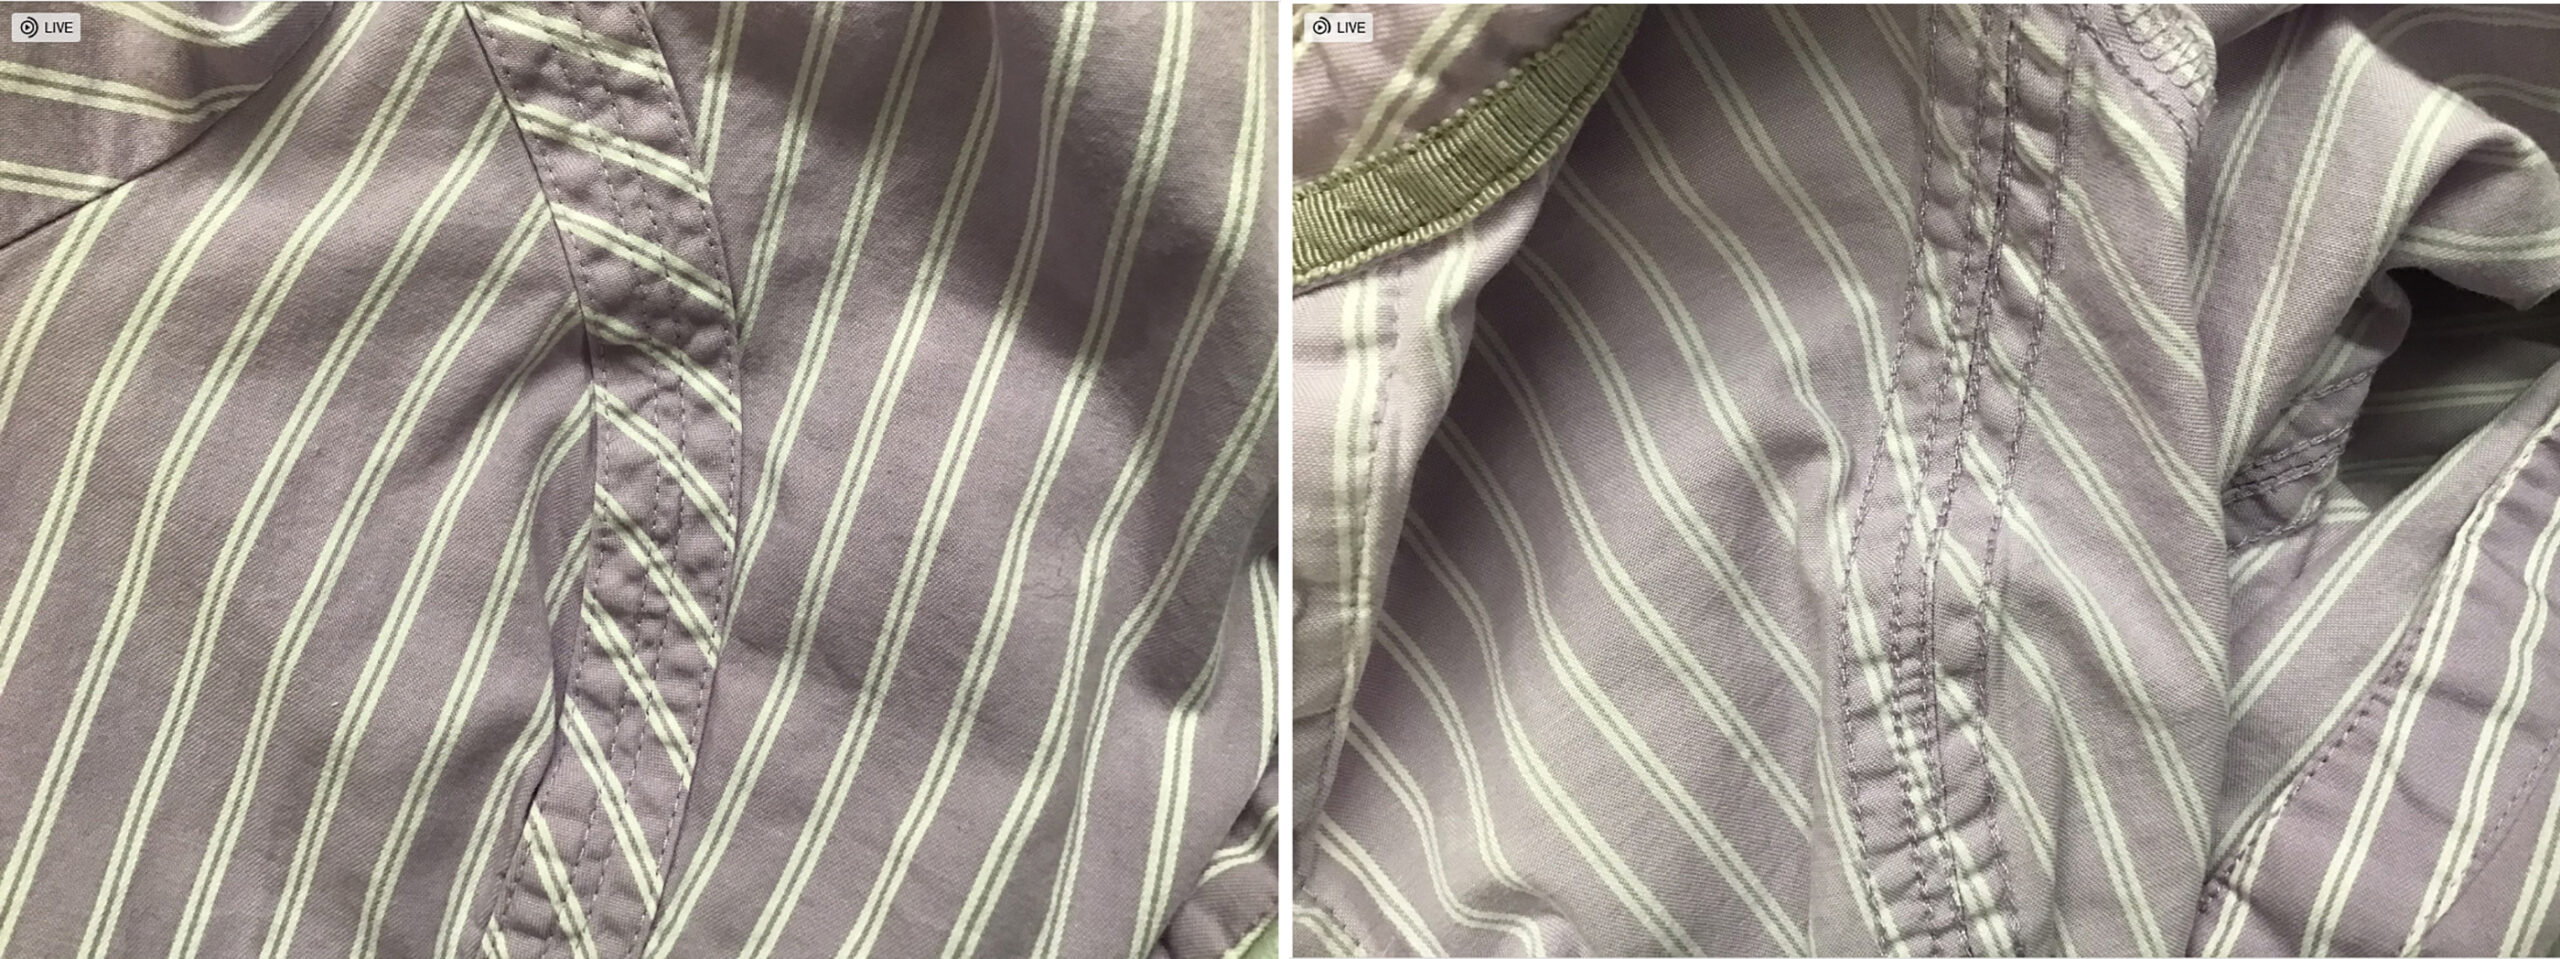
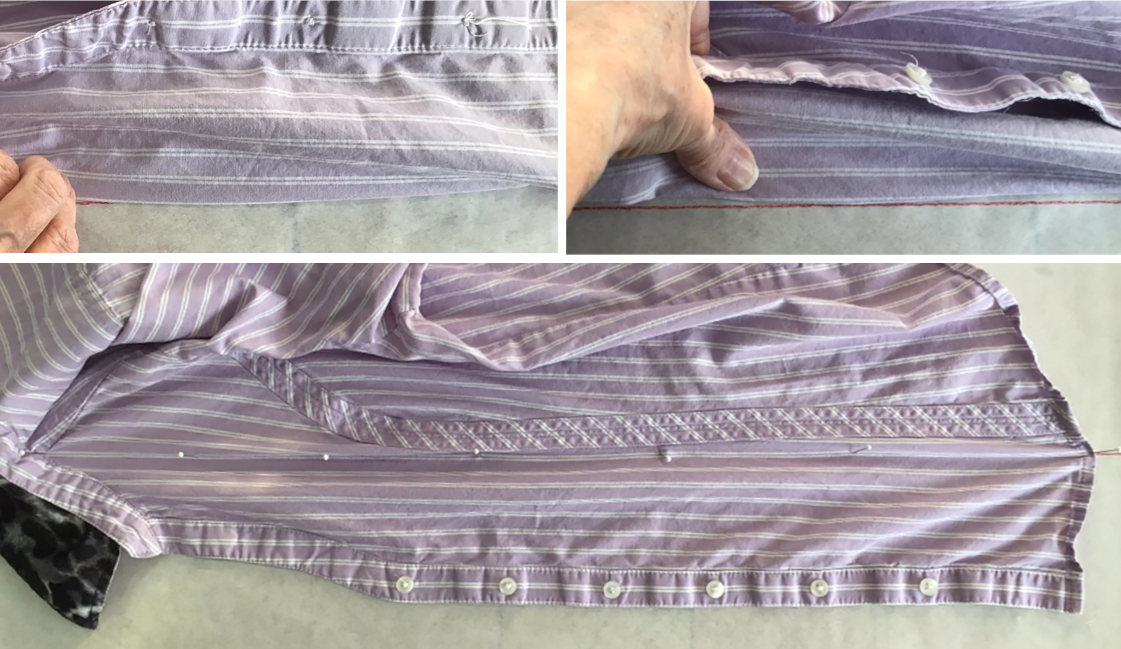
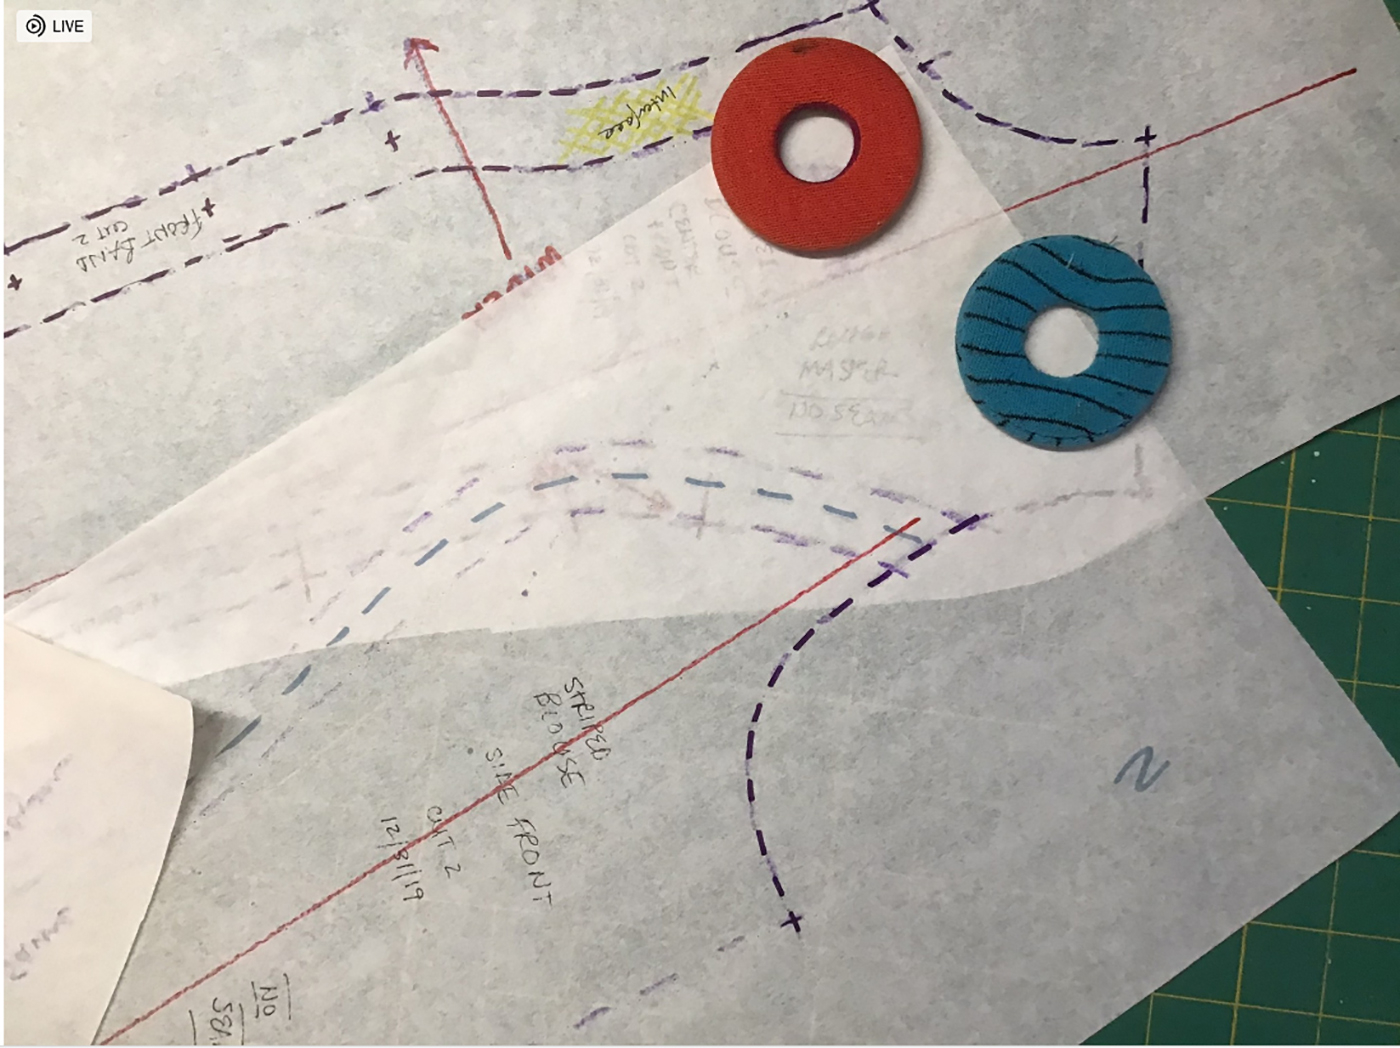
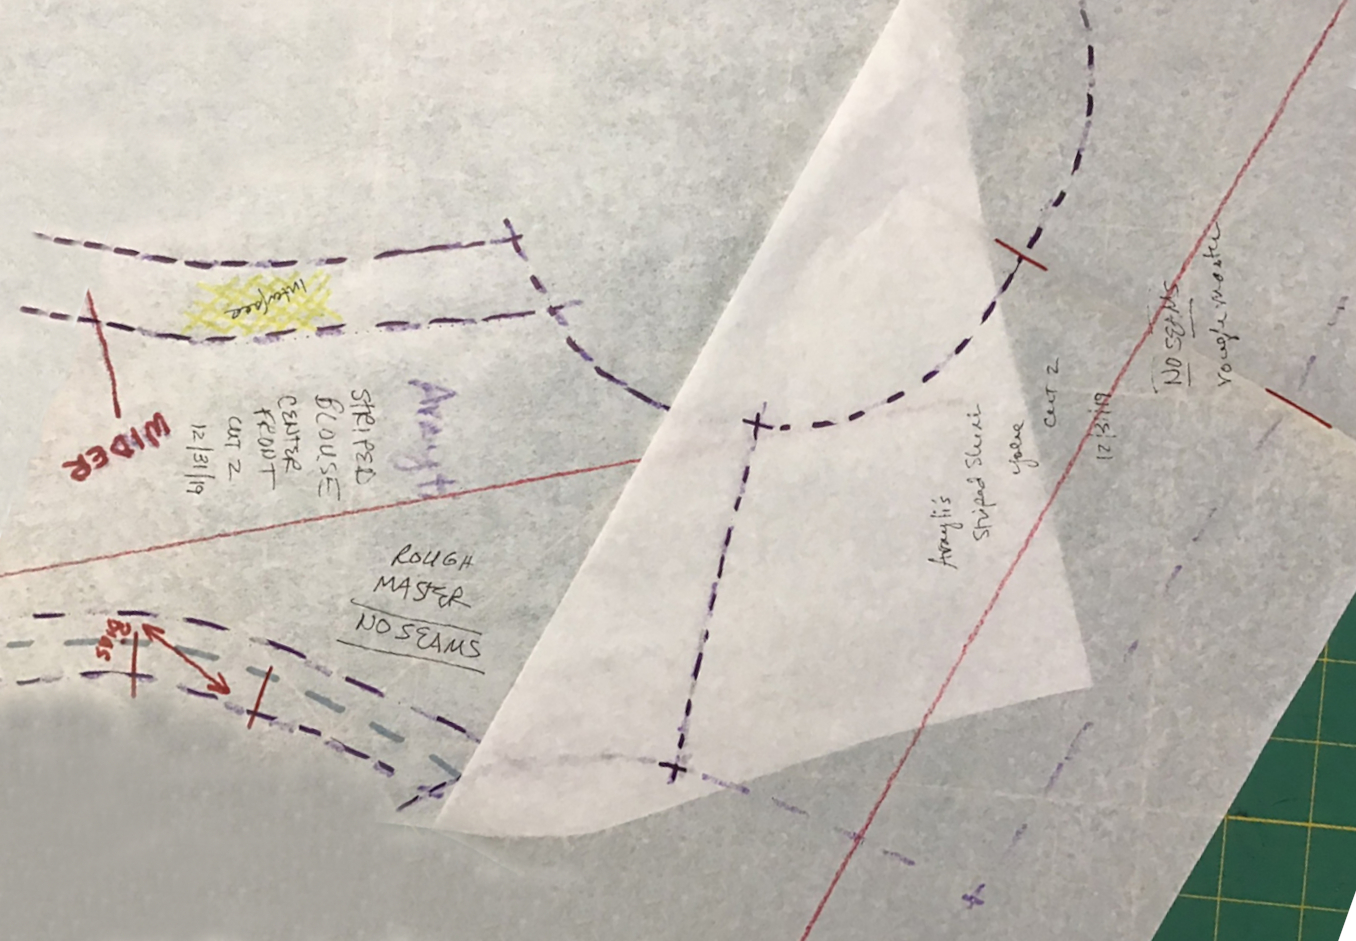
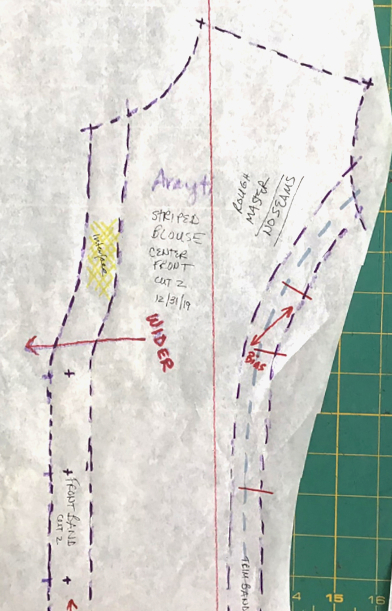
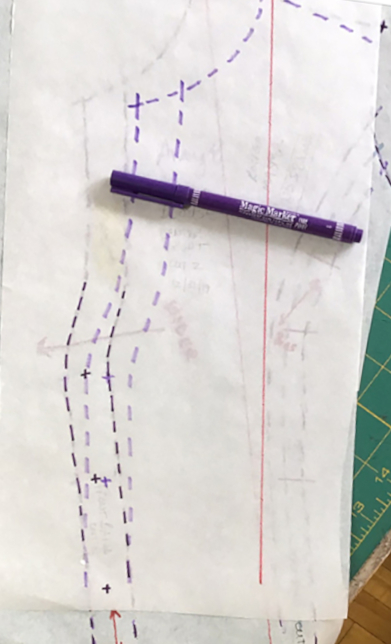
(detail) Center front in progress. Fabric should be able to be pinned out flat without distortion.
Once the pieces’ edges are pinned out, mark along their edges with a washable market. Note that the grainline is not the seam line.
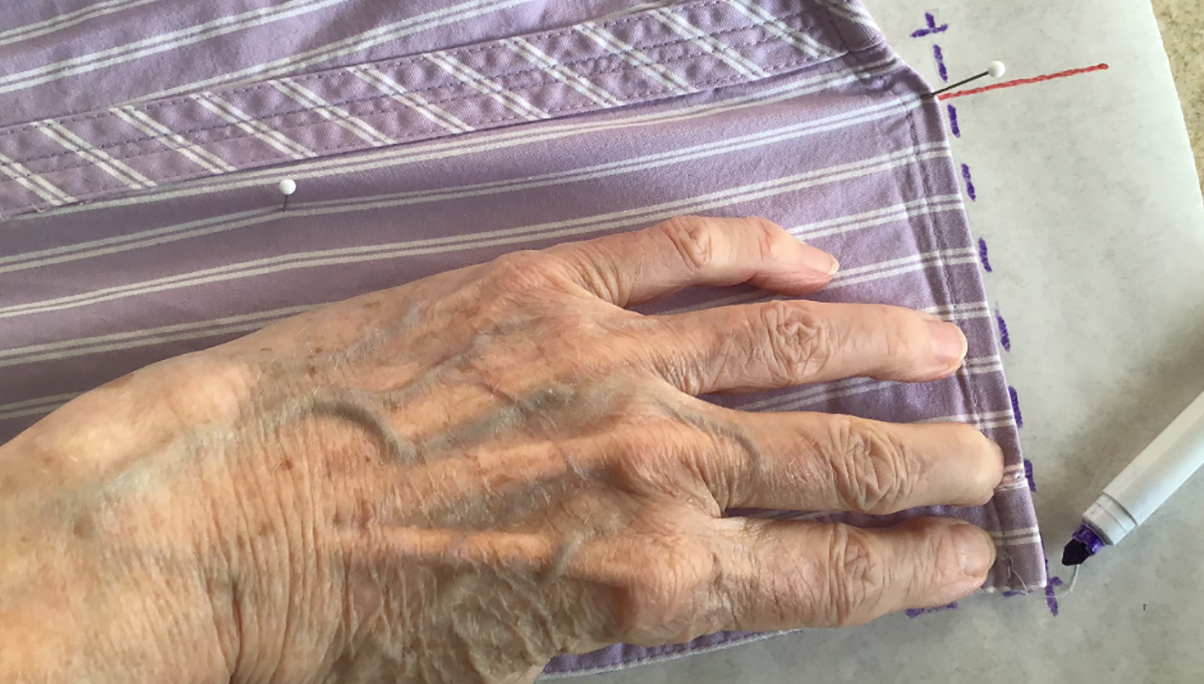
This center front has to be captured in two sections. First, build a fence of pins starting at the front edge, and smoothed as far as possible. Finish all the detail for this part.
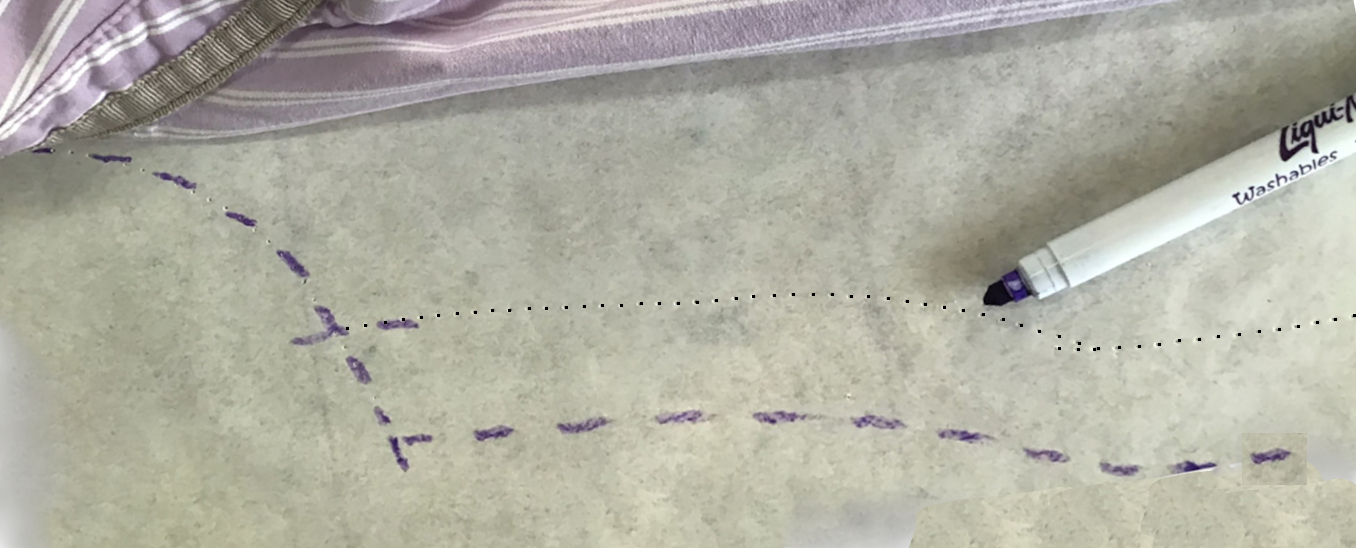
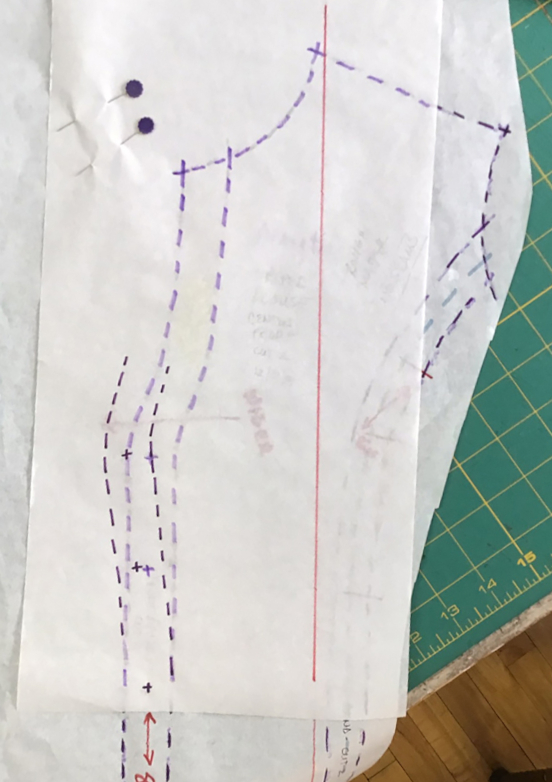
Lift the fabric from the front section and immediately go over your pricked lines with a marker. Do not lift the paper until you’ve done this! The holes will close up and make it hard to see them.
Release the front pins and complete pricking out the pattern piece.
Note the cross marks for button/buttonhole placement.
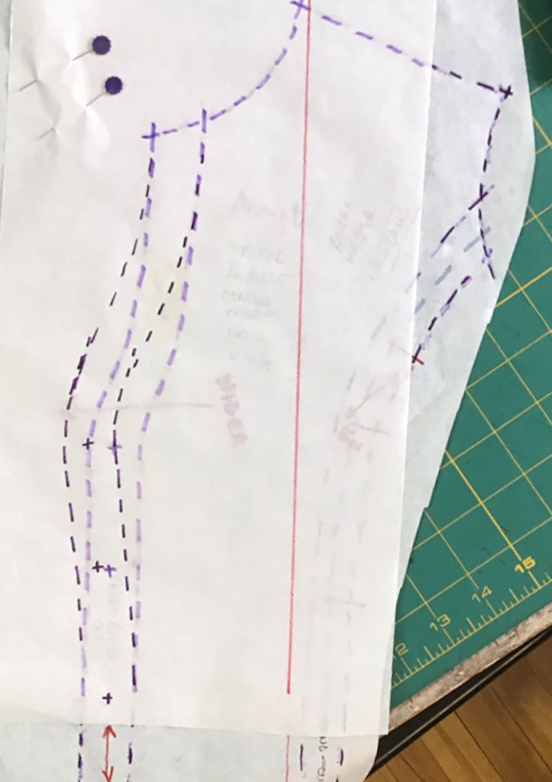
Check off each piece as you complete it.
The front bands and the side seam trim pieces have also been captured. They will be traced off separately into working pattern pieces once this has been reconciled with the pieces it’s seamed to: the side front, the sleeve, the back yoke, and the collar band.
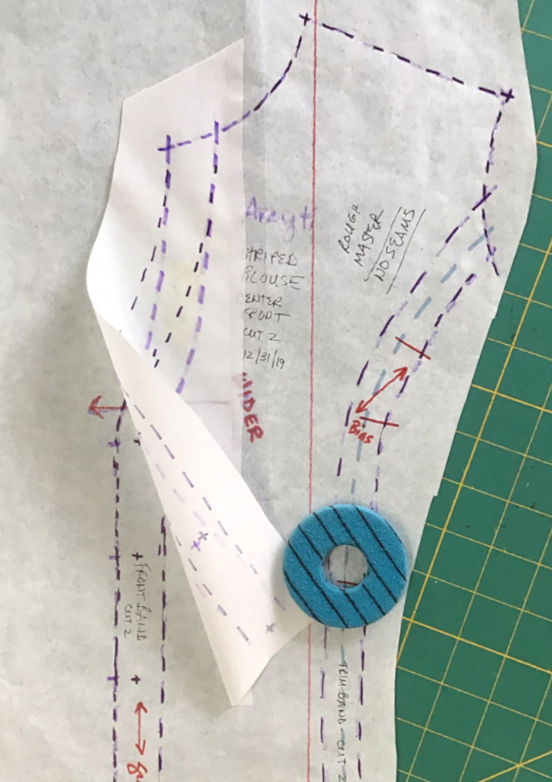
Side front; capture the trim strip again as a cross-check.
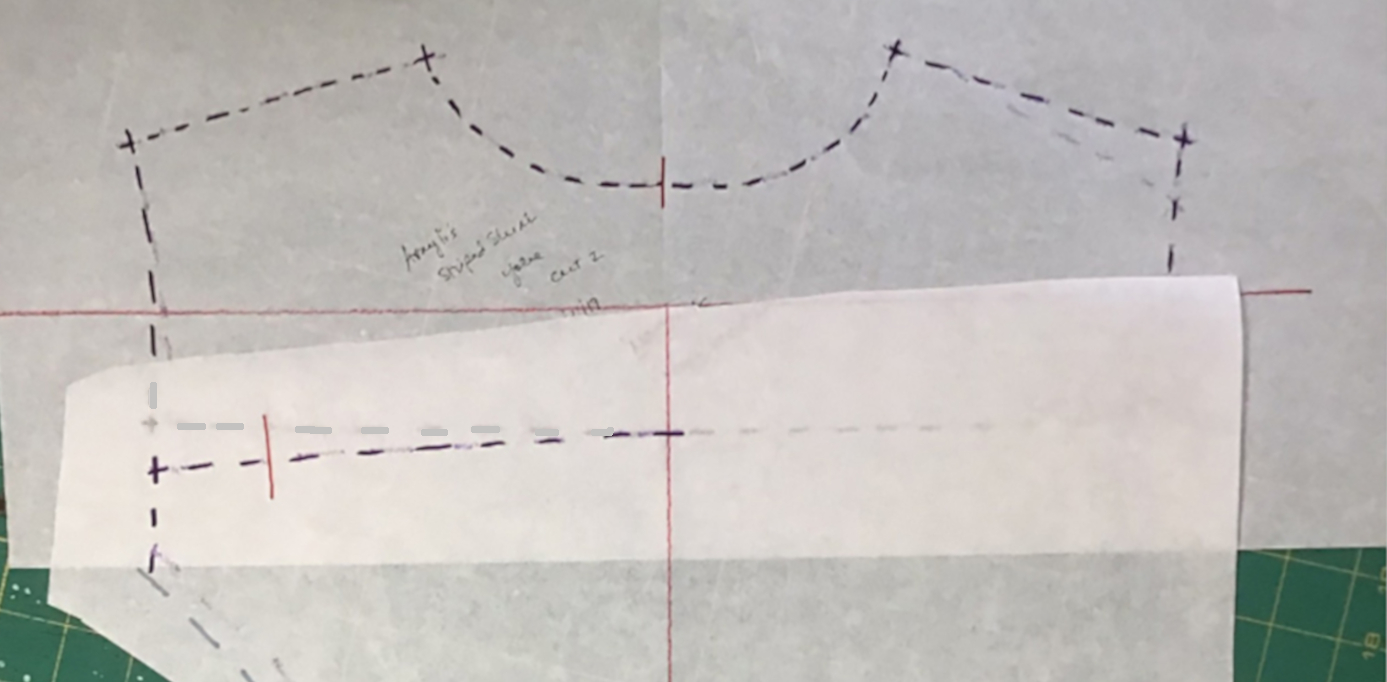
Yoke: square it up as much as you can. Pin and capture it in two sections. Check the paper for skewing: fold it in half at the center back and redraw, splitting the difference where there are discrepancies.
Not all pieces have been shown.
%%%%%%%%%%
(add how to do darts and pleats)
When you have captured all the pattern pieces laid out in your sketch, you’re ready to go over the temporary marks with permanent ones as you reconcile the pieces with each other (the lengths of the stitching lines must match). This is also called pin-tracking or truing. Work from the top center front down and around.
Begin with the center front pattern. Go over all its markings with permanent marker. The side front seam will be reconciled to it. The armscye of the side front will have the sleeve trued to it, so go over that section with permanent marker too.
Overlay the center front with the side front, matching at the armscye.
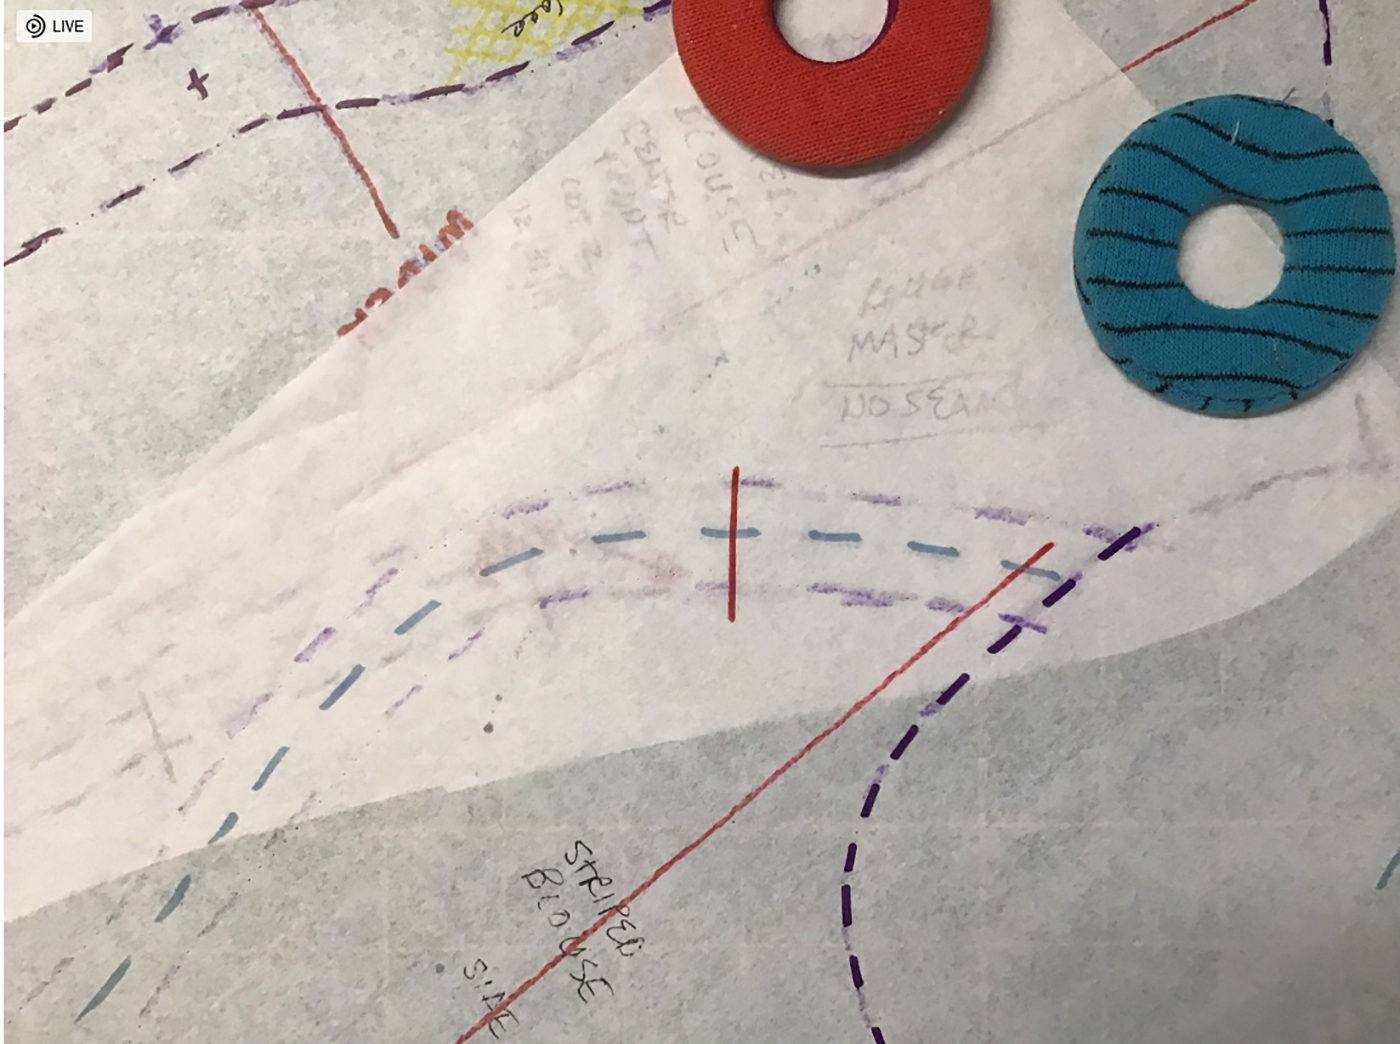
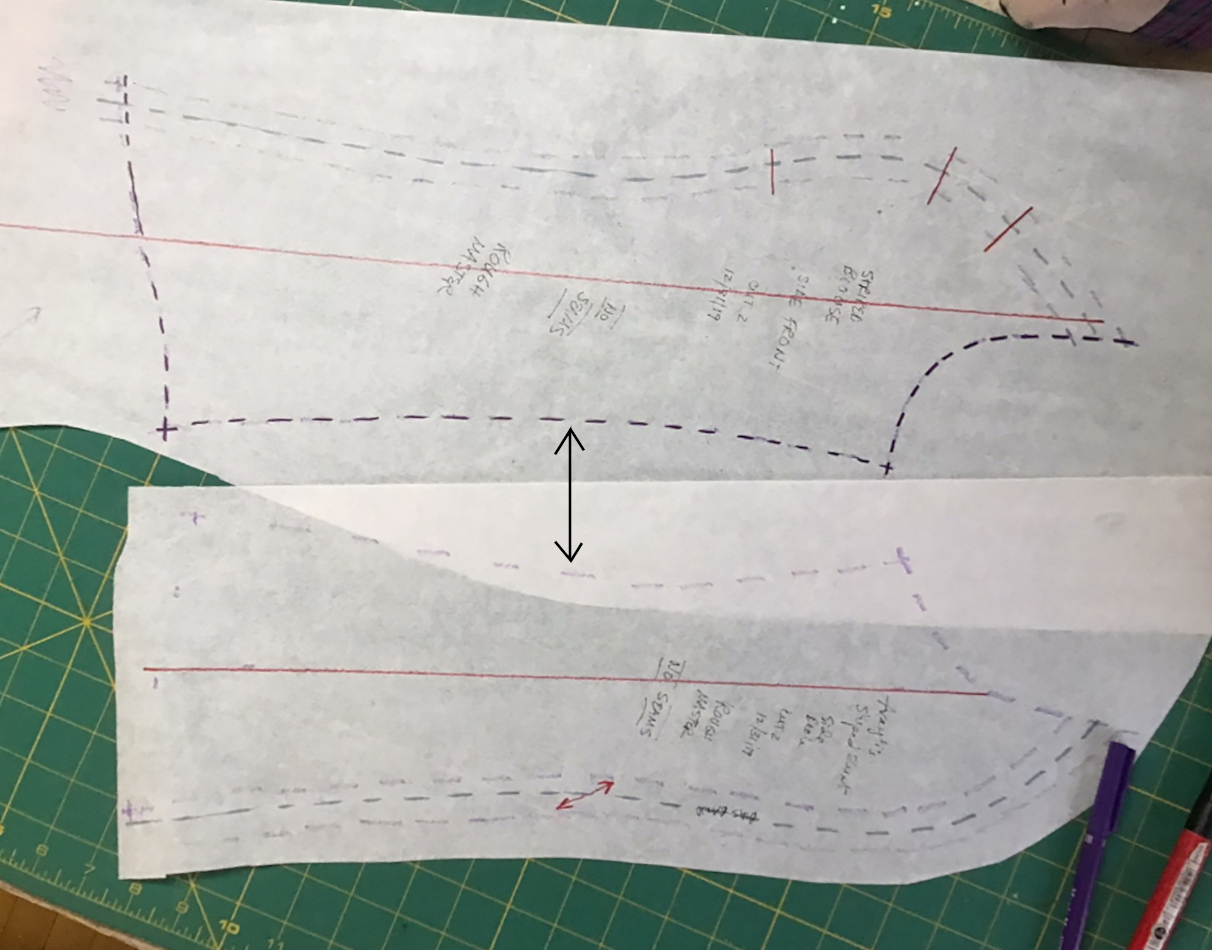
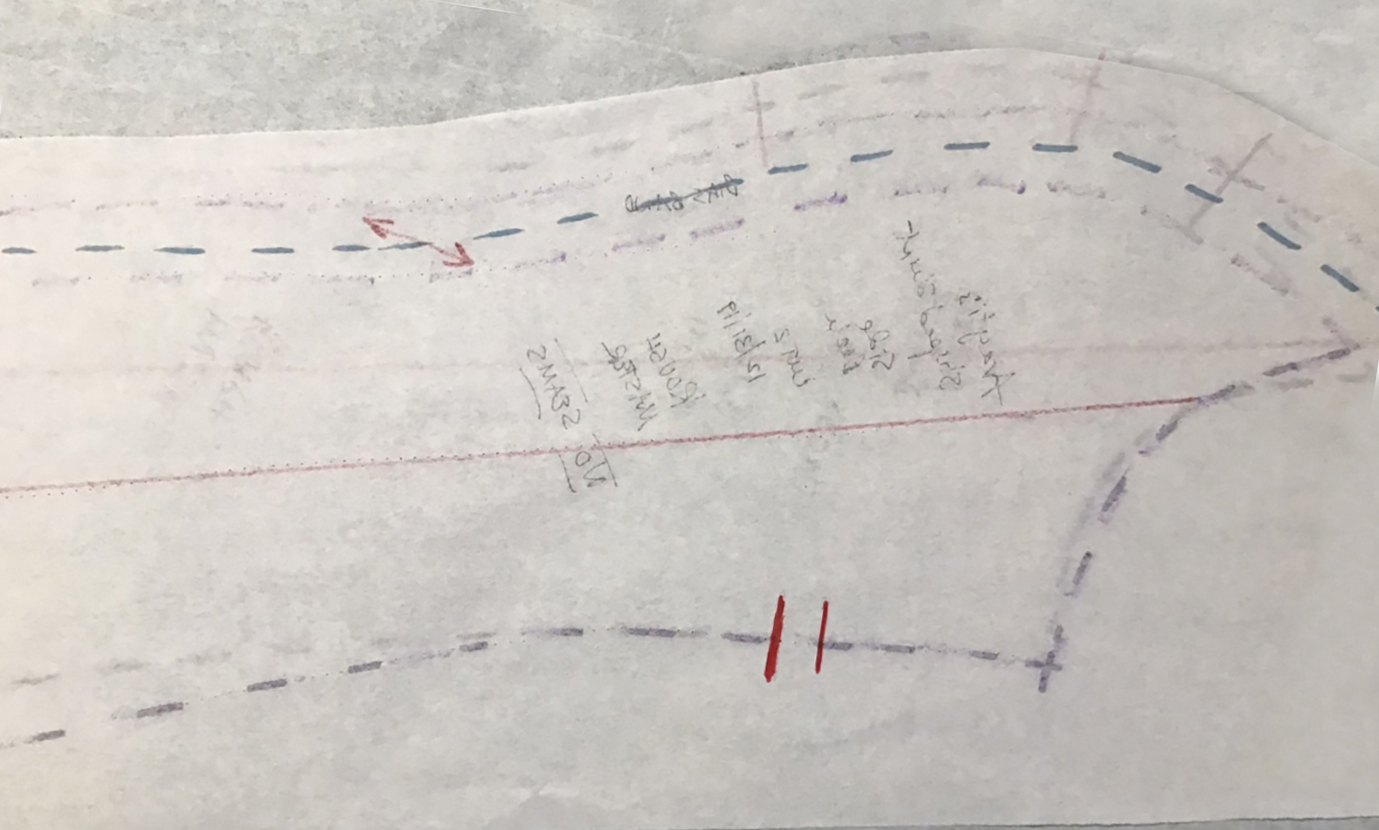
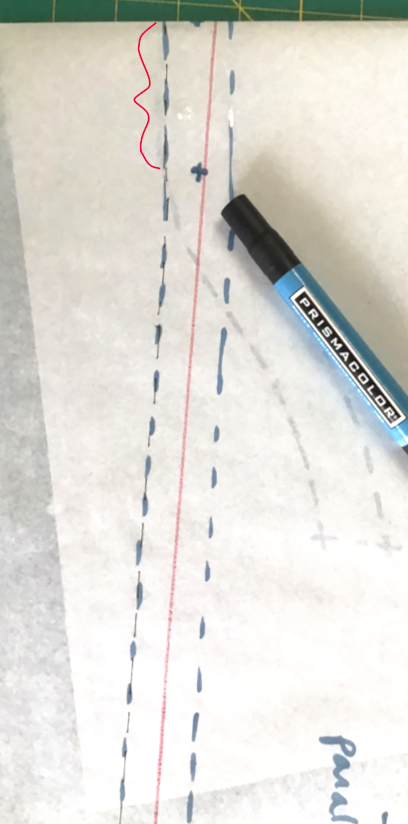
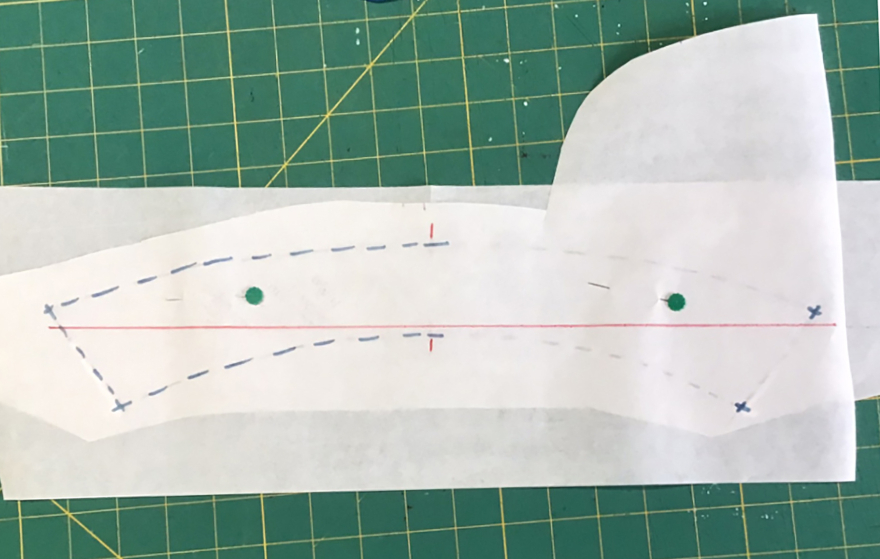
Track as far as the two align and draw a red line perpendicular to the sewing line. This will be a registration point. In commercial patterns this is a diamond and is clipped into the seam allowance so that you can match seams as you sew.
I like to put three registration marks on a princess (side front) seam: one at the fullest part of the bust, one between there and the armscye, and one below the bust mark about a third of the way to the hem.
Continue leapfrogging your pins down the seam line, adding red lines for the registration marks at the fullest part of the bust, etc.
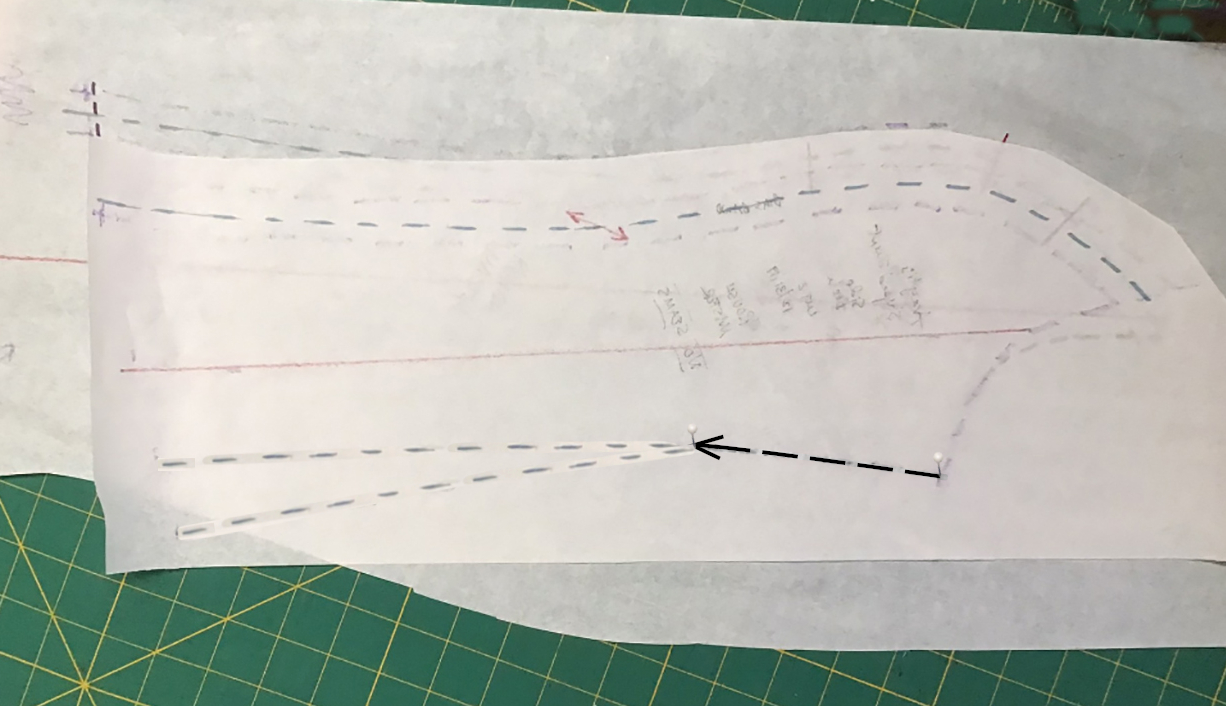
When you reach the hem, it’s common for the lengths to be different.
Change the side front to match the front. Draw the hem line to the side seam.
Next: reconcile the side seams using the side front as reference for the side back. Note that the shapes of the seams are different. Do NOT make them the same.
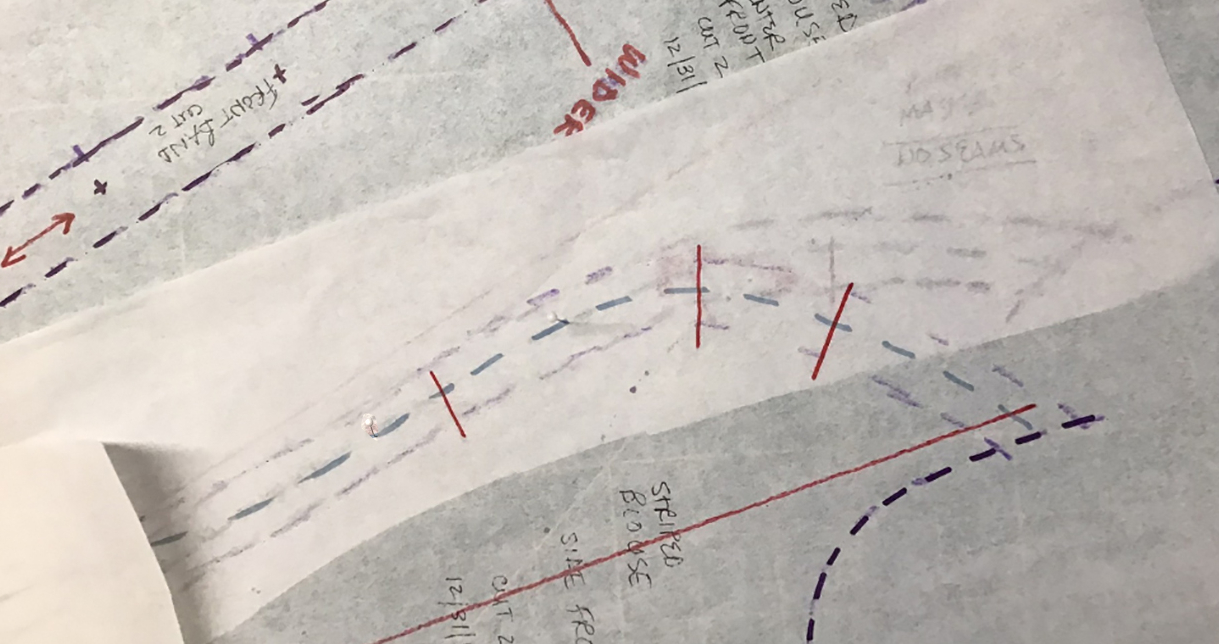
Overlay the side seams, starting at the armscye. Redraw the sewing line with permanent marker, pin-tracking.
Three or four fingers’ width from the armscye, draw a couple of registration marks.
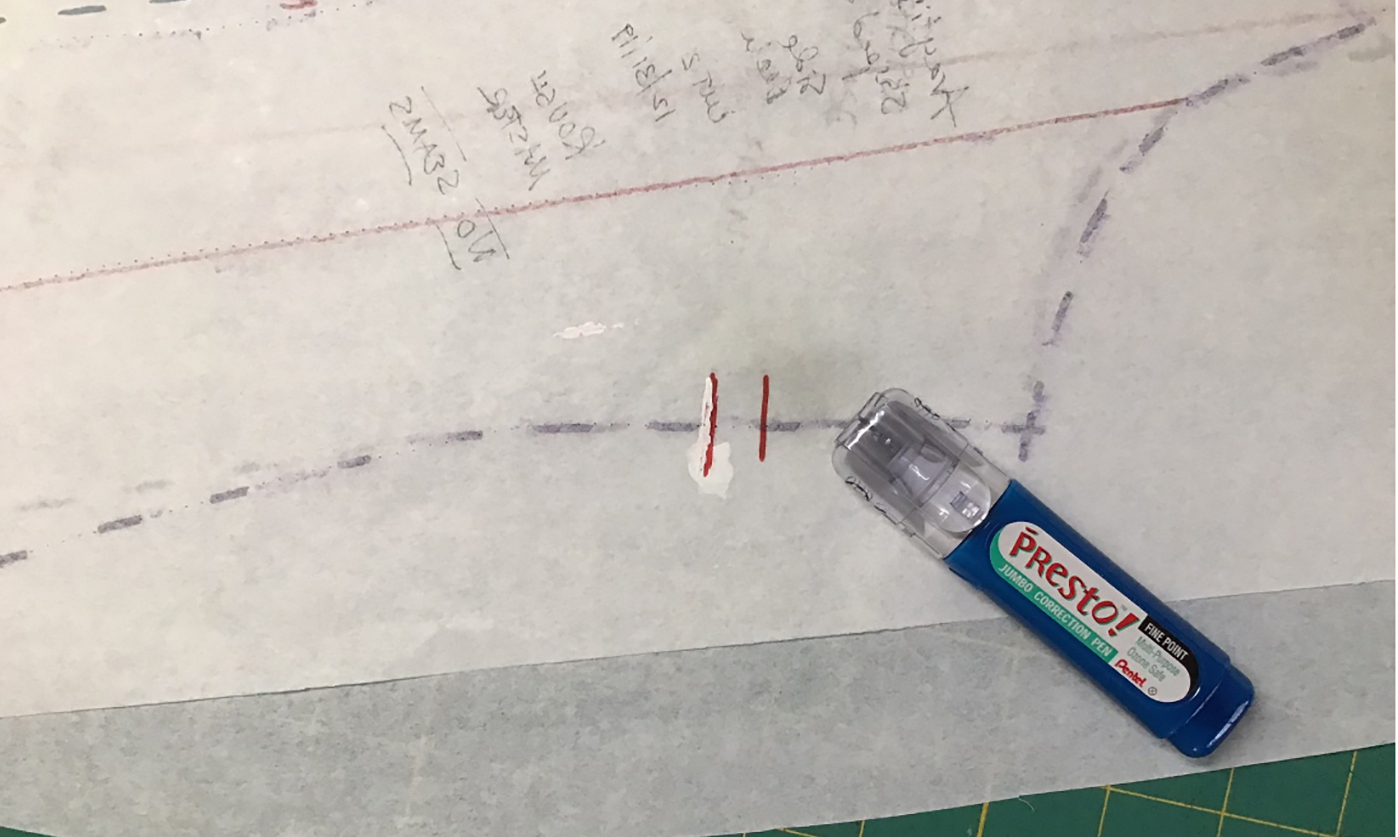
If you goof on any of the lines, an easy correction is with office white-out fluid.
Reconcile the side back to the side front at the bottom. Reconcile the side back to the center back (not shown).
Fold your traced yoke in half at the center back seam, lining up the neckline and shoulder seam if possible. Trace with permanent marker, splitting the differences.
Corrected yoke.
Reconcile the yoke’s shoulder seams to the front. There may be 1/4″ // .6 cm extra length in the back yoke to build in shoulder ease.
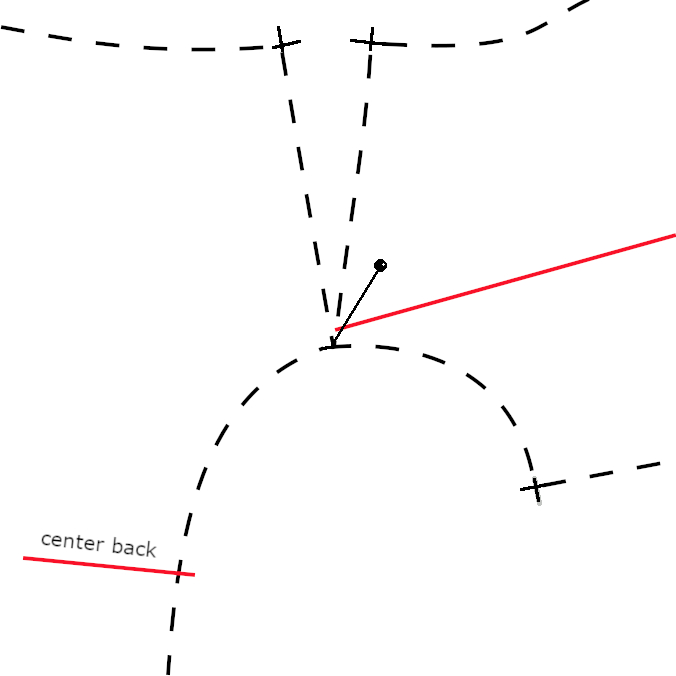
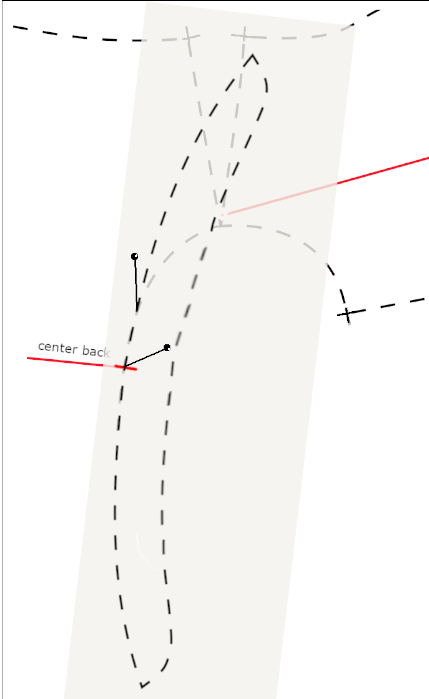
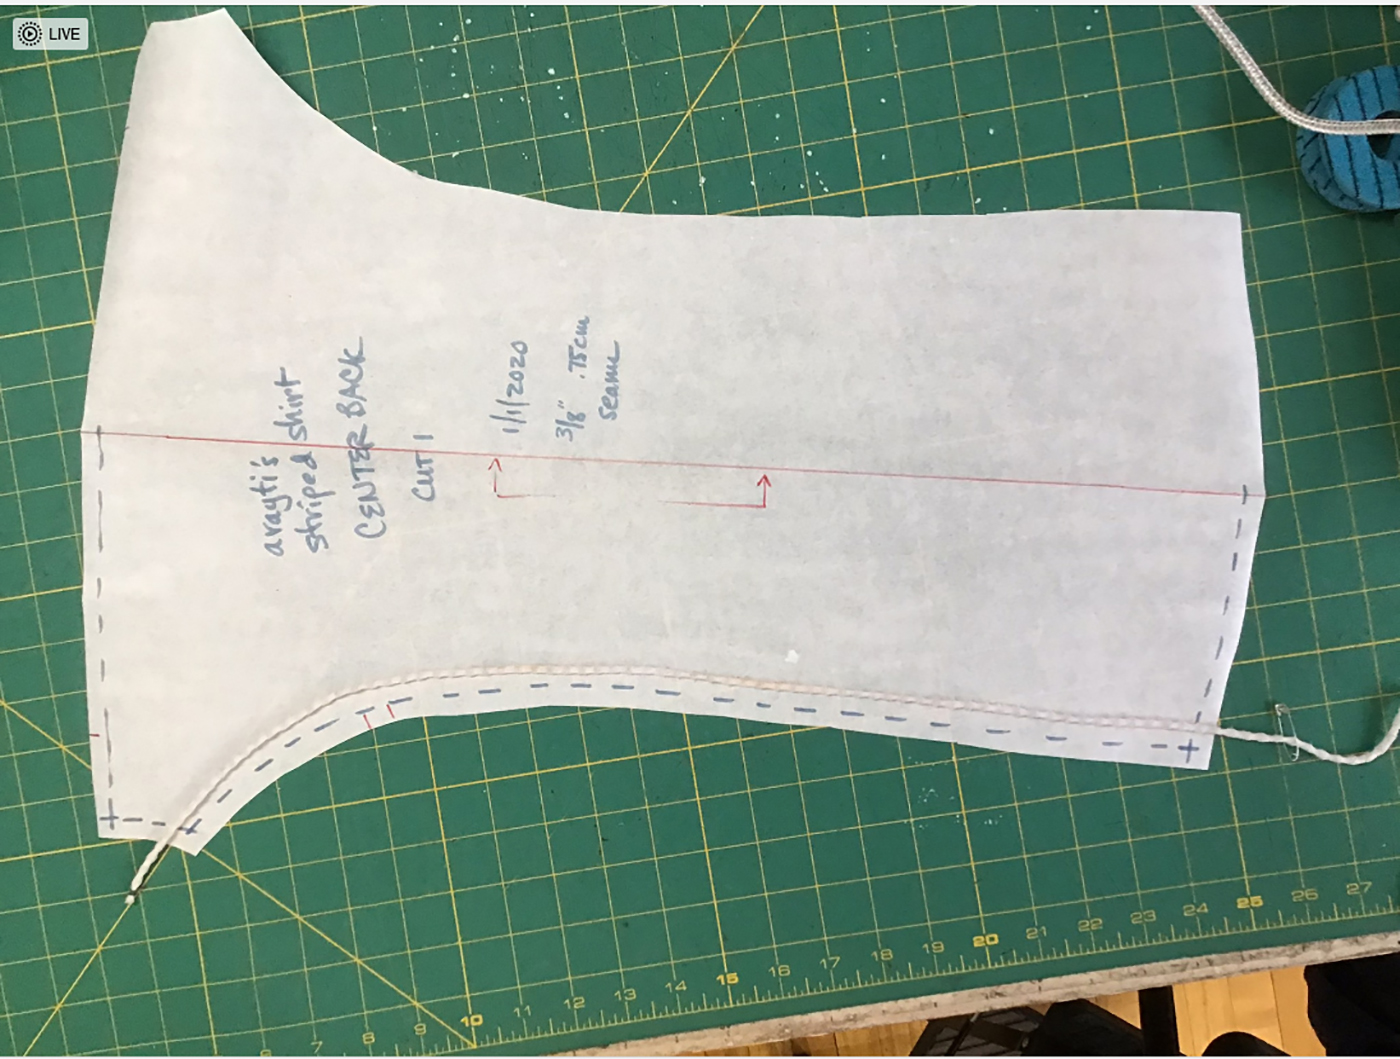
The upper edge of the lower center back should be slightly dished up. This creates ease for moving the shoulders.
This shows the curve at the upper back seam between the yoke and the center back. Greater ease could be gotten (as is common in men’s shirts) by widening the piece and adding a box pleat.
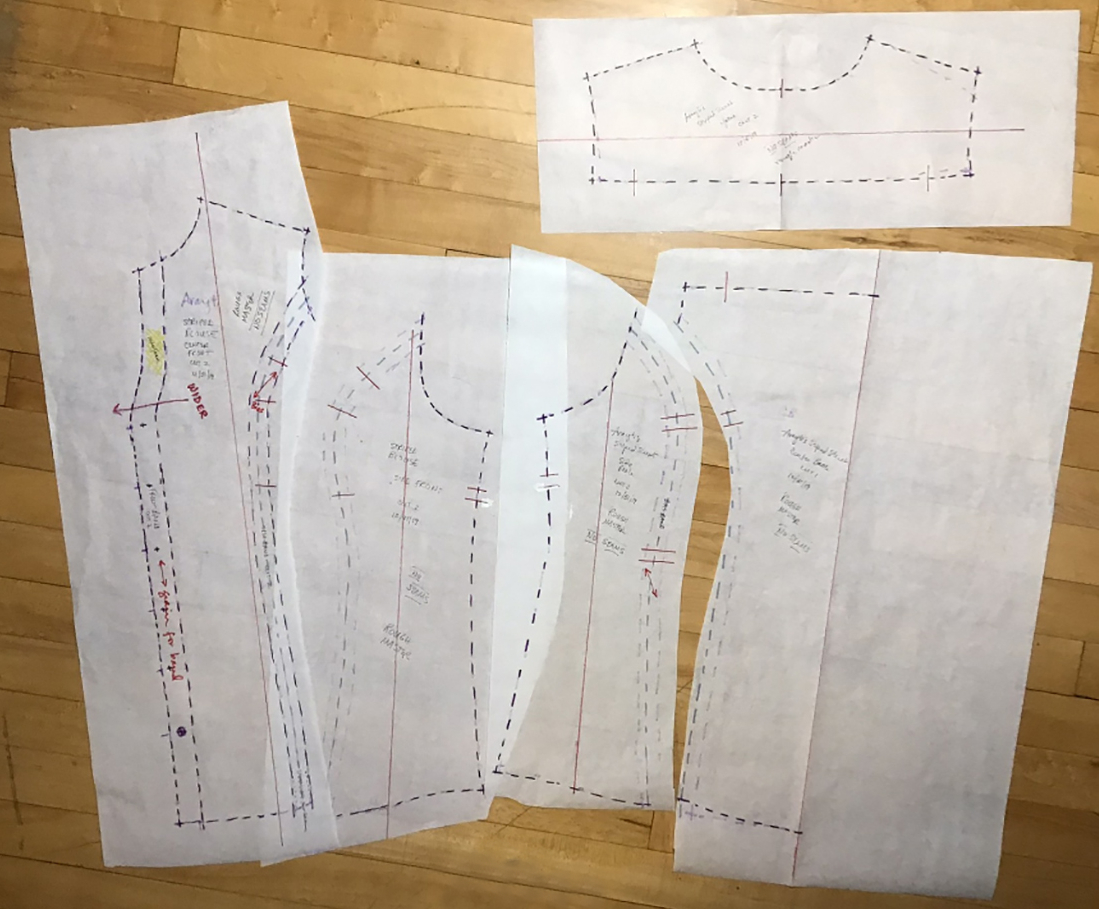
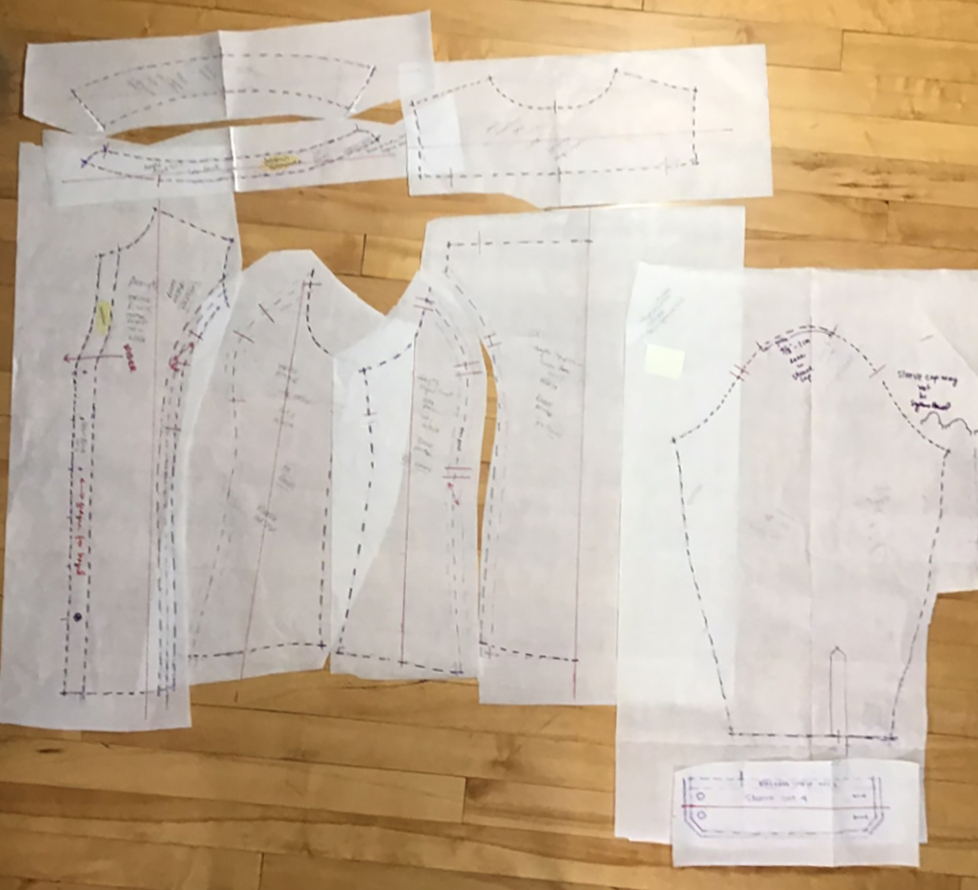
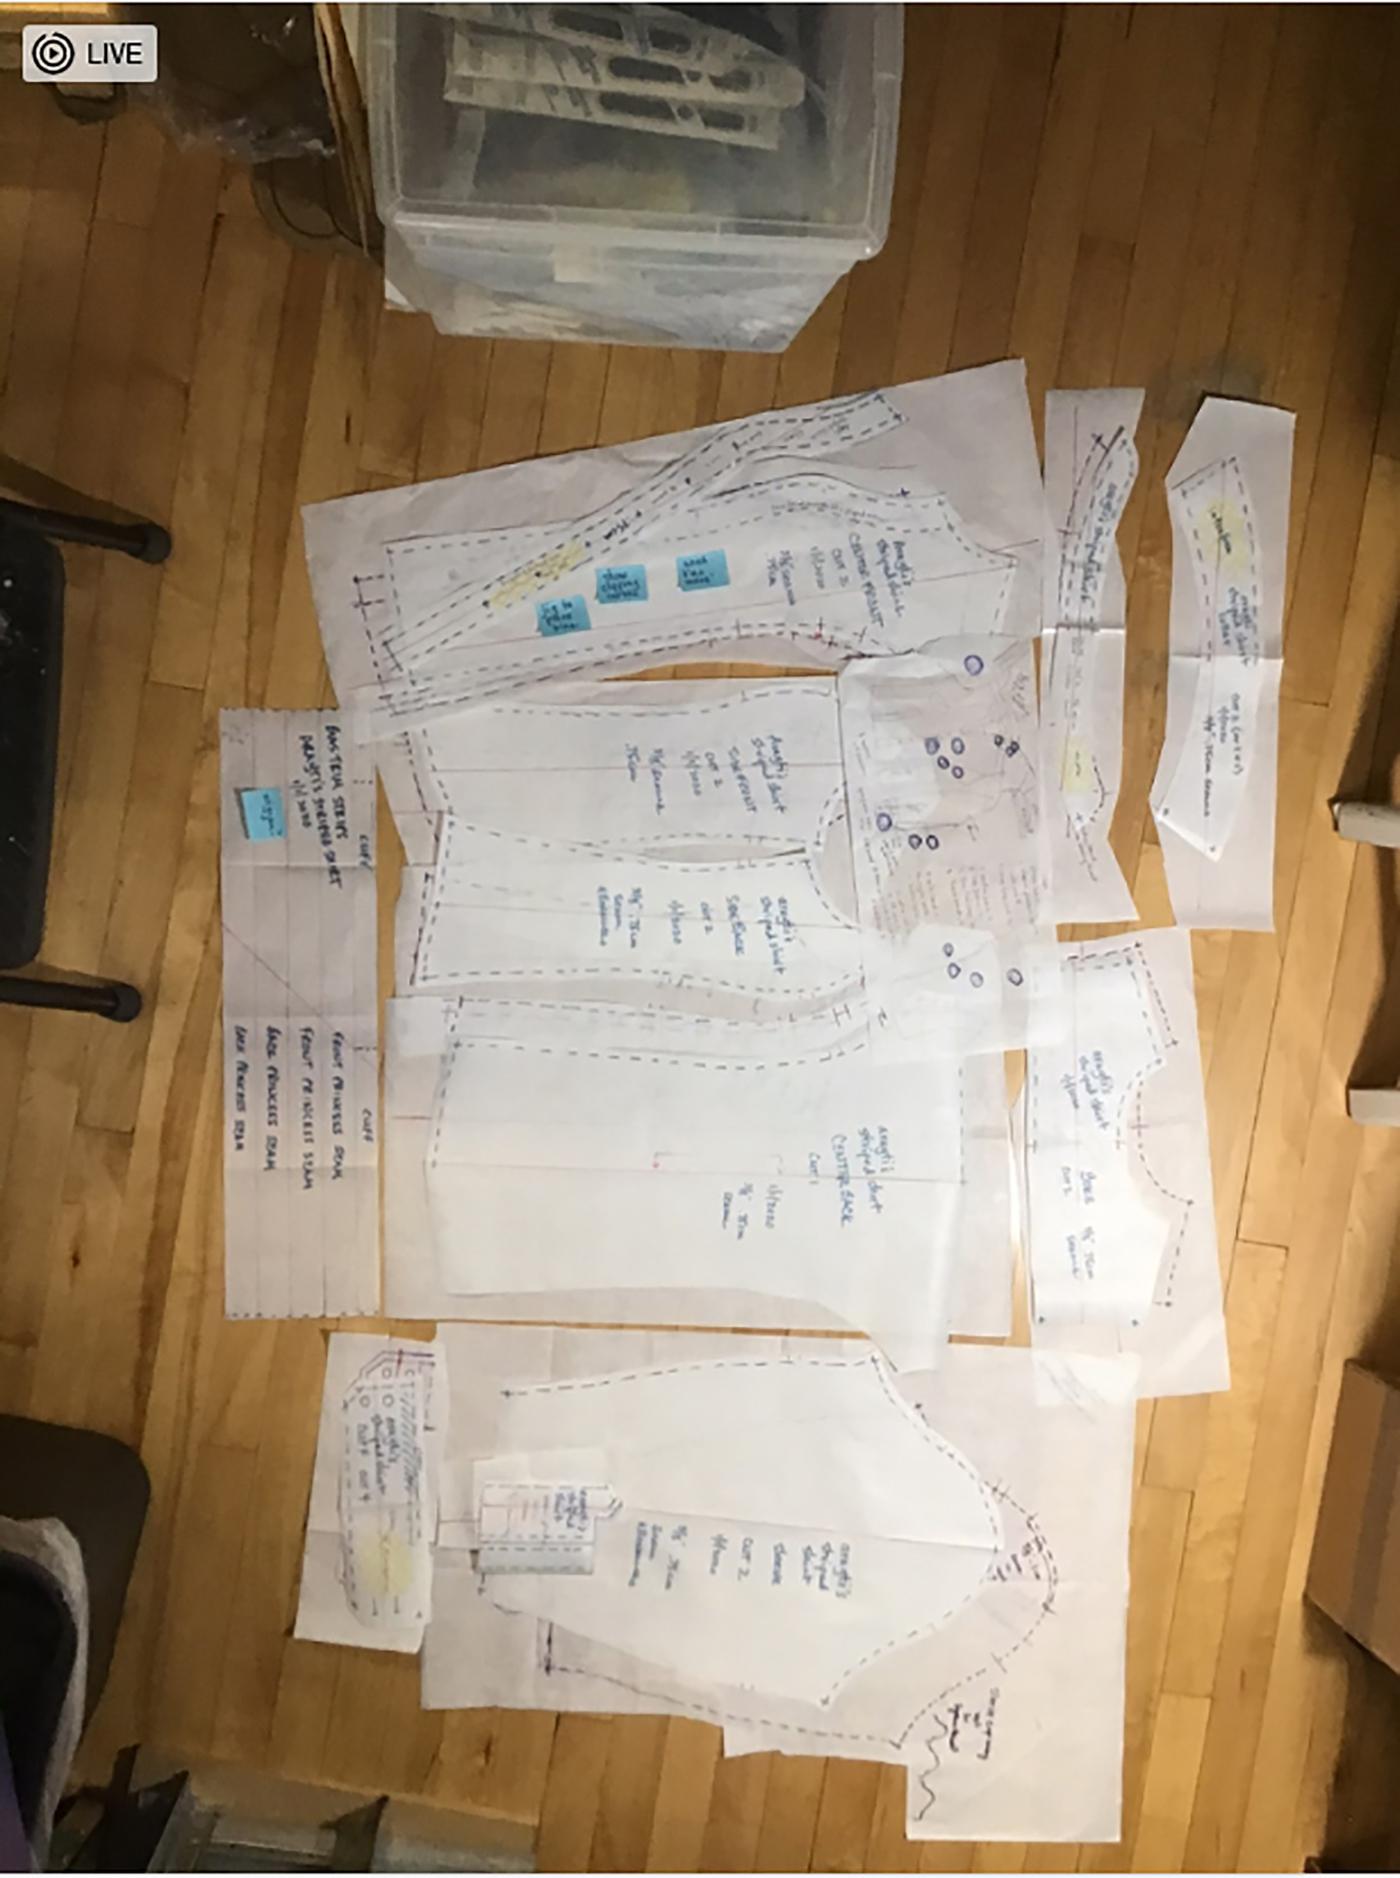
The reconciled bodice pieces.
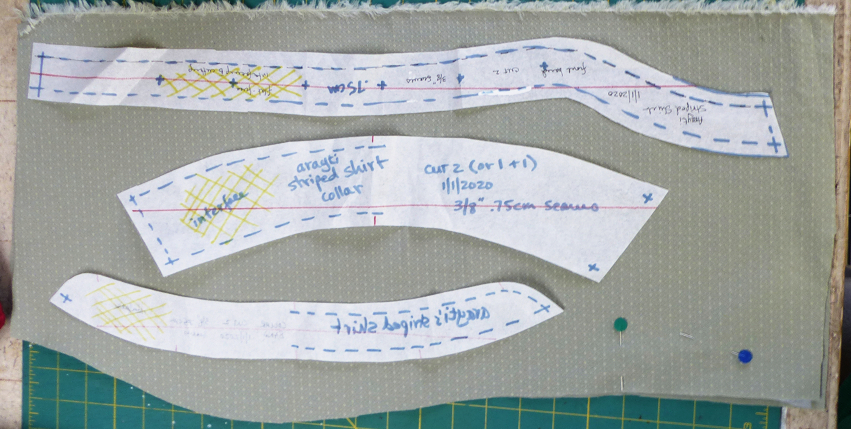
The collar band:
Match the shoulder seams of the front and back at the neck ends, pivot for a smooth curve.
Pin-tracking/truing/rectifying the pieces: Place the middle of the collar band at the center back. Align it with the back neck curve as far as you can.
Take out the CB pin and pivot to align the next section. Continue leapfrogging pins and pivoting the sewing line.
Continue to the center front.
Adjust the collar if necessary so the sewing lines come out the same.
Track the collar to the band, starting at the center back and correcting the collar to the band.
Prep for sleeve: aligning the pieces for the armscye.
Create and link to tutorial on sleeve cap height, range of motion, biceps width
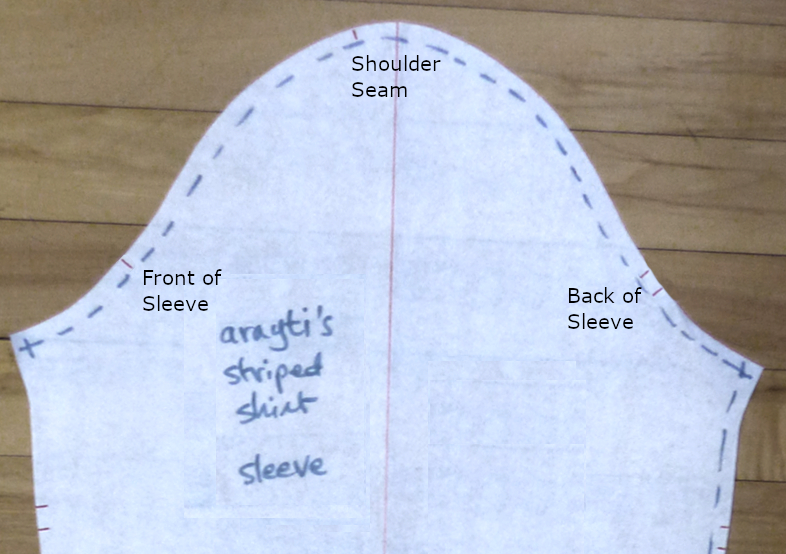
This is a sleeve cap with standard registration marks. They’re made with short nips into the seam allowance when cutting out, and lined up as you sew. The shoulder seam nip matches the actual seam itself.
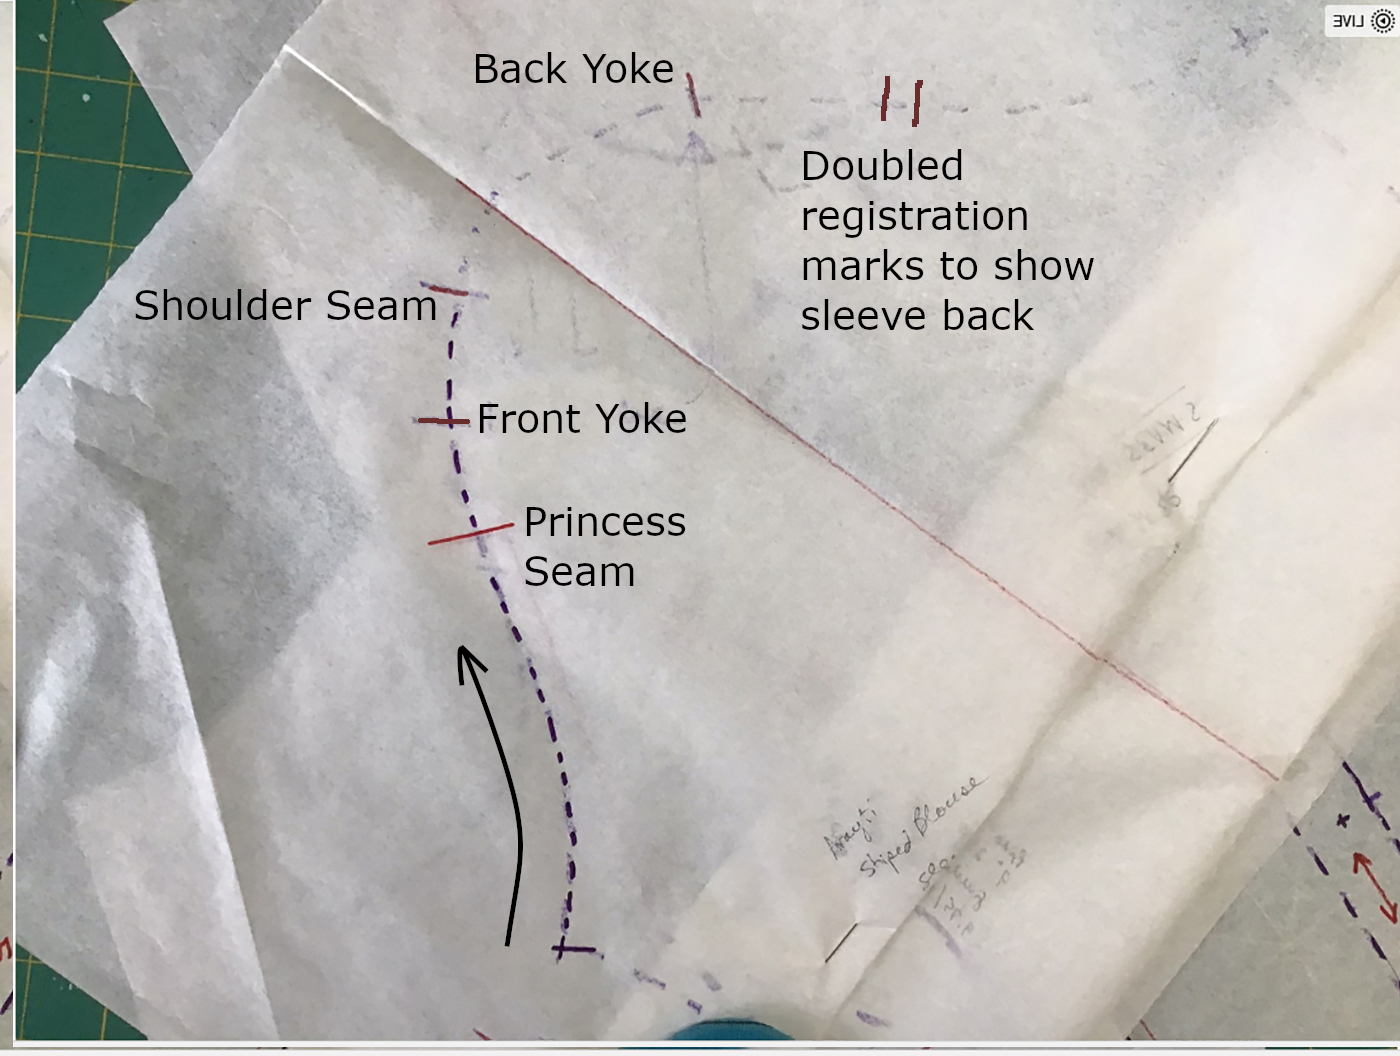
In this shirt we have the side front (Princess) seam and a yoke, so registration marks are added to match those. Begin tracking your sleeve to the side front, adding your marks as you cross seams.
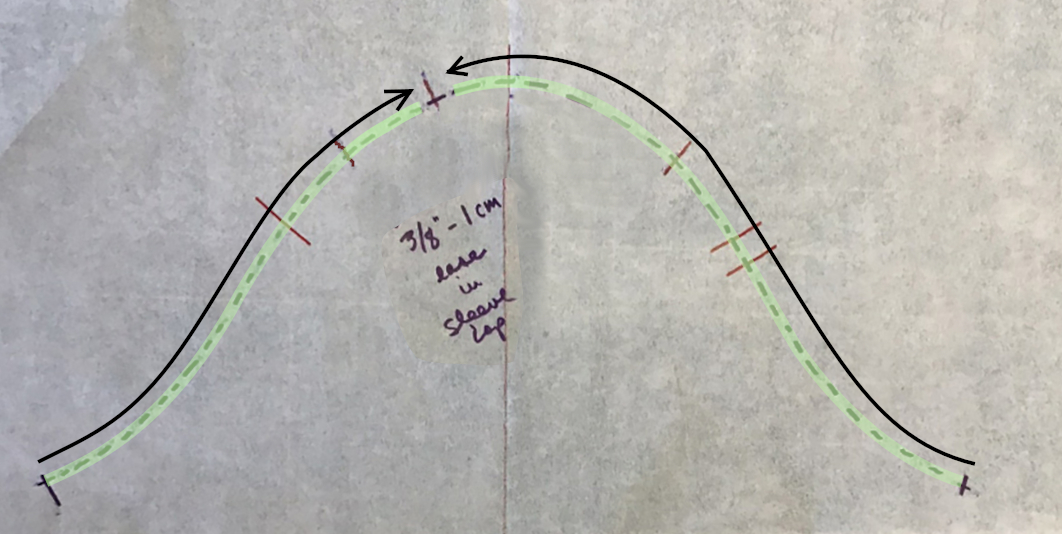
When you track from each underarm seam of the armscye to the shoulder seam registration mark, you’ll have a gap (usually around 3/8″ // 1 cm but can be more or less depending on the height of the sleeve cap). This is the ease built into the sleeve and is normal.
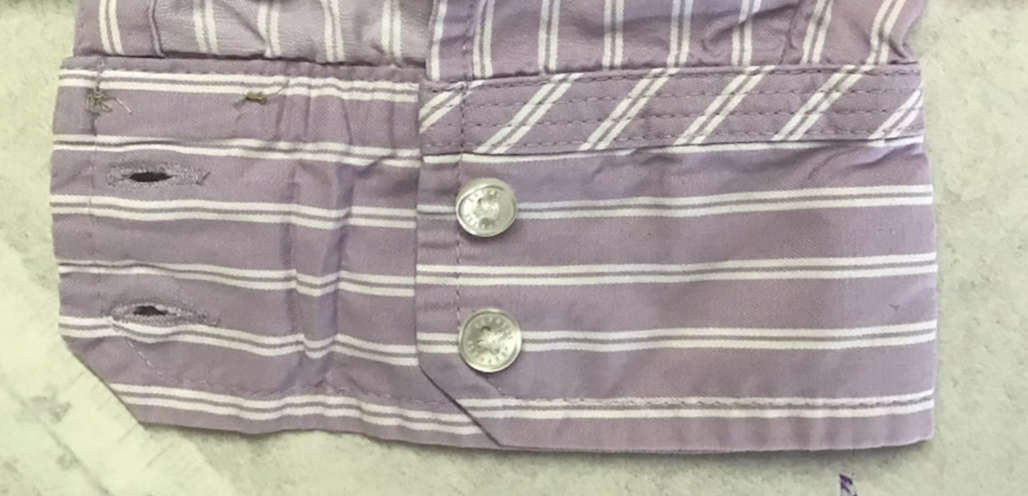
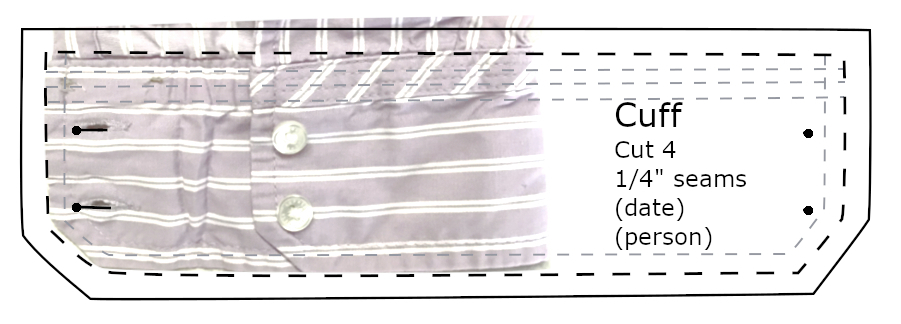
The sleeve, its placket and its cuff. The difference in width between the cuff and the sleeve at its hem is how much gets pleated out (under the narrower rectangle of the placket)
This master would let you duplicate the original shirt. That one was too tight over the bust, so fixing that is next up.
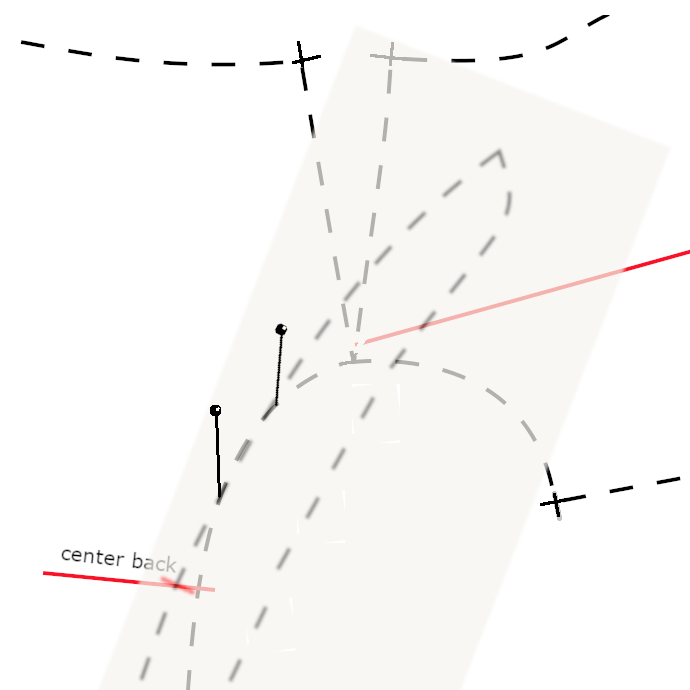
Correcting the Center Front:
Here’s the original center front. We’ll make a partial copy while we’re messing around with getting it right.
Refer to your photos/notes to see how far down the center front had to go to align. Trace the center front/band that far. Pivot from that spot, tipping the front until you’ve added enough room at the bust.
Trace the front and band that far. It was only the bust itself that needed to be expanded; the high bust/shoulder area was fine.
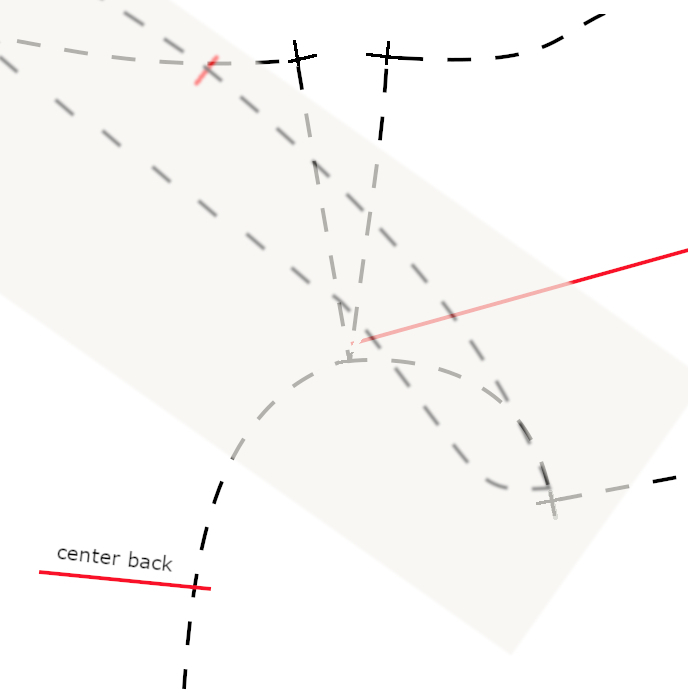
Reset over the original.
Gentle the lines to the neck edge.
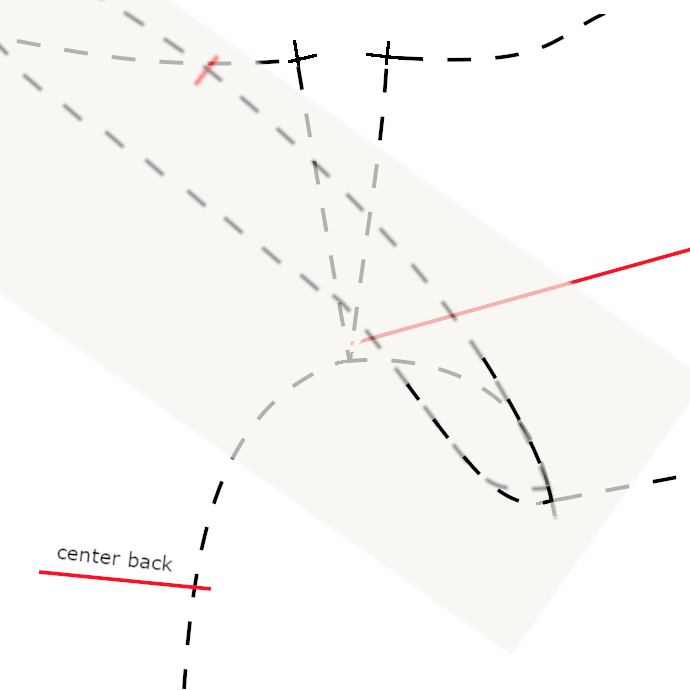
Even though the front is now wide enough, to keep it from gaping with movement when worn, a button needs to be at the fullest circumference of the bust. Space any others up and down from there.
We’re now ready to trace off working pattern pieces, adding their seam allowances.
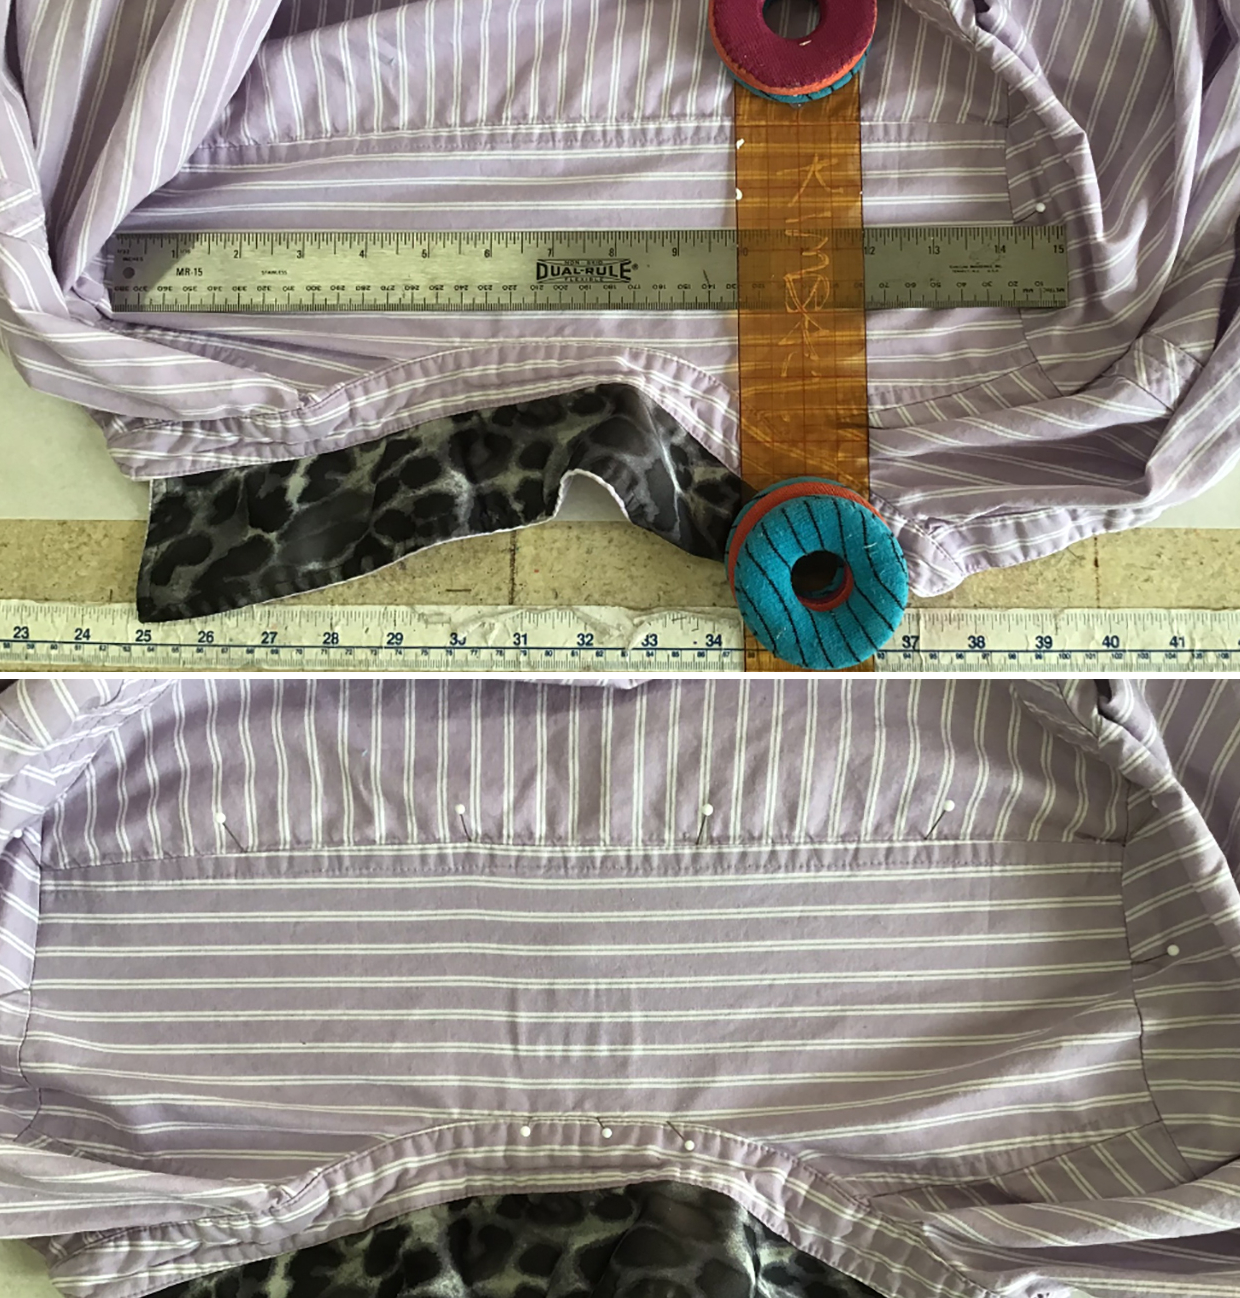
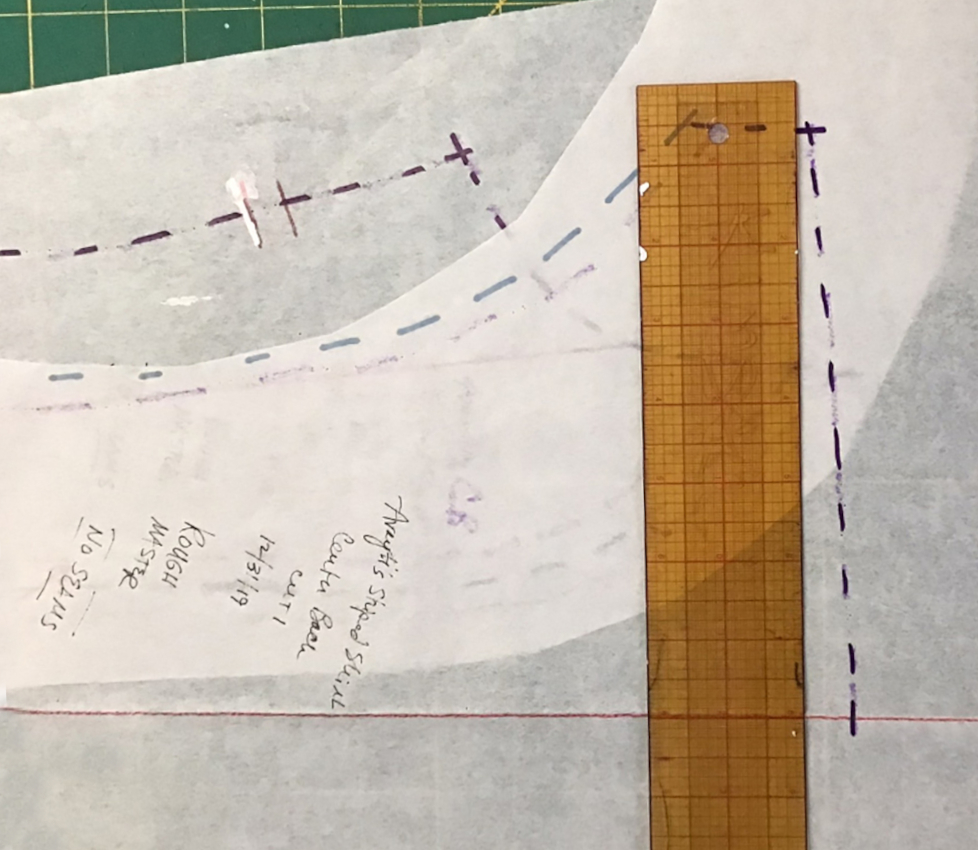
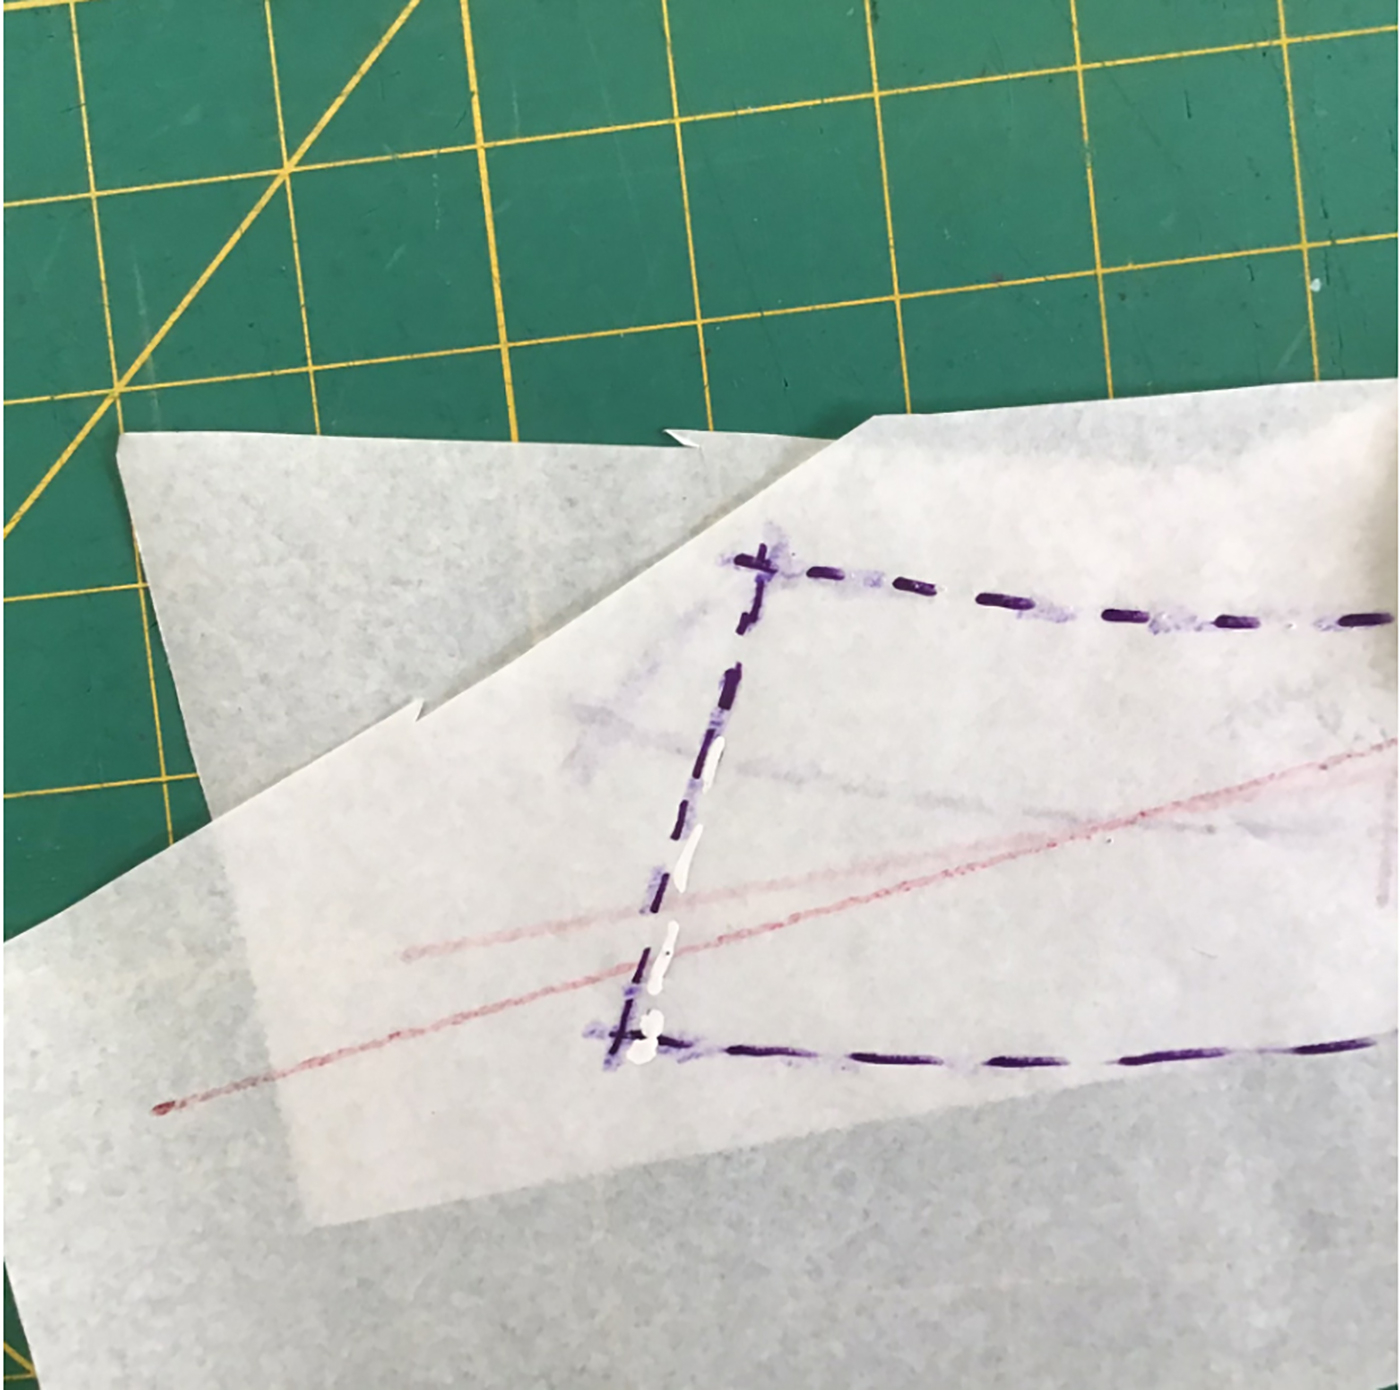
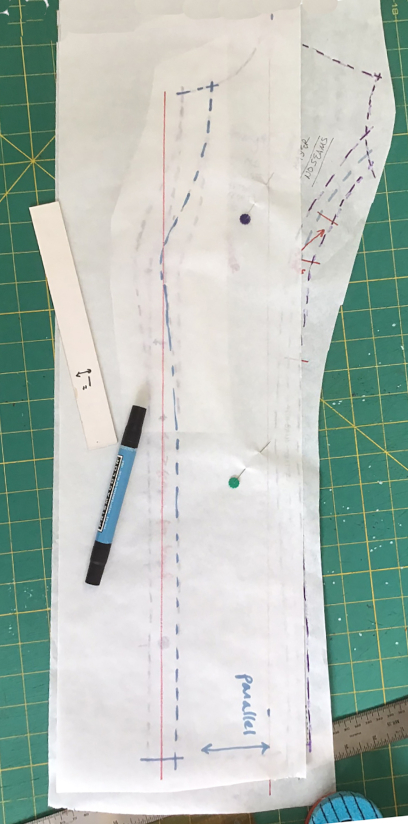
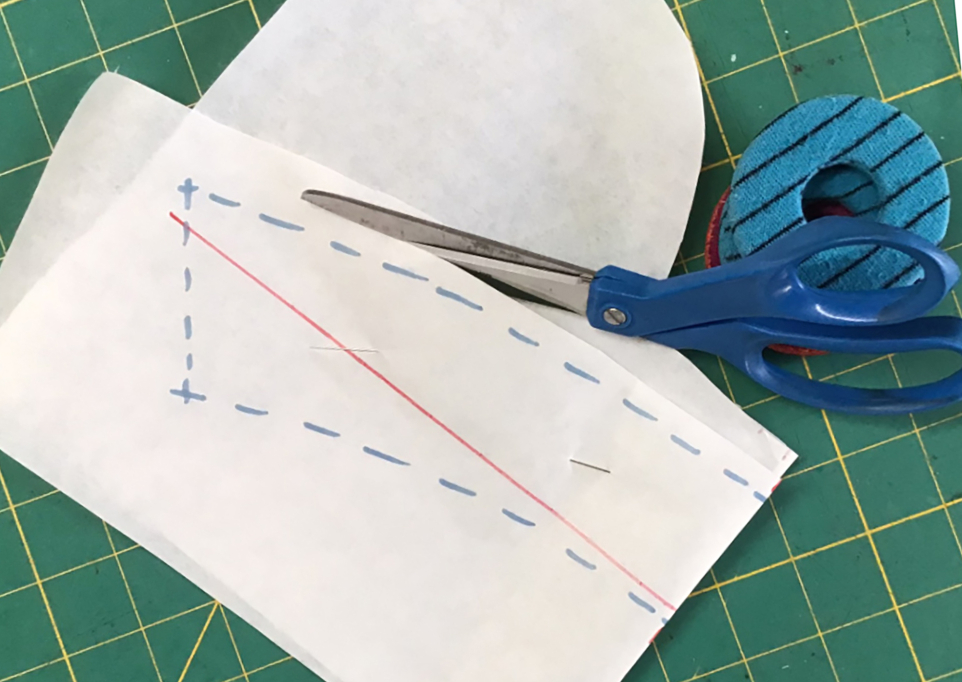
Work from the center front, top down. First up is the front band. Trace off the seam where it joins the center front. Its grain line will be parallel to the front piece (unless you’re putting it on the diagonal).
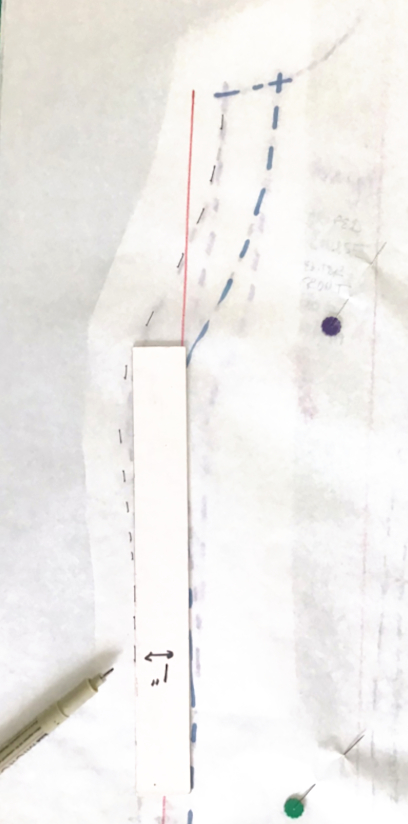
Figure out how wide you want your front band (you may have a ruler that works). Here I’ve cut a strip of cardboard. Square out from your marked seam in short sections, following the original curve.
Go over your lines with permanent marker (if you get off, correct with white-out). Put a cross at the fullest part of the bust for that button. Use the distance from your original pattern to place the next one below it.
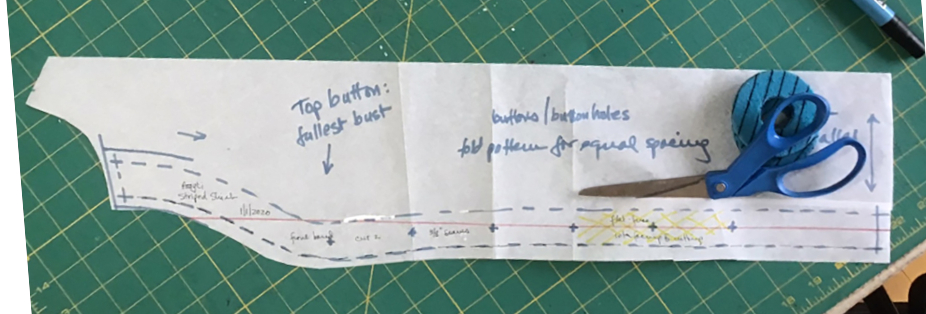
Fold the band at the cross for the second buttonhole, lining up the band sections between. Flip the pattern piece over and draw a new buttonhole cross over the top one.
Continue tracing off and labeling pieces. Refer to your original sketch to be sure you’ve gotten everything.
Adding seam and hem allowances:
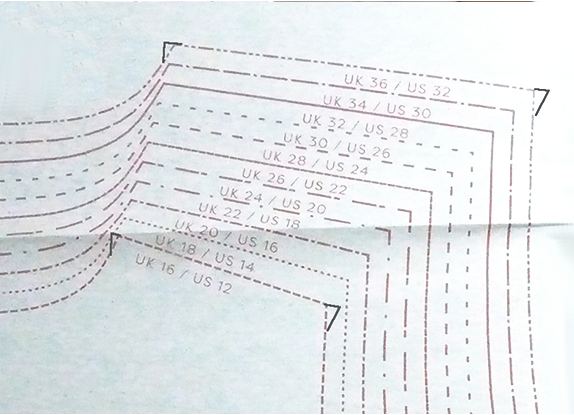
Seam allowances on home sewing patterns are often 5/8″ // 1.5 cm, though they can be as narrow as 1/4″ // .6 cm for collar pieces, crotch curves, etc. so you don’t have to trim them after sewing. Couture uses 1″ // 1.5 cm; some outerwear companies use 1/2″ //1.25 cm. What’s important is that you write the width(s) on each of your pattern pieces so that if you’re interrupted, you know what you used. Why waste energy trying to remember when the solution is easy?
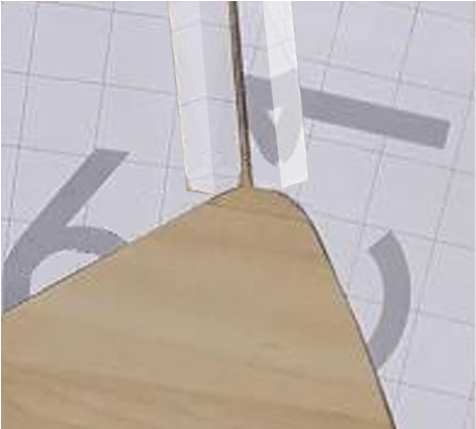
This commercial pattern company neglected to to consider which way the seam allowances will fold after sewing. They’re usually pressed open, which needs the correction shown on two sizes here.
When turned back (lighter strips) the fabric does not extend to the bodice’s raw edges.
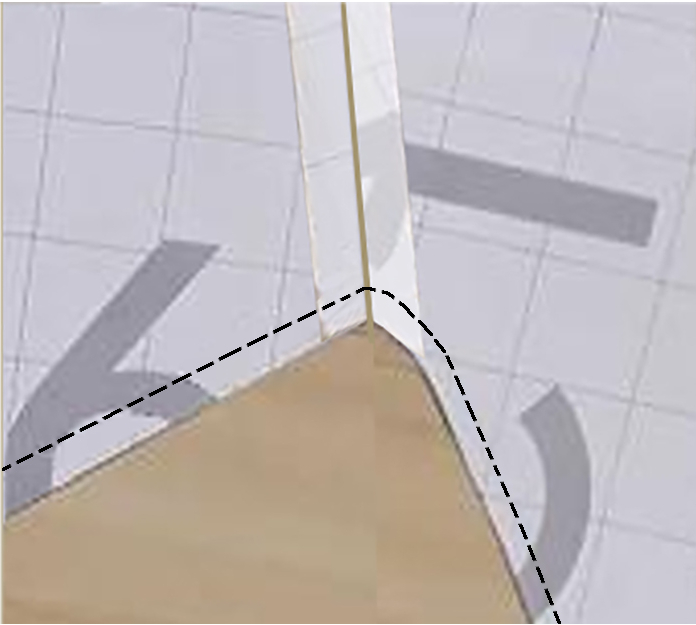
There’s no way to fix the error once the garment has been cut: those missing tiny triangles are crucial.
The corrected pattern
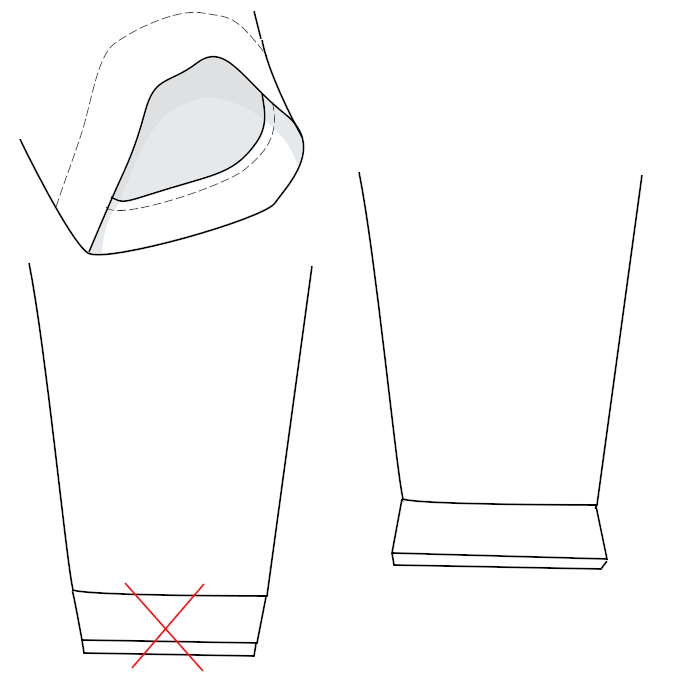
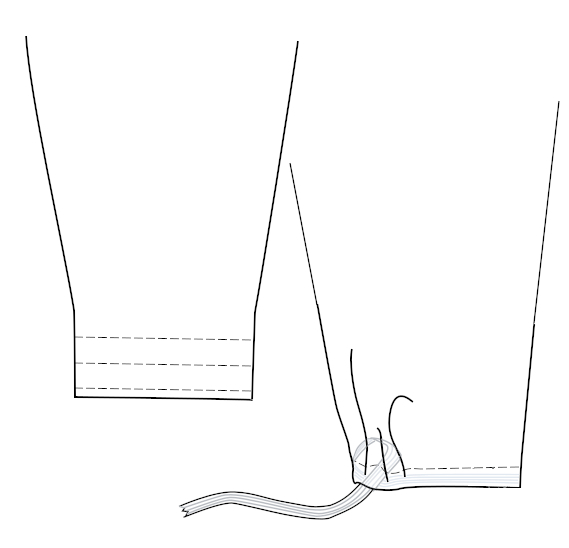
A tapered sleeve or pants leg must likewise have its hem (and seam allowance) mirror the finished shape.
For an elastic cuff where the fabric turns up for a self-casing, simply straighten out the bottom area.
Continue adding buttons down the length of the band. Check this off your master schematic.
Pattern paper is cheap; I usually throw in an extra layer and cut a spare piece at the same time for any garment likely to be made multiple times (here, there was a spare for Arayti). All that’s necessary then is to add the grainline and a label. After the original working pattern is starting to show wear, pull out the duplicate and go. No need to retrace from the master.
Don’t bother to laboriously measure out your seam allowances (these are narrow, 1/4″ // .6 cm) other than when you first begin; teach yourself to cut the right distance from your sewing line. Even the most insecure, ham-handed students I’ve ever had were able to free-hand-cut the correct amount after one or two pattern pieces, albeit with re-cutting where not far enough and taping in a spot or two.
Though these red registration marks may extend to the sewing line, make tiny clips only deep enough to find easily.
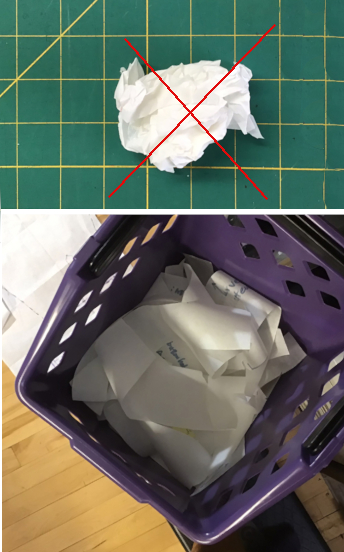
Drop your scrap into your waste bin; these strips can be used for smaller pattern pieces. When you’re finished with your pattern you can have an orgy of crumpling them up.
Layer your corrected piece (here a collar) using scrap.
The pieces are folded precisely (hold them up to a light to check) and cut together.
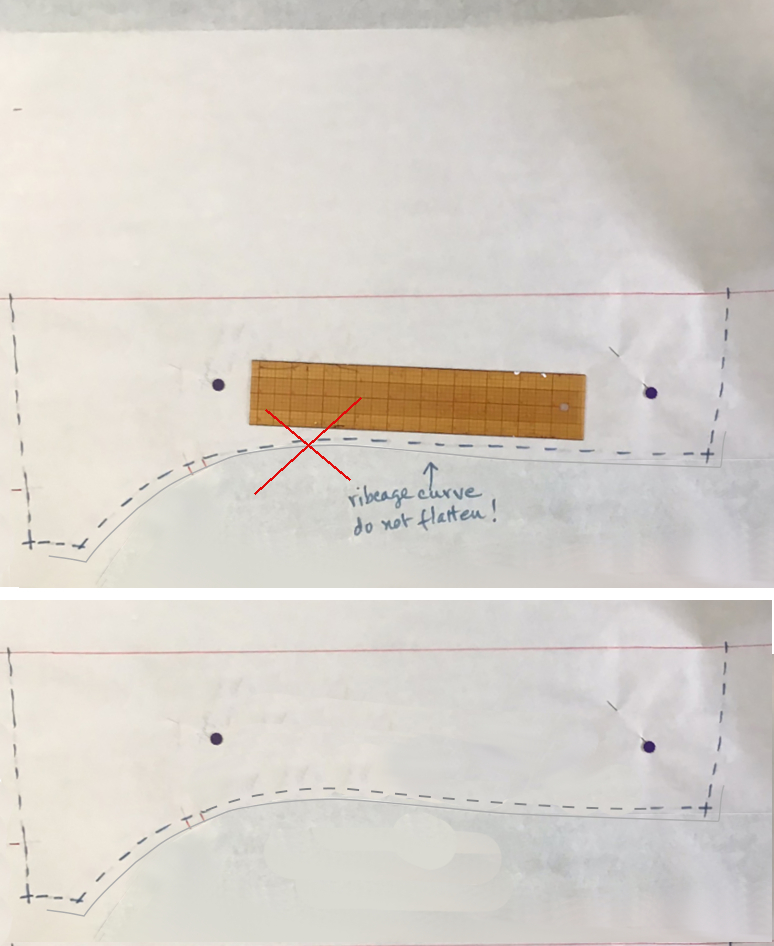
Though drawing in long, smooth strokes is generally good, be careful not to flatten out critical curves. They’re why you like the fit of your pattern.
%%%%%%%%%%%%%%%%
6-18-23 100
Lay your interfacing pieces exactly on grain on a comfortably big enough piece of fabric. Take them off and flat-fuse one or both layers. Replace the pieces and cut.