
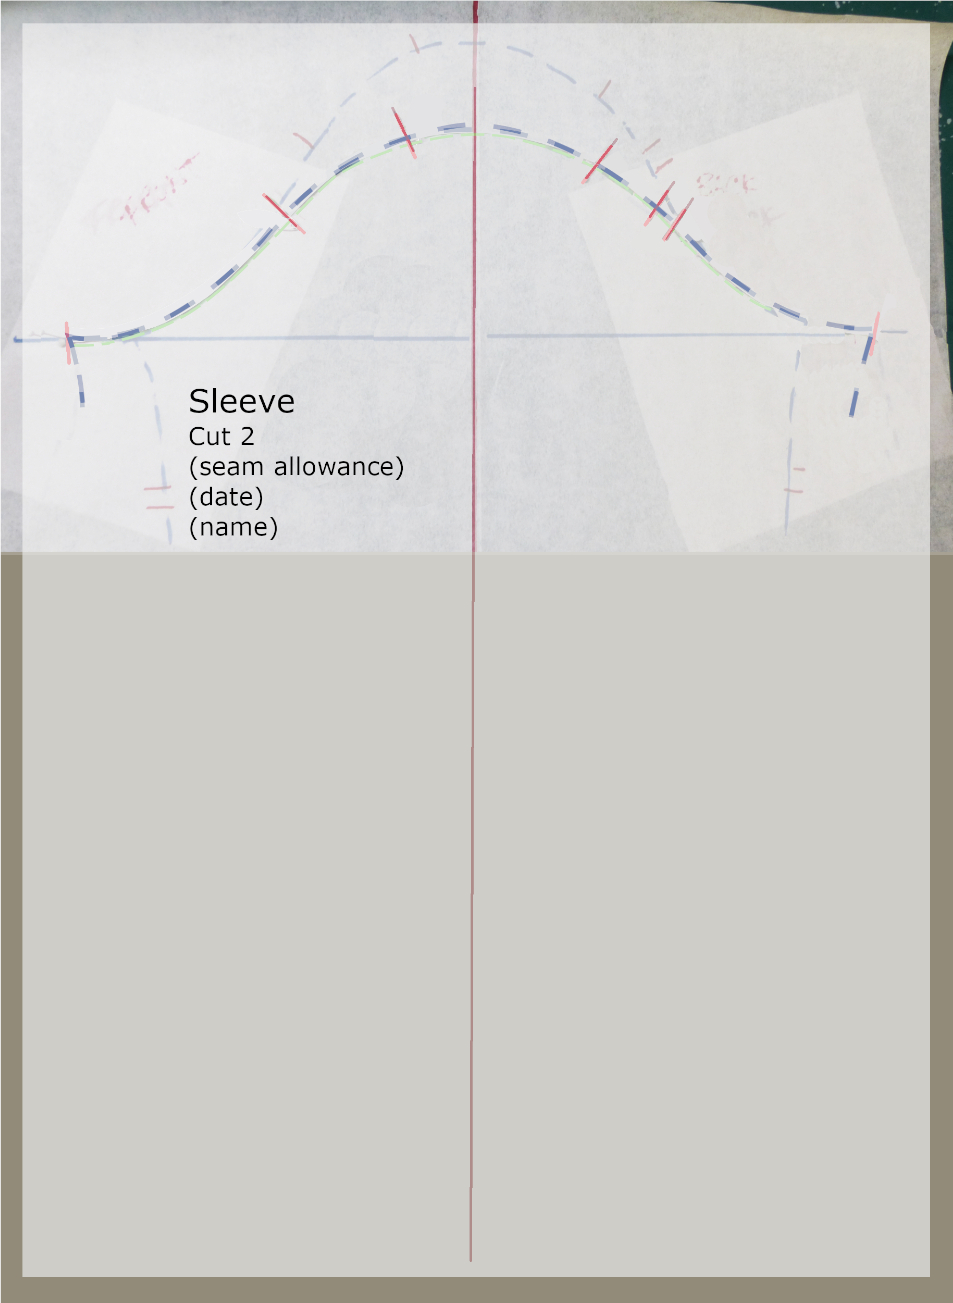
Widening a sleeve pattern for a fuller upper arm:
This is a more extreme example than many of you will need. The principles and steps remain the same.
Wash-out marker
Permanent market
Straightedge (ruler)
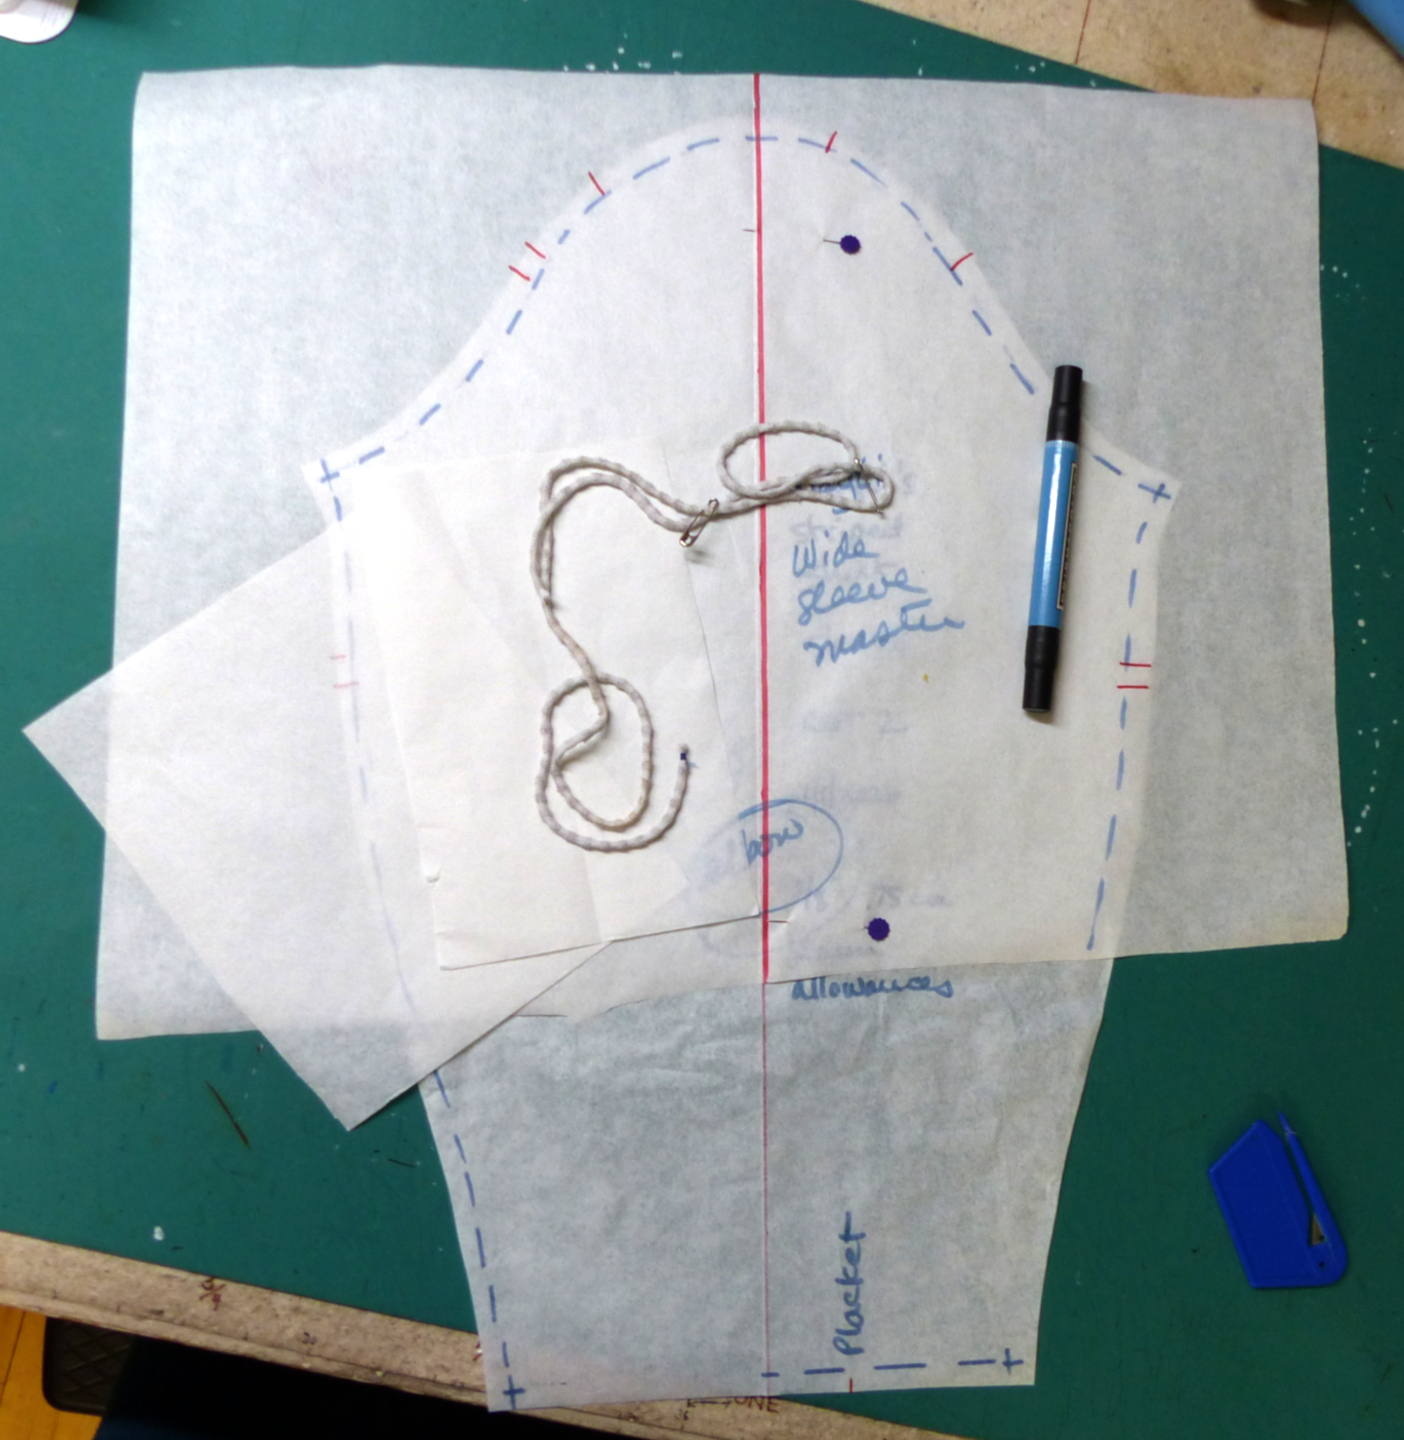
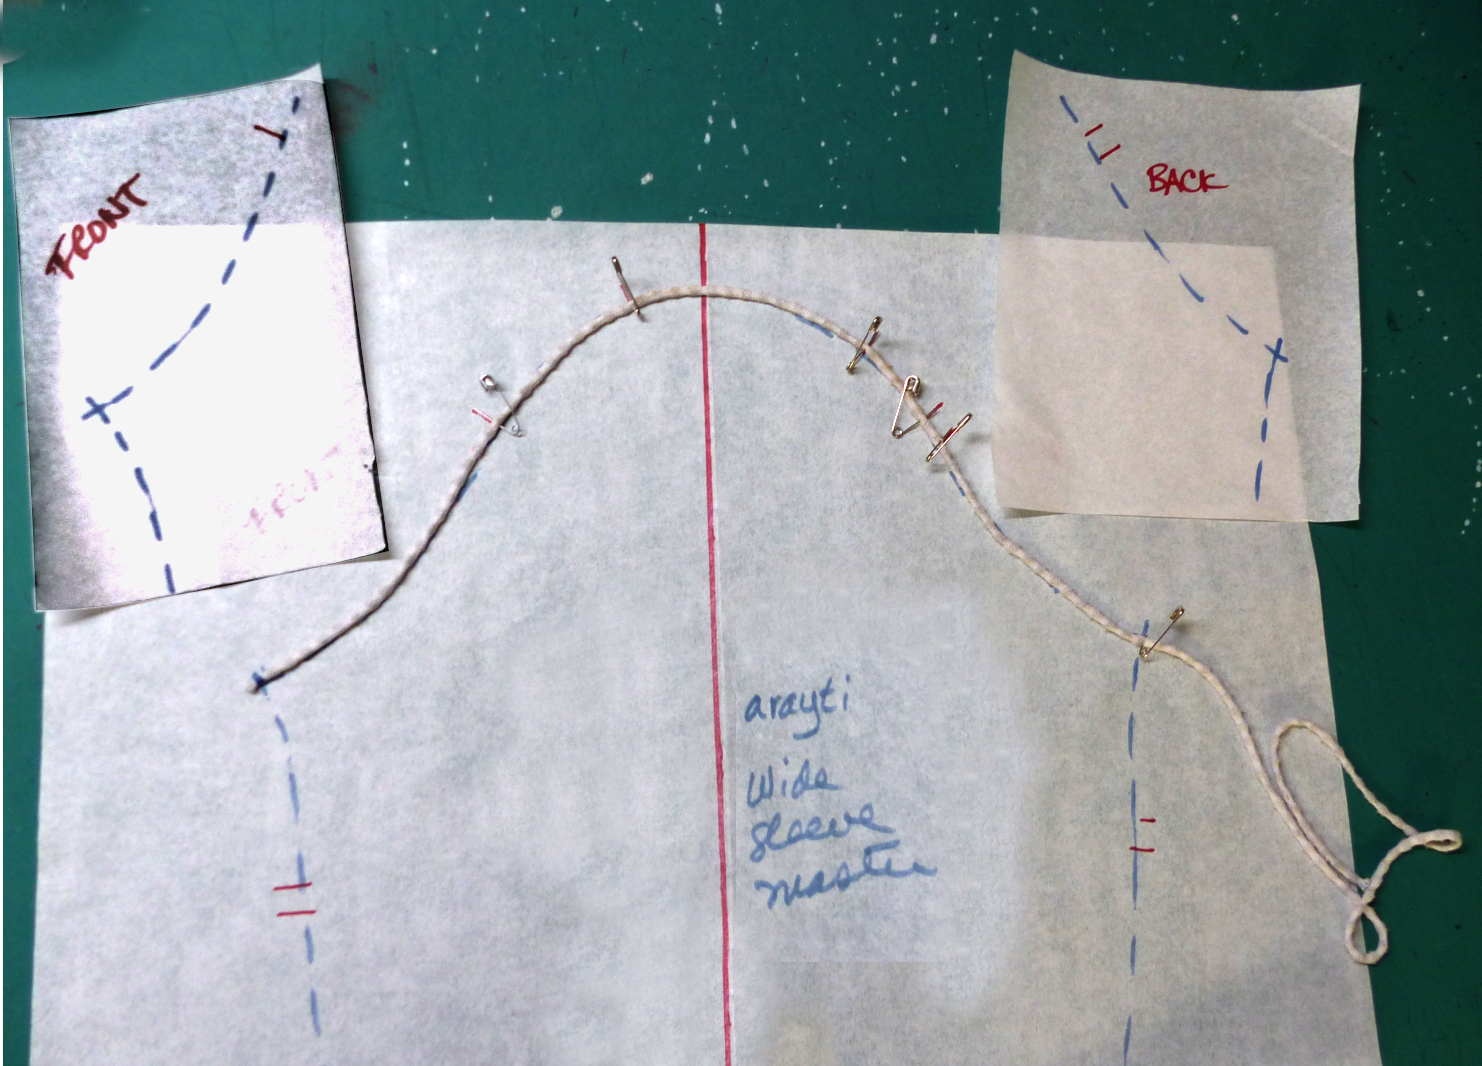
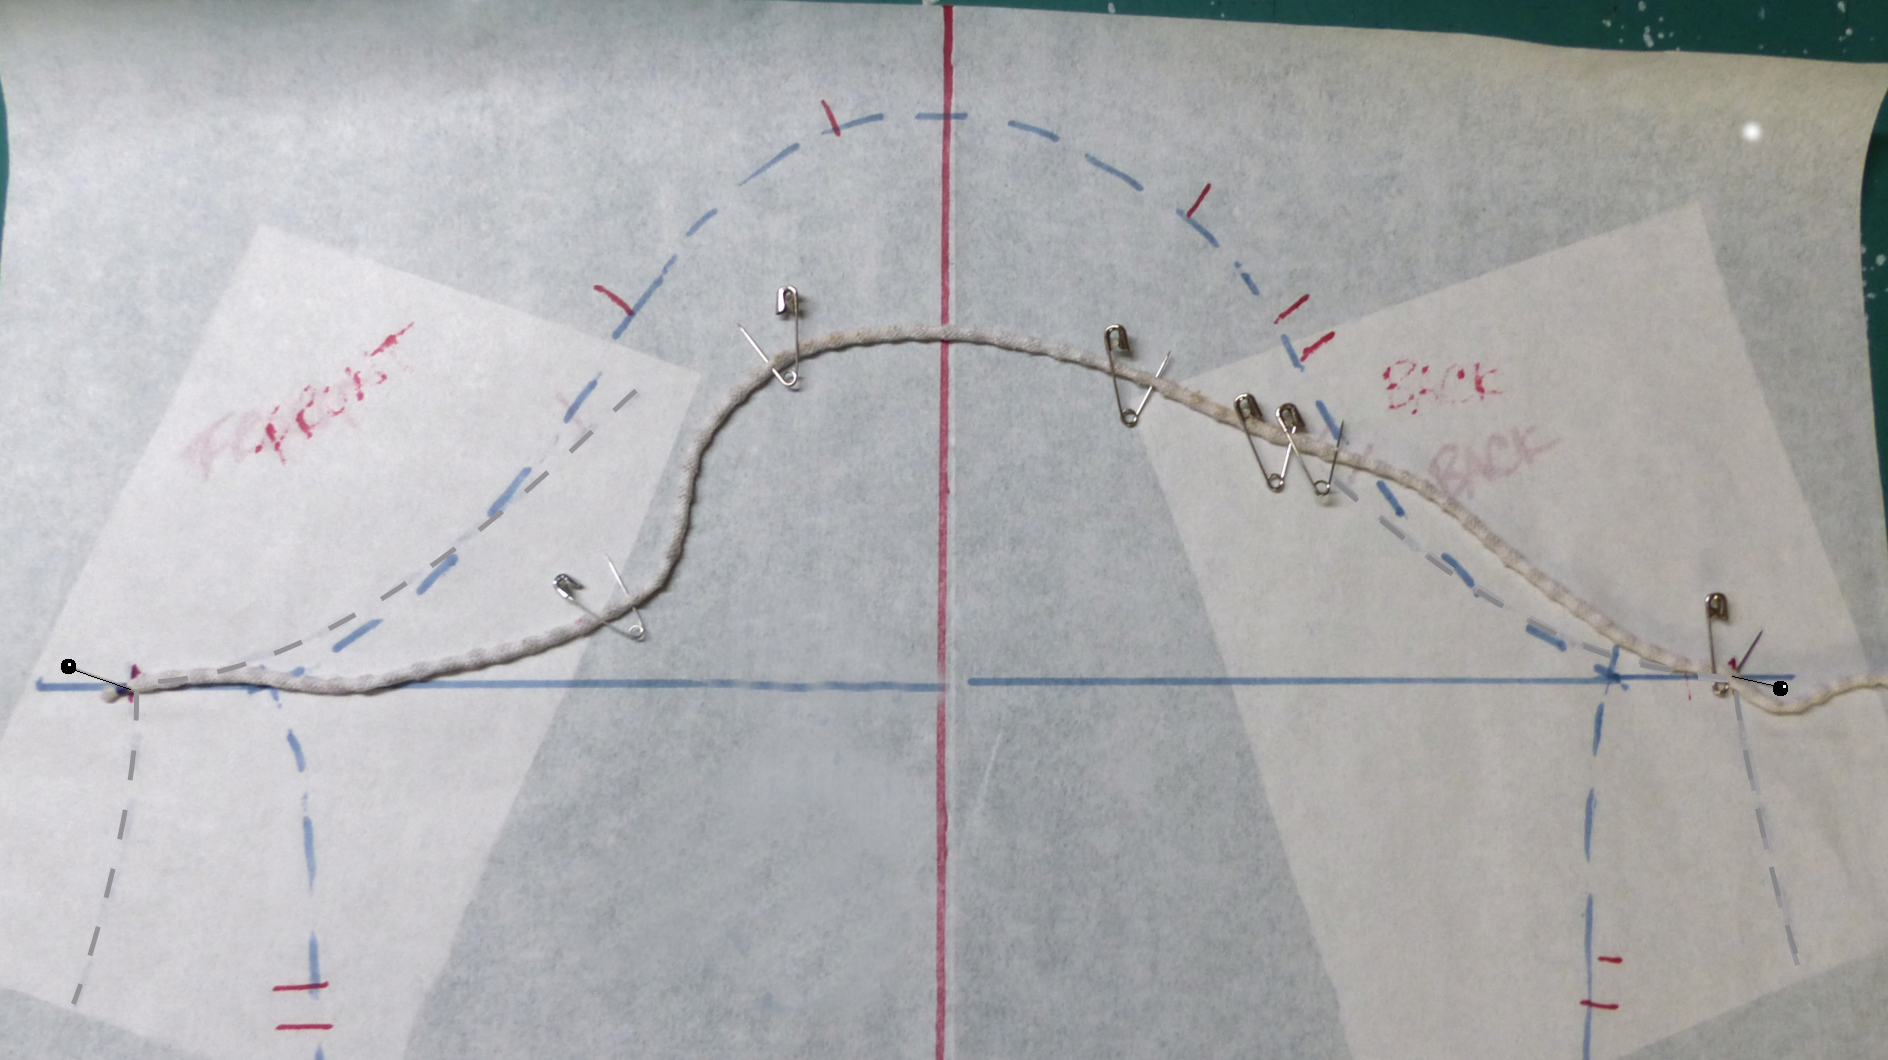
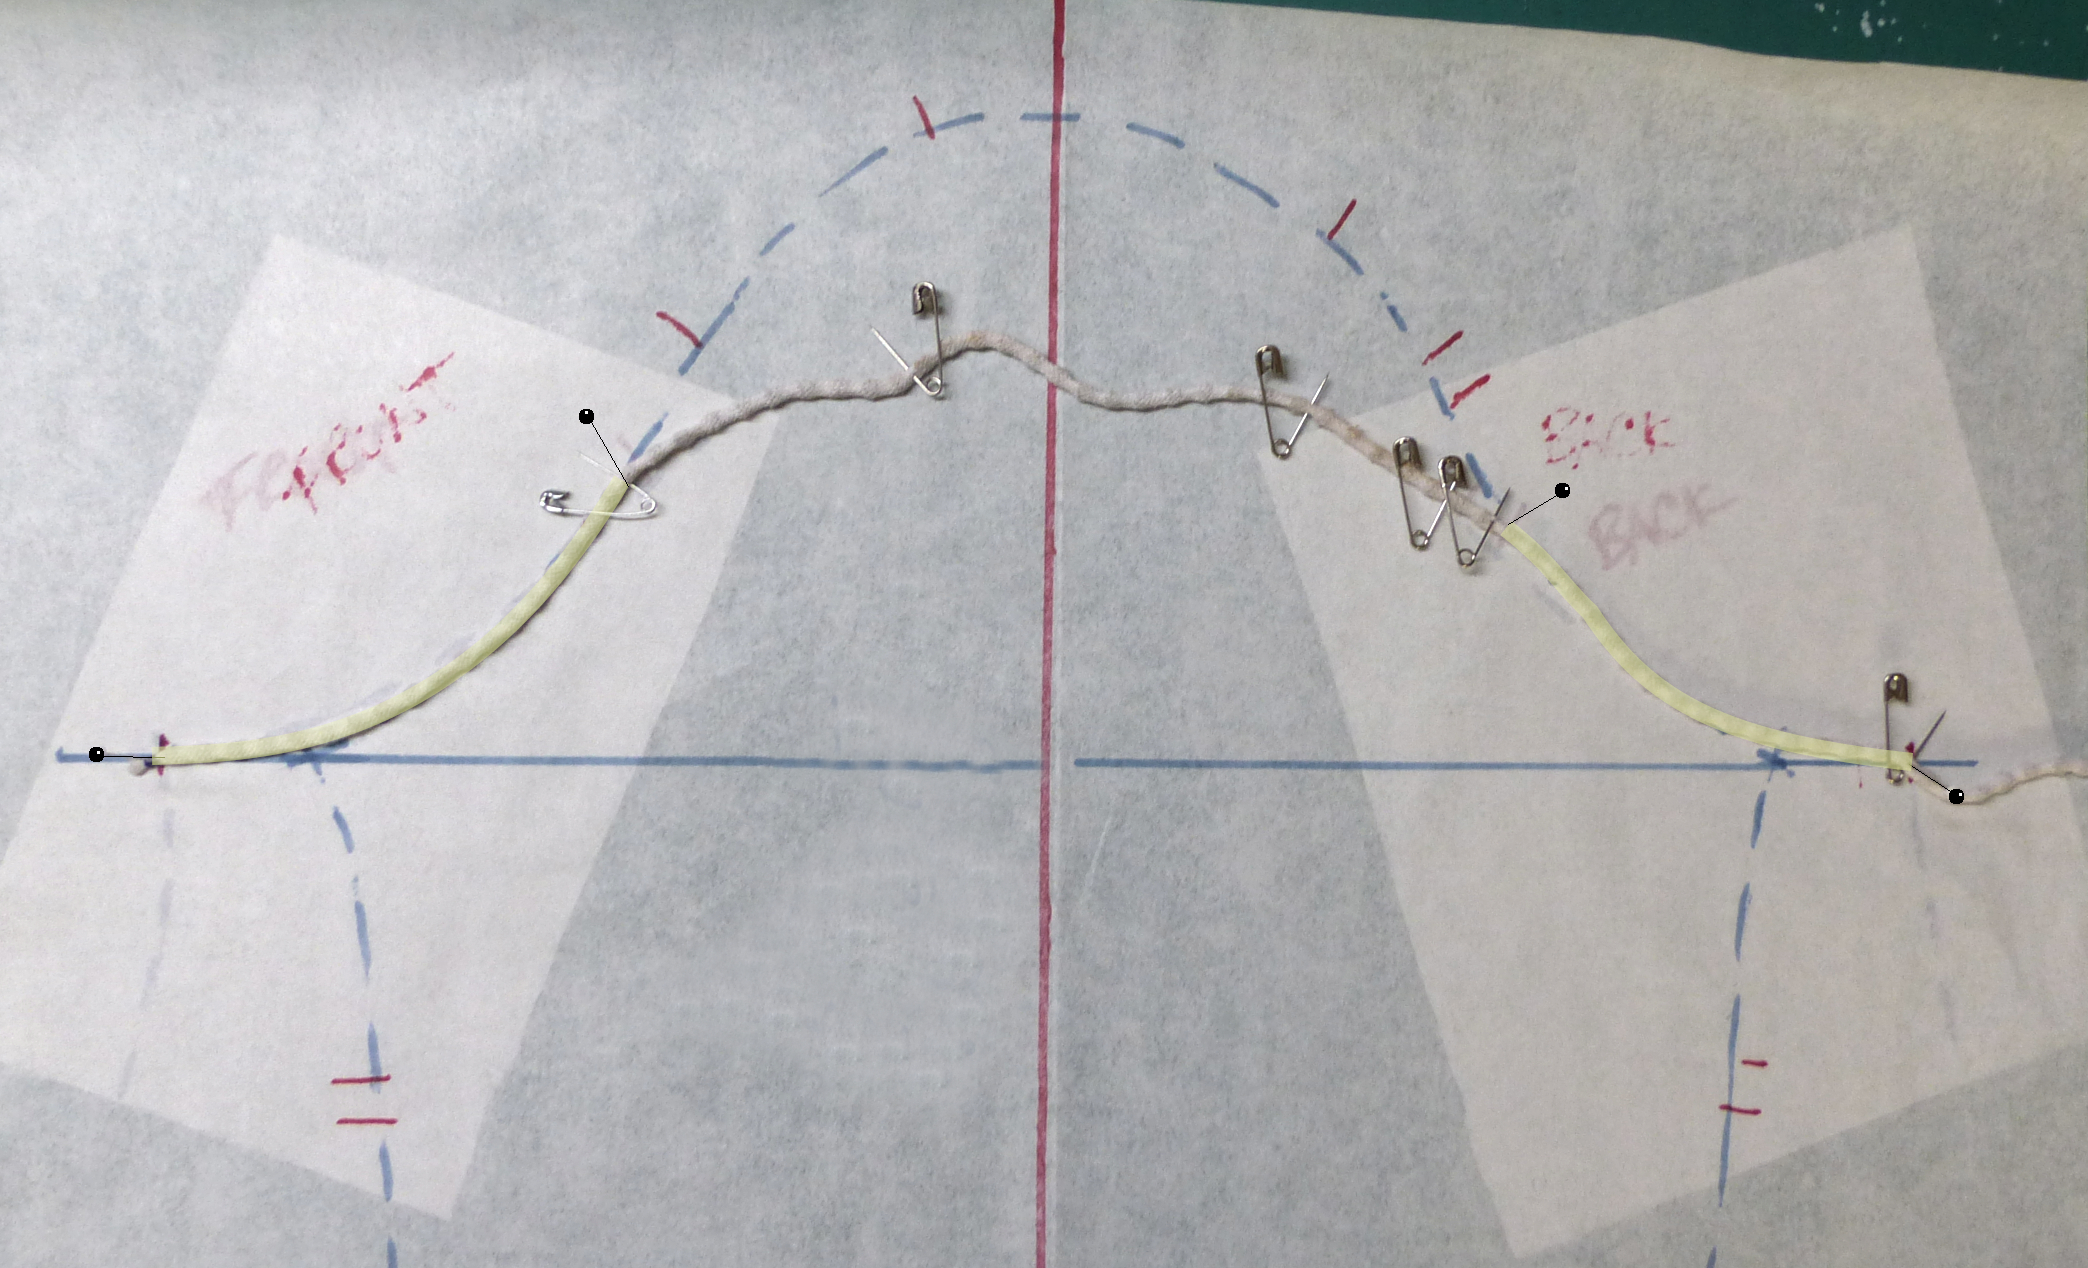
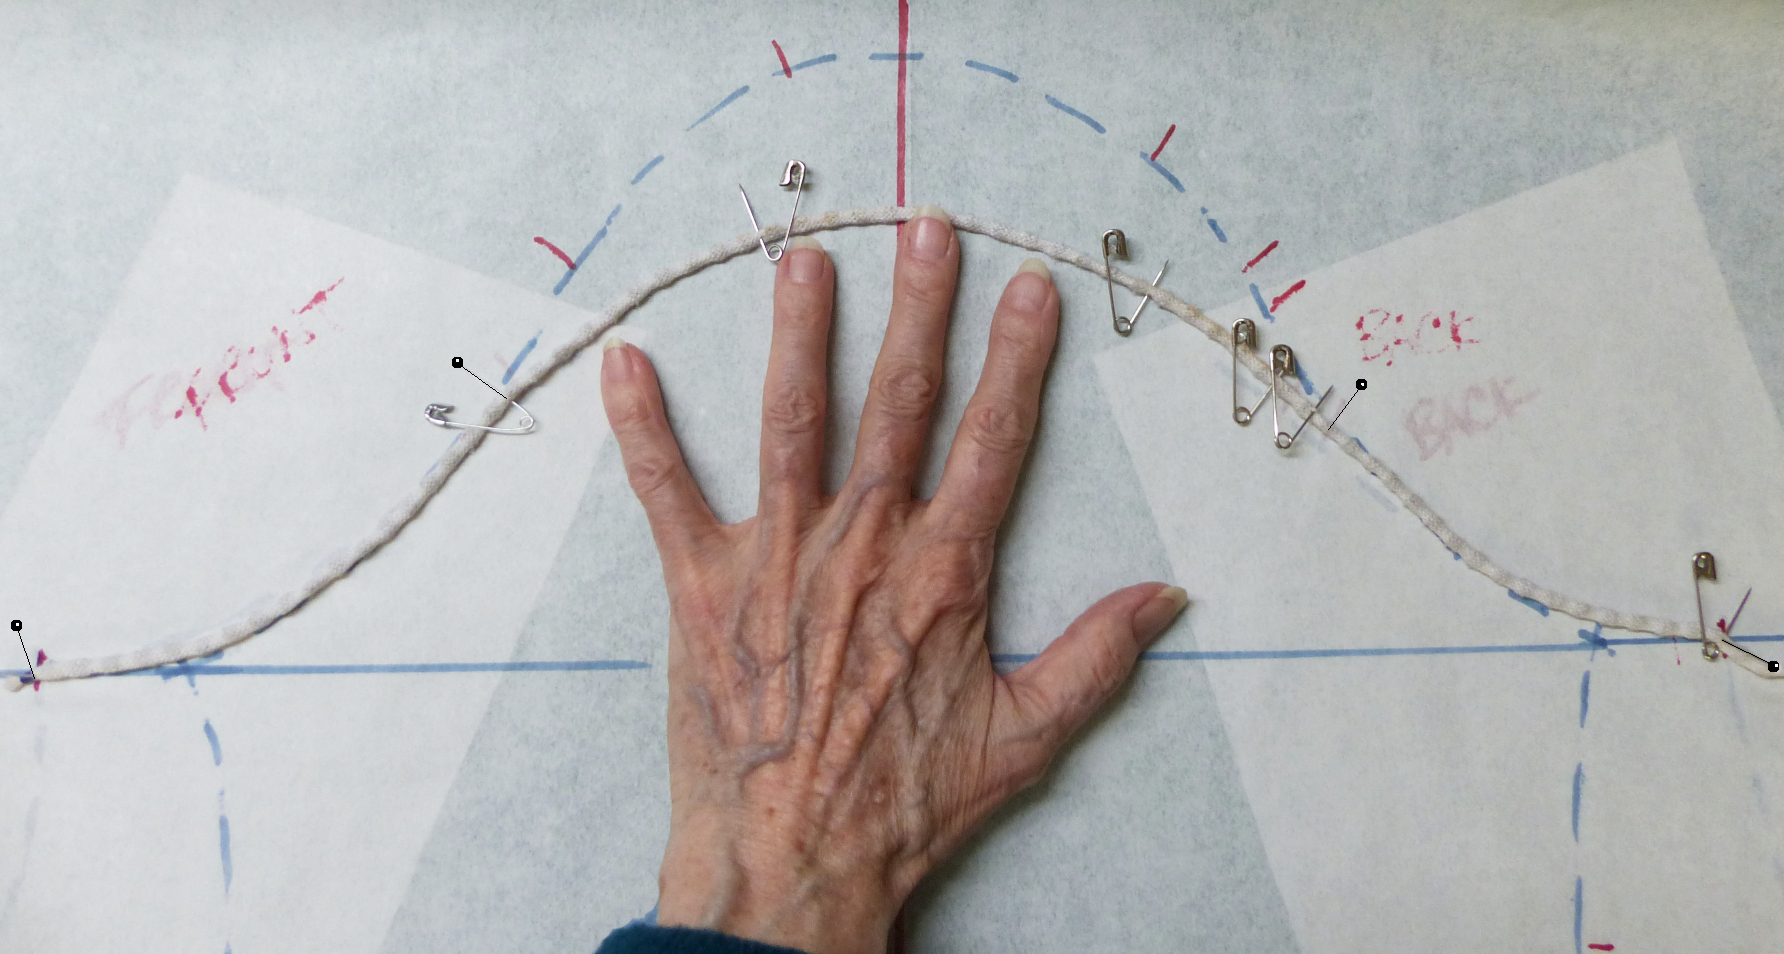
Flexible, non-stretching cord – I use drapery weight, little pellets in a thin cotton tube
Pins, straight for pinning down into the mat, and safety for marking the cross lines on the armscye line
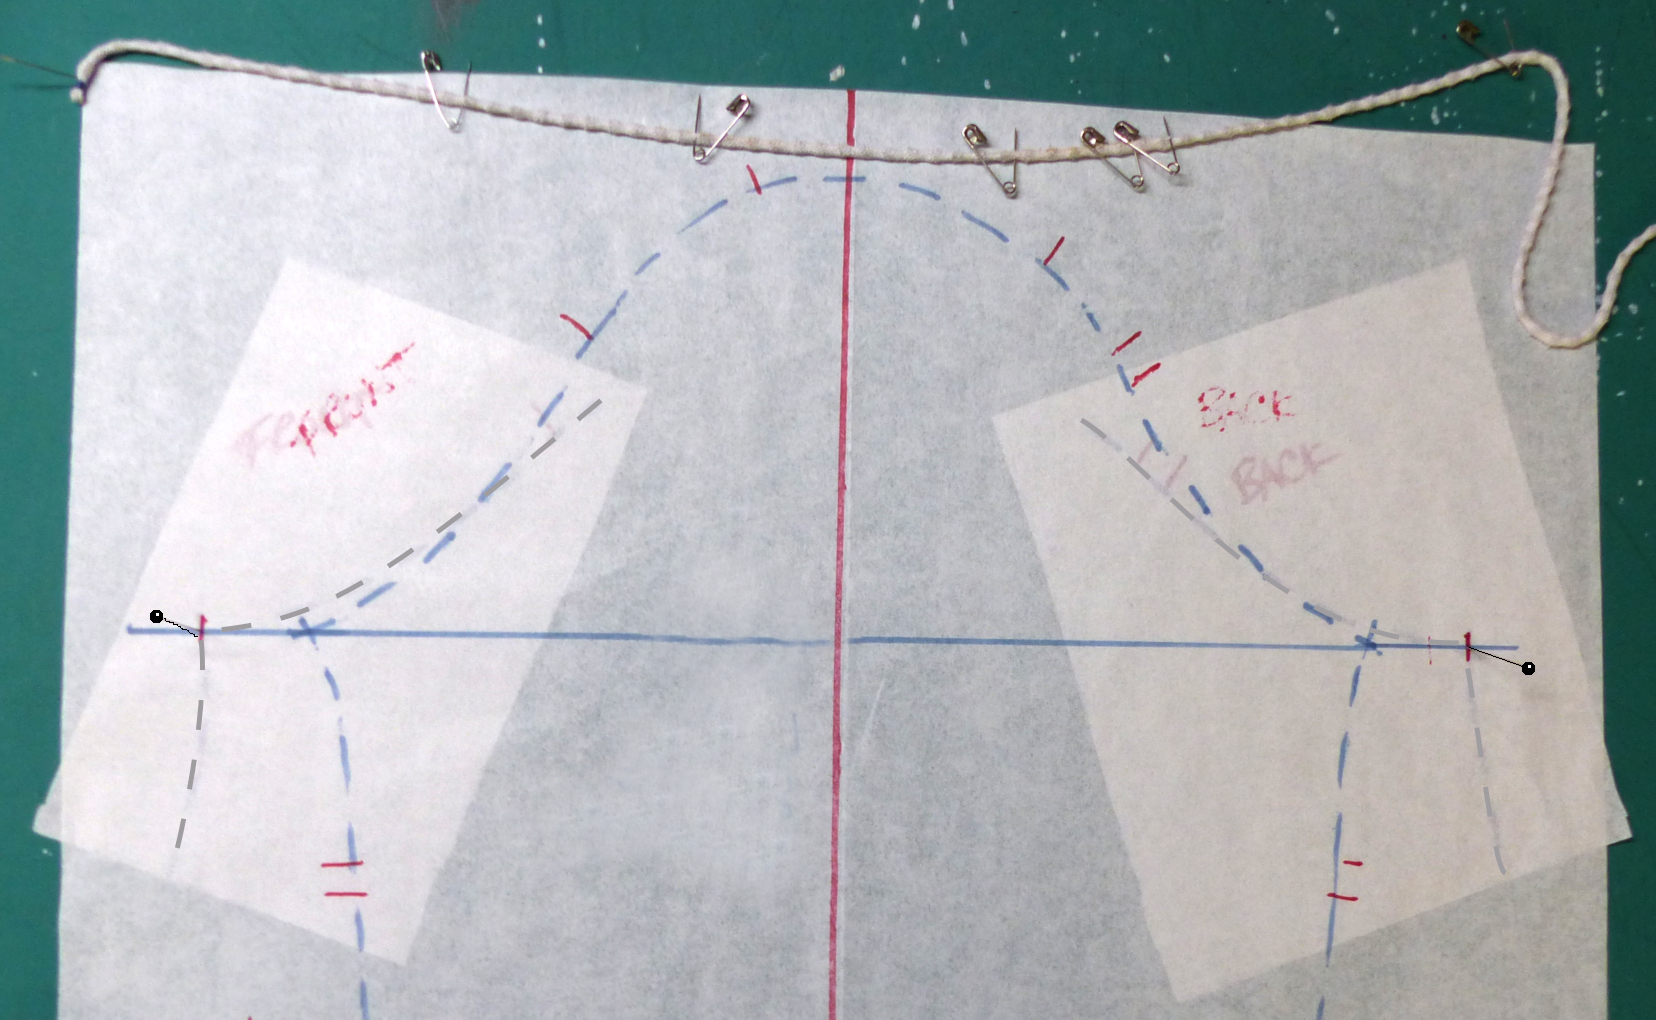
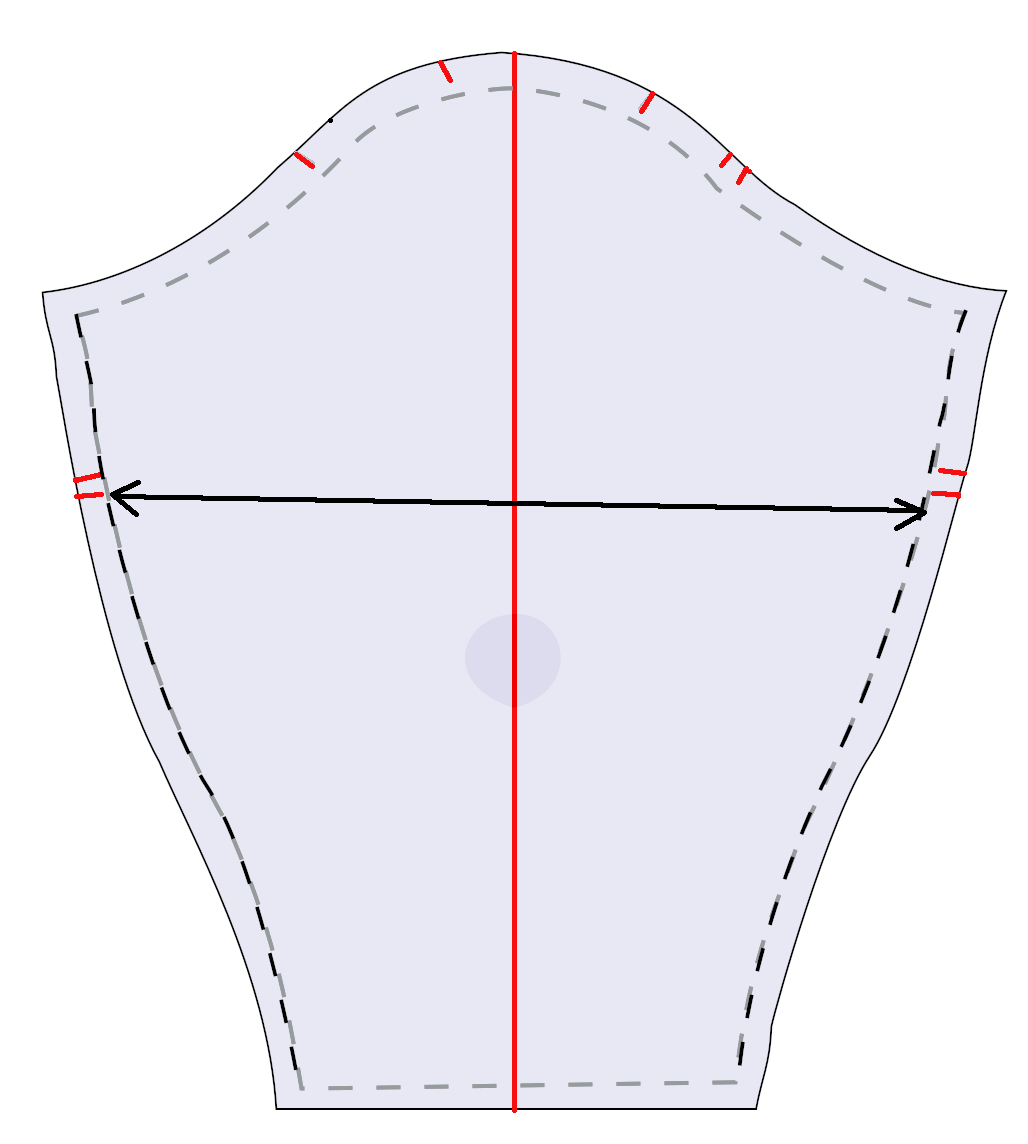
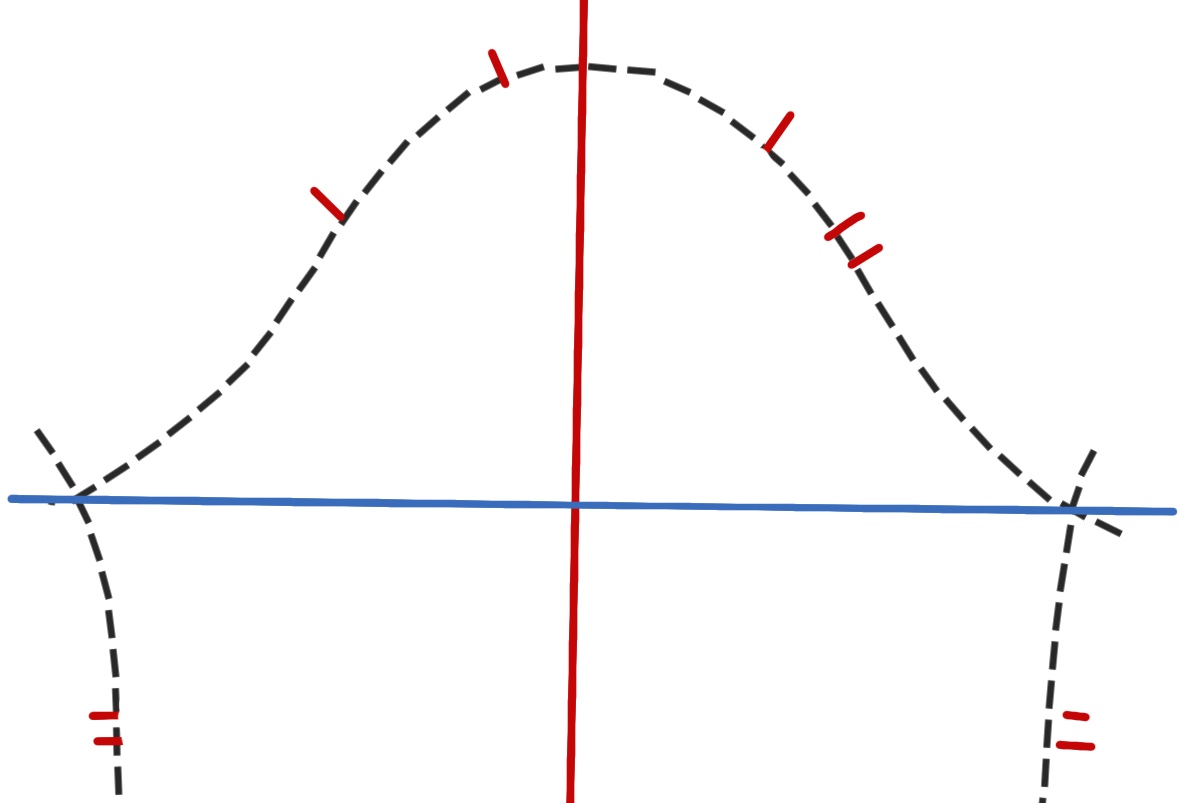
All changes are made using the dashed sewing (not cutting) line
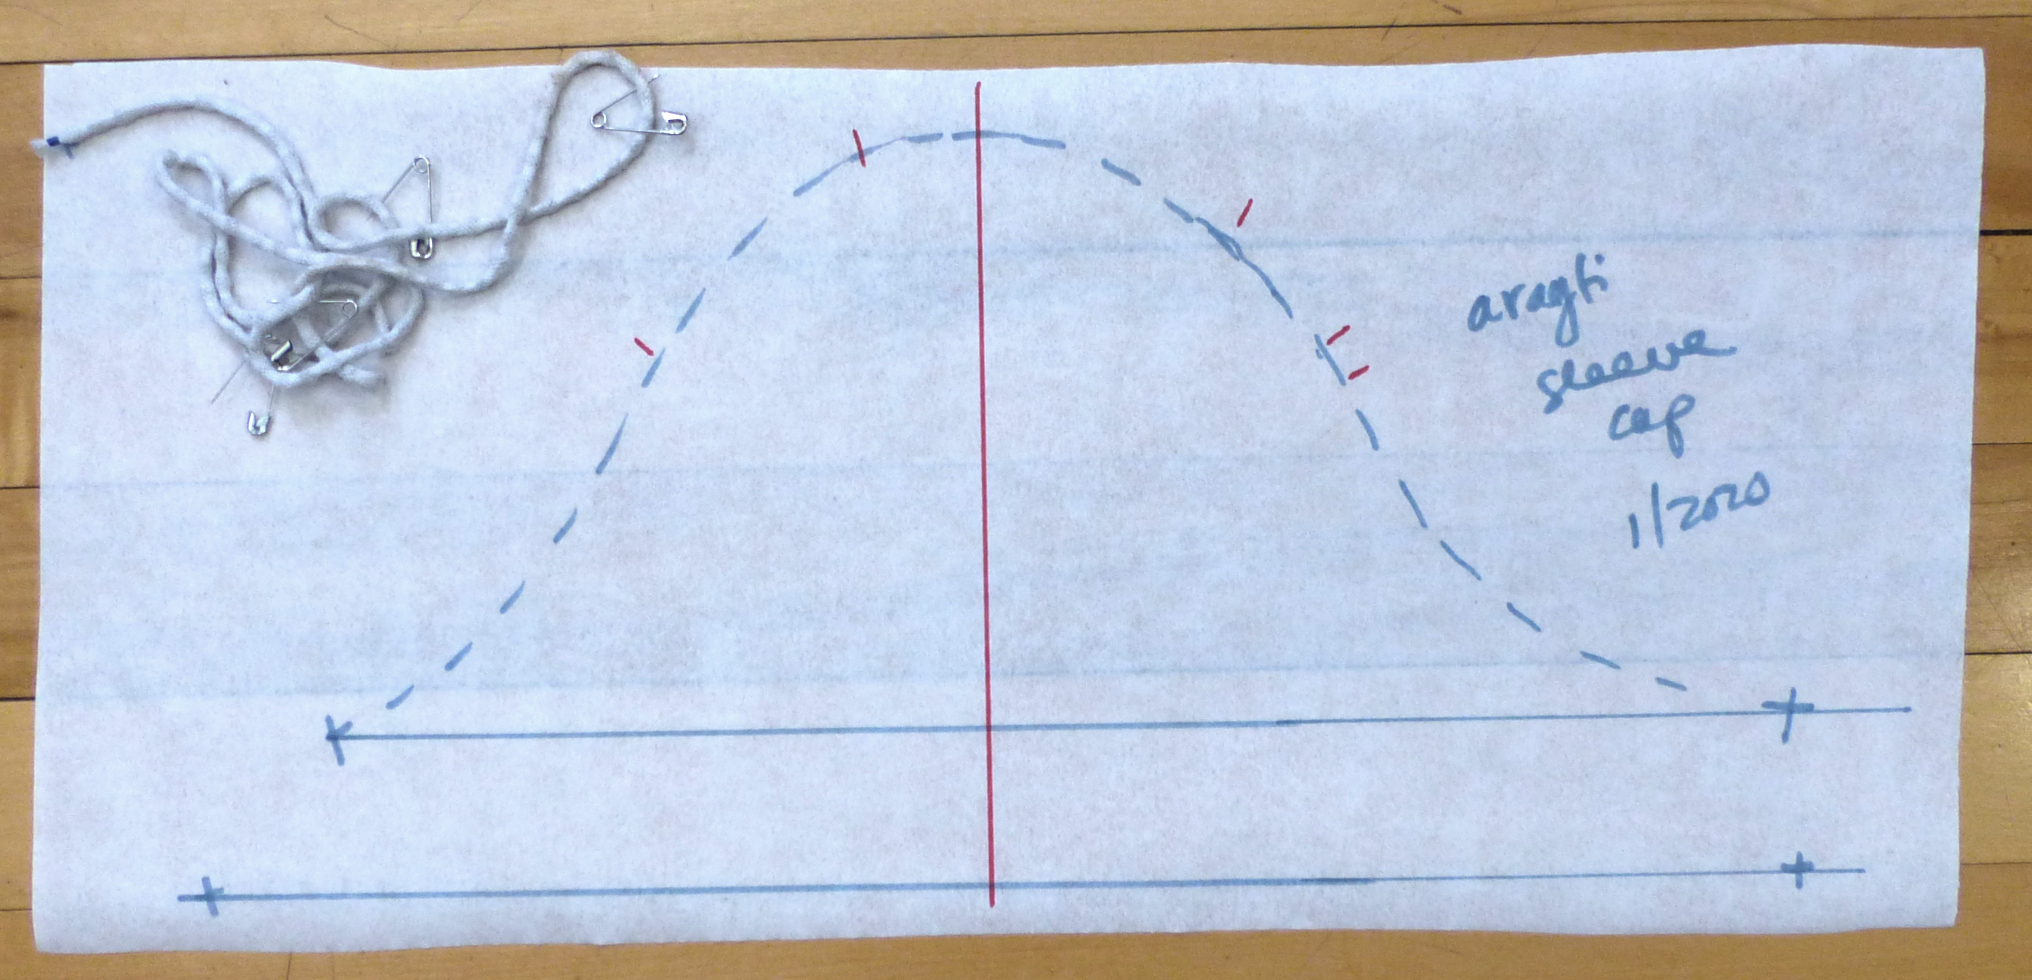
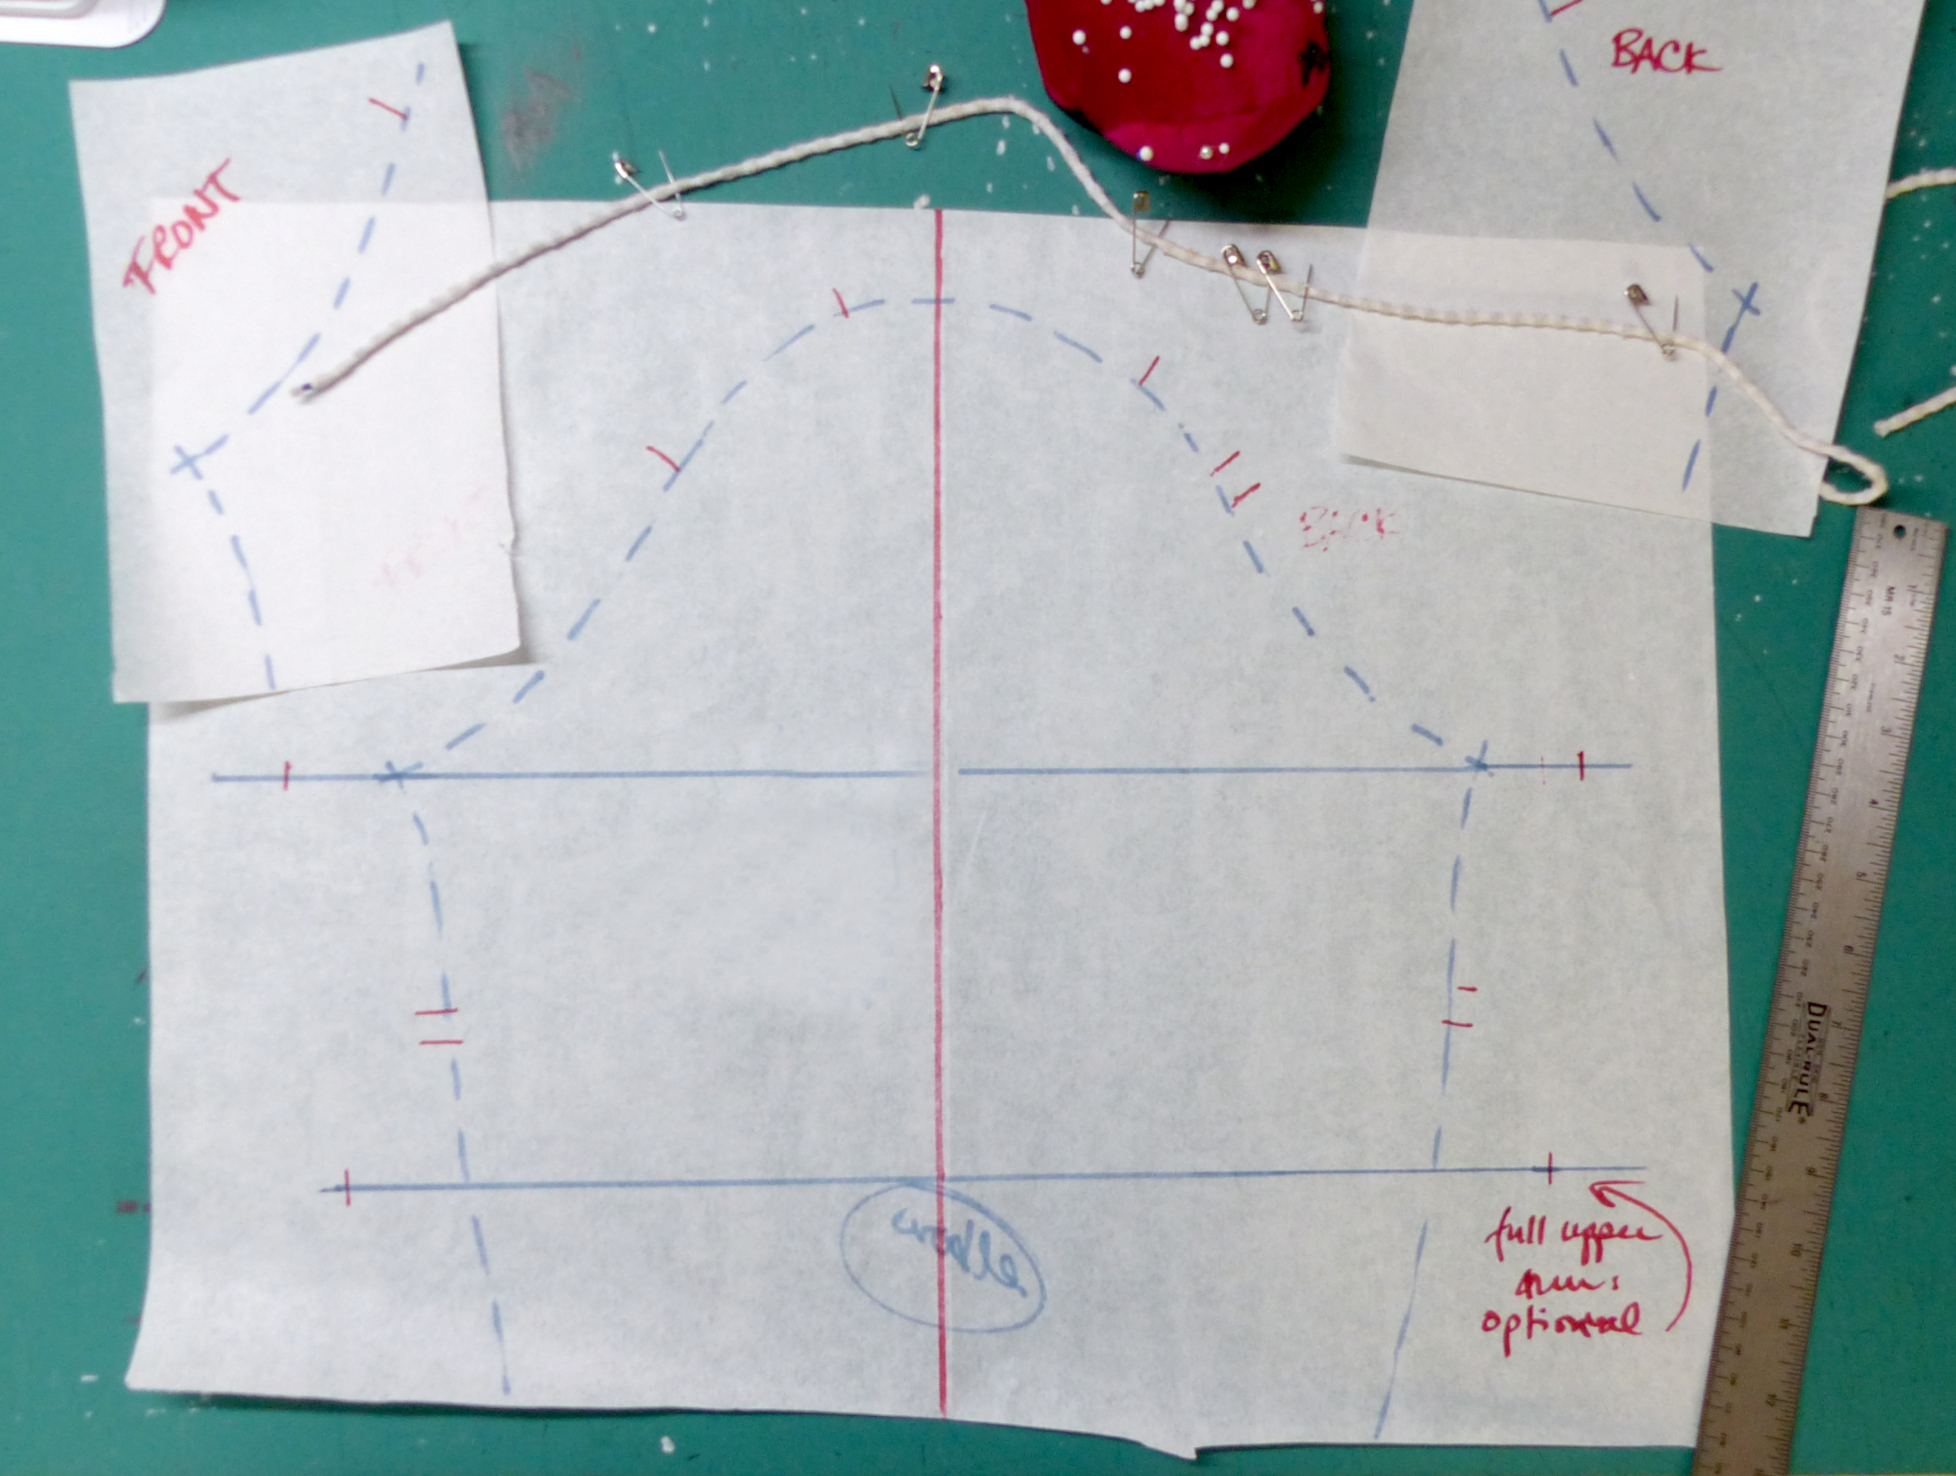

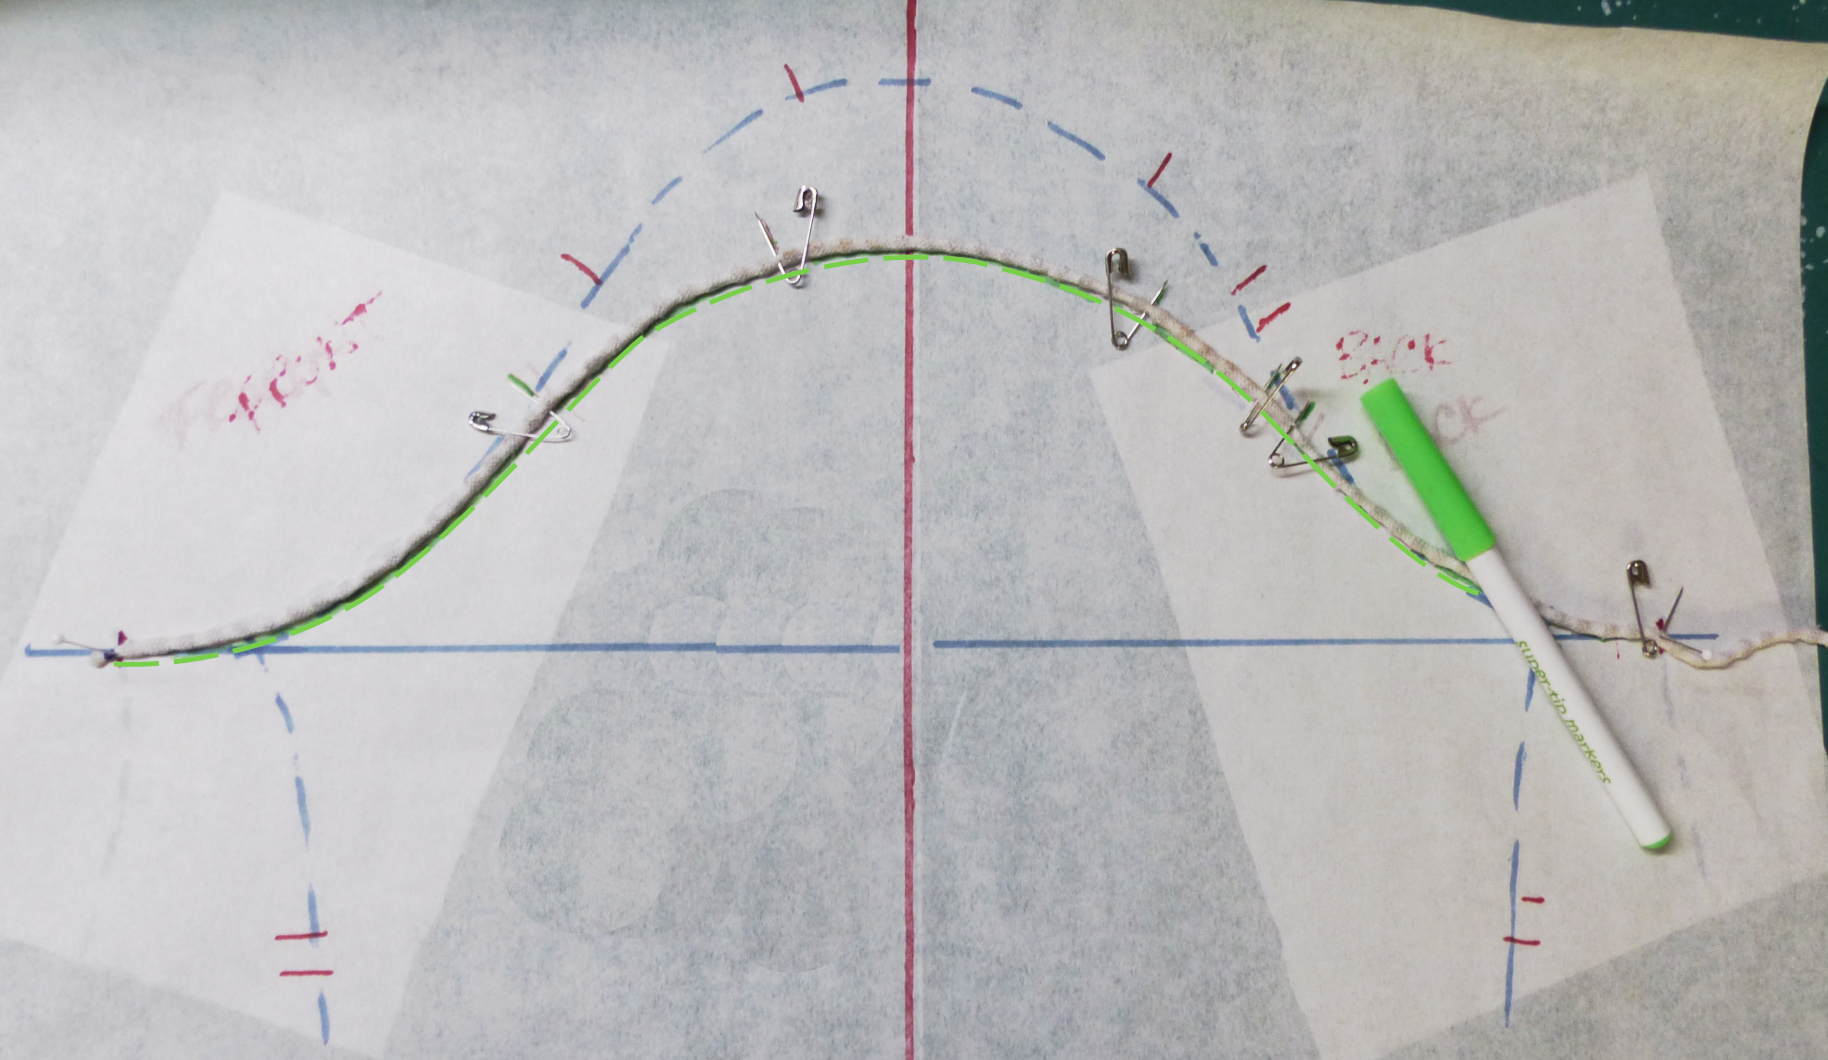

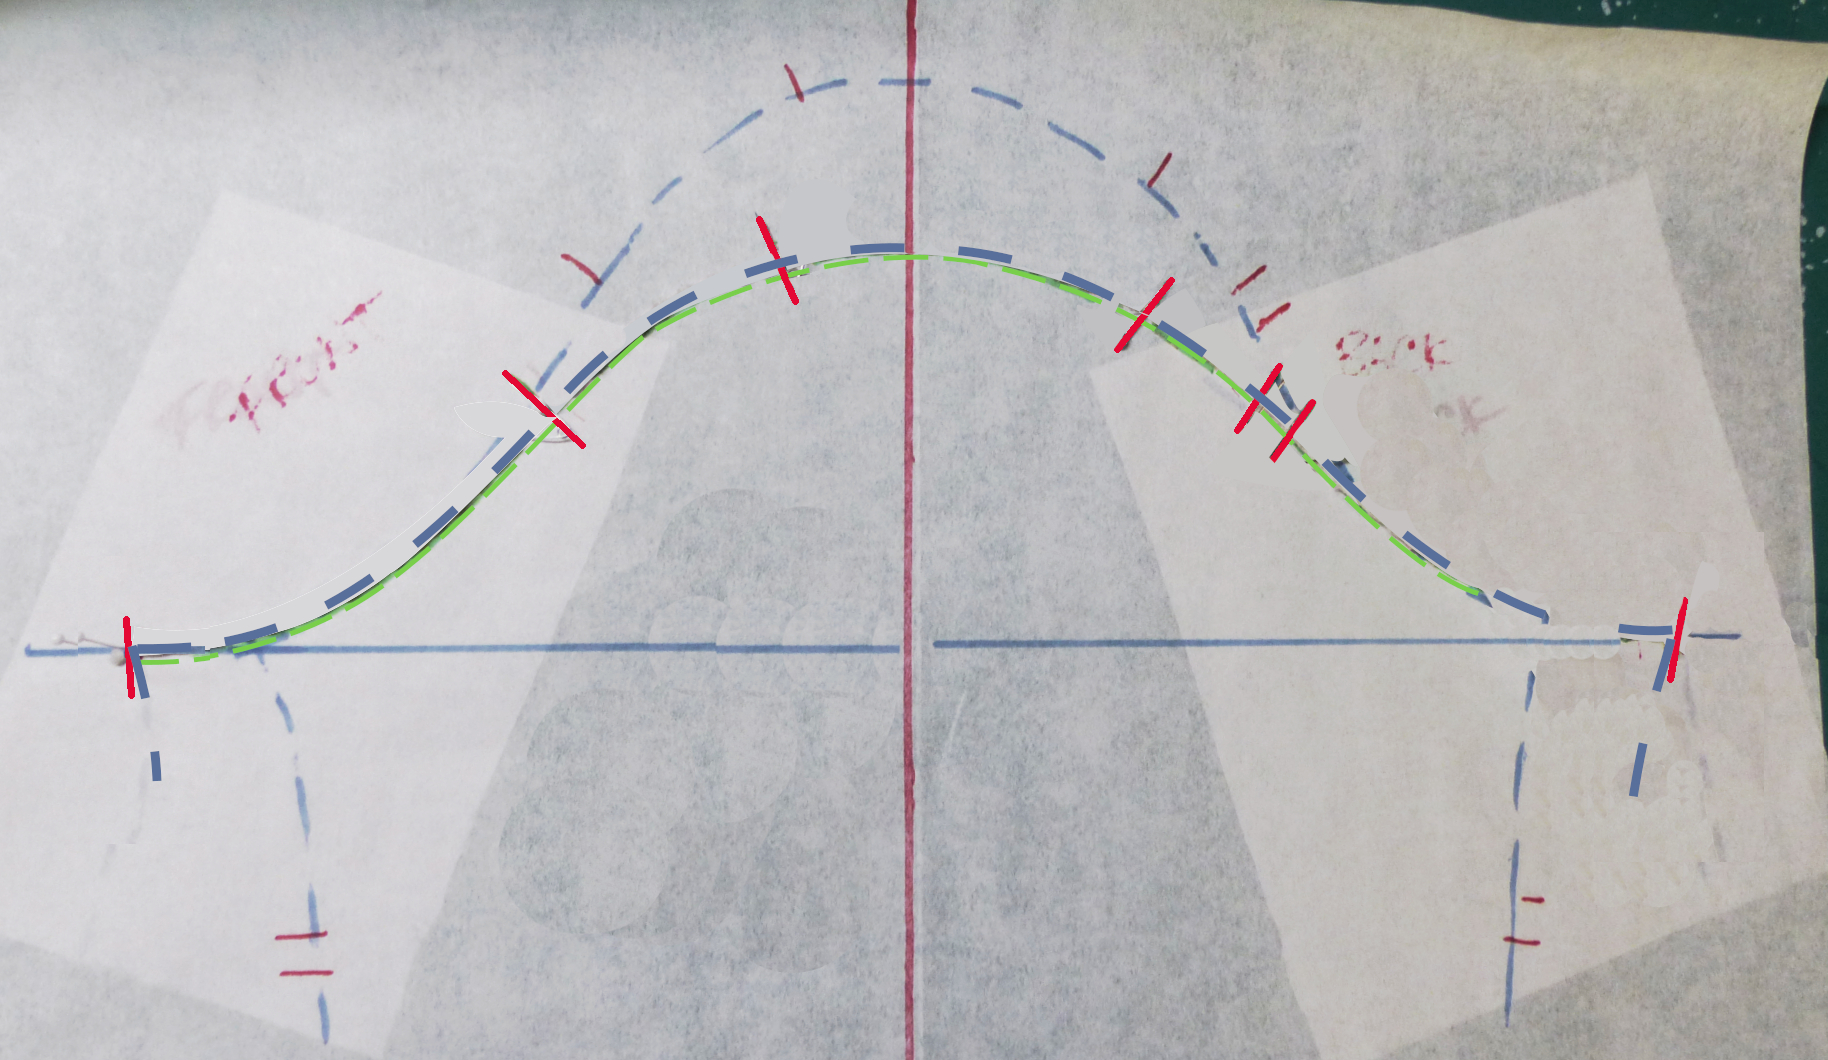
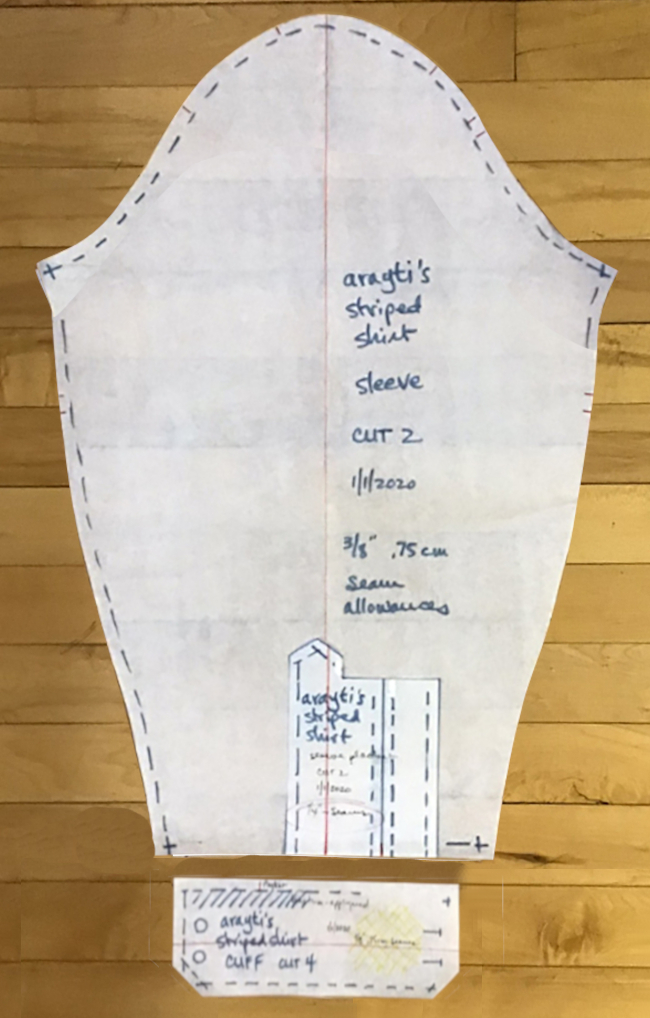
This completes your sleeve cap master. Label it.
Using the Cap Master for a sleeve:
On a piece of paper long enough (plus a little), draw a grain line. Copy the armscye length.
Transfer the registration marks.
Label.
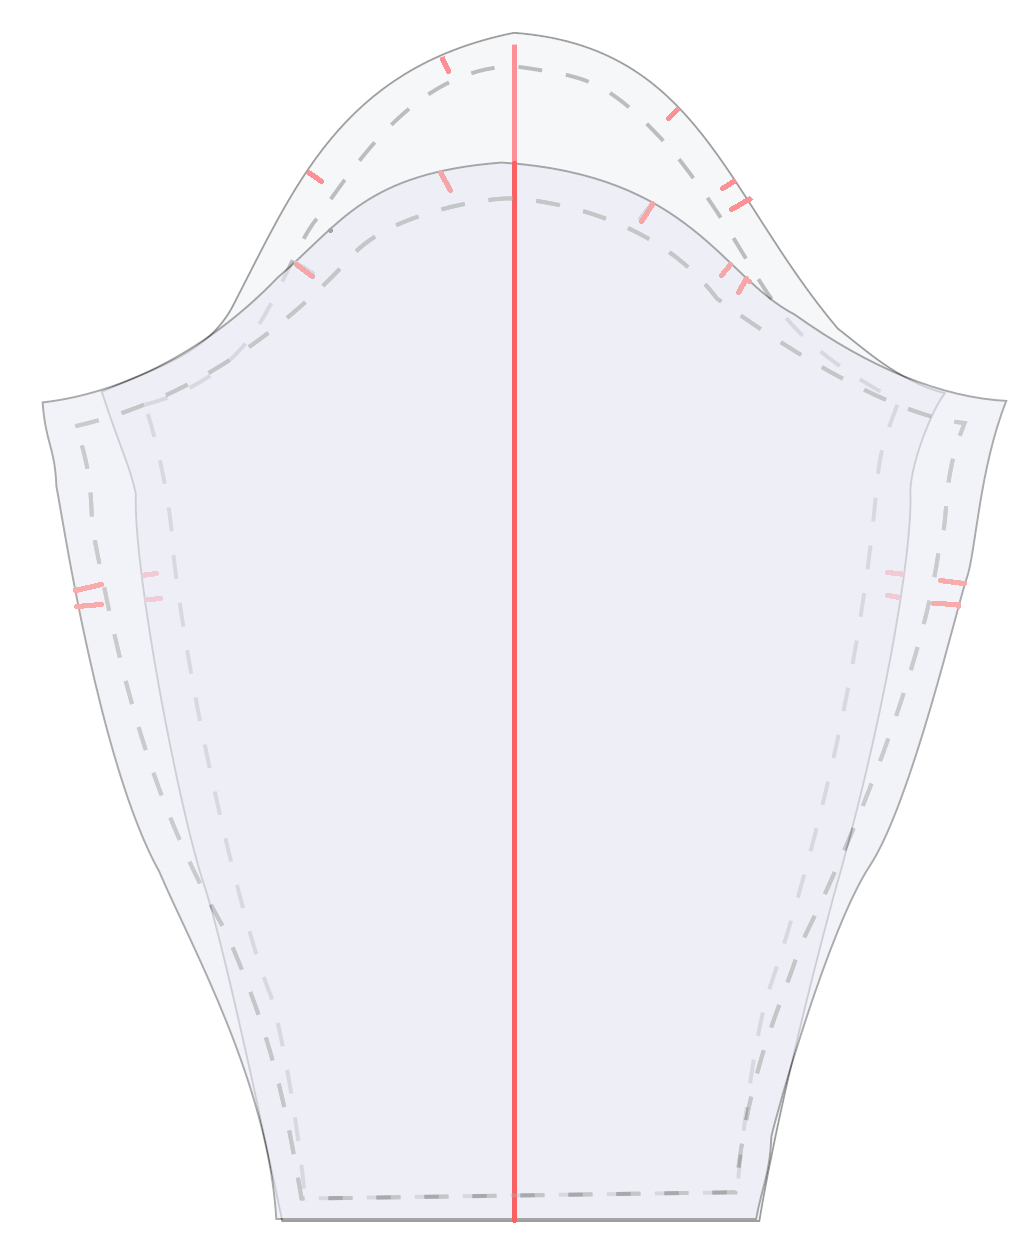
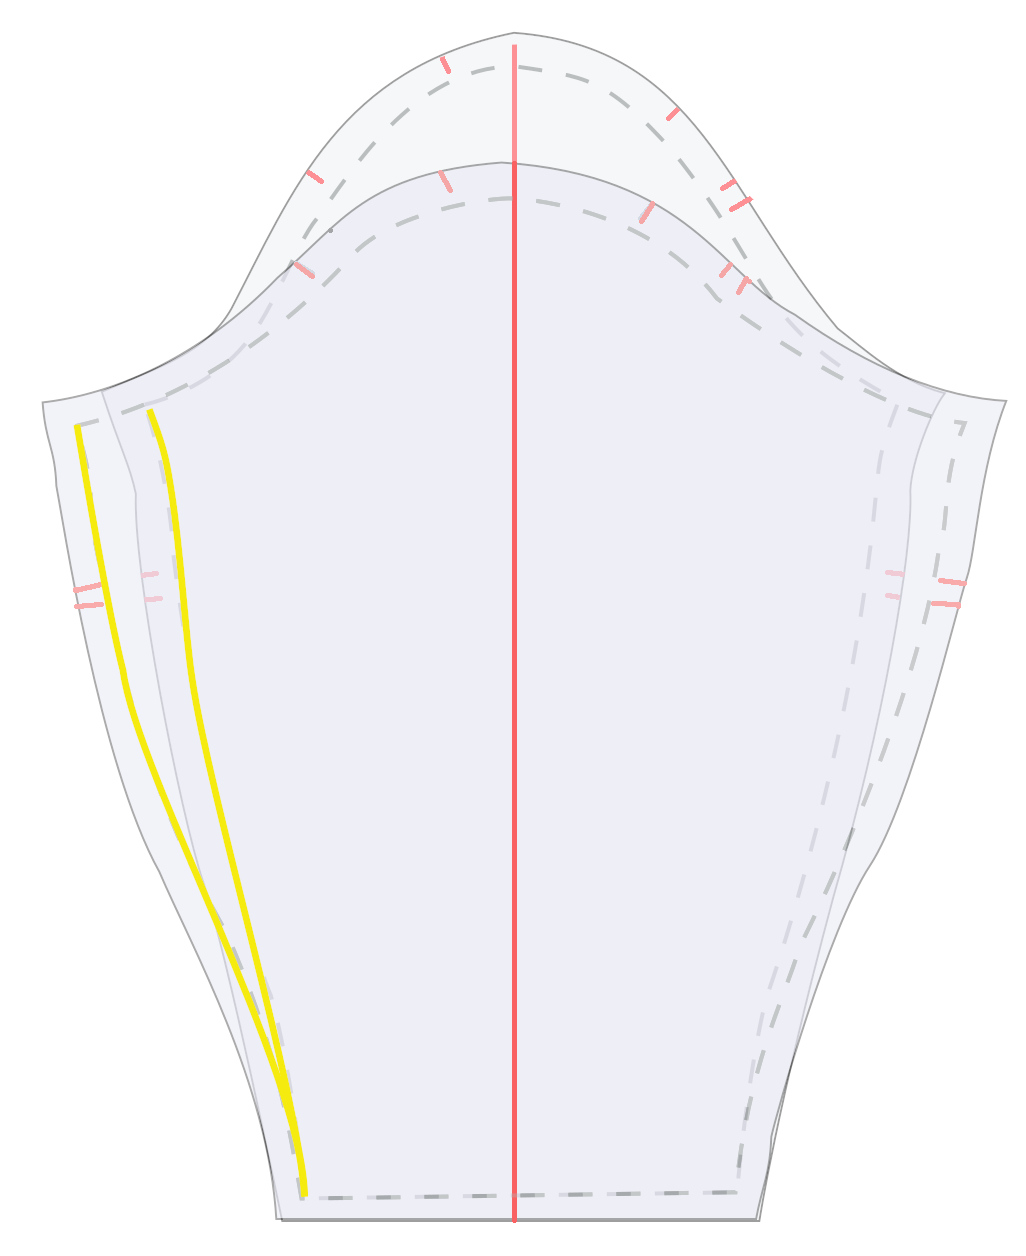
The length of your underarm seam of your new sleeve must be the same as your old one. Likewise, the widths at the elbow, forearm and wrist.
If you’re determining these from scratch, be sure you’ve added wearing ease. A common problem when going from a sleeve with a cuff to a straight sleeve is not having enough width at the hem. Be sure you can get your knuckles through.
As long as your bodice/sleeve blocks use this armscye length, any variation of this sleeve will fit it.
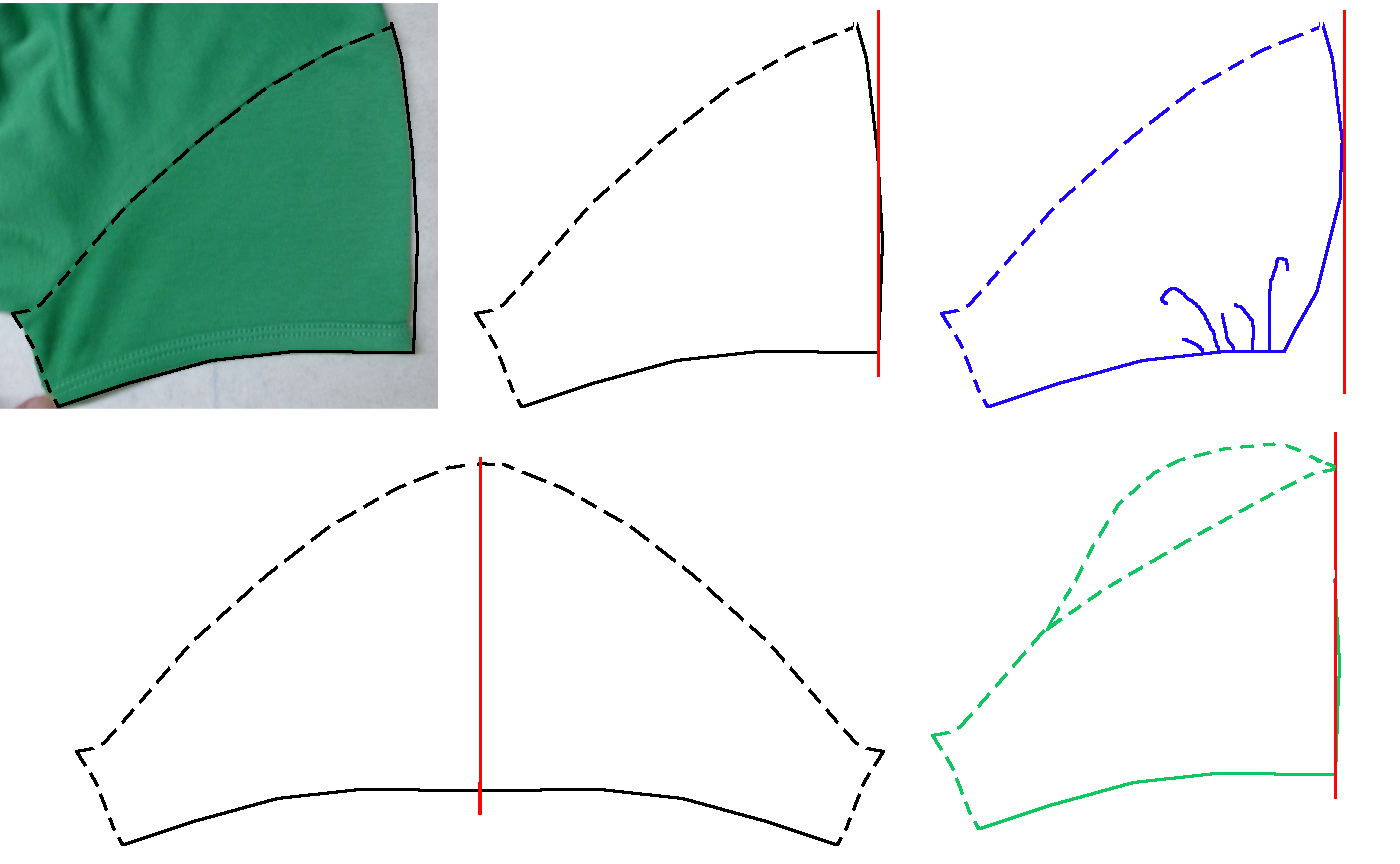
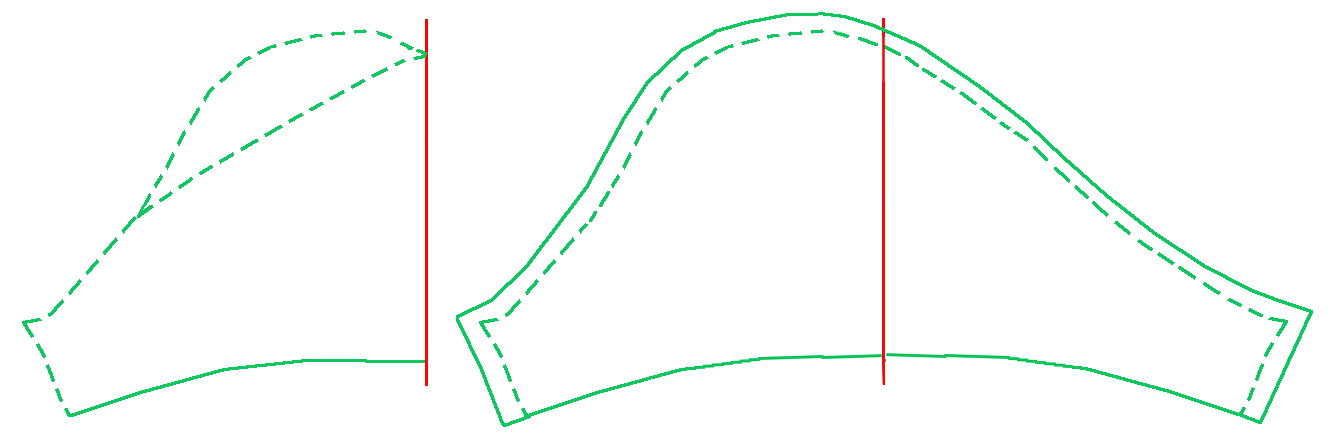
Method if you don’t have a suitable cord:

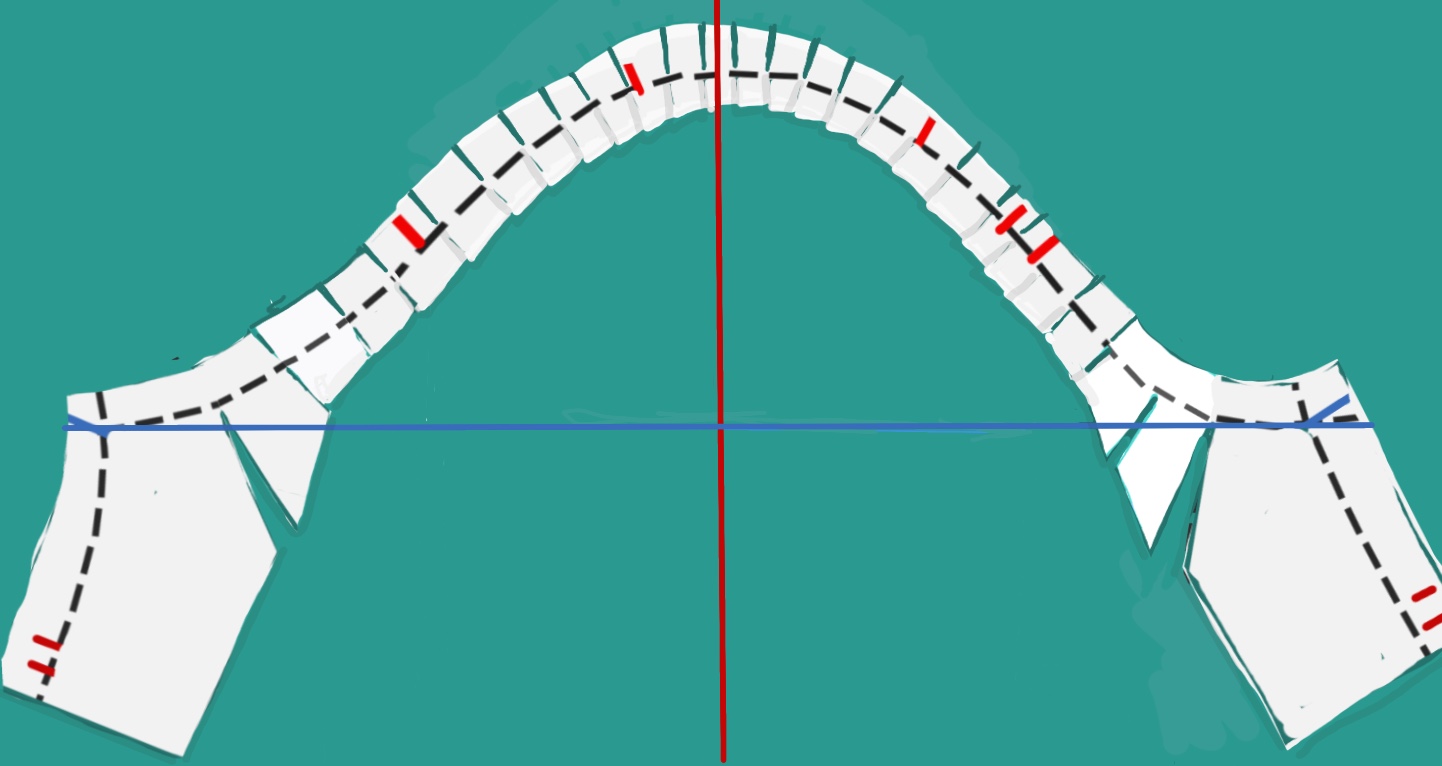
Trace off the armscye length with cross marks as above for a temporary armscye. Trim and slash. Expand it to the new biceps width. Place a fresh piece of paper (your sleeve cap master) over it and trace your final version. Your underarm seam at the armscye will gentle into the old seam.
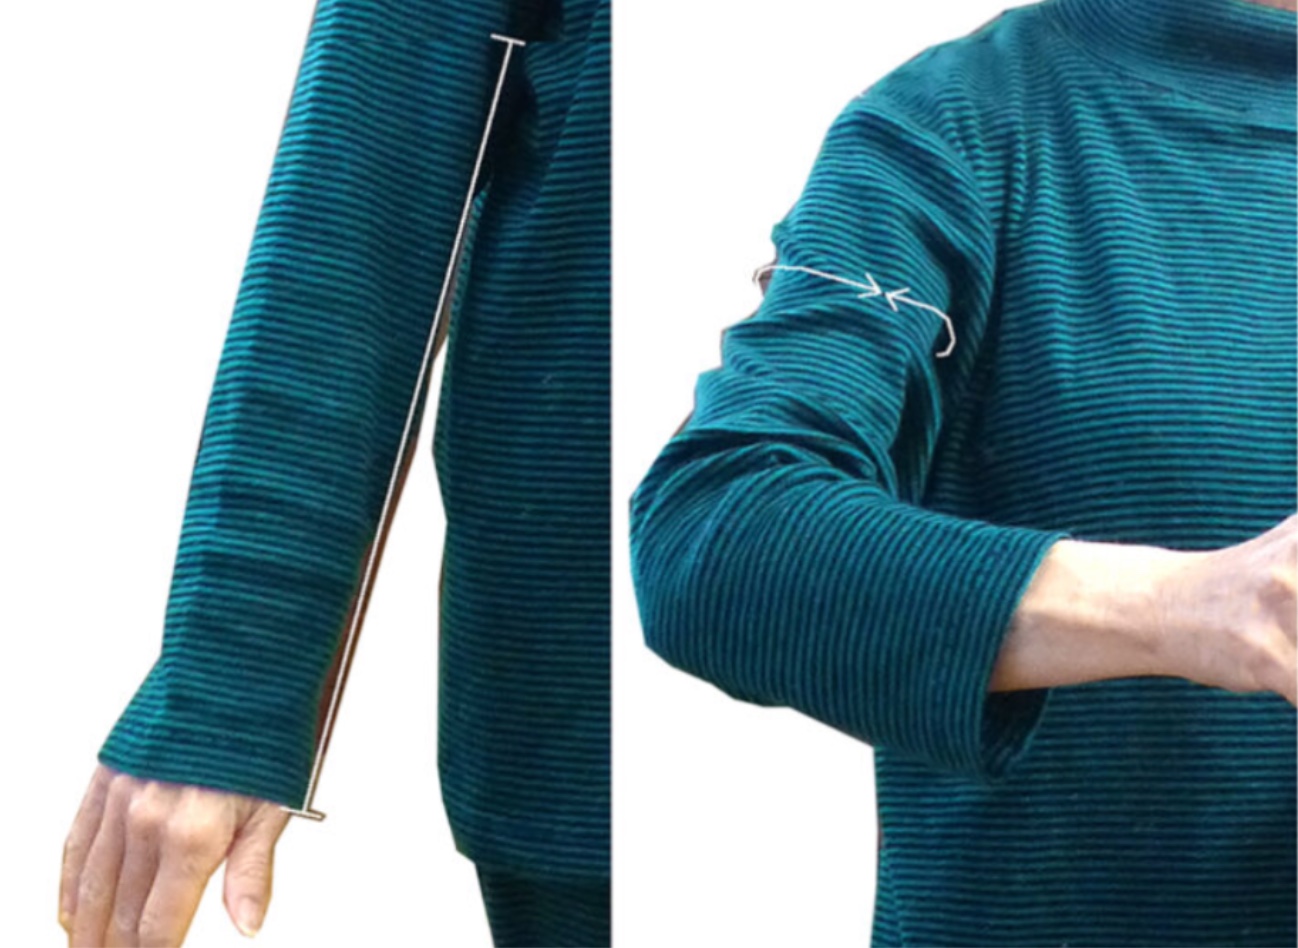
Determining sleeve length and biceps circumference (with ease). Your sleeve will pull up as you bend your elbow, so fudge extra length in there. This is why the elbows of cheap shirts blow out.
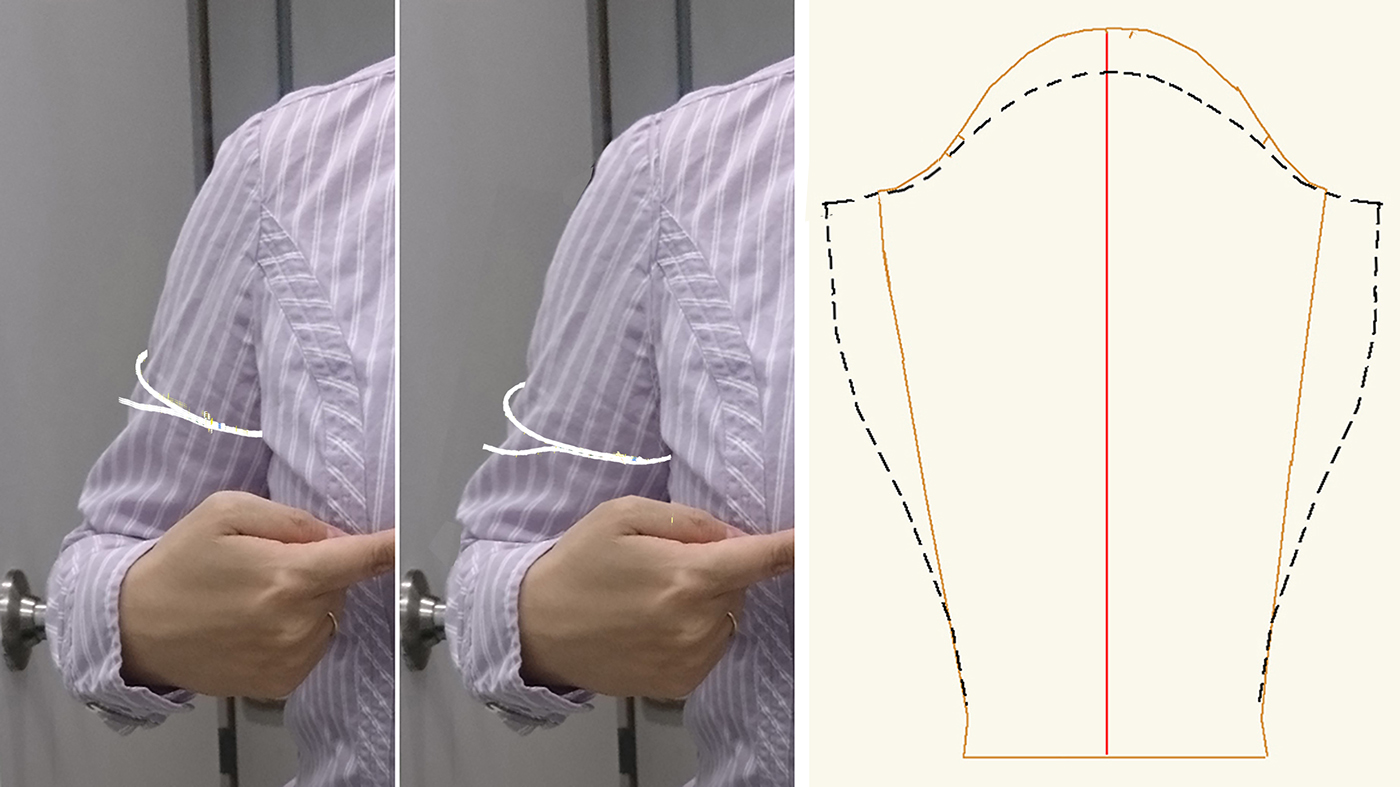
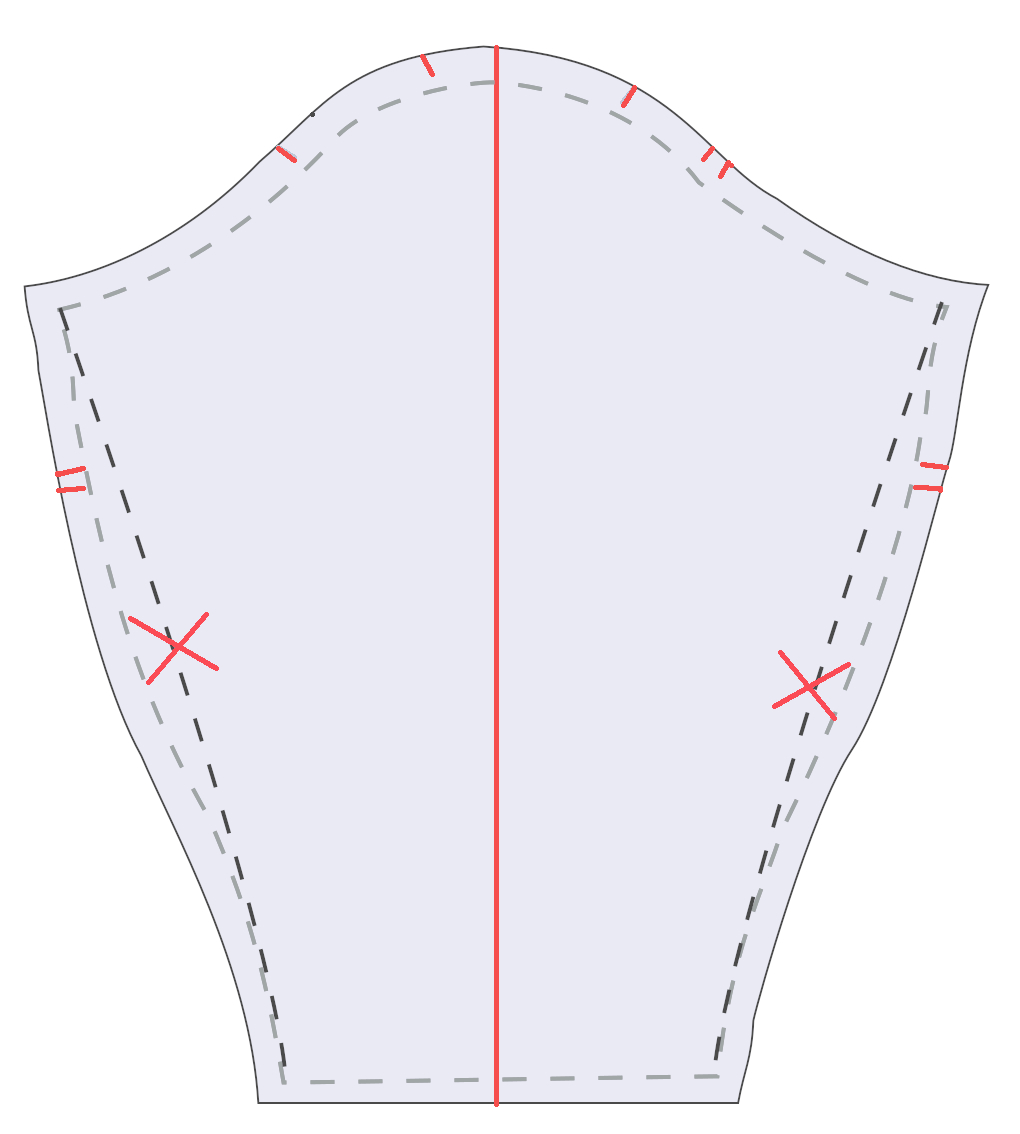
Shapes of Sleeve Caps
As long as the length of the armscye seam remains the same, there’s flexibility in its shaping.
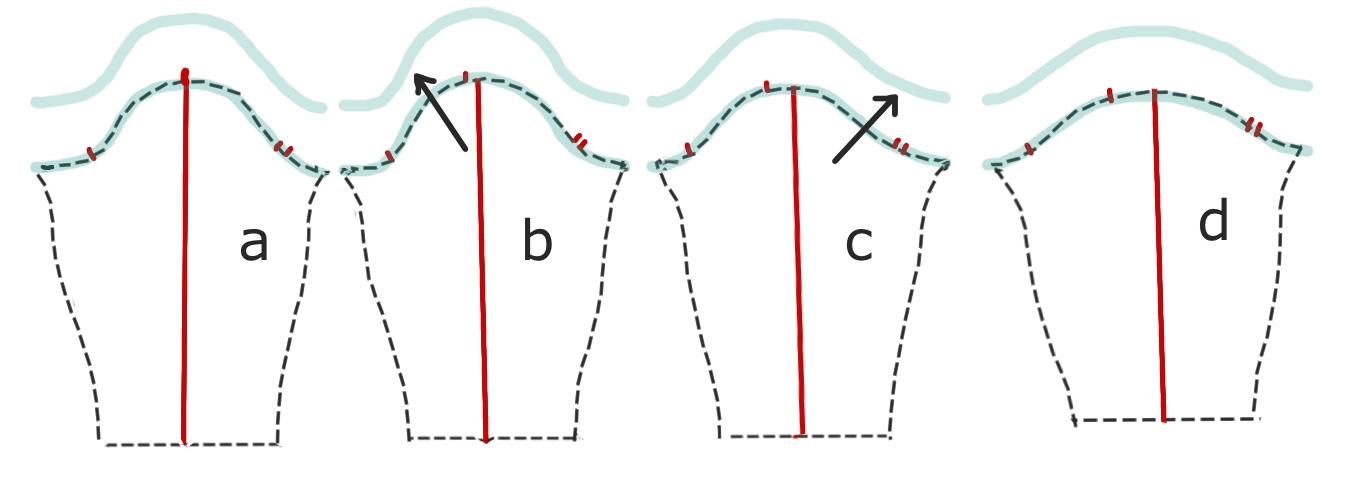
At left (a) is a sleeve that’s symmetrical front and back, a bad design as our bodies are not. Next (b) is a better design for most genders. European design (c) scoops the front armscye and flattens the back, which builds in a better range of motion (my default choice). A more extreme version is below. The one at right (d) shows the modification for a wider bicep.
Asymmetrical Sleeve Caps
Drafting a sleeve from an existing bodice/shirt/top
https://carolkimball.net/creating-sleeves-from-a-bodice-pattern/
Find and add this PDF for knitting sleeves with various amounts of ease
The Beta Test Sleeve pattern PDF