
See also Stealth Pockets here
Would your favorite skirt, top, or pair of pants (bought or sewn) be improved by pockets?
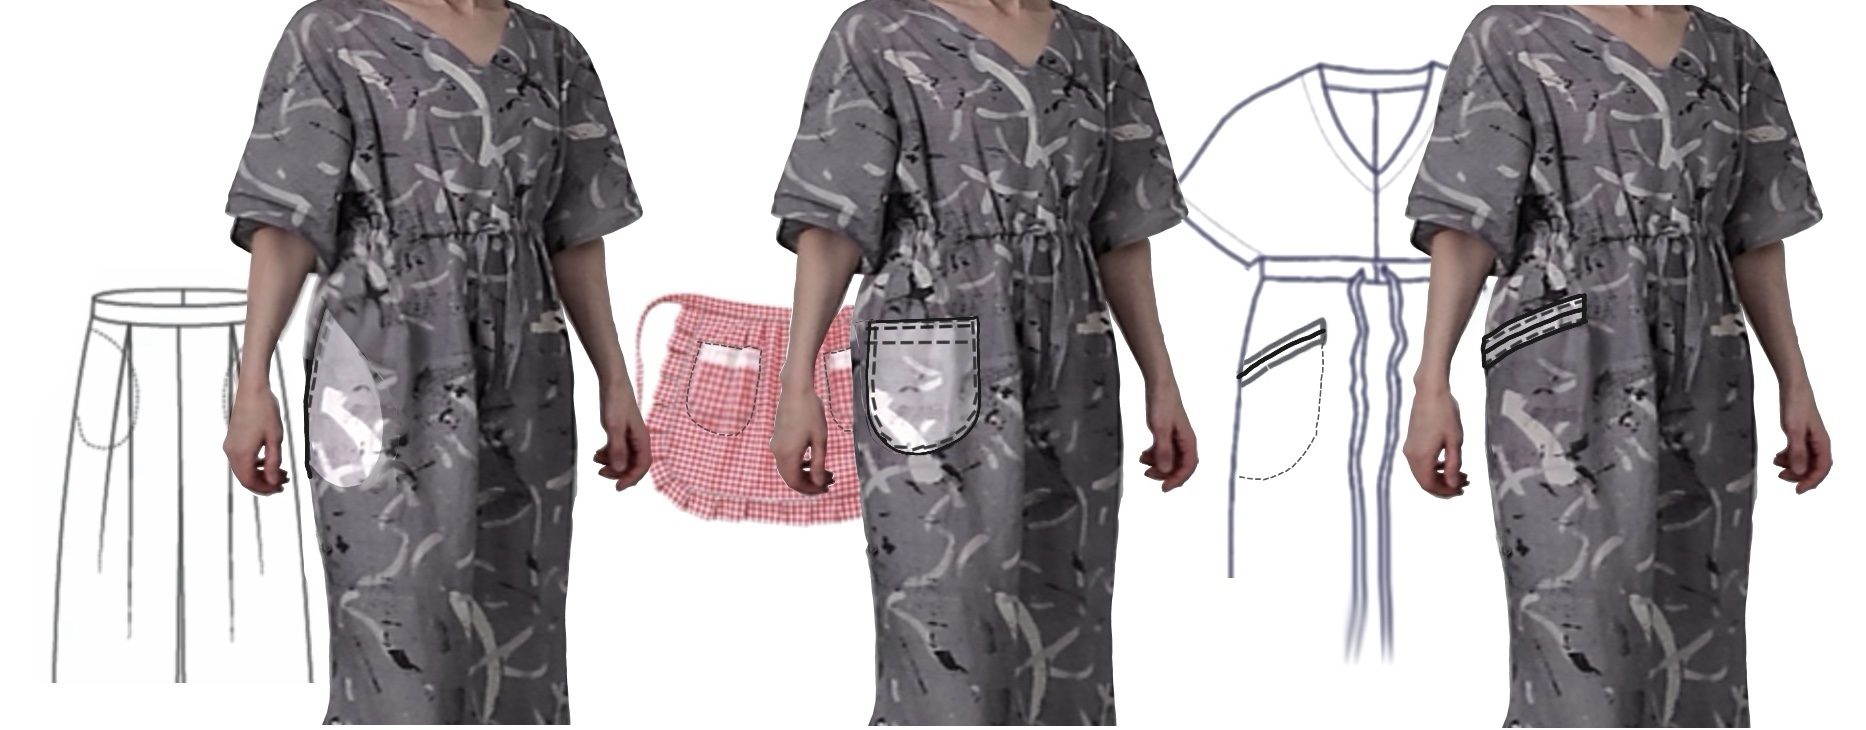
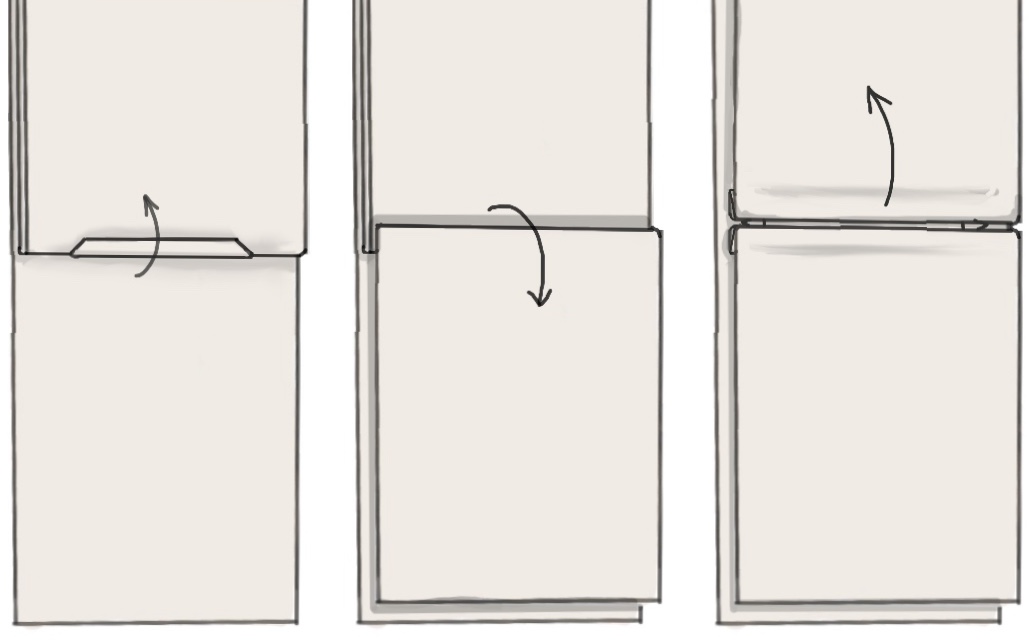
There are three options: set in the side seam, as a patch on top, or as a welt.
The side seam ones never seems to stay put and have an unfortunate tendency to bulge out the side, regardless of careful under- and top stitching. Things also tend to fall out of them.
The patch is easy but looks casual. Whatever’s in the pocket bulges out from the garment. Contrast with pocket bags that hang to the inside.
The welt is much classier and stable, but has a bad rap as difficult to sew (nonsense!). If your first experience is a welt pocket in a tailored wool jacket, sure, it’s complicated. But even little kids can sew ones like these, though they need supervision for the ironing.
Pressing after every step is critical! Accept this and do it!
We’ll start with a faced hole, and then look at adding welts.
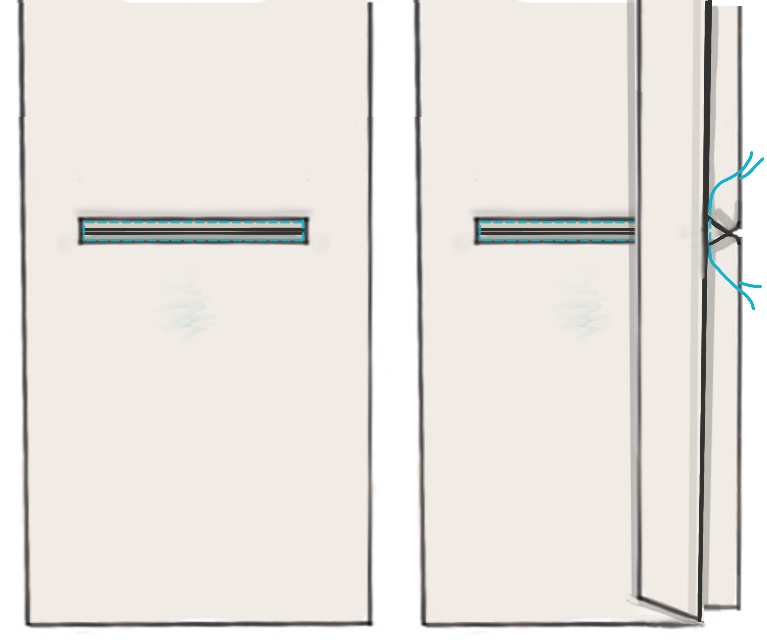
Start with two rectangles more or less as shown. Dimensions are given for those comforted by them. Lay them right-sides together. What we’ll call the lining starts out on top and then reverses to the back.
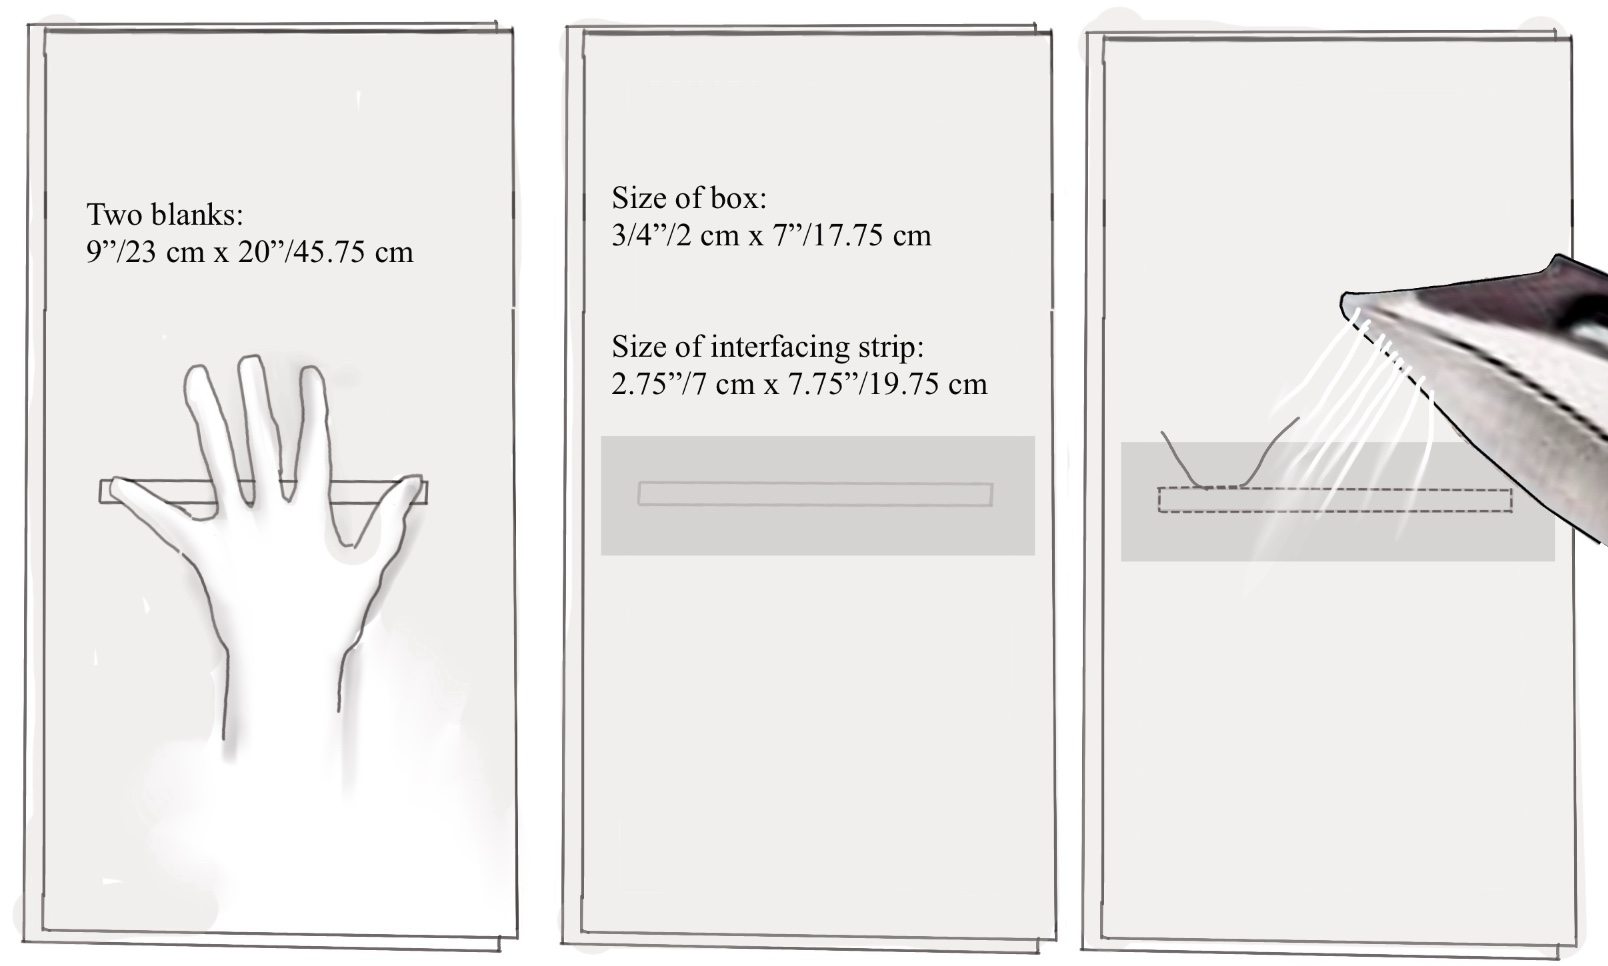
Fuse a strip of lightweight interfacing crosswise in the center. Draw a narrow box with chalk or a marker, with a couple fingers’ width extra to the outside.
Sew the box:
1. Shorten your stitch length.
2. Begin in one long side and sew to the corner.
3. Lower the needle right into it.
4. Raise the presser foot. Pivot the layers. Put the foot down.
5. Hand-walk across the short end, counting your stitches. It doesn’t matter if you’re a bit over or under the line as long as it’s the same at the other end. Don’t get your box too narrow as you’re going to cut up its middle.
6. Continue around the box, overlapping your previous stitching by a finger’s width. Reset your stitch length to normal.
Give a hard press with plenty of steam. The fabric flattening out and the thread embedding in its surface are magical. And necessary!
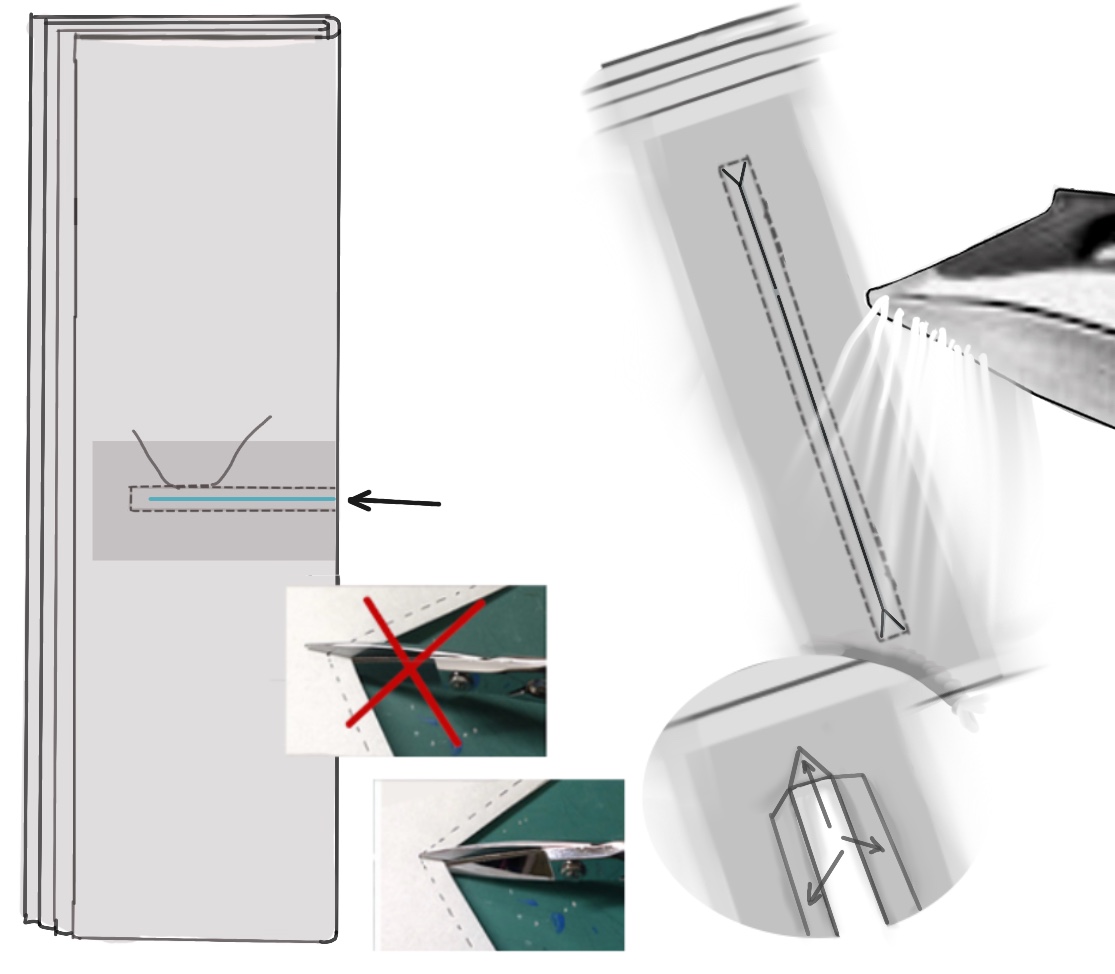
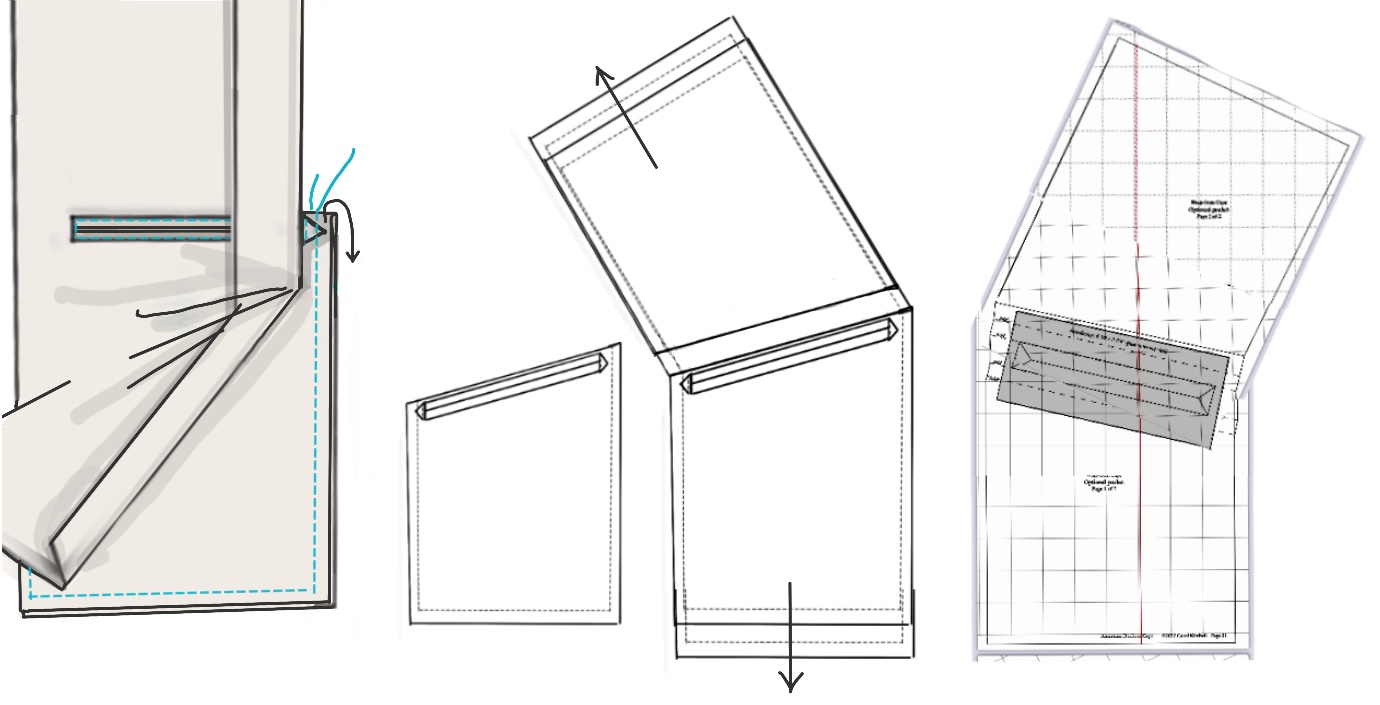
Fold the strips in half lengthwise and carefully make a snip in the middle of the box. Open out and extend the cut not quite to each end, cutting with the tips of your scissors so that you can’t accidentally snip too far. Take your time and center the cut. Make angled snips to the corners of the box, stopping a few threads short of the stitching. If you nick that, it’s game-over-start-again.
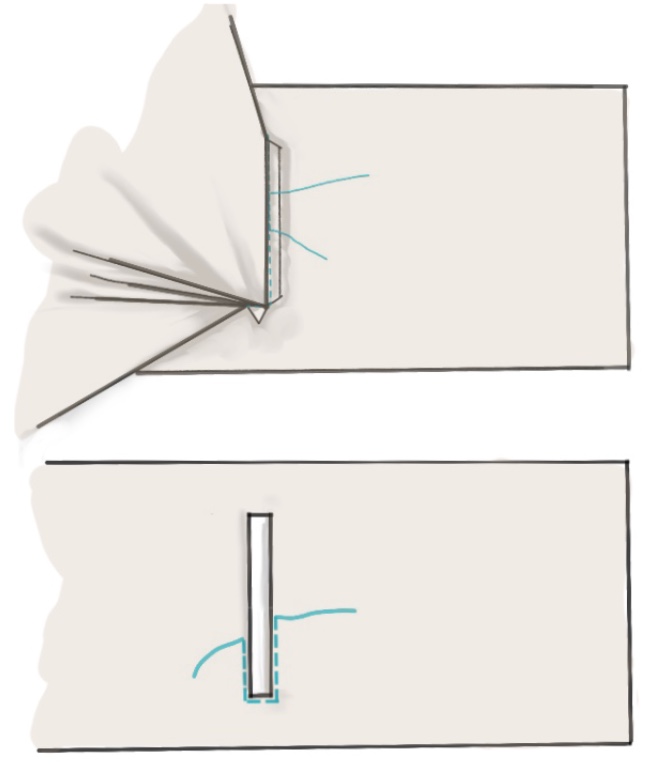
Press as sewn, then press the flaps and the little triangular ears out back on themselves. Turn the lining through the hole to the back, tugging gently on the lips and the little ears. This will magically open and flatten the hole! Press.
If you haven’t clipped to the stitching, the box ends will pucker. Flip the fabric back and clip a few threads more.
You may choose to stop with this faced window (say, to add a zipper behind for a pocket in a bag or tote) rather than add welts; it needs stabilizing stitching to stop here.
Press between each step.
- Lay right-side up.
- Pick up the top layer.
- Understitch close to the window’s stitching (easier with a zipper foot).
- (Optional) topstitch around the window.
Here’s the fast, low-rent version of a welt opening. Hard press at each step!
Return to the window after turning but before the stabilizing stitching. Lay inside-up with the lower lining flap pulled up.
Press the lower set of lips up, then wrap the lining firmly down over them.
Repeat for the other set. Turn right-side up.
Stitch-in-the ditch at the very inside edge of the window.
Then lift each side in turn and stitch across the little ears.
Instead of two narrow lips you can fold the lower flap up to fill the box (usually this is done with a separate strip as that will fill the opening more completely). Not covered here.
To turn this into a rectangular pocket, fold the upper back flap down and stitch between the ear-holding stitching and the edges. Do not skip catching the ears first! You need that stitching for stability!
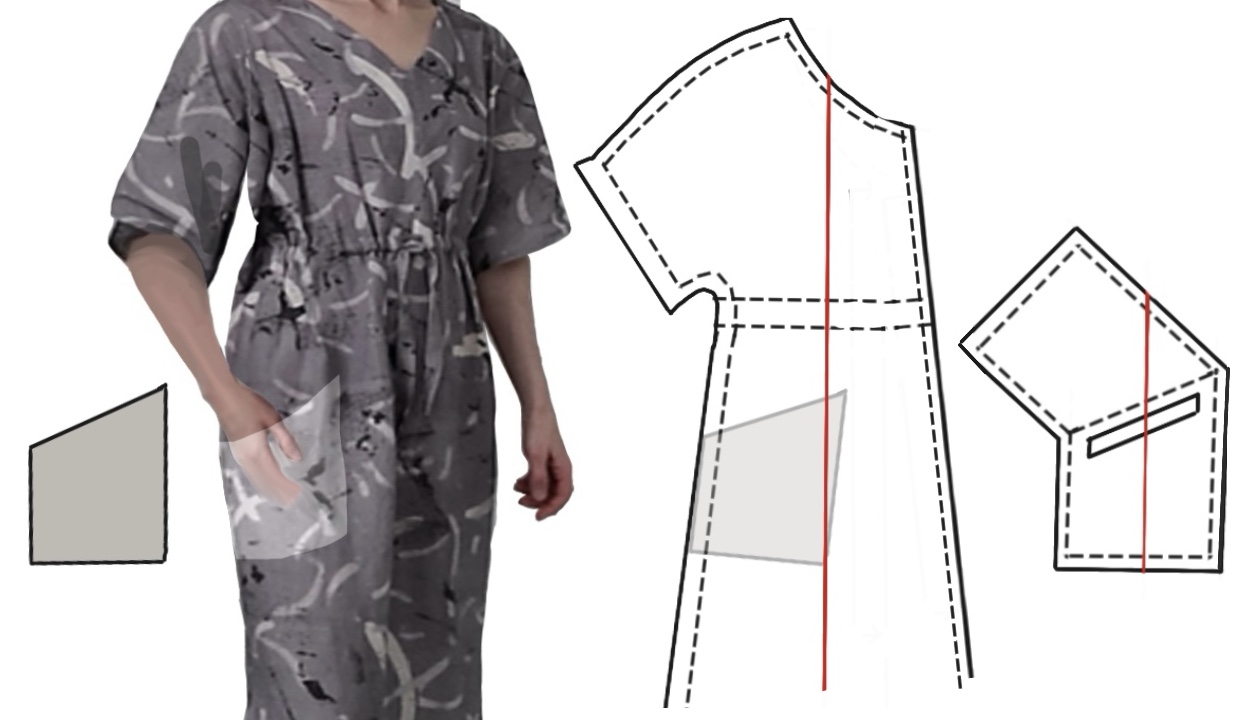
For any pocket: draw the outline of the finished pocket, then overlay a larger piece of paper, double to create its backing, and fold the bits into place. Mark them carefully, then open out the real pattern piece. If the top is slanted, the edges will zigzag much as the ends of a dart at a seam.
Even faster is to overcut the sides and ends of the pocket, make the window/welts, fold down and trim back to an even pocket.
Or, go to the American Duchess Cape pattern I worked up for Arayti, scroll down to the PDFs of the pattern pieces, and use those pocket pieces. It’s sized for a cape; print it out at whatever fraction makes what you want.
Remember that for more stability, you can stitch the pocket through your dress or pants piece.
For a specific garment? Cut yourself a pocket from a piece of paper. Not right? Cut another: paper’s cheap. Fiddle with its placement on your garment until you like it.
Trace around your mock-up, add its back section and seam allowances. That’s all there is to it!