
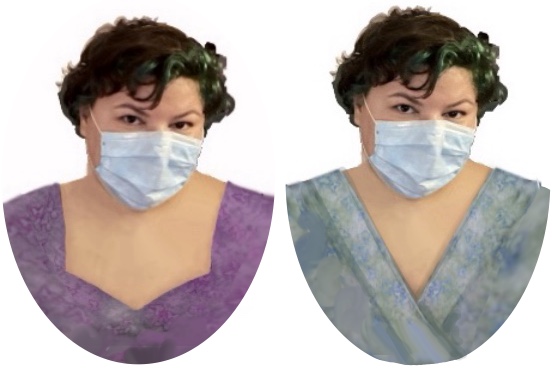
The above images are composites. Their raw components are below.
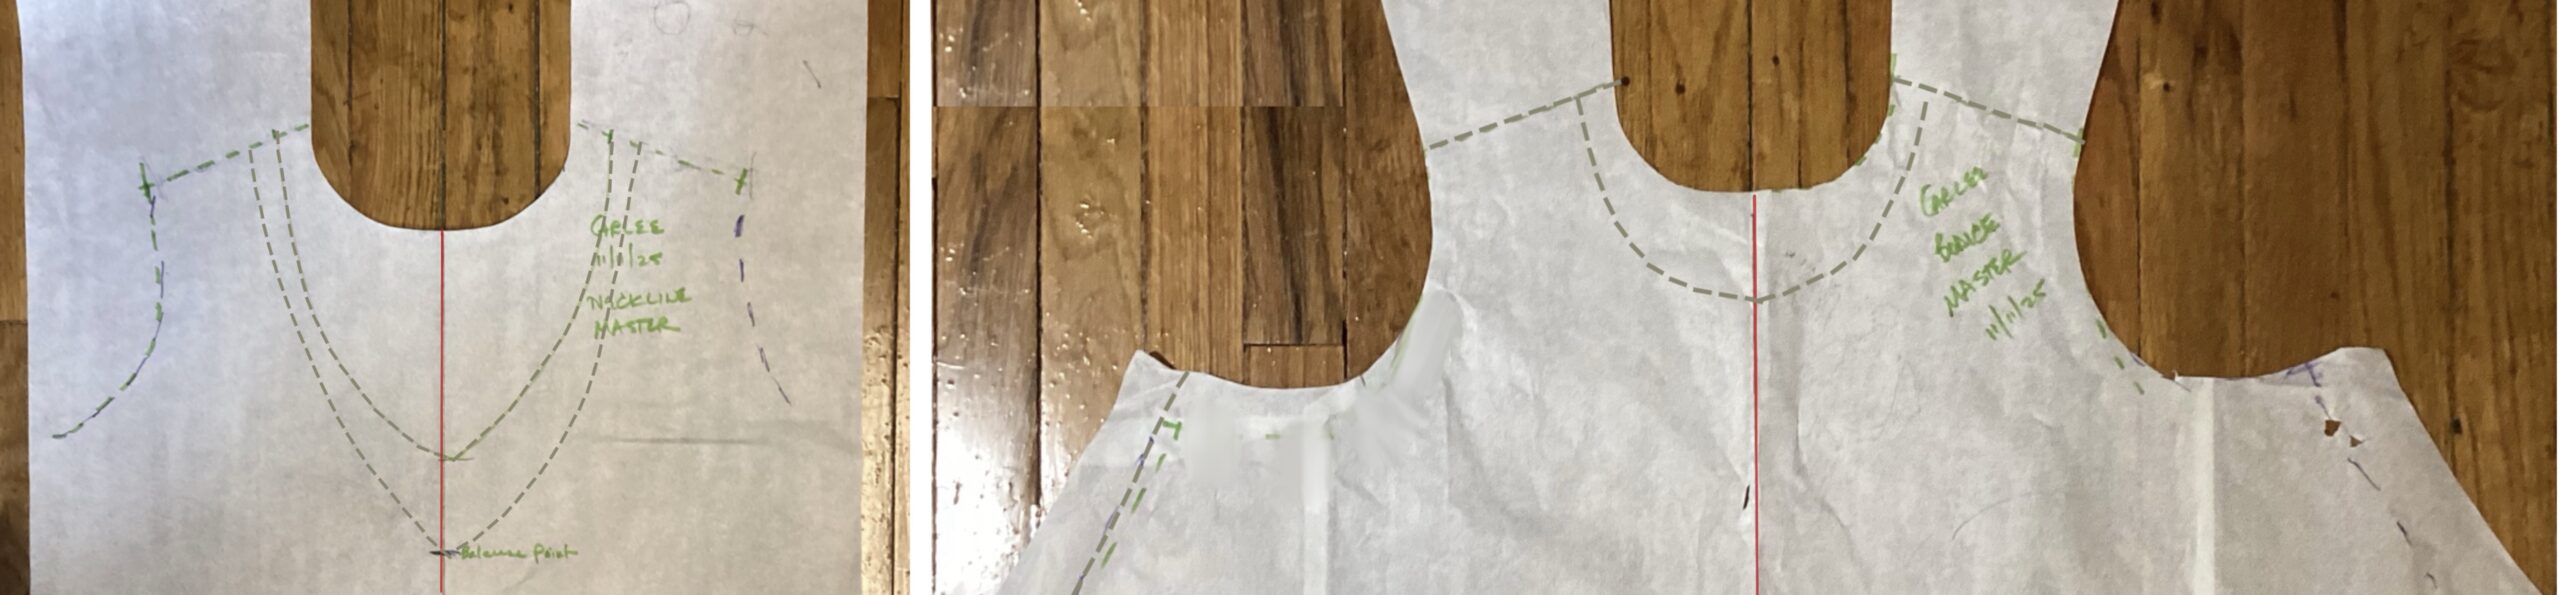
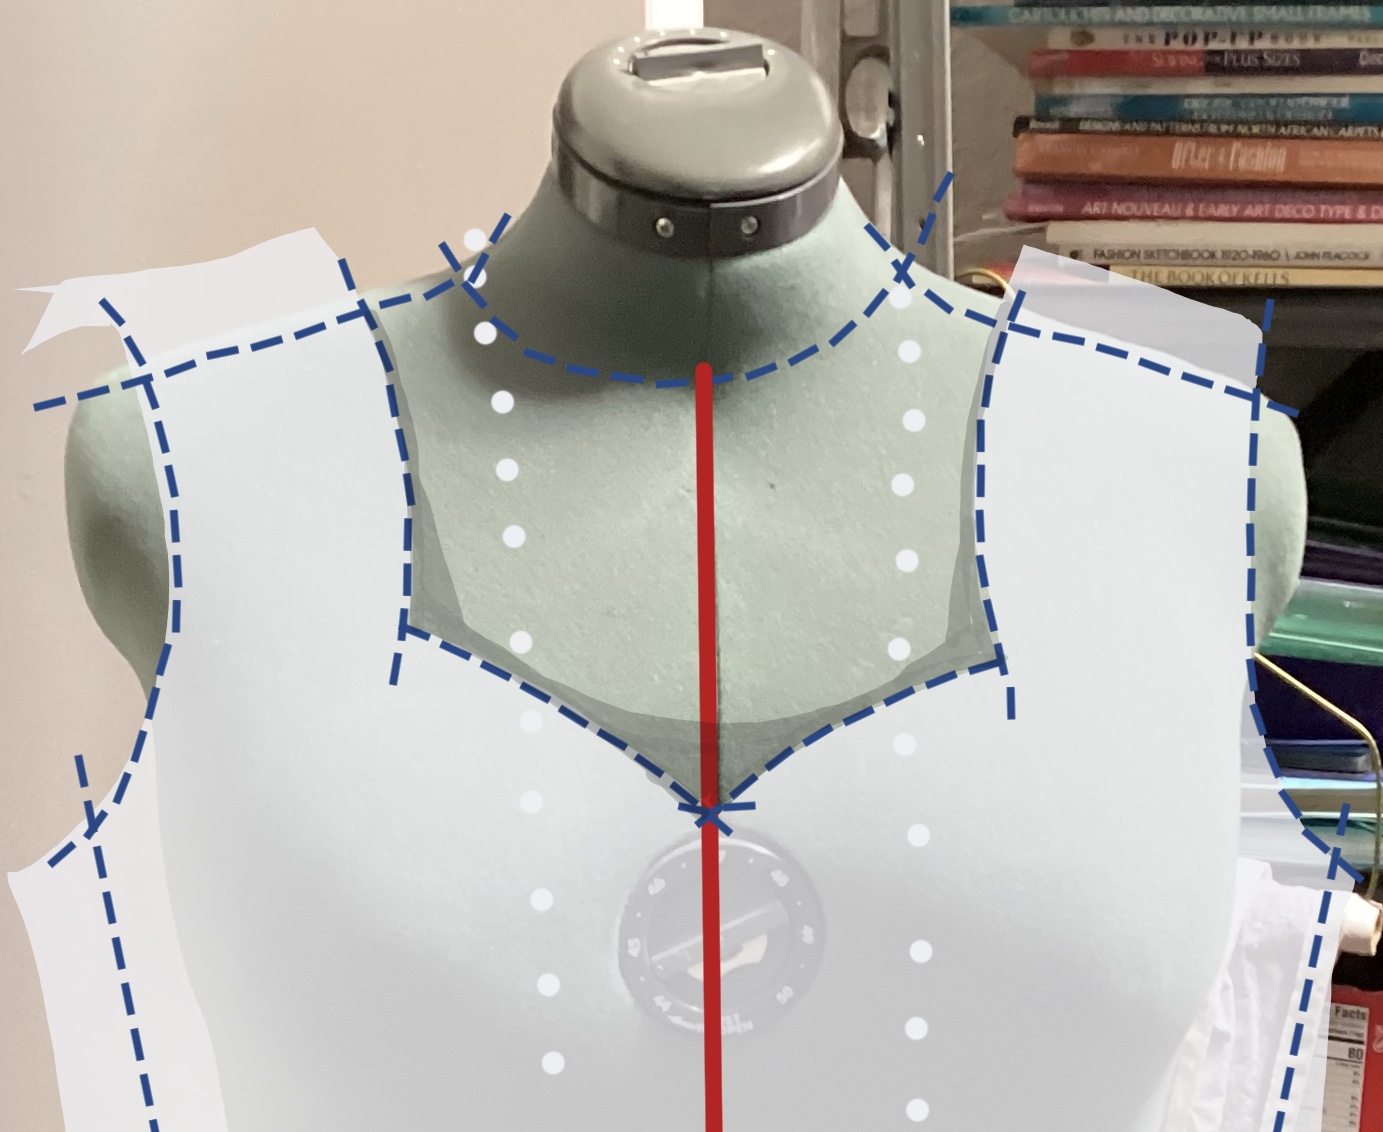
The first step when pulling a torso block (for any body, not just the woman shown) is to start with a jewel neckline.
It’s where a thin gold chain would nestle around the throat. It’s the basis for a crew neck, or where a collar band or stand attach to the front (a Mandarin collar is a type of band, a stand has a collar attached).
After the shoulder slope has been determined, other neckline shapes can be worked up.
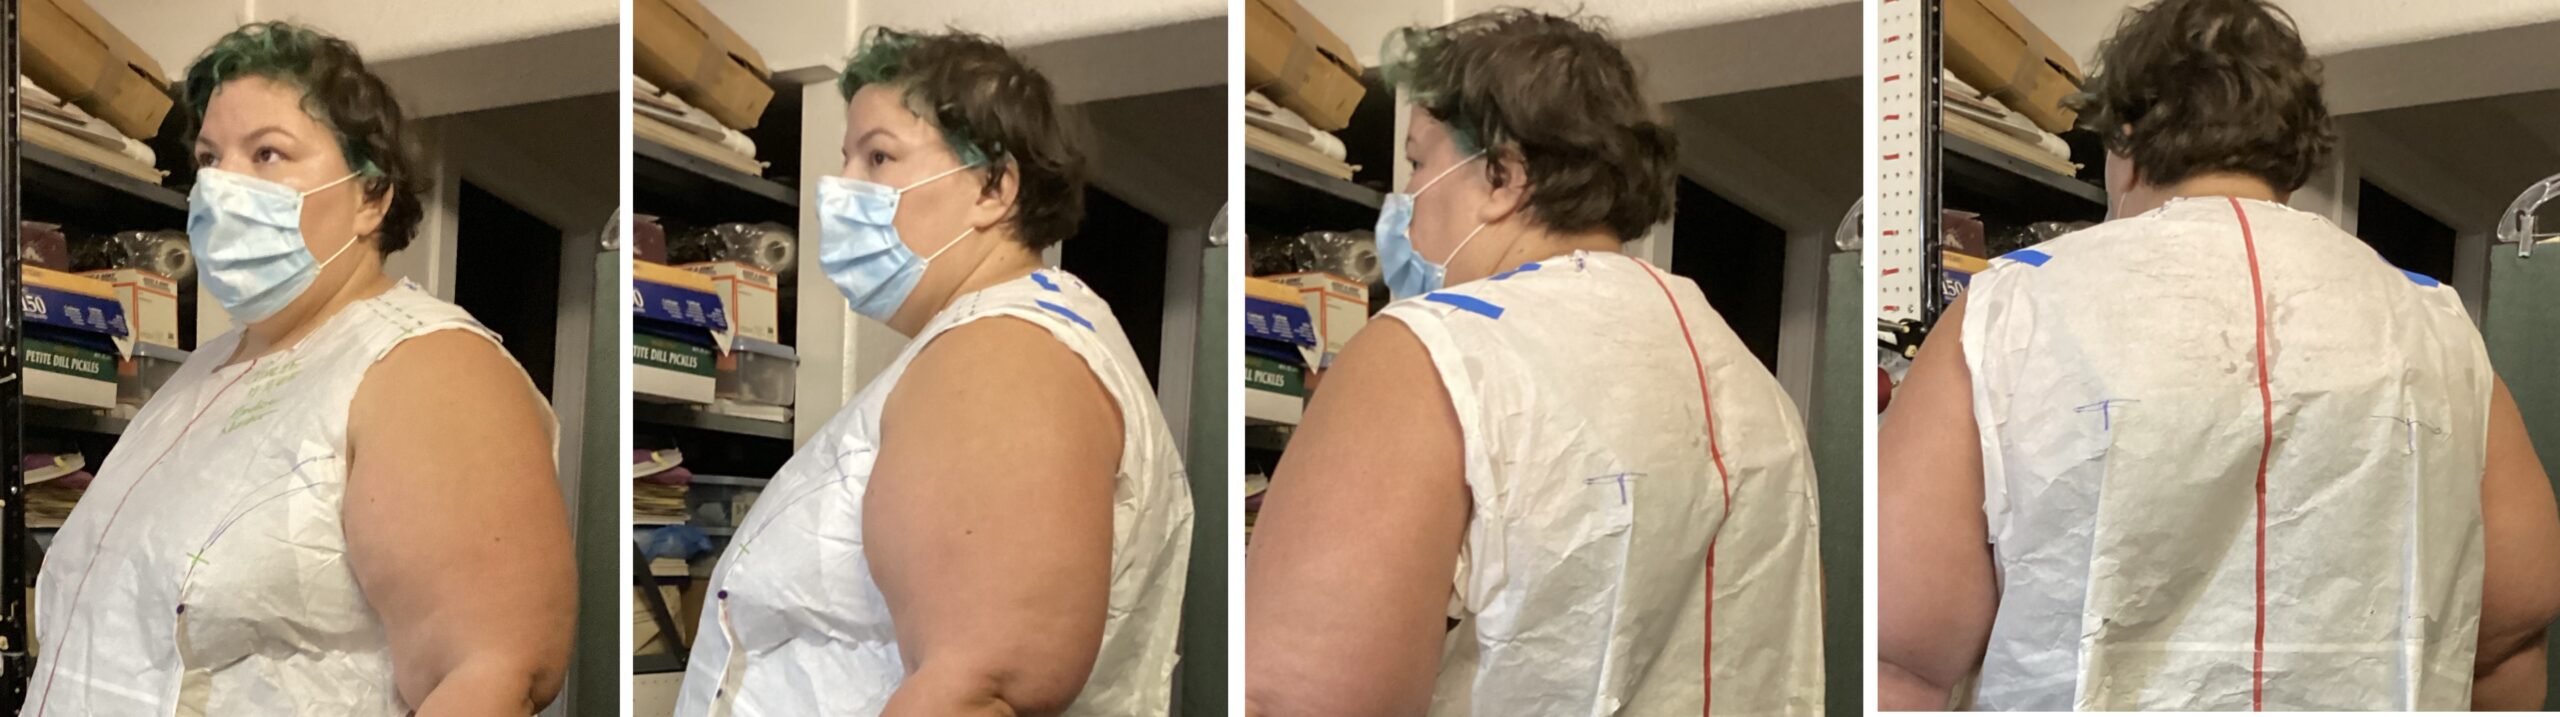
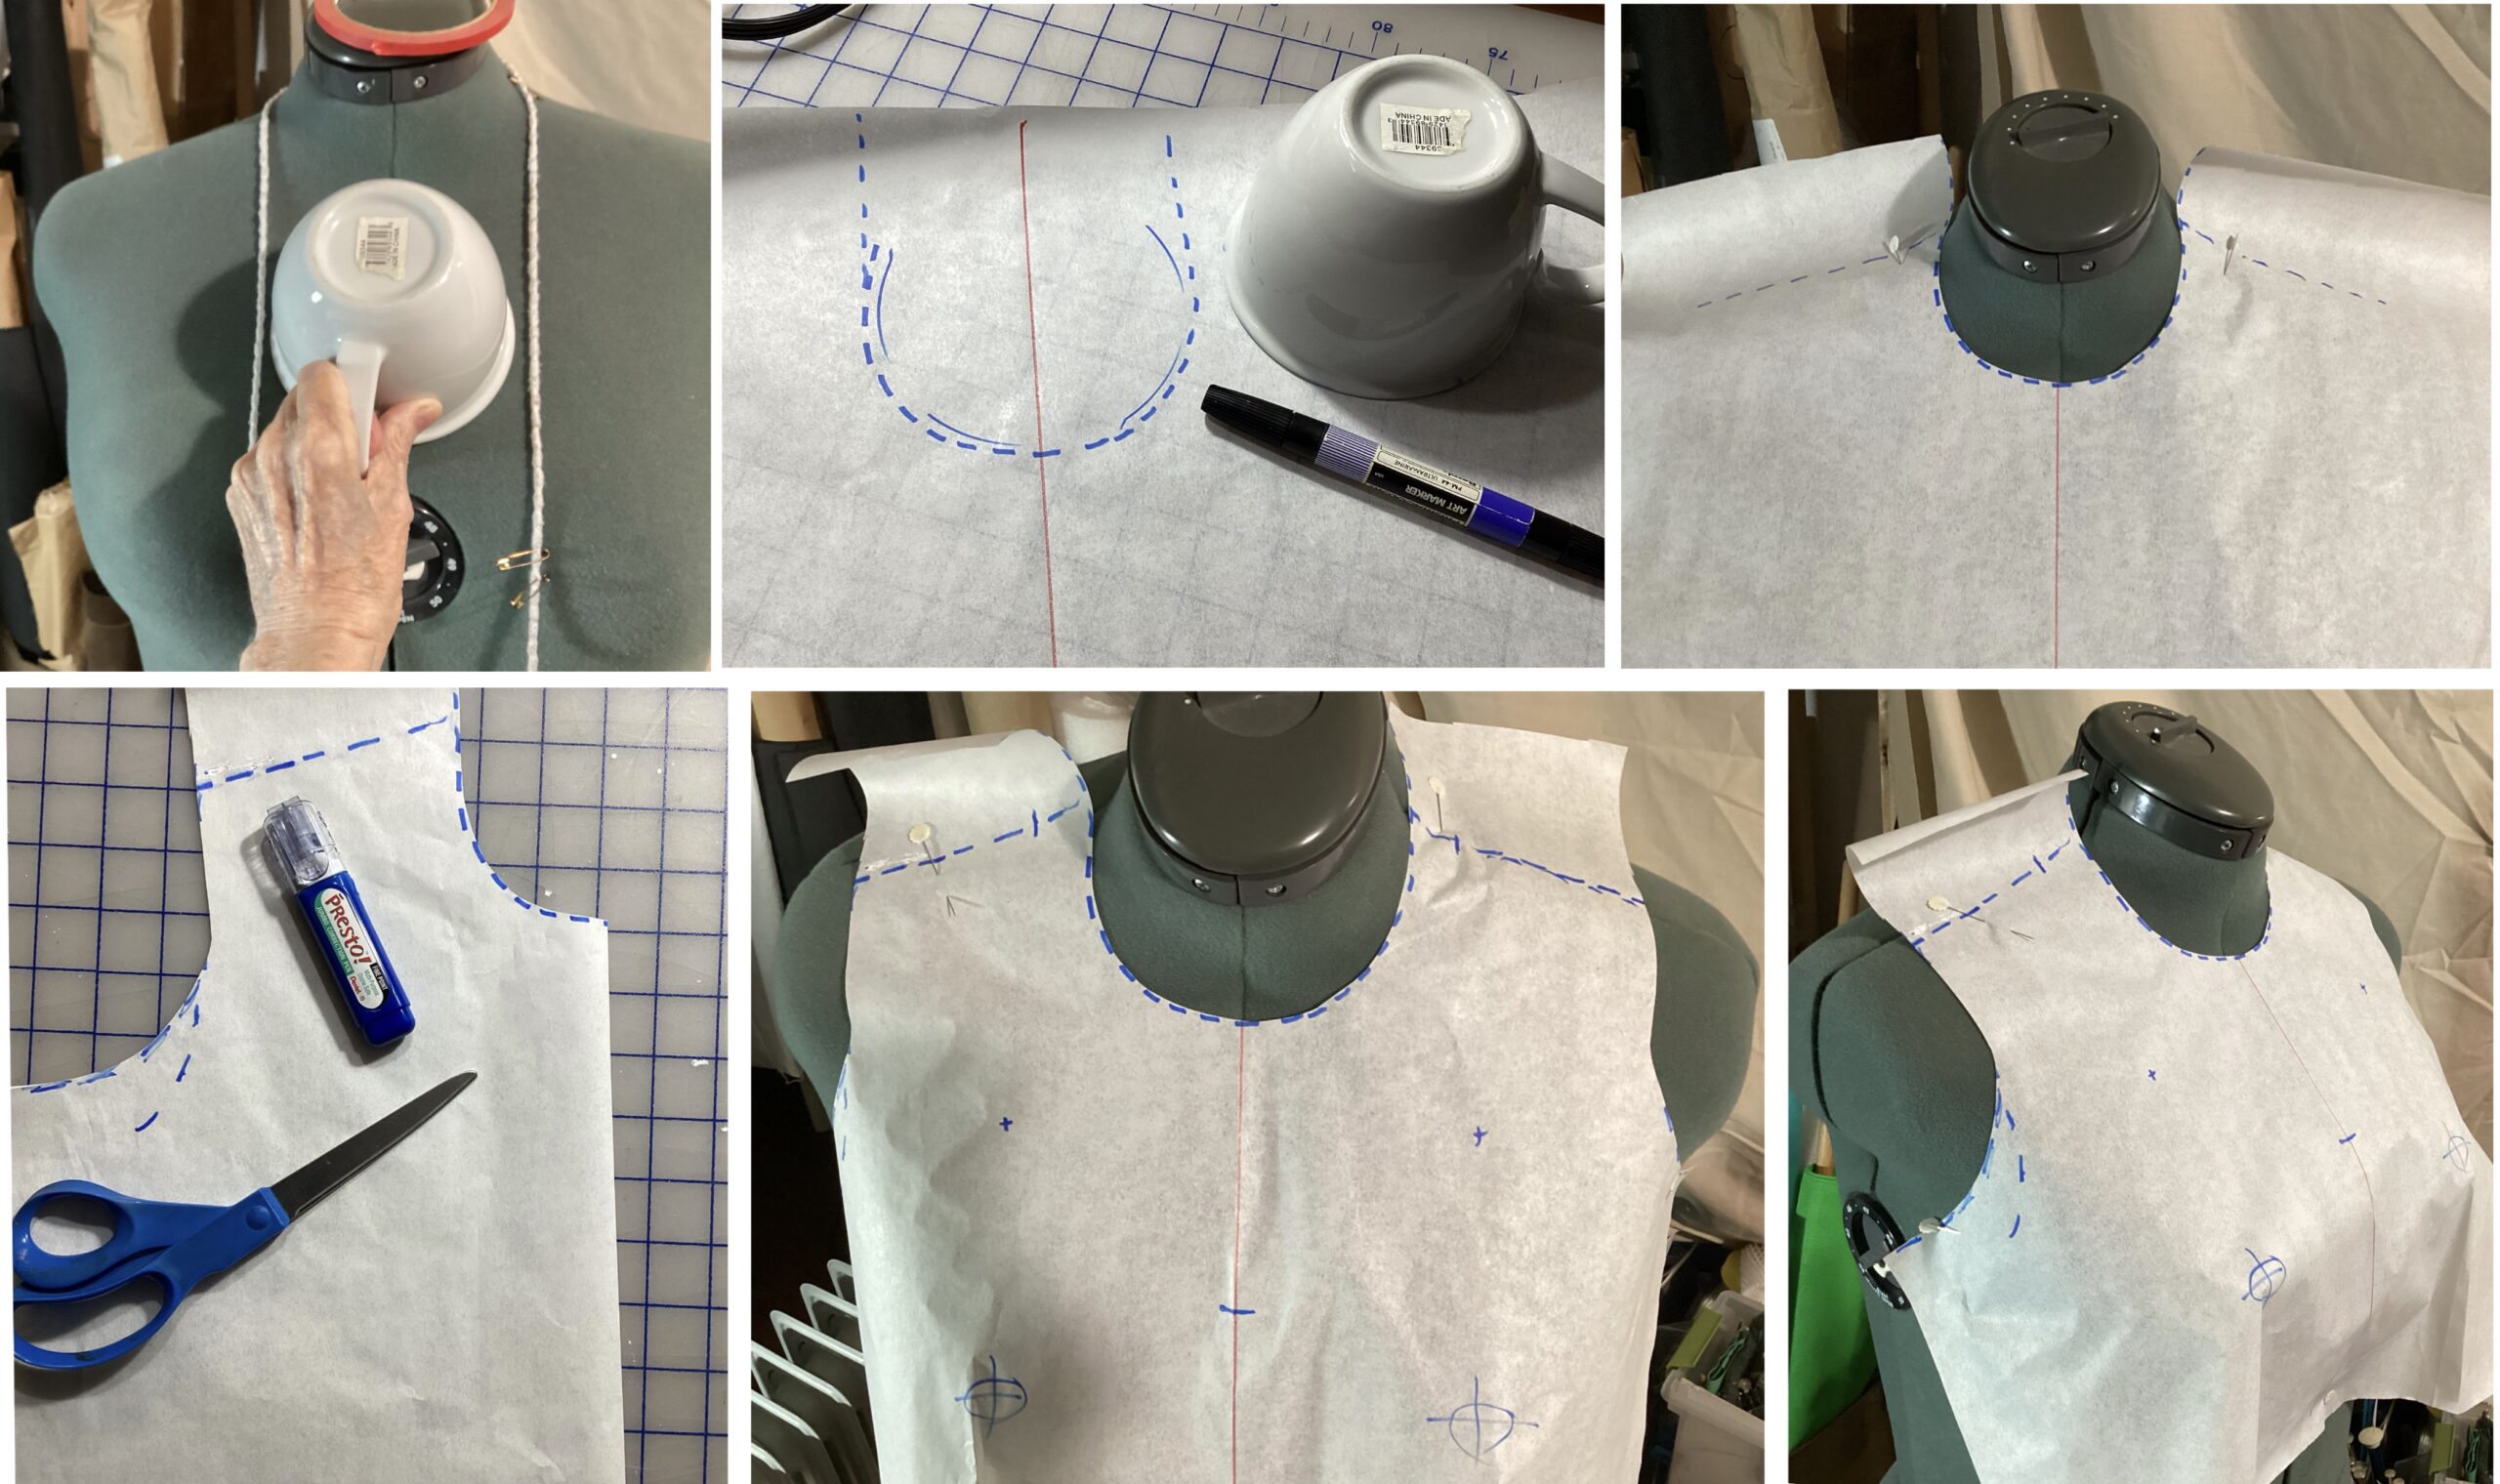
When fitting the pattern master, the upper front and back must fit smoothly around and across the body.
We’ll be working here on the Front Master.
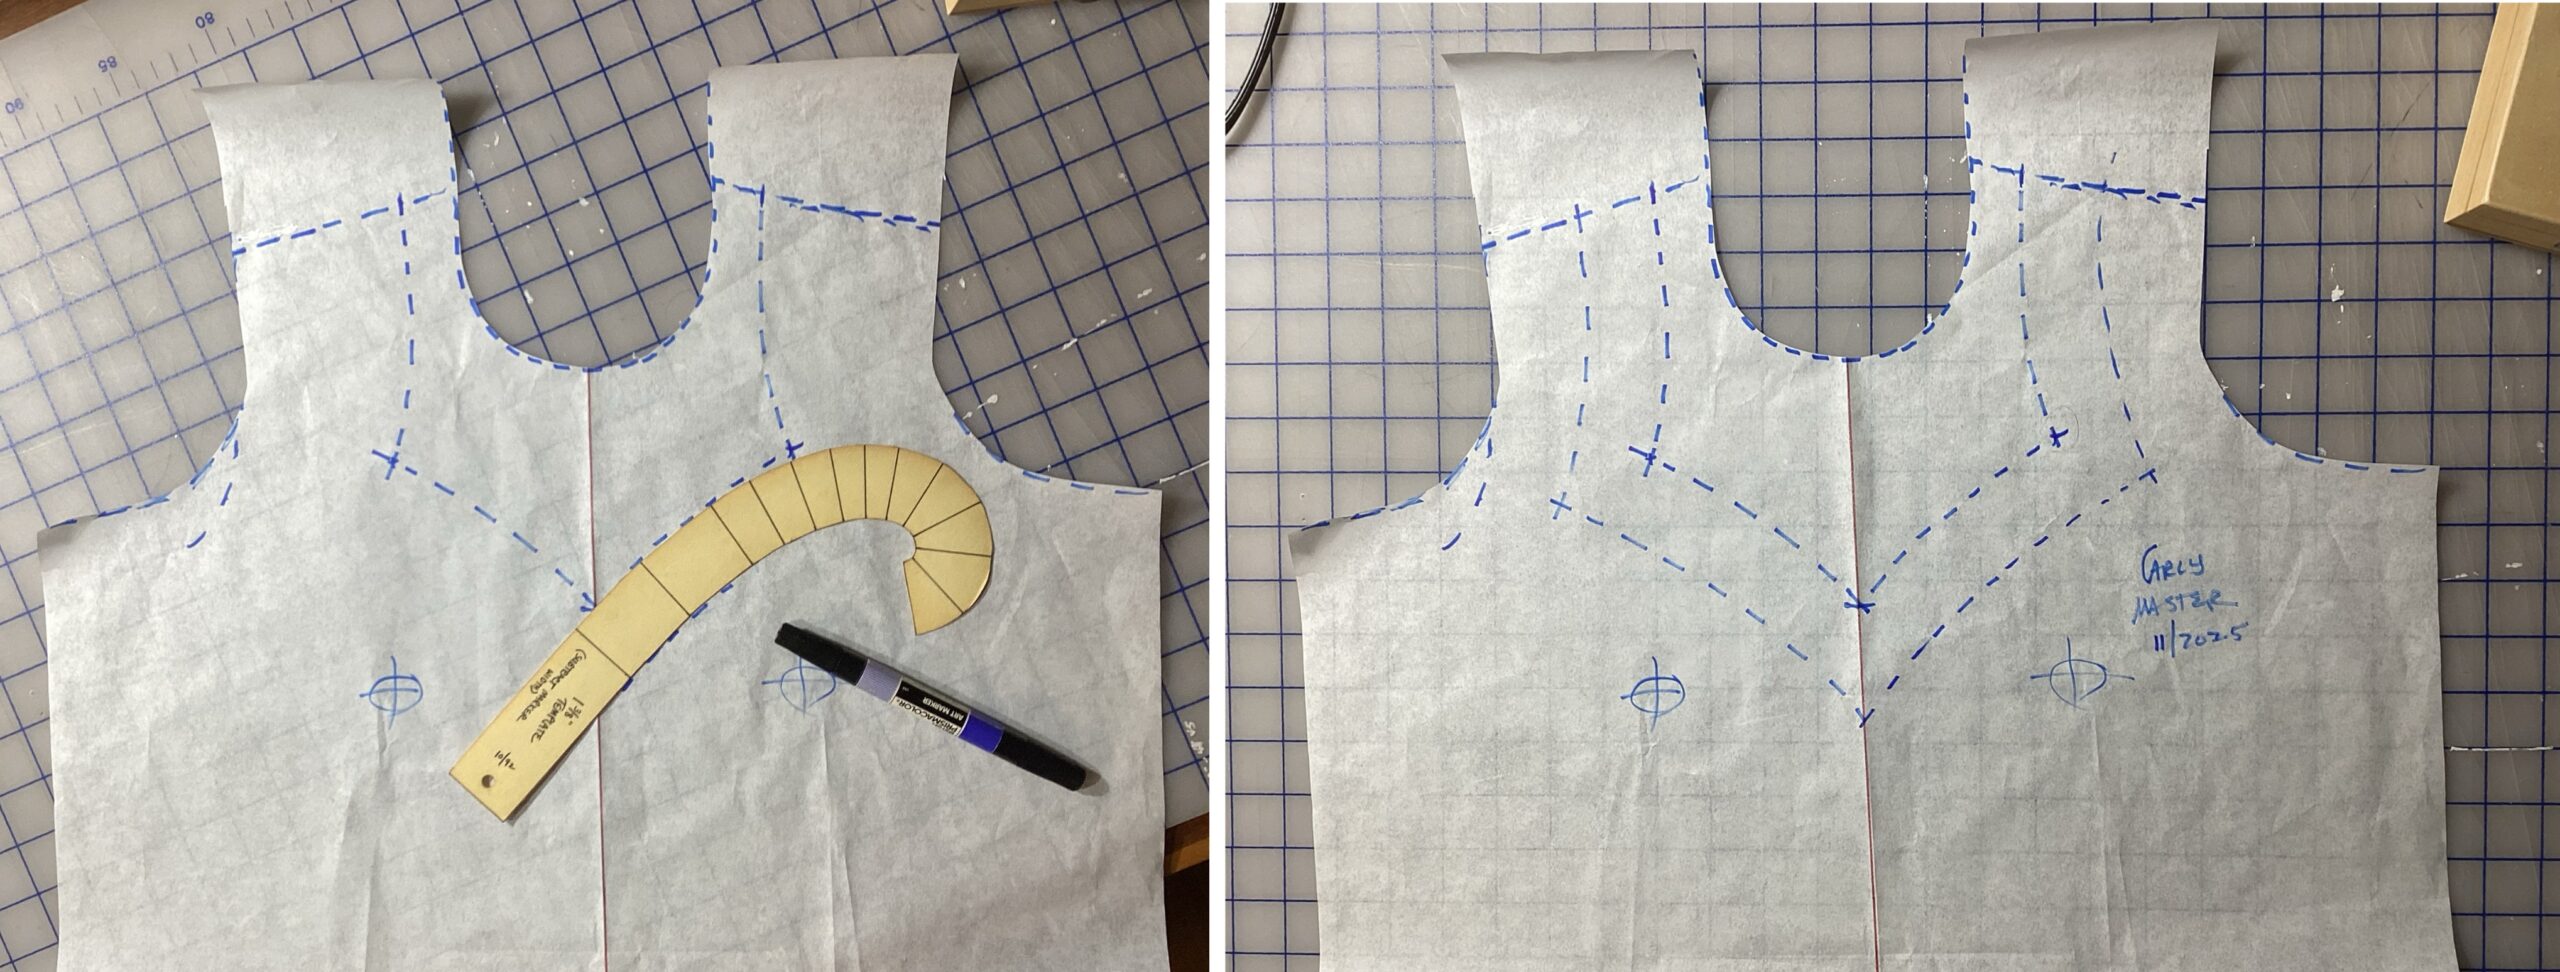
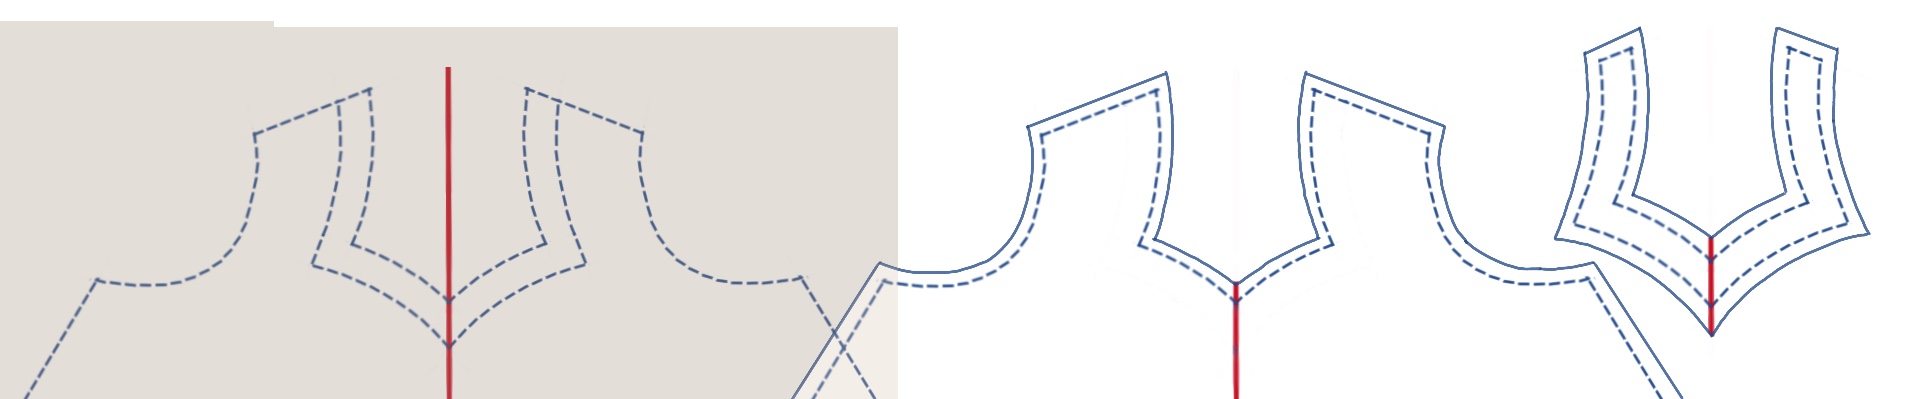
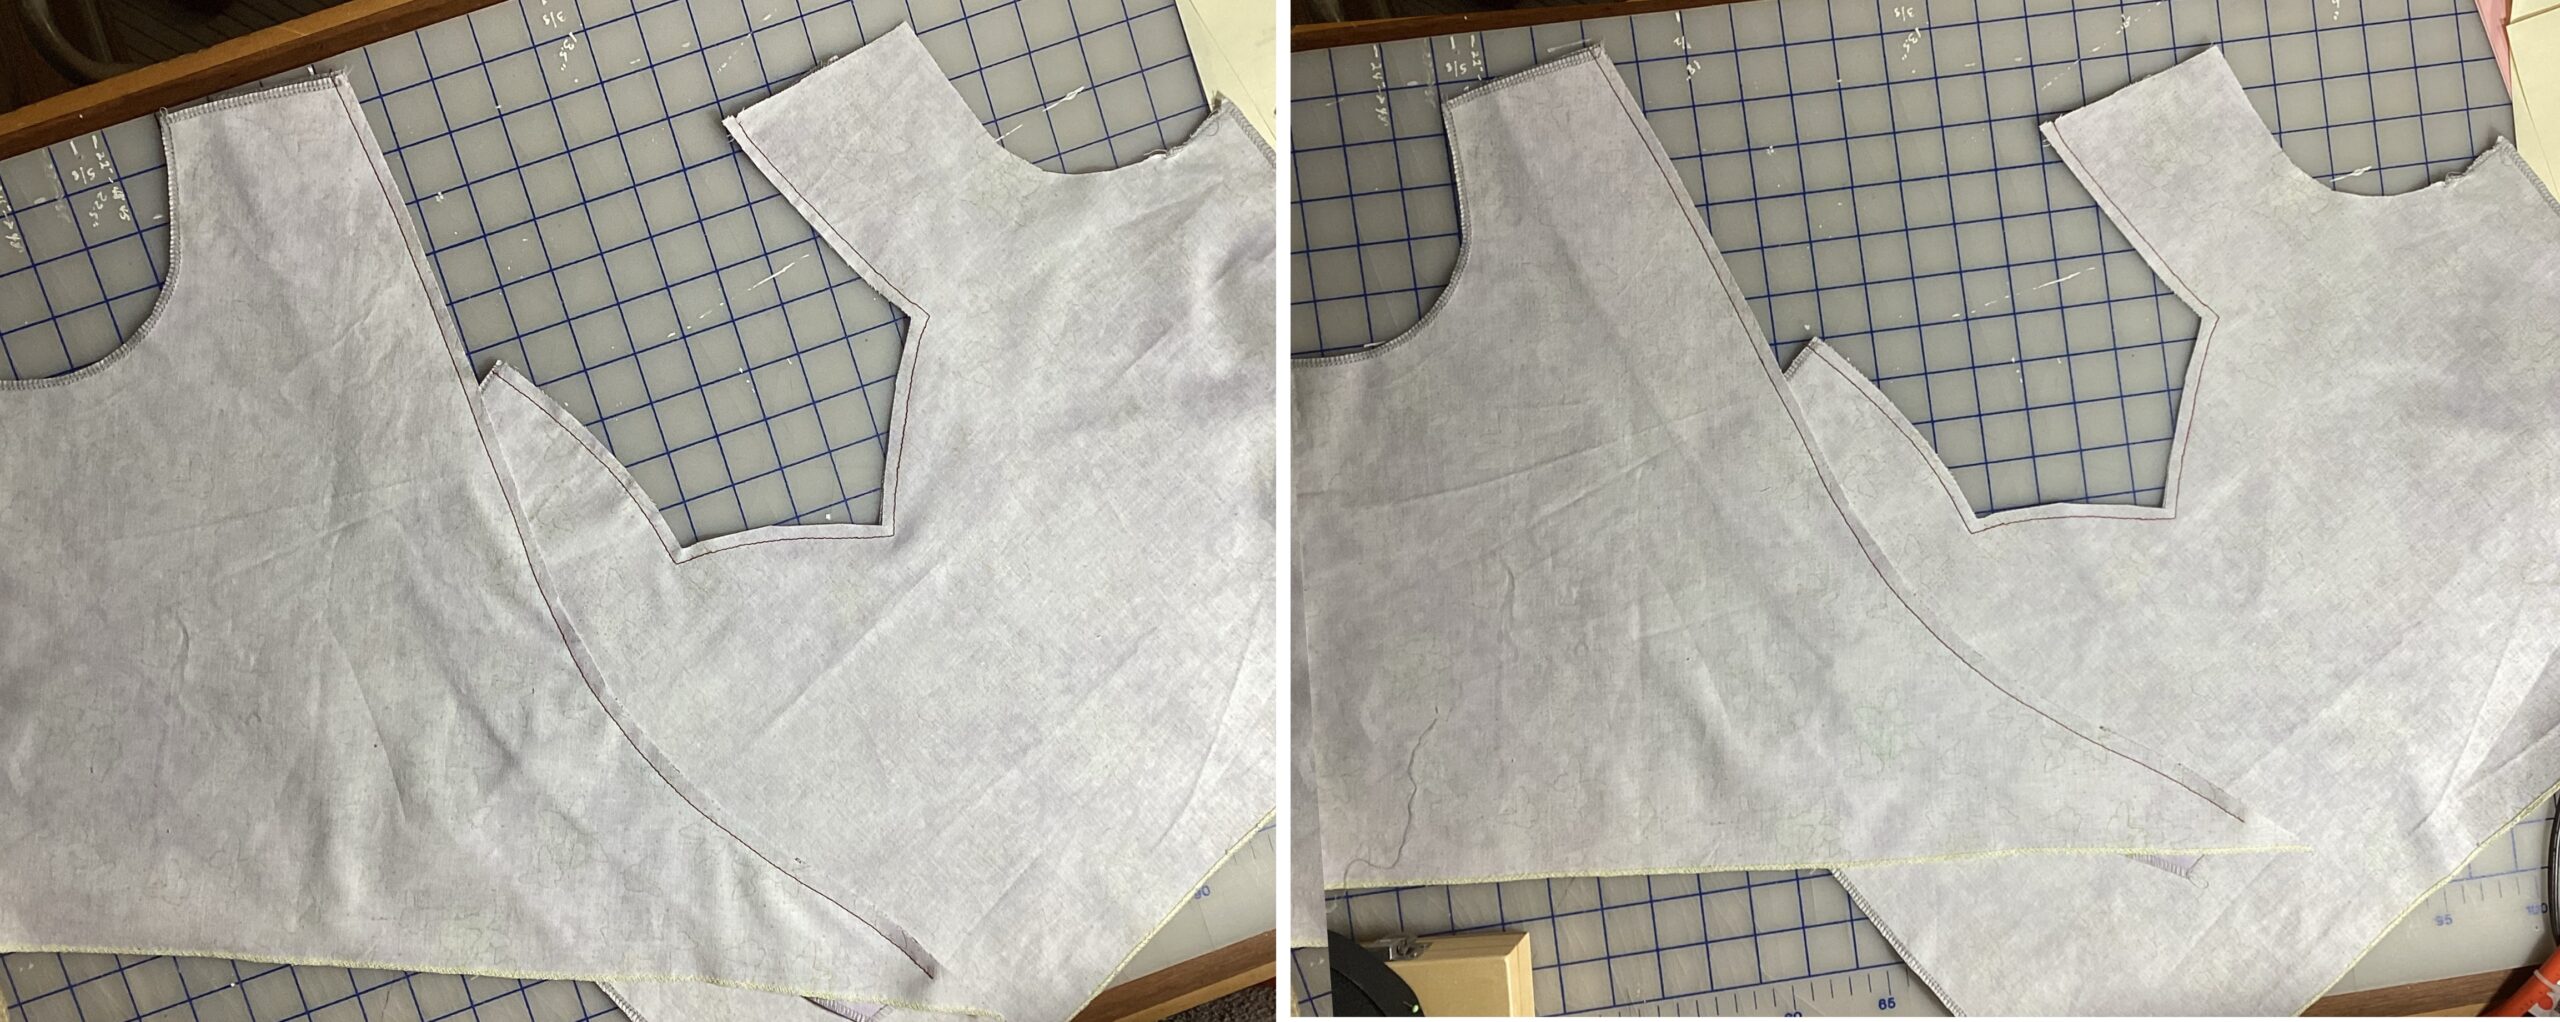
Trace this master for each neckline variation: it’s fast, and paper is cheap. The dashed stitching lines indicate that there’s no seam allowance.
Necklines can vary widely according to the person’s body and preference.
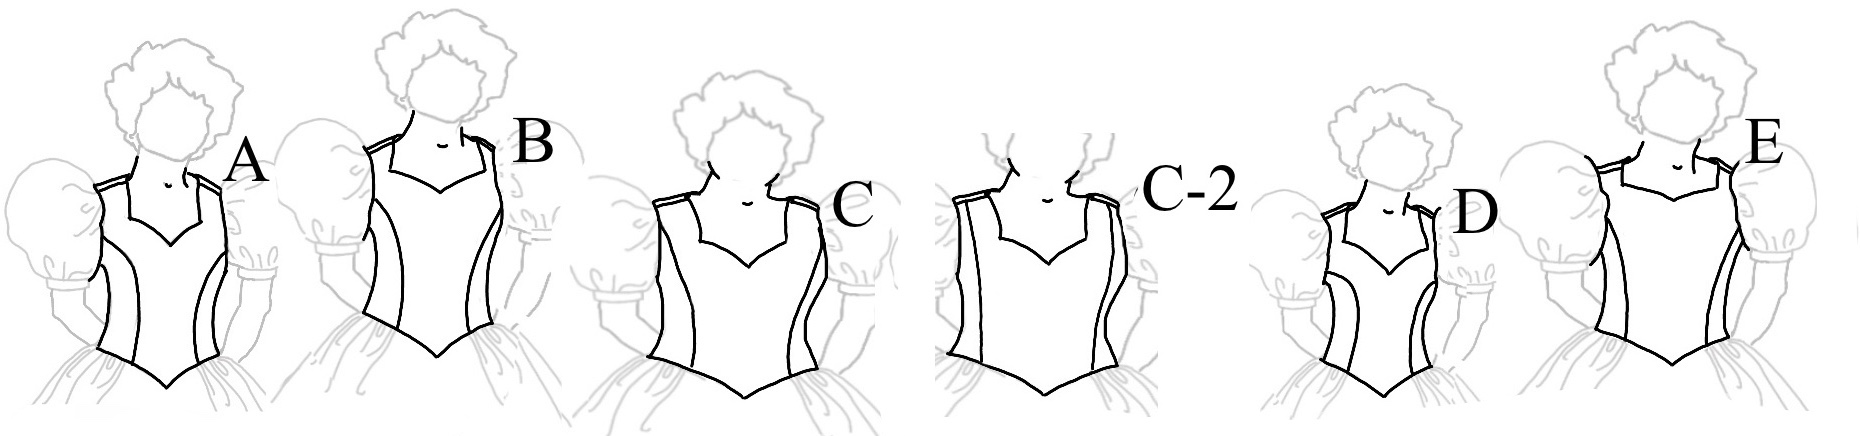

Have your client point where they want the neckline to fall, and connect the dots with curved lines rather than straight ones (we’ll cover how to sew/stabilize them below).
The paper will stand away from the body over the upper chest. Note the area(s) where this is happening.
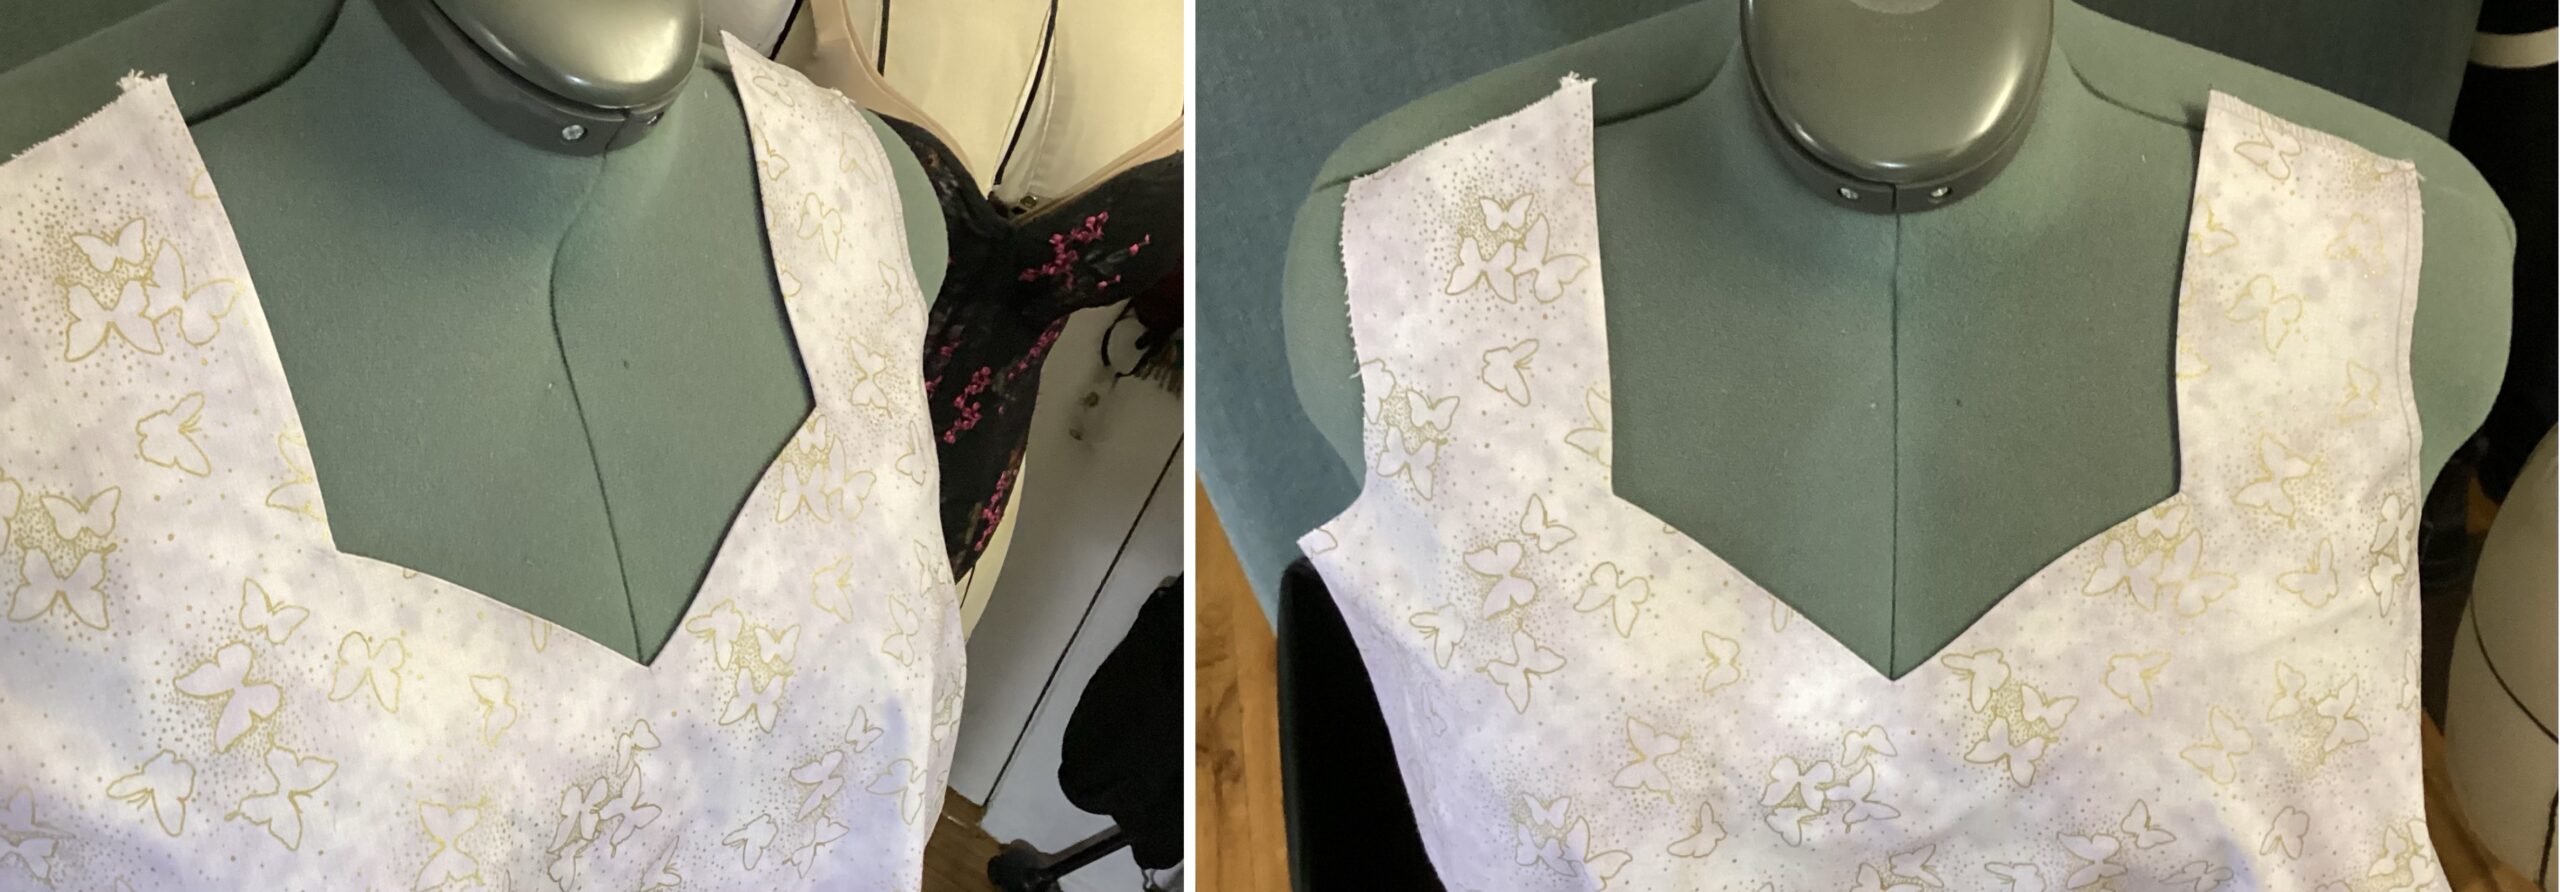
The facing is the same shape as the neckline.
1 3/4” or 4.5 cm is a good width for a facing.
Facings, quick overview:
- The success of necklines has to do with their facings. None of the steps are difficult. Press between each step!
- Use a lightweight interfacing on the wrong side of the facing. Couture trims them a thread or two inside the sewing line and hand-fells them into place. Fusible is my go-to.
- Use the crimp stitch to snug in the fabric in places that want to tent out from the body.
- Understitch with a 3-step zigzag.
In greater detail:
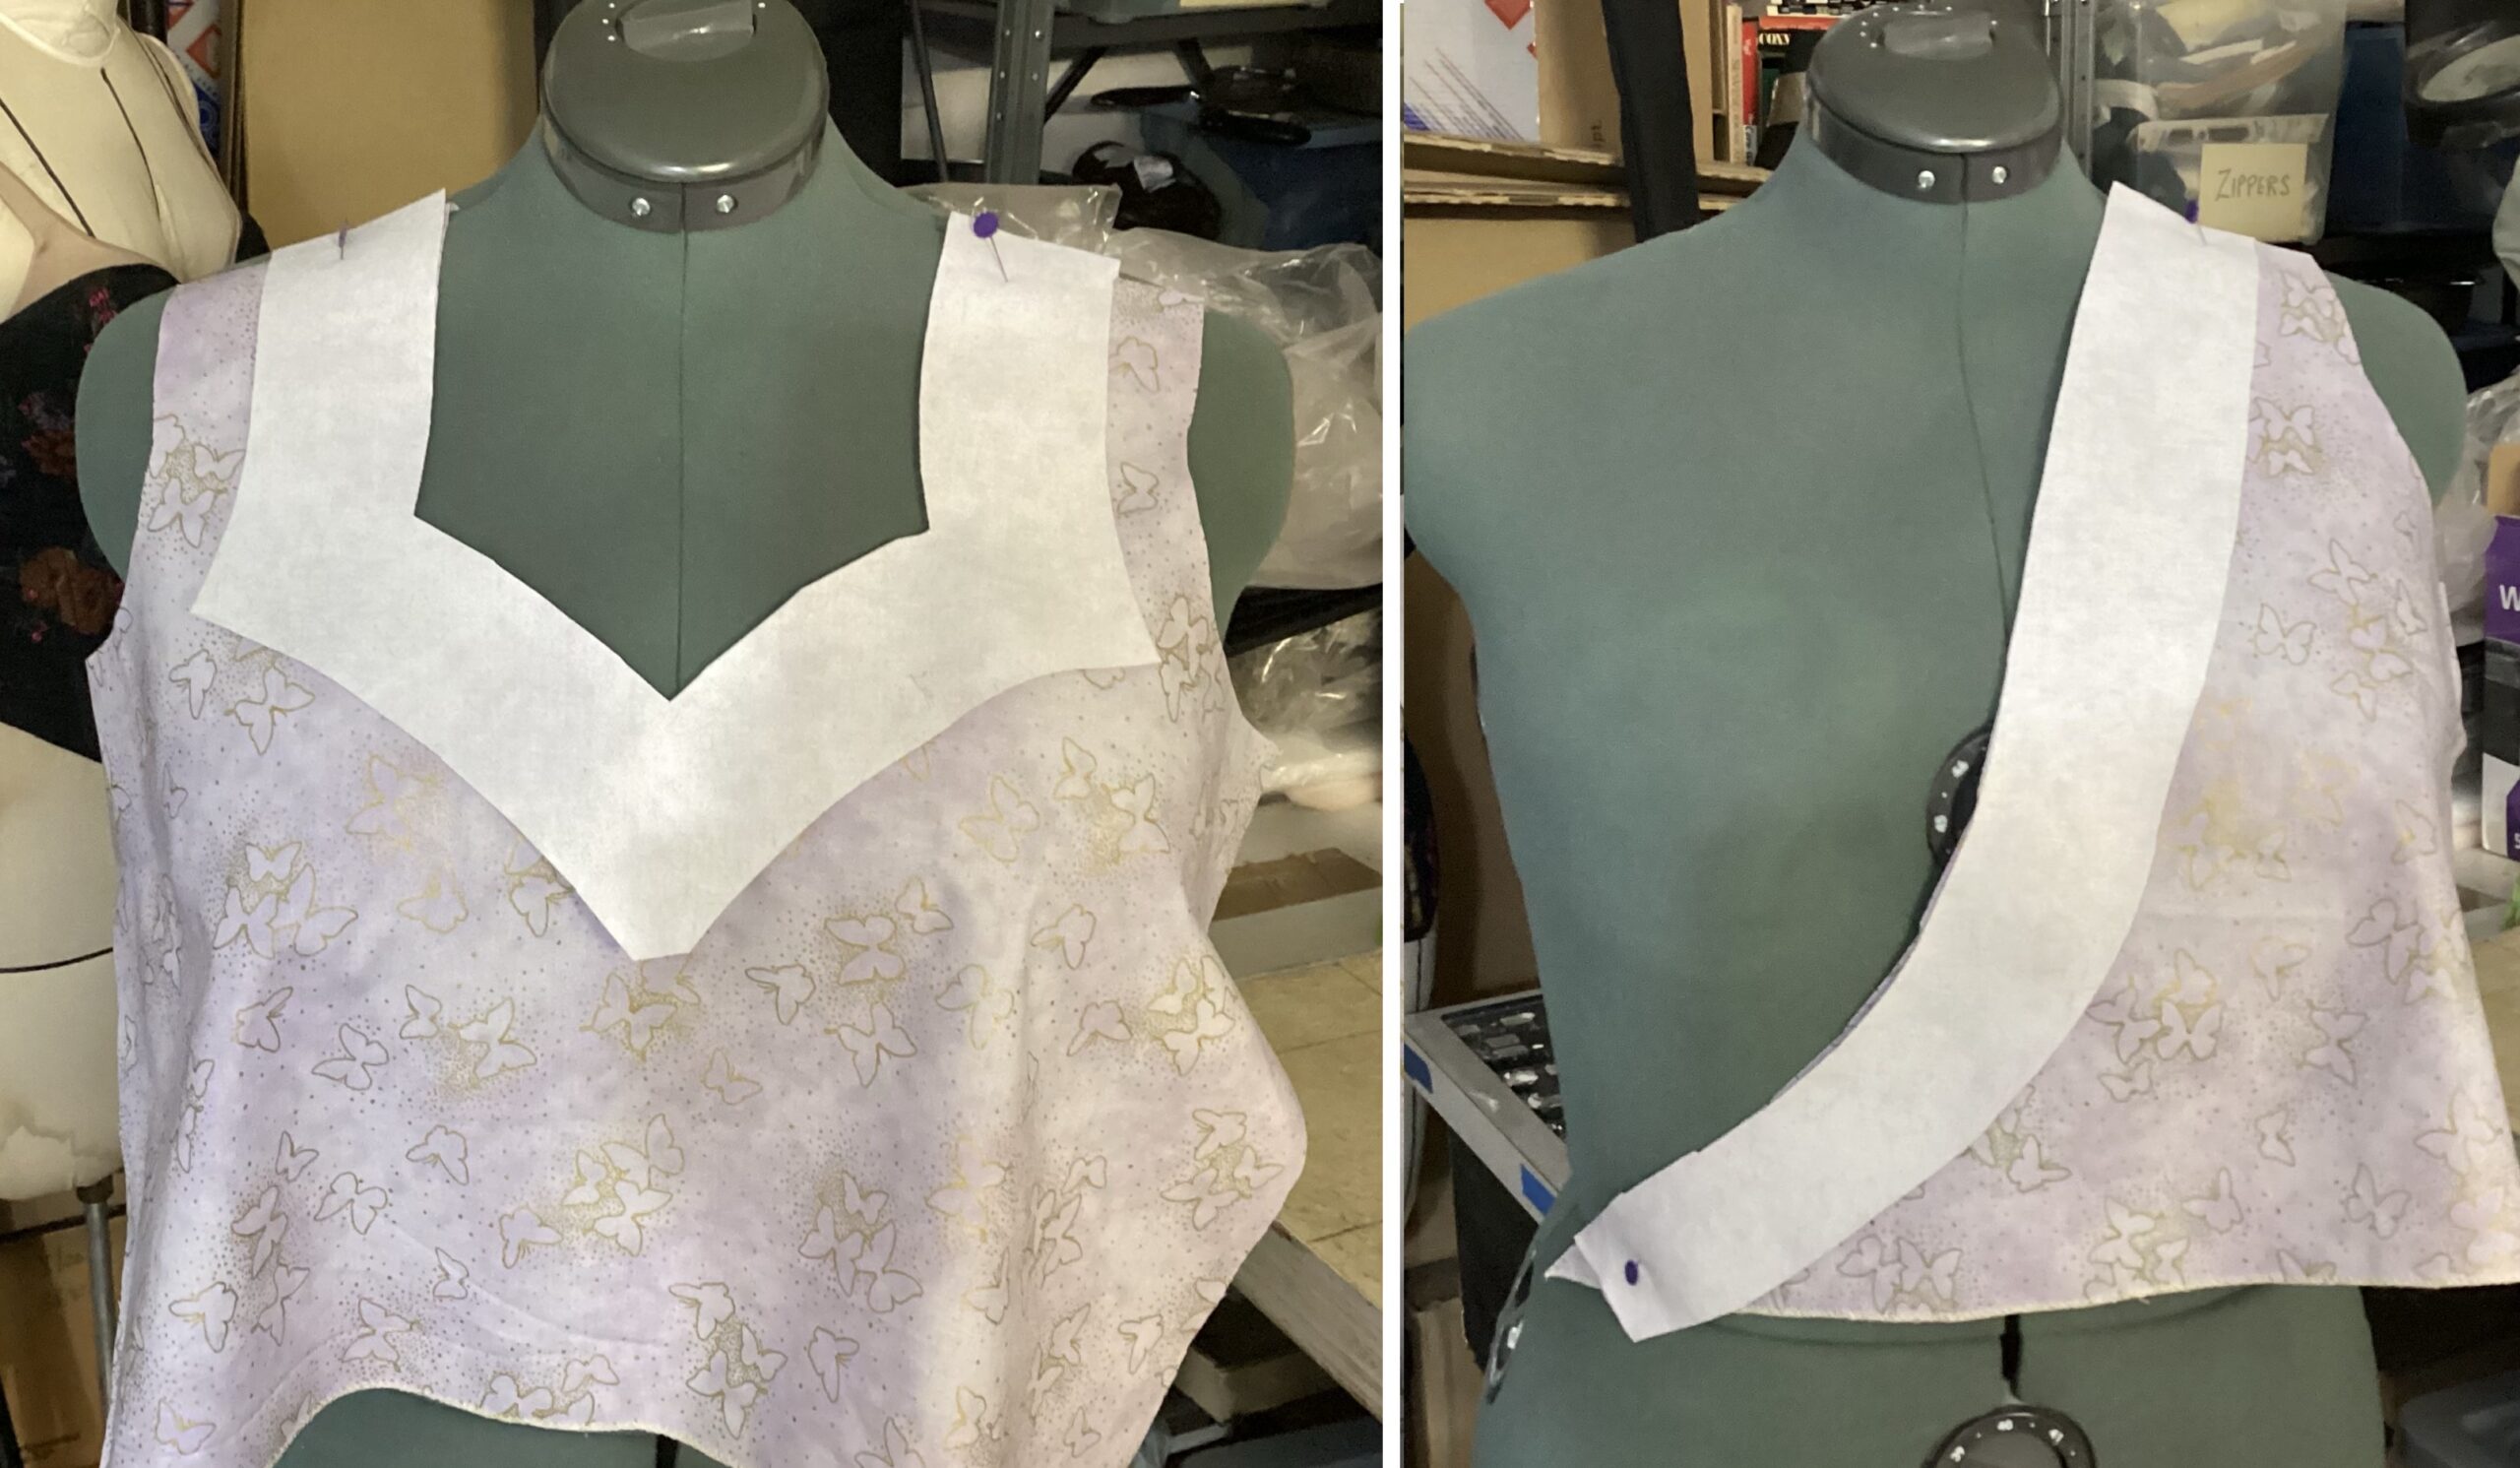
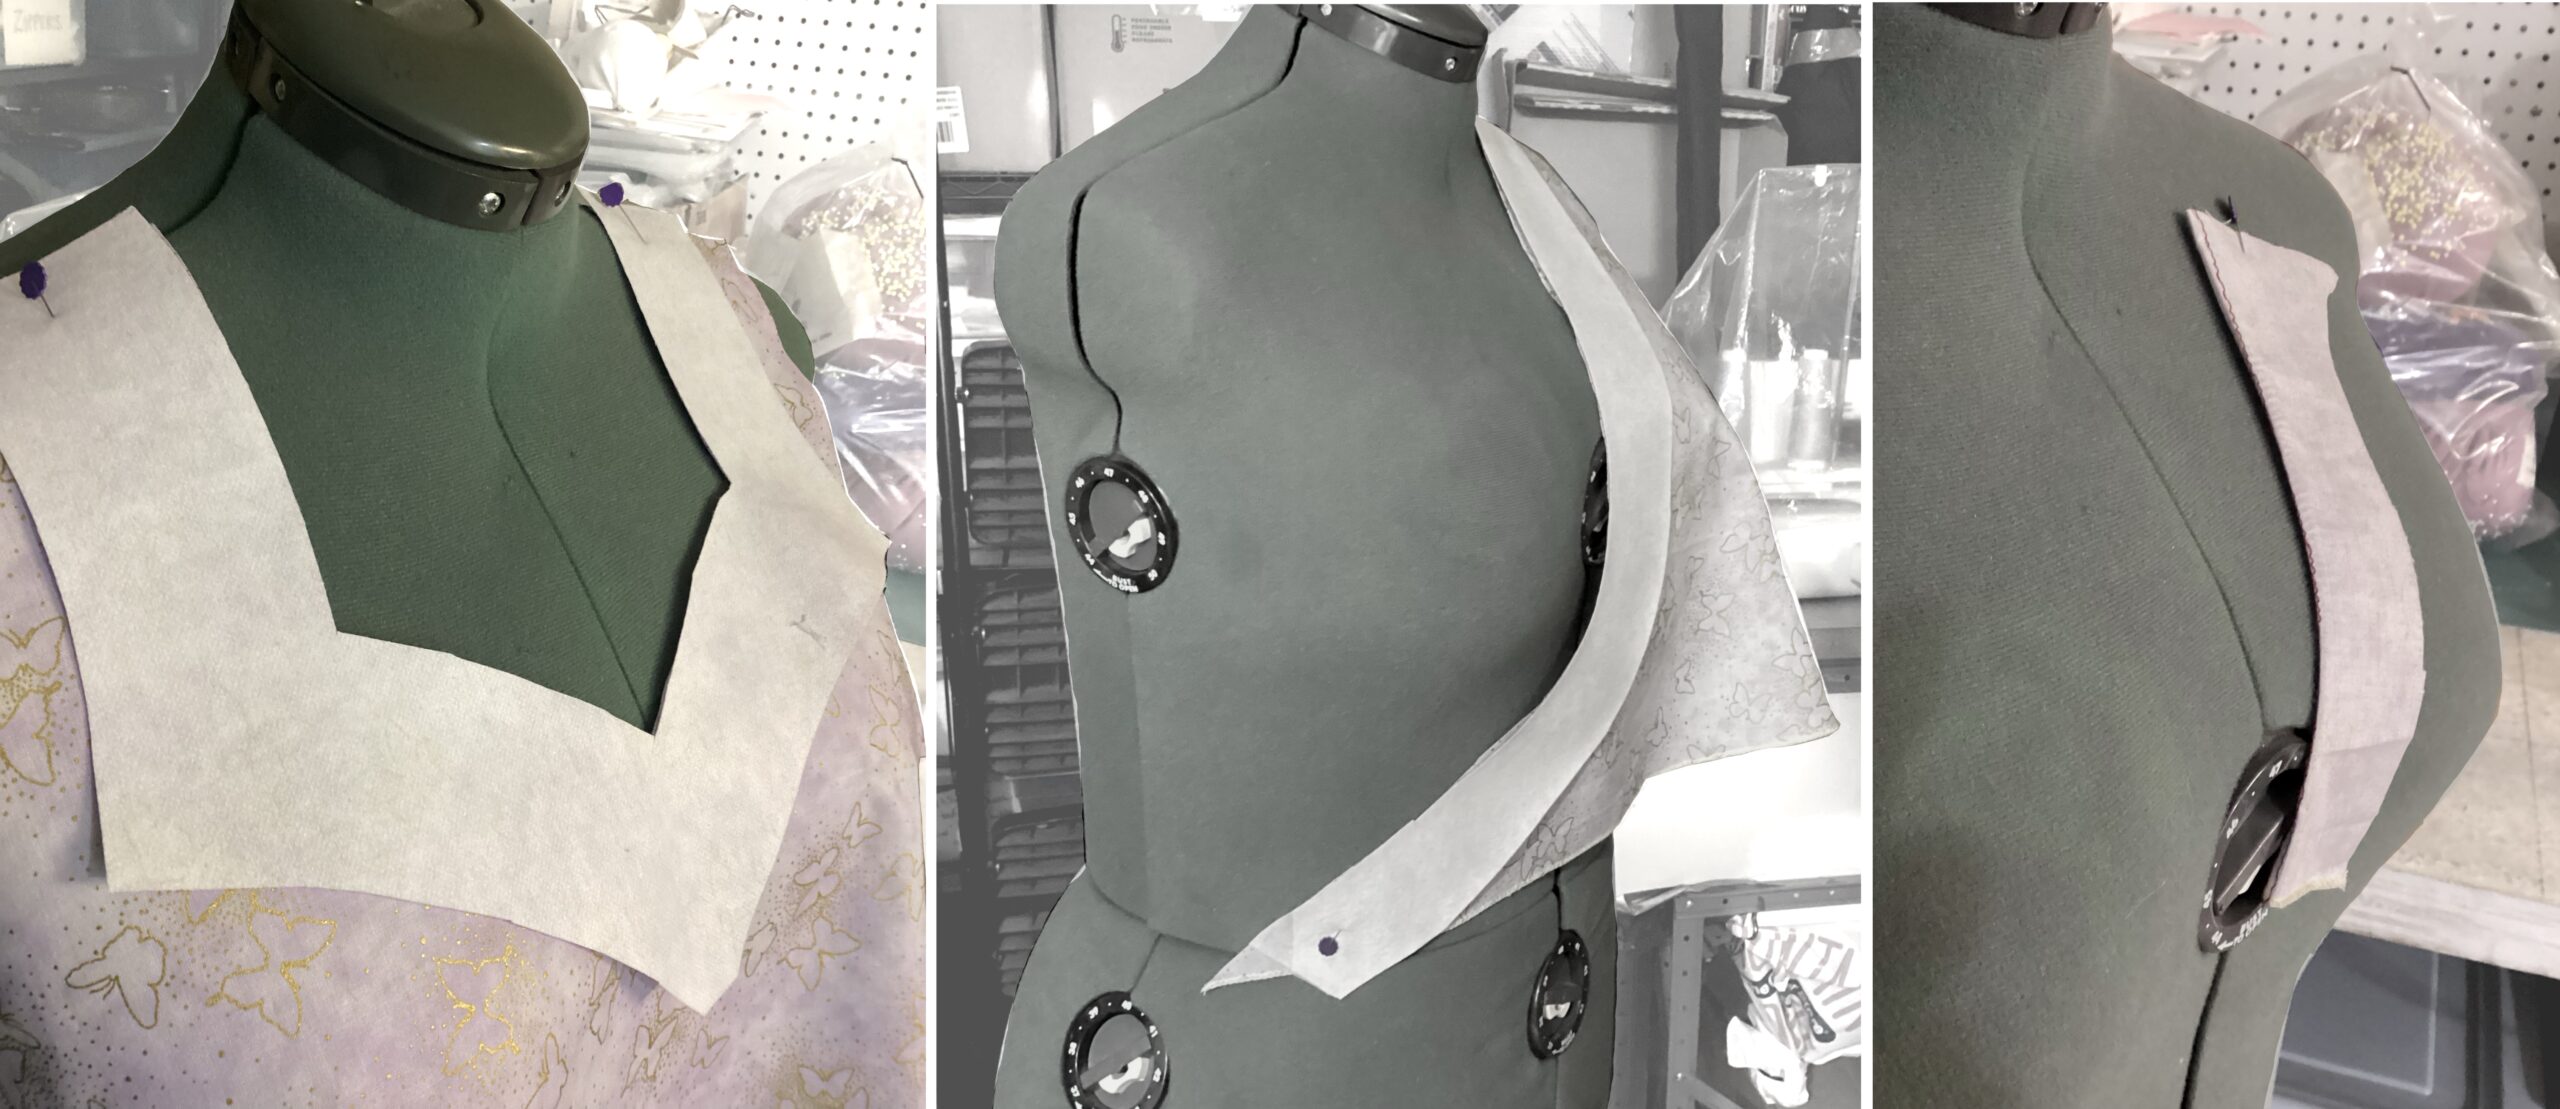
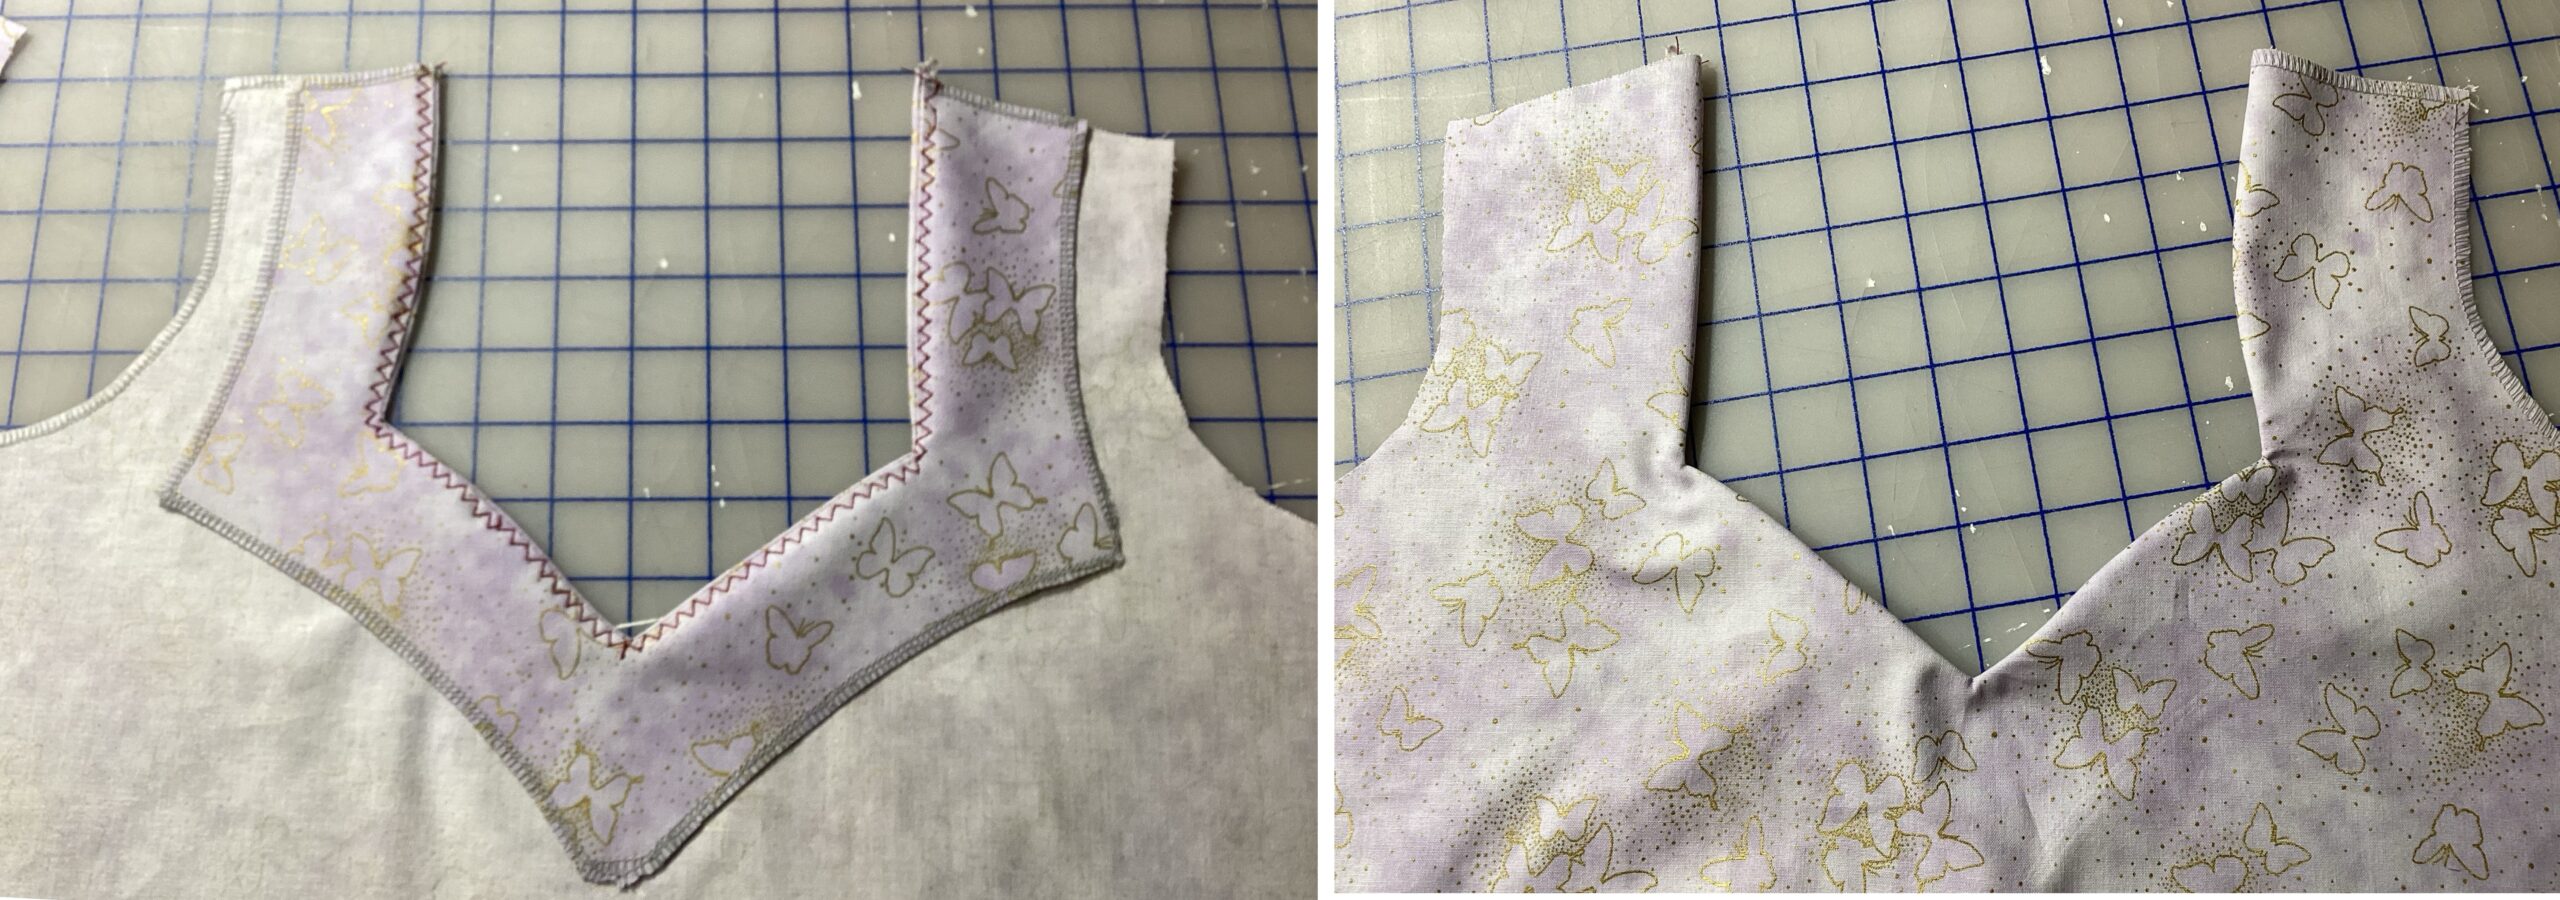
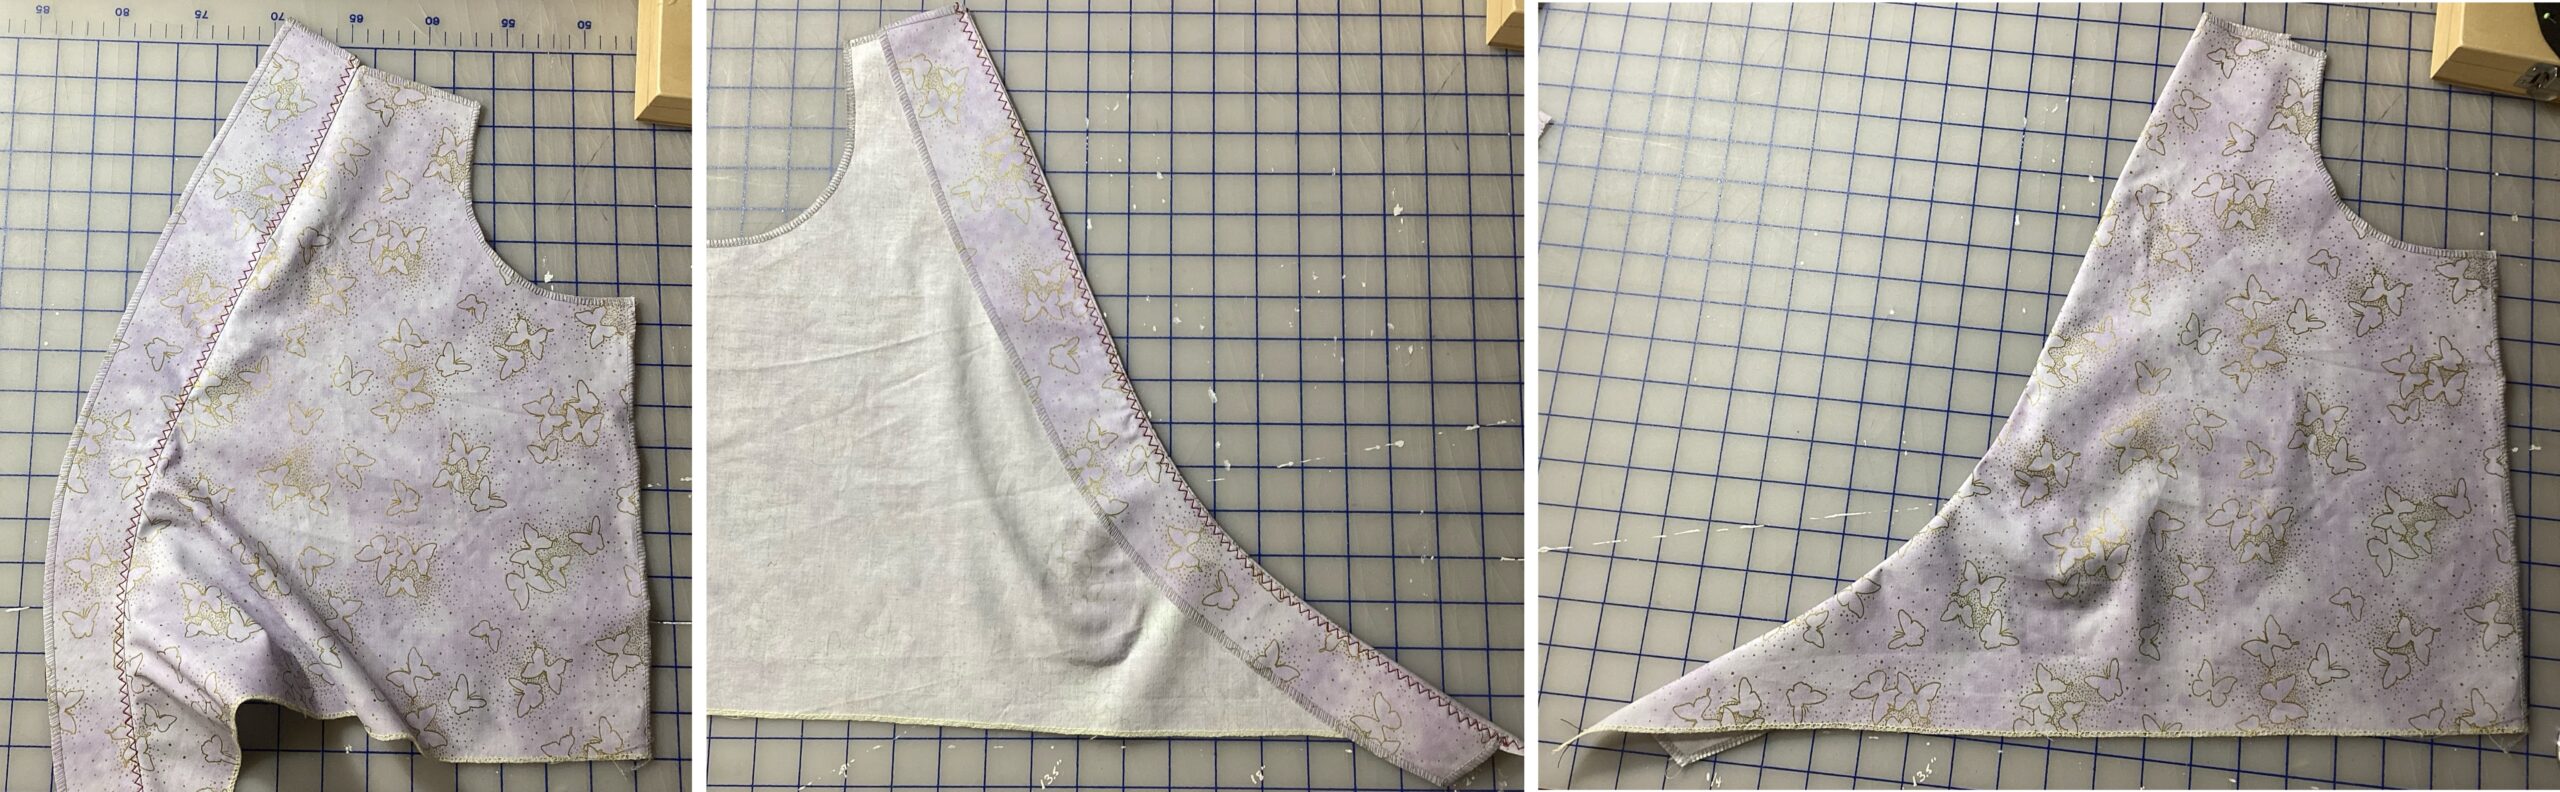
The Industry flat-fuses interfacing rather than fiddling with trimming the seam allowances. Here are the cut pieces for our two samples, each laid over a front piece, right-sides together, as they will be sewn: a sweetheart and a surplice (wrapped front).
Deeper necklines tend to gape over the space between the breasts. The little sample at right shows how crimp stitching pulls in the curve.
Sewing a facing to a bodice and understitching:
Stay-stitch the neck and armscye edges with lines of shorter stitches a few threads into the seam allowance (not shown).
Once any sewing is done, immediately press it. This not only flattens the fabric, but embeds the stitching into it. Do not skip this step, or think you can do several steps at once. It doesn’t work that way! This separates professional results from “loving hands at home.”
The Sweetheart Neckline
Sew the facing to the front, right sides together, along the neck edge. Press. The next step, understitching, rolls the seam slightly to the inside and provides shaping and structure. Be sure the facing lies flat on your machine bed. Ignore the front piece folding or pleating other than to keep it out of the way. I prefer using a three-step zigzag in order to put as many stabilizing stitches into the area as possible. The contrast thread (used for clarity here) does not show on the finished garment.
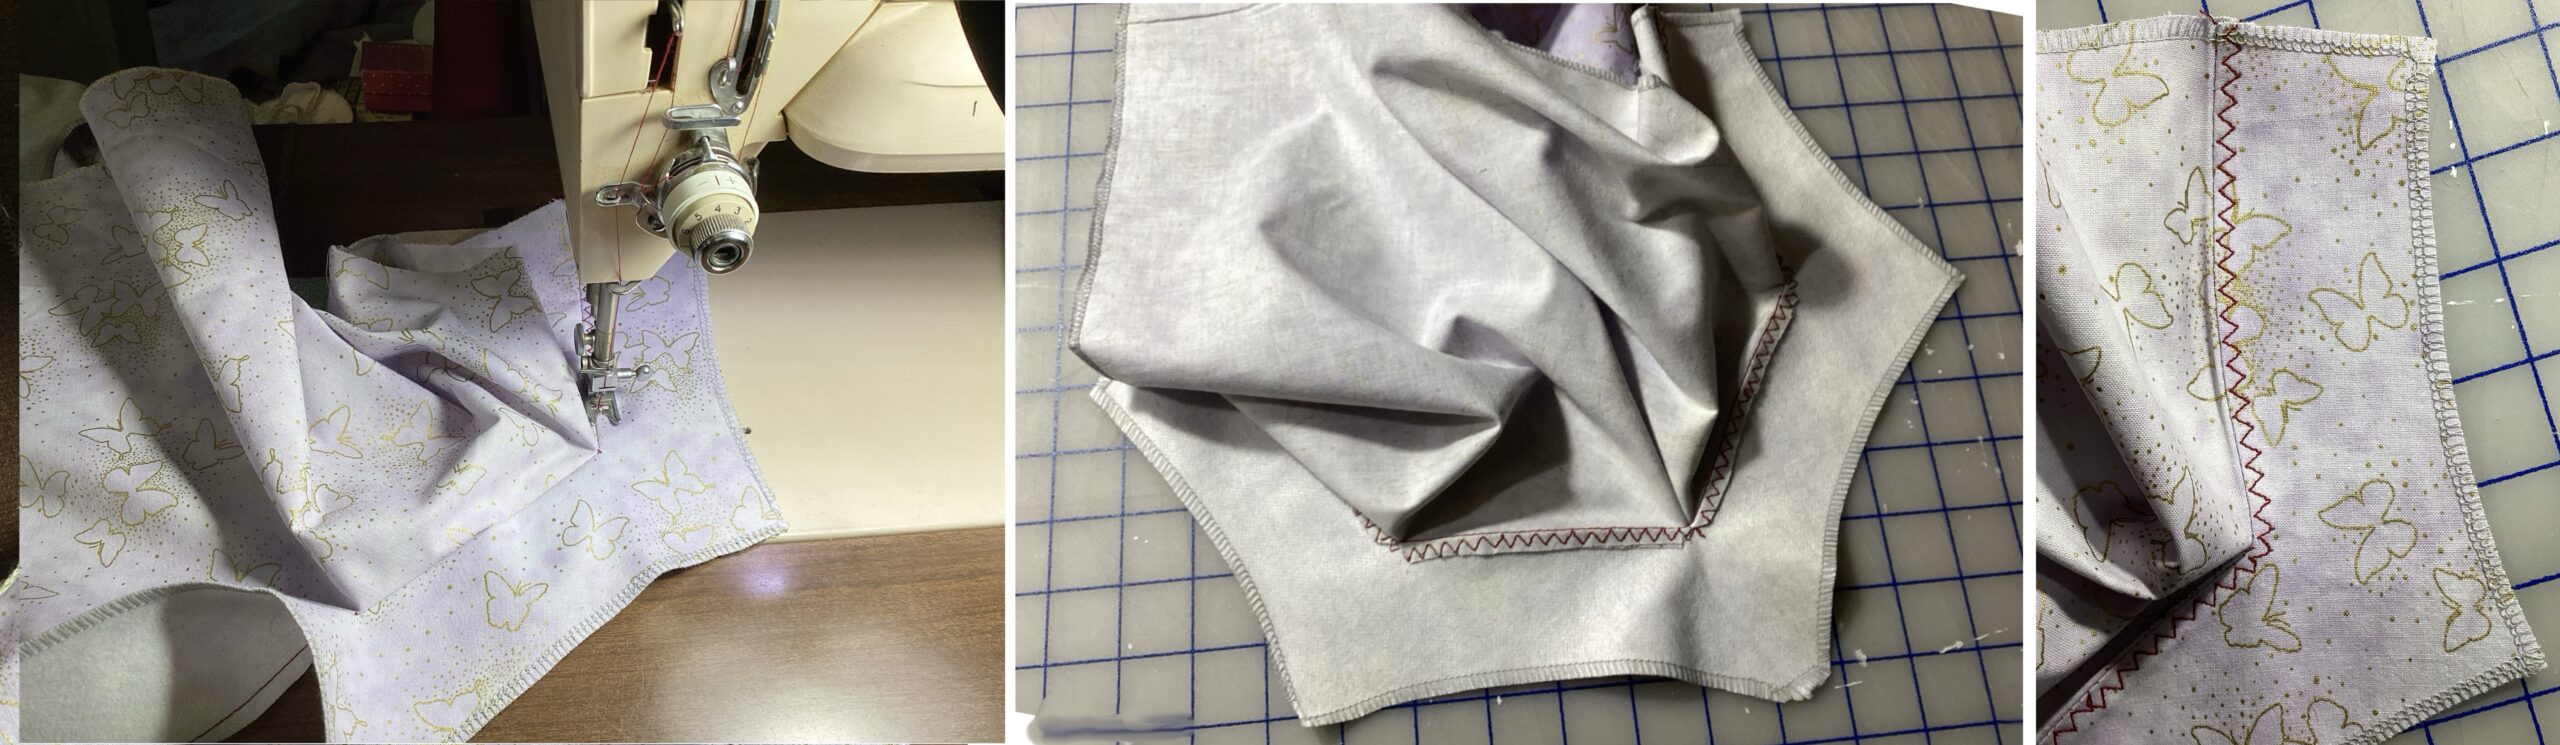
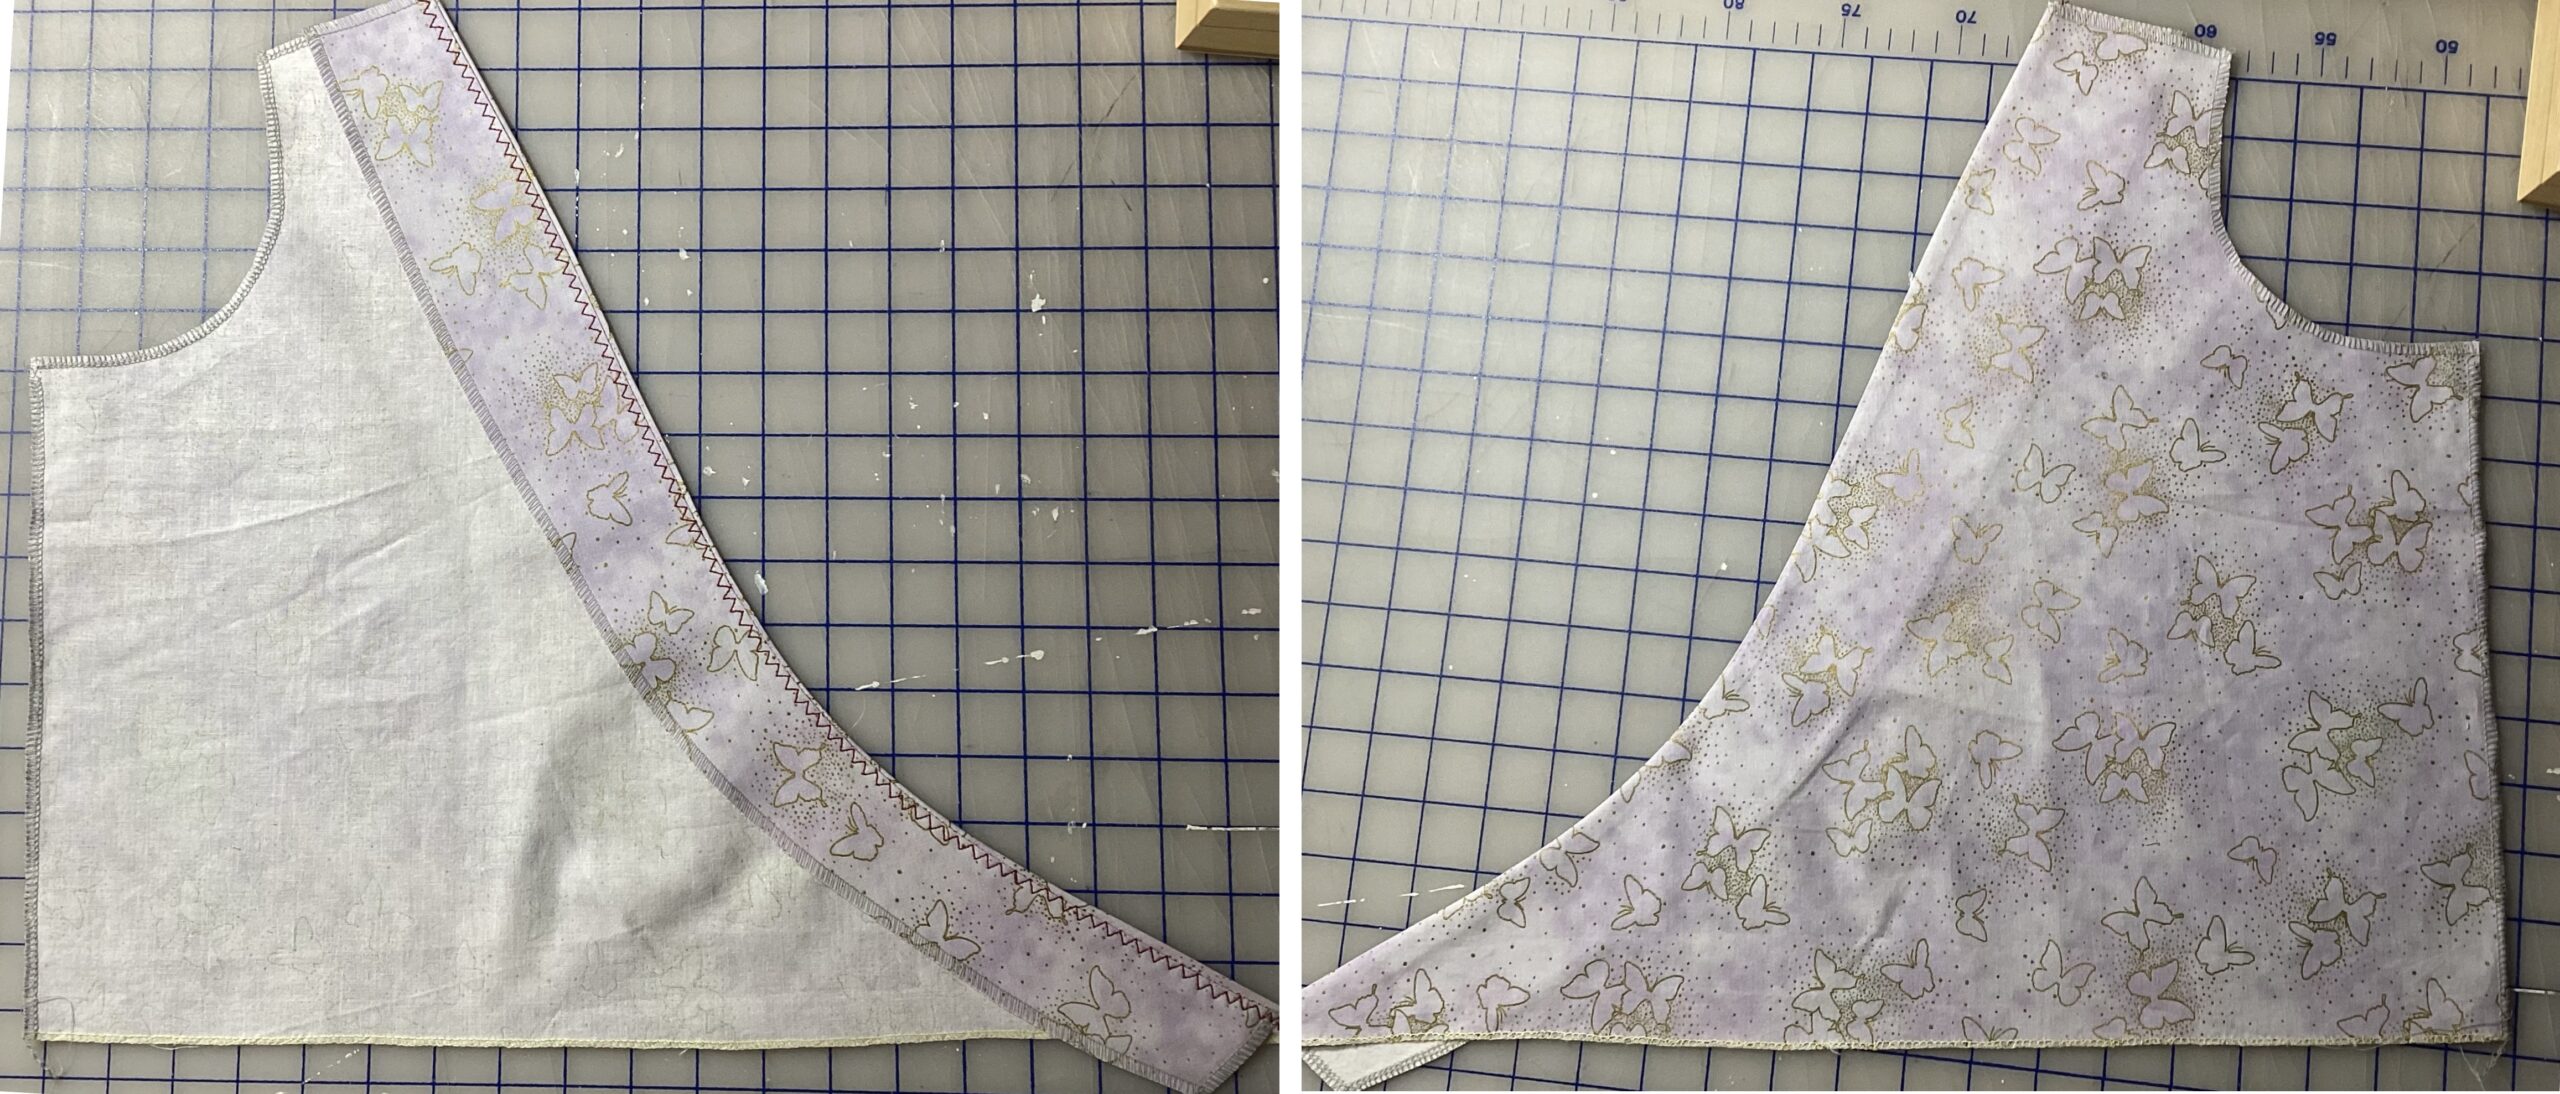
Open the seam flat, facing on top and with the seam allowances underneath the facing. The inner edge of the zigzag is a few threads from the seam.

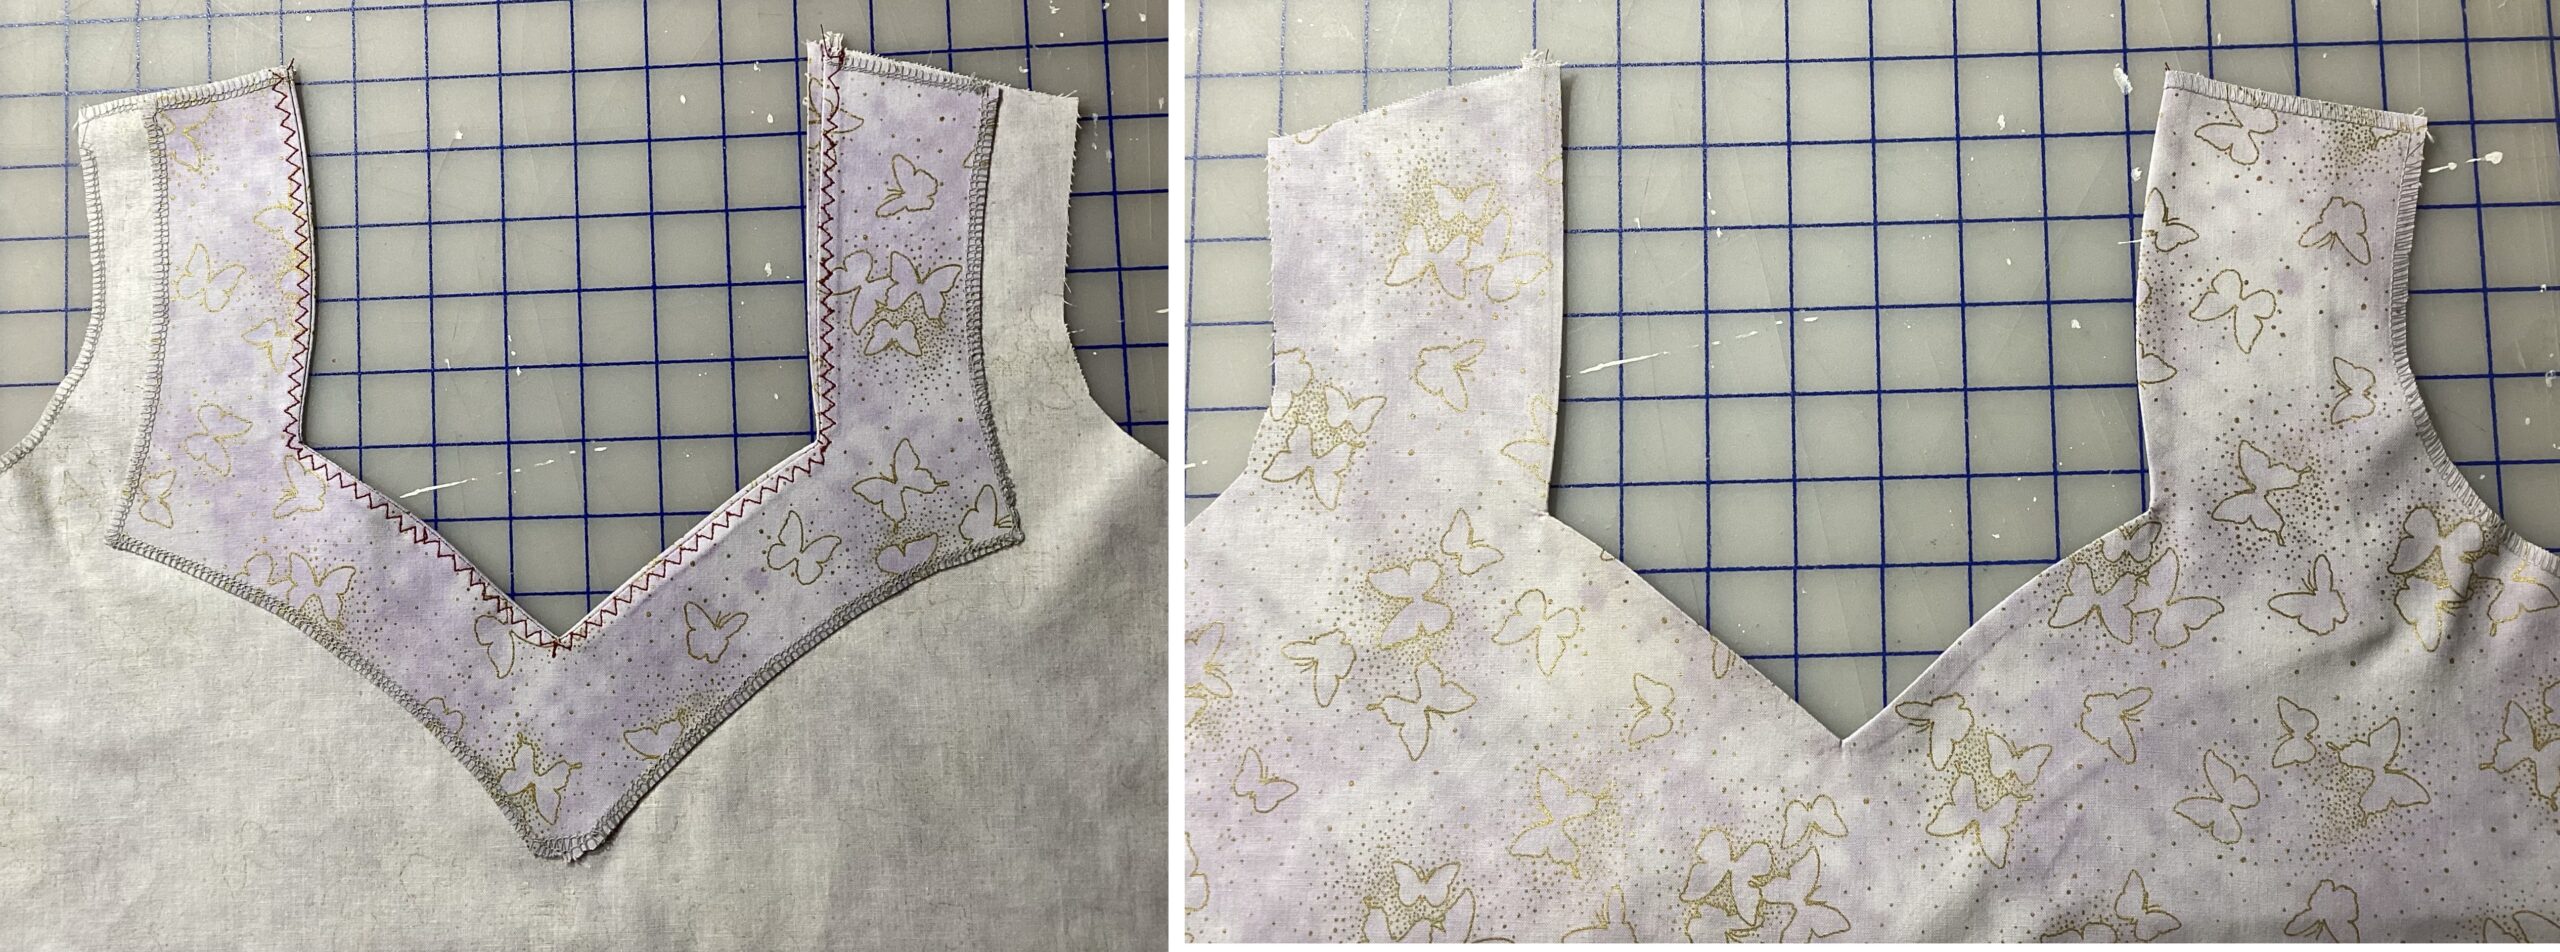
Once the facing is flipped to the inside, even before pressing, the seam will roll to the inside and the curves of the piece will hug the body. This is among the most magical tricks I know.
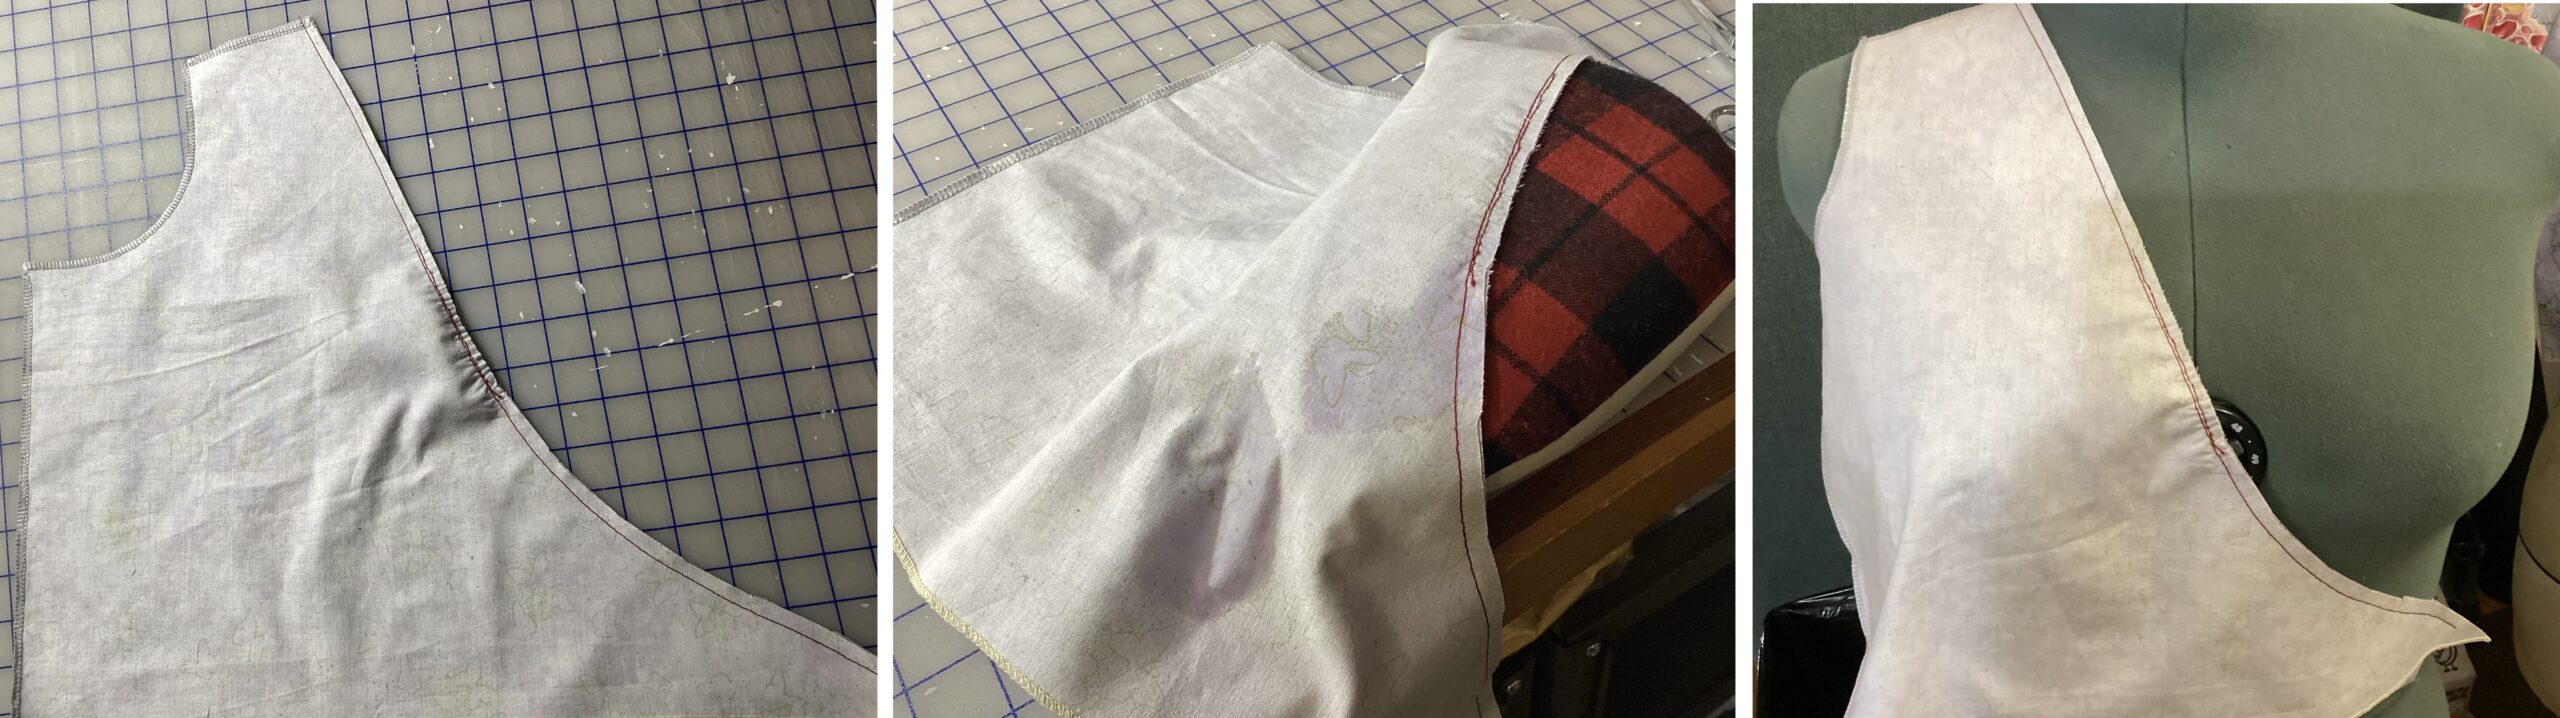
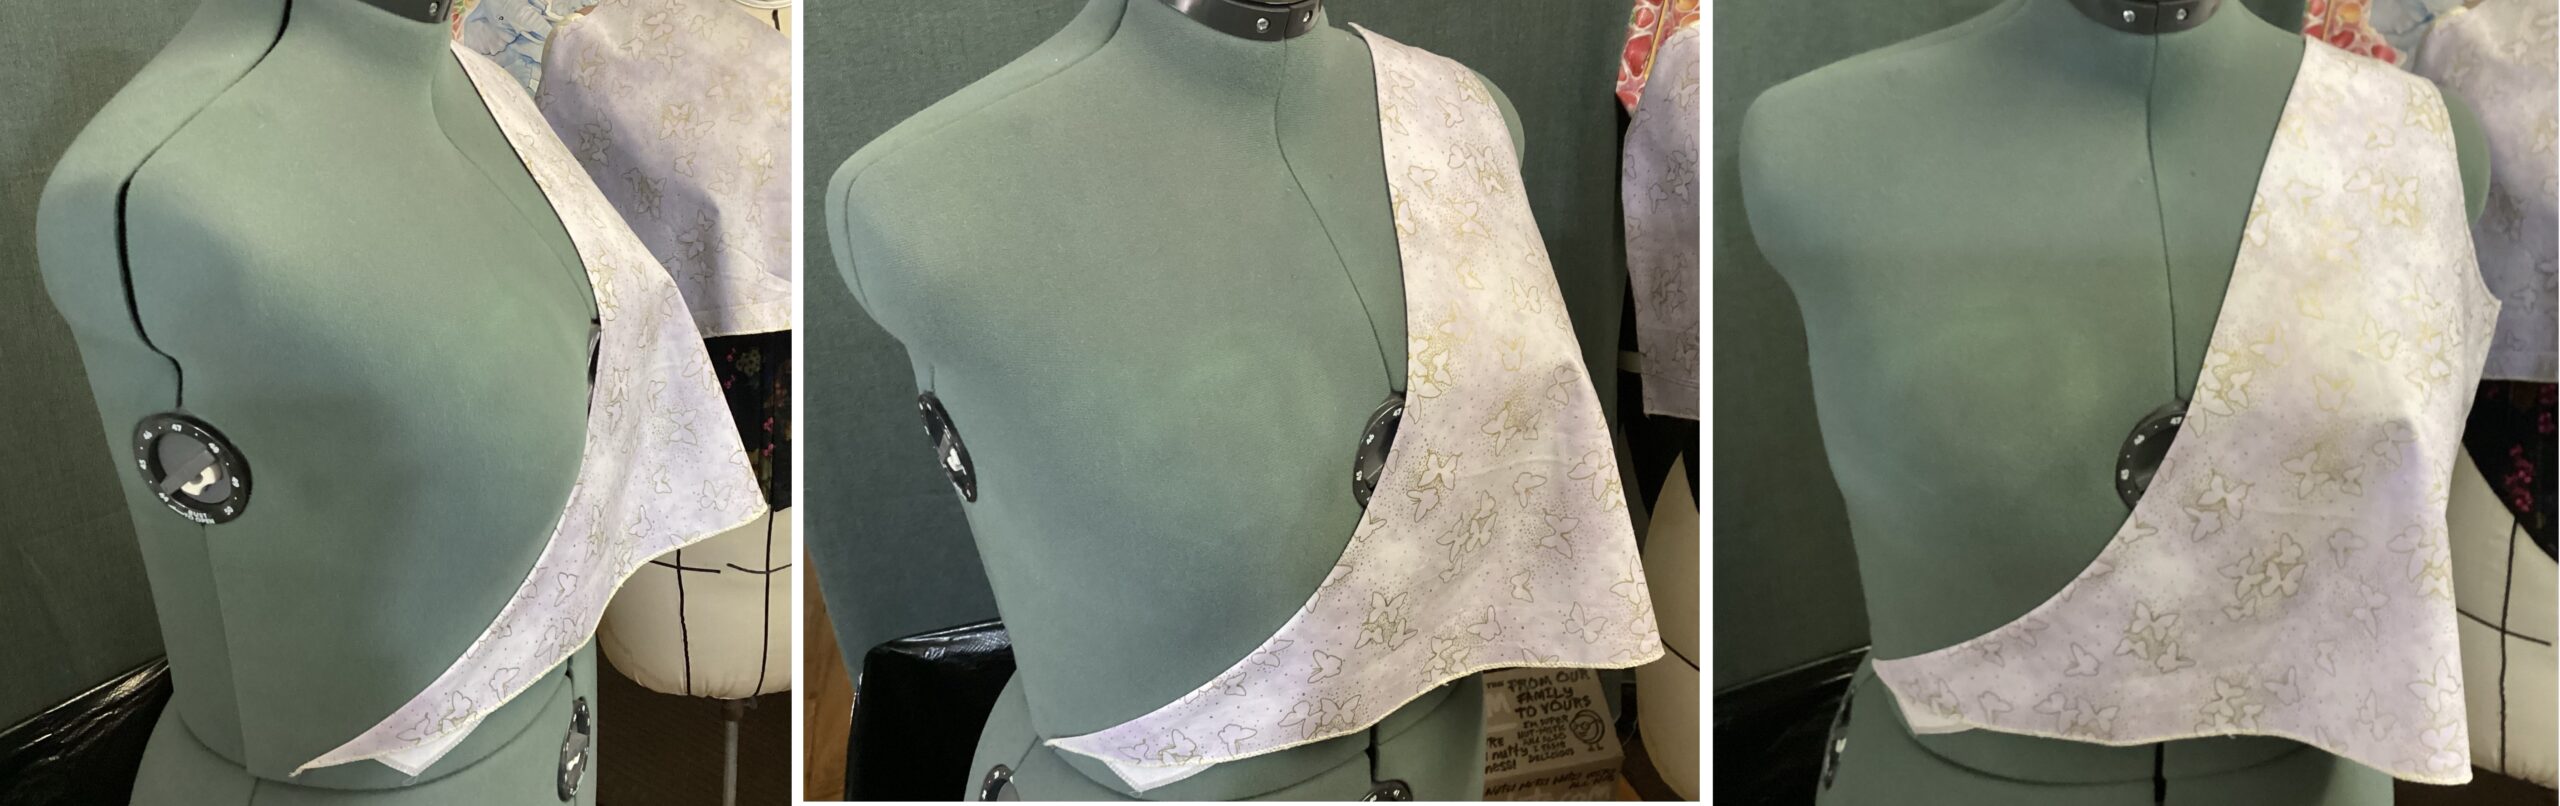
Crimp-stitching a surplice neckline
Sew the facing to the bodice front as usual. Try it on the body to see where to adjust how much needs to be drawn in.
To crimp-stitch, place the pad of a finger against the back of the presser foot, hard, to keep the feed dogs from pulling the fabric through. Periodically leave the needle down and raise the presser foot to release the buildup, then continue. The result will be a slightly puckered area. DO NOT SMOOTH IT OUT. See the Margaret Islander link at the bottom of the page for her video.
Press the stitched area over a ham (or a folded towel) to embed the thread while maintaining the curved shape.
Understitch with the 3-step zigzag. Note in the left photo how the facing is flat to the table. When flipped to the inside, the seam will automatically roll in.
The same method is used for less complicated necklines!
References:
The Triumph of Individual Style (link goes to Thriftbooks)
Mathis and Connor
Balance points (depth of neckline)
Bodymapping (from ThriftBooks)
Kathy Illian
Neck width
Islander Techniques, Alabama Extension Office
Margaret Islander
Crimp Stitching
(Sewing with Nancy/Nancy Zieman)
Her Wikipedia page
Her PBS episode on this
Understitching starts at 7:00.
She had just suffered an attack of Bell’s Palsy which can make this difficult to watch. It’s worth it.
Thing’s cameos (when determining the necklines) are courtesy Chas. Addams