
© 2022 Carol Kimball
A rub-off is is the clothing industry’s term for copying an existing garment
We’re pulling a pattern from woven pants, and then creating a working pattern from that. Jeans are a complicated type so we’re using those.
Preparation: try on your pants, walk around in them, sit, climb stairs. Note changes to be made.
You will be creating several patterns:
The first, one that would clone your garment
The second, with changes (a working pattern from which the first muslin will be made)
Successive ones, with continued alterations and improvements, until you’ve achieved your desired pants block, on which all following pants/blocks will be made.
Details such as pockets, flies, and belt loops are usually ignored in the muslins until close to the finished pattern.
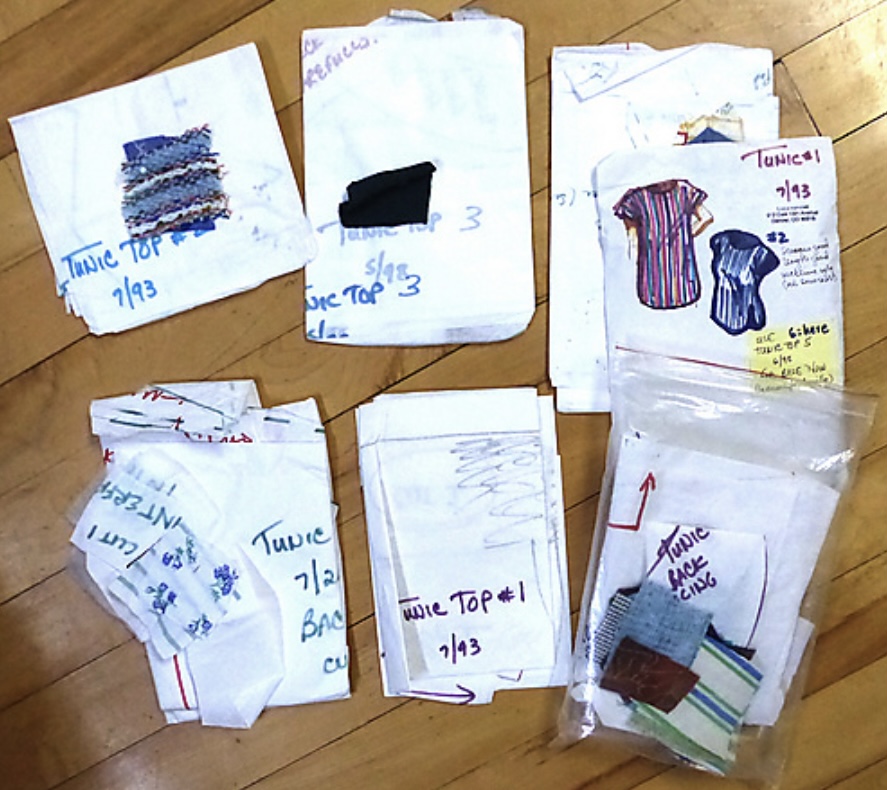
I strongly suggest you label and keep all versions (paper is cheap and doesn’t take much space). Fold each set together with a label out, pin (except for the most recent), and store in the same envelope (note the swatches pinned to various versions of my tunic). While you’re pretreating your newly-acquired fabric, you can dump out your packets and easily find the one you want.
Tools and supplies: PHOTO
Big pieces of pattern paper – physician’s exam table paper, rolls of sewable non-woven from fabric stores…if you need to order online, WAWAK is reliable and slightly above wholesale for most items. No affiliation. Avoid vellum and student-grade architectural rolls. They’re more expensive, bulkier folded, and give a wicked paper cut.
https://www.wawak.com/cutting-measuring/pattern-making-paper-supplies/pattern-paper
Pricker (hat pin, sewing machine needle)
Wash out marker – kids’ non-toxic tub toy area of store
Permanent markers, (black? + red) Pigma Micron, fine line Sharpee
Long straightedge
Surface to pin into – cutting mat, layered blankets, bed (unless waterbed)
Pins
Scissors
Tape
List pieces (front, back pocket bag)
List fabric, notions

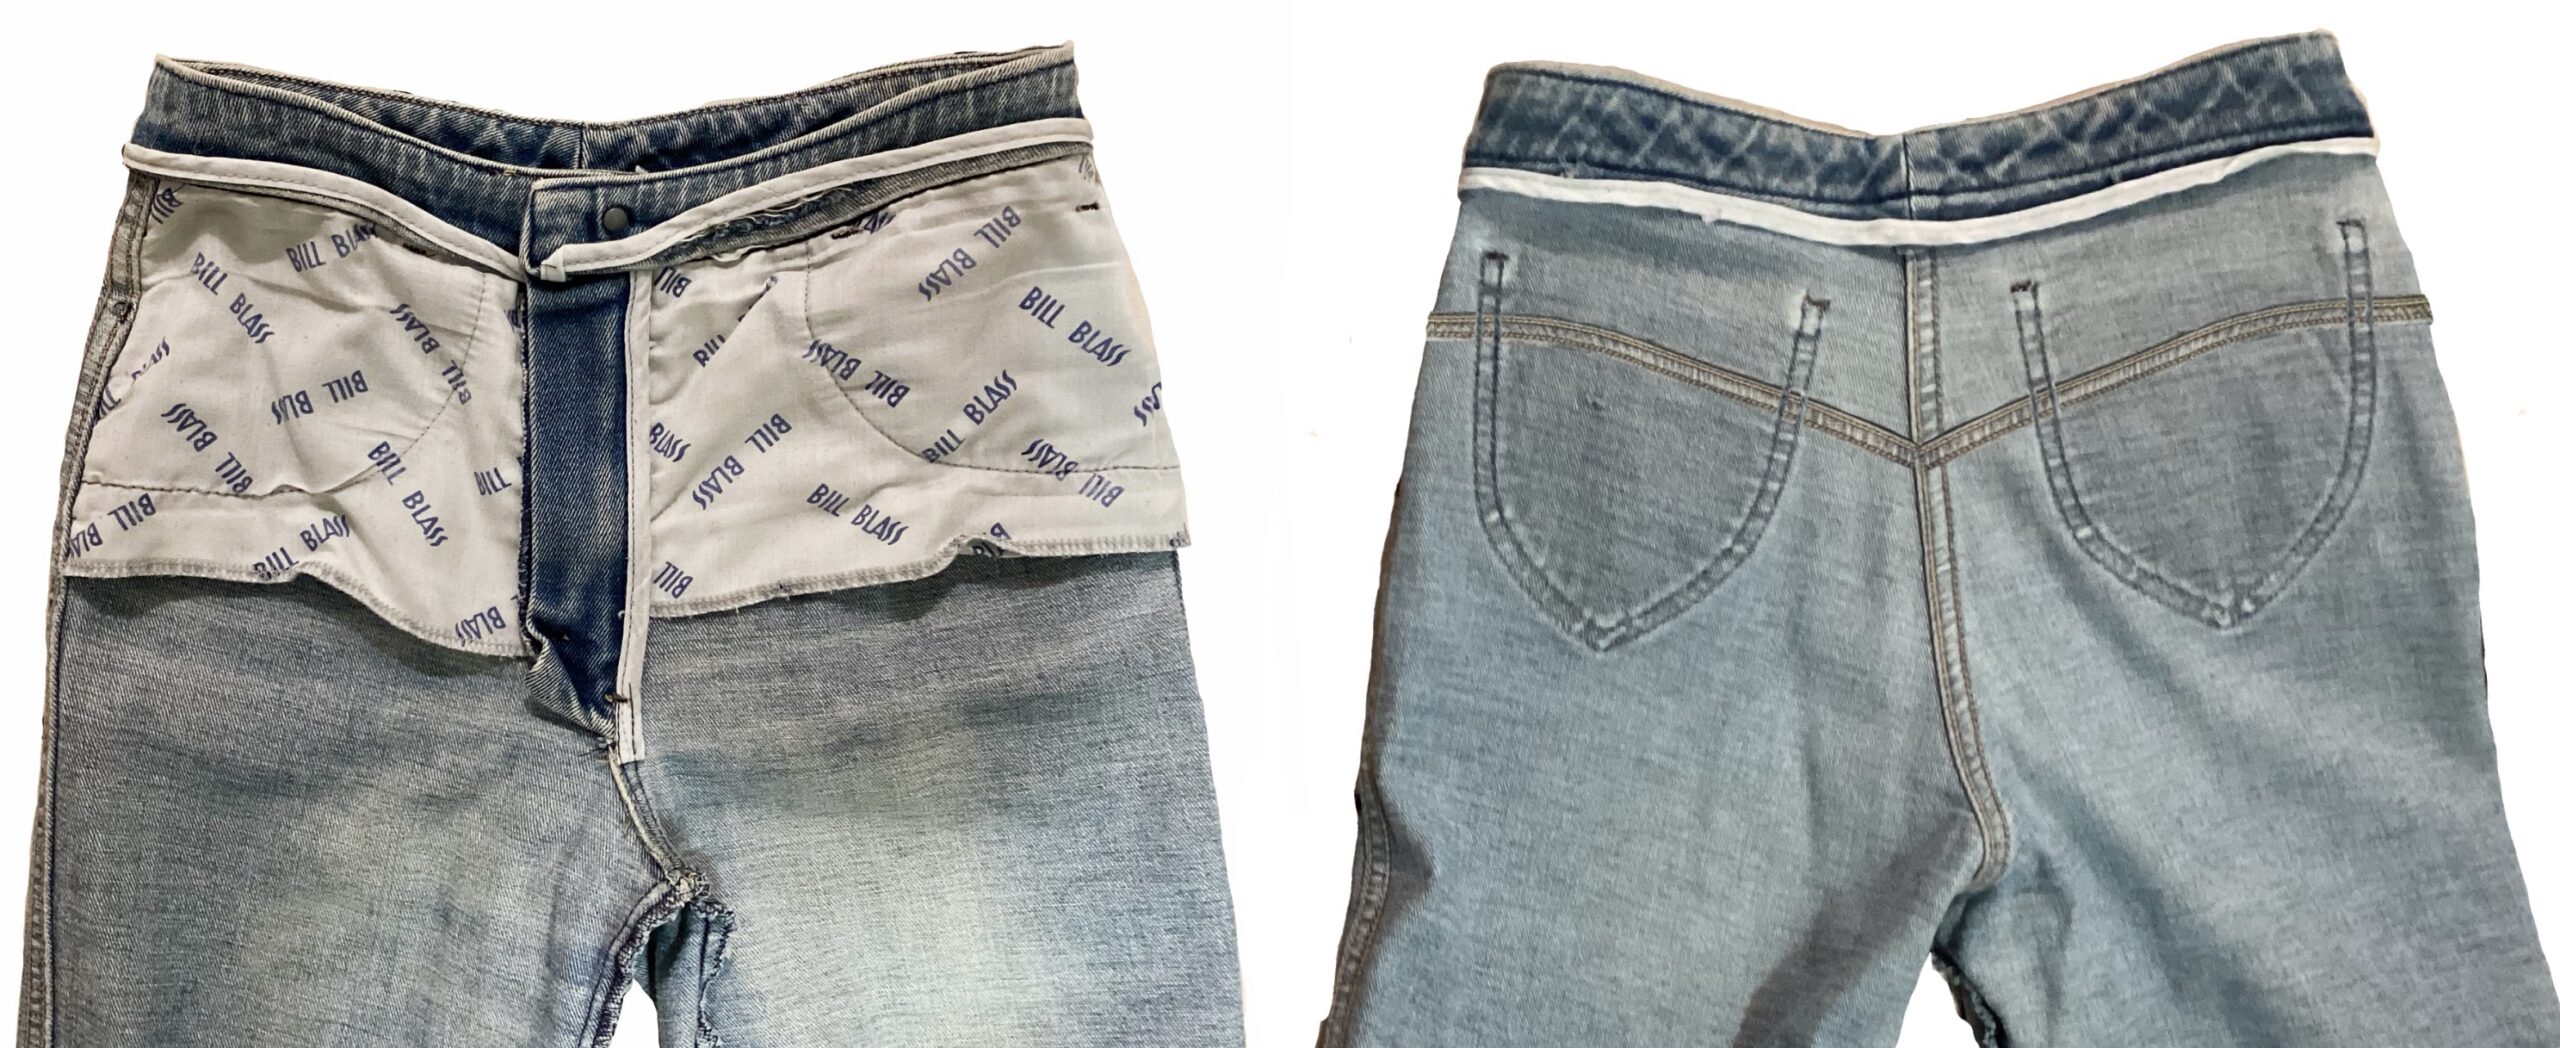
To get one leg inside the other: start with your pants inside out, reach up though the hem of one leg, across and down the other, then grasp that hem and invert.
This puts the seams to the outside and makes the crotch fork accessible. That’s the triangle that sticks out of the back but can refer to the front as well.
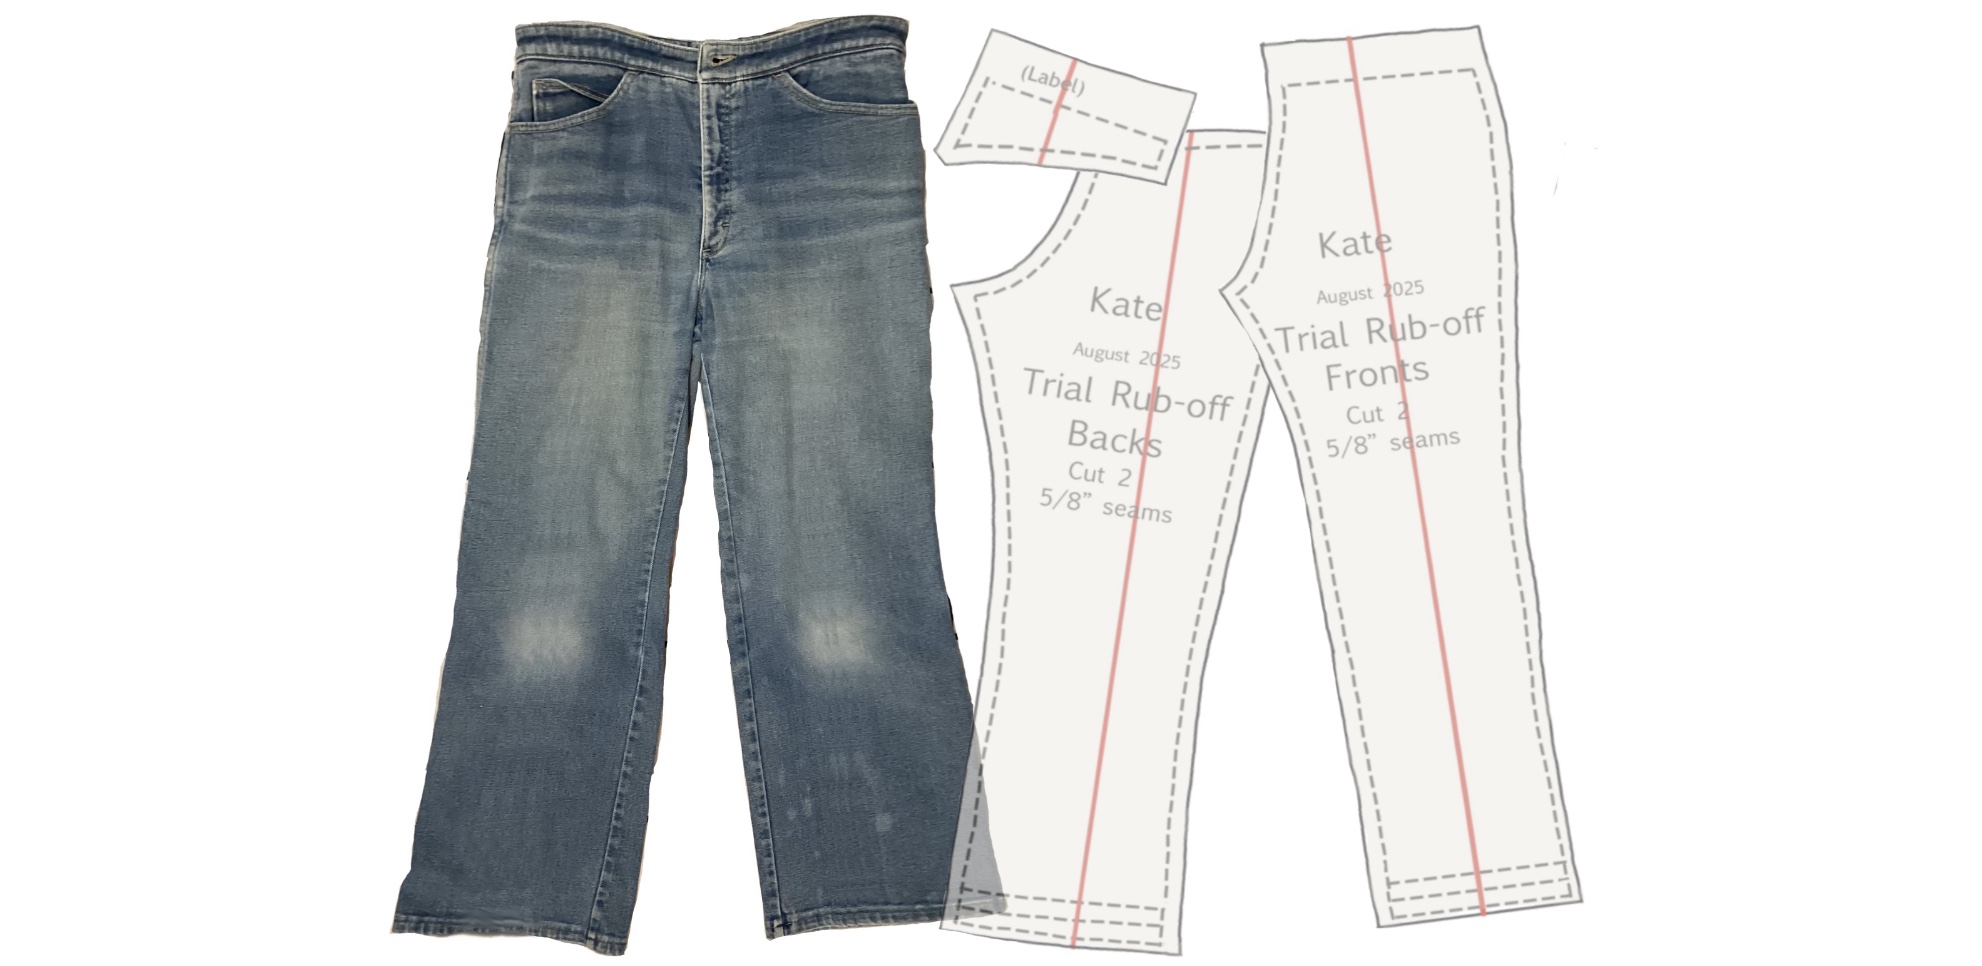
Lay a large sheet of paper with a vertical red grainline on your work surface, then your pants with the fronts uppermost and the outseam at one edge. Smooth out as far as possible.
The grainline runs vertically up the leg from the ankle to above the knee. It continues straight up through the pelvic area, which tips back as the hip area gets fuller. We will adjust the position of the grainline in the first muslin, when we see where it falls in the fabric on the body. If it isn’t vertical, the legs will twist.
Pin onto your work surface.
With washable marker, draw around the edge
Prick front waistband
Prick back yoke if there is one (this is tricky as it’s hidden; feel for it)
Prick hem
Prick crotch curve
Prick inseam
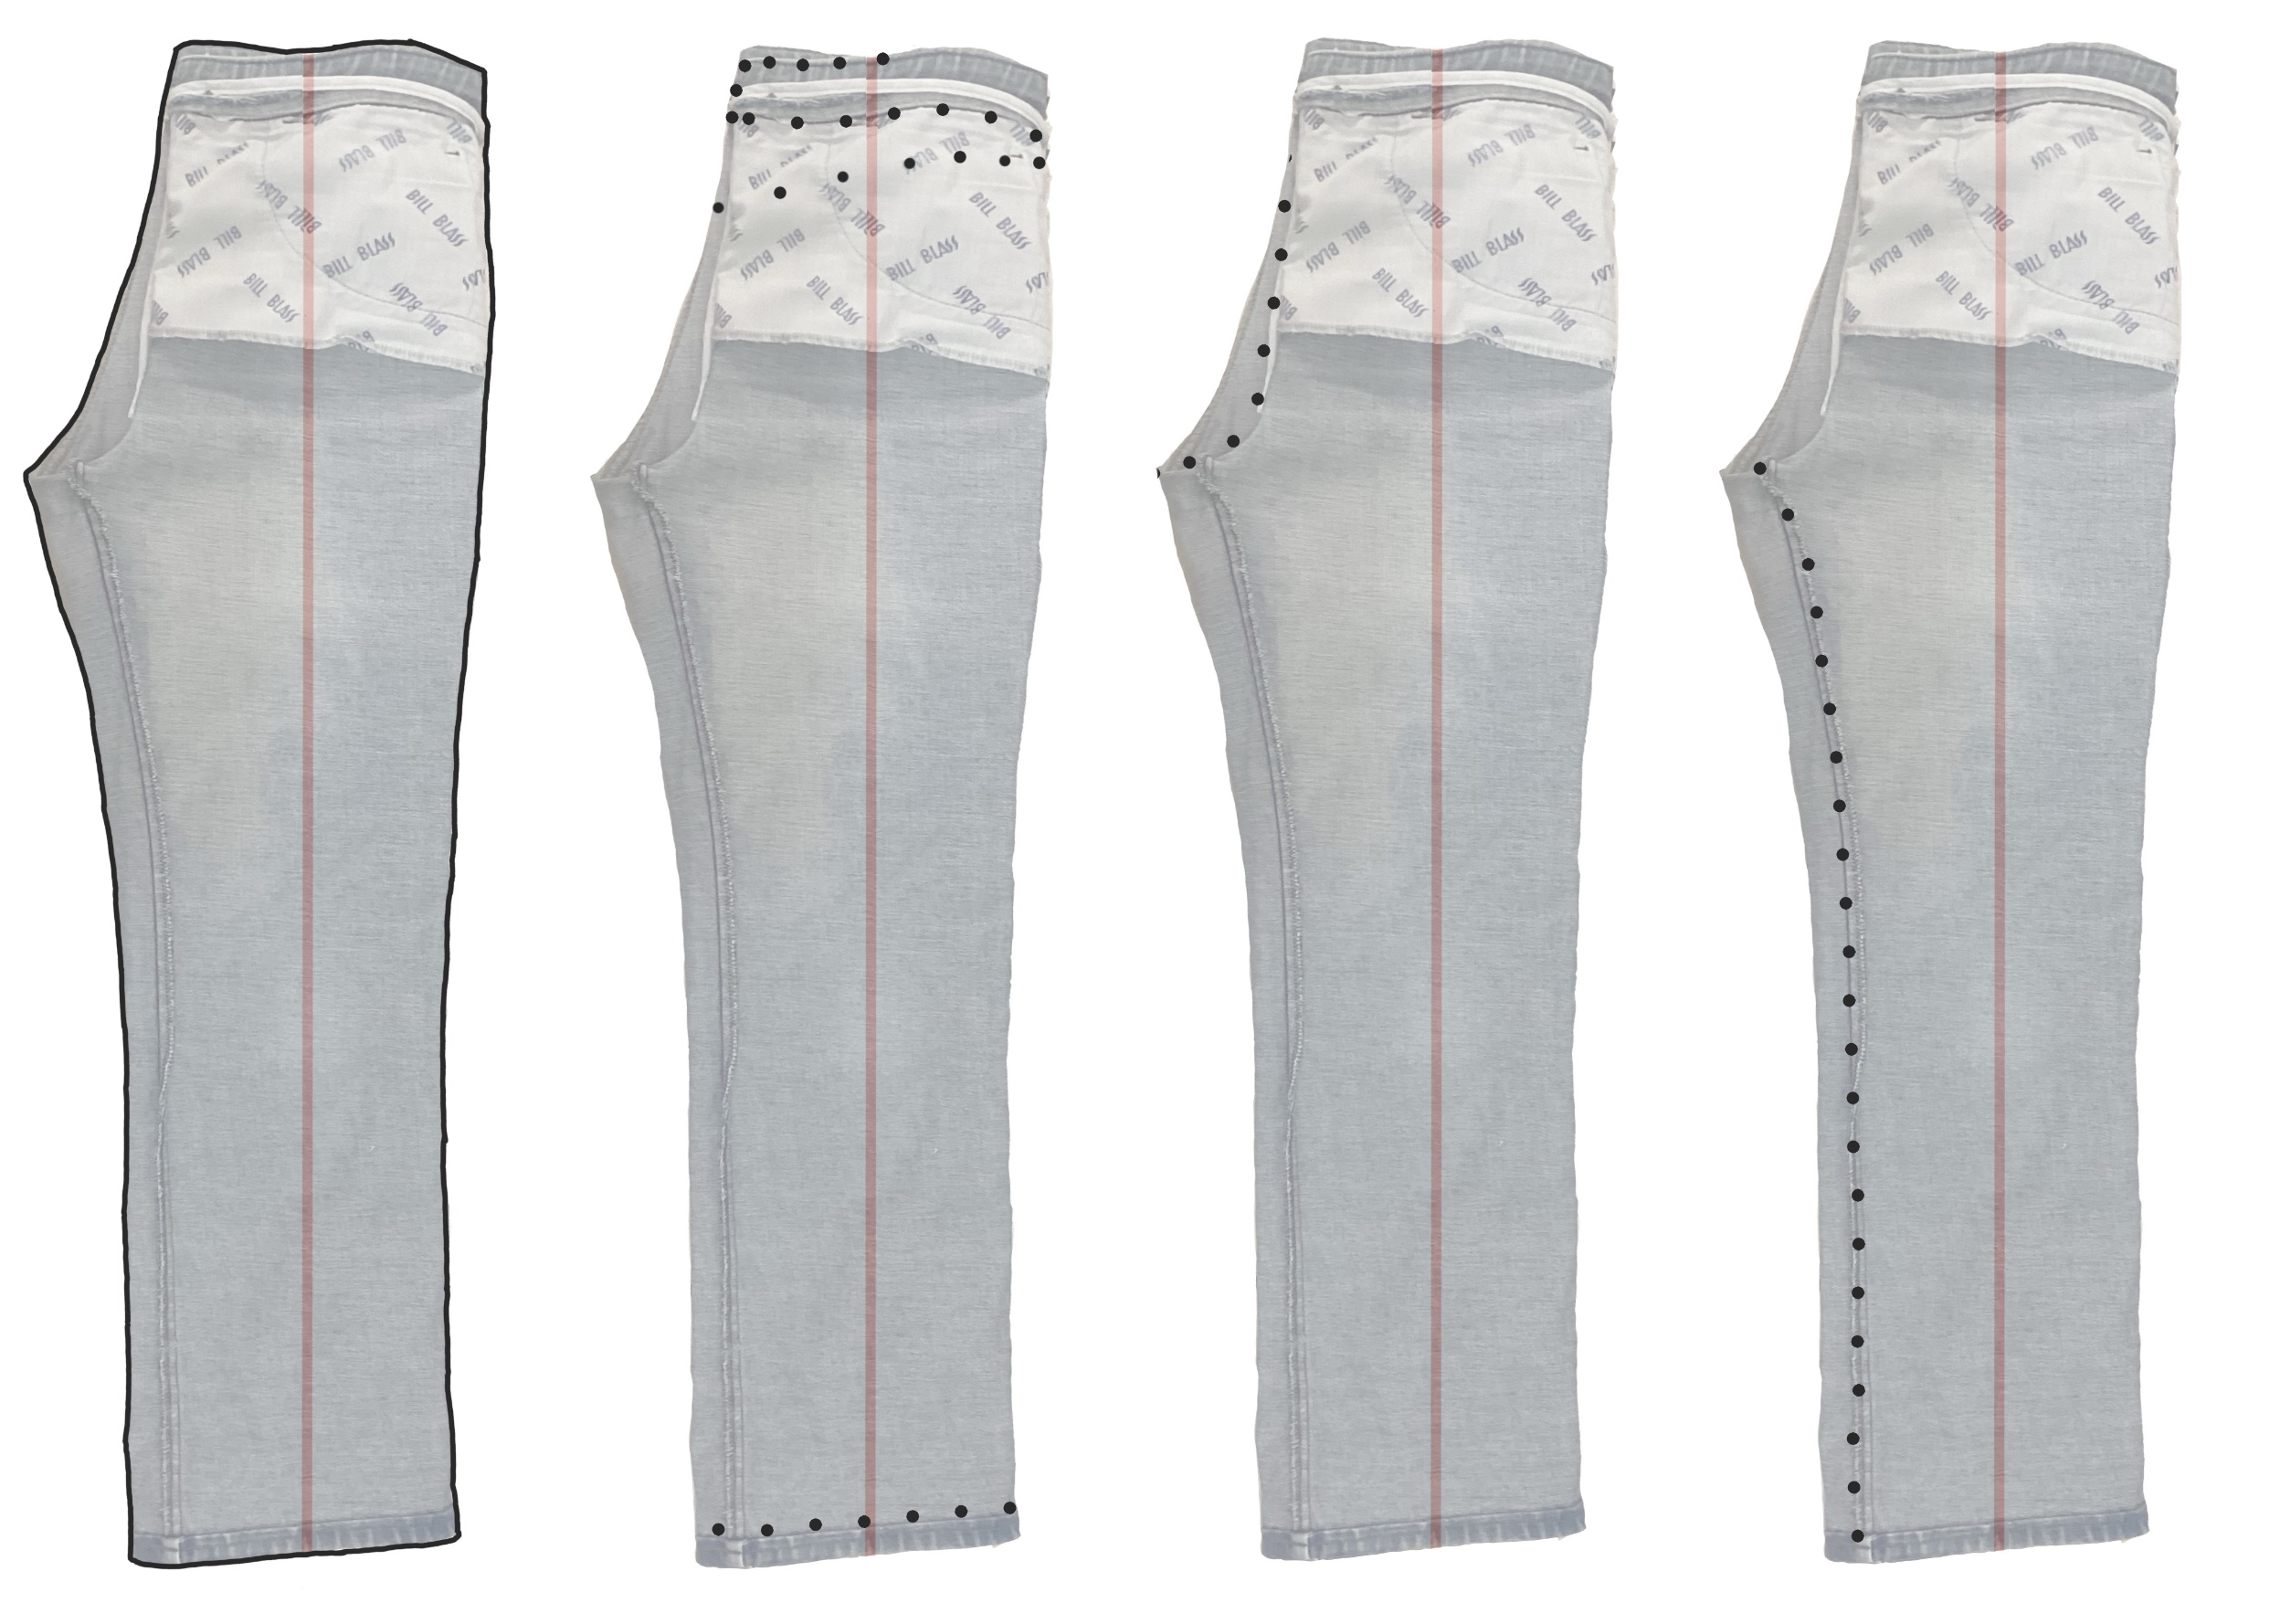
Carefully peel back your pants, re-marking anything that isn’t clear.
With the fabric out of the way, re-mark this rough master with a fine line permanent marker. We will true up irregularities later (there will be plenty). Use dashes for the sewing lines. It’s more important that the lines are fluid than that the dashes are exact.
How to draw long smooth lines (pull from Fashion Sketching disc).
Capture the pelvic area details on fresh paper (add graphics)
With the pants inside-out and laid flat, rub-off these details for the front and for the back:
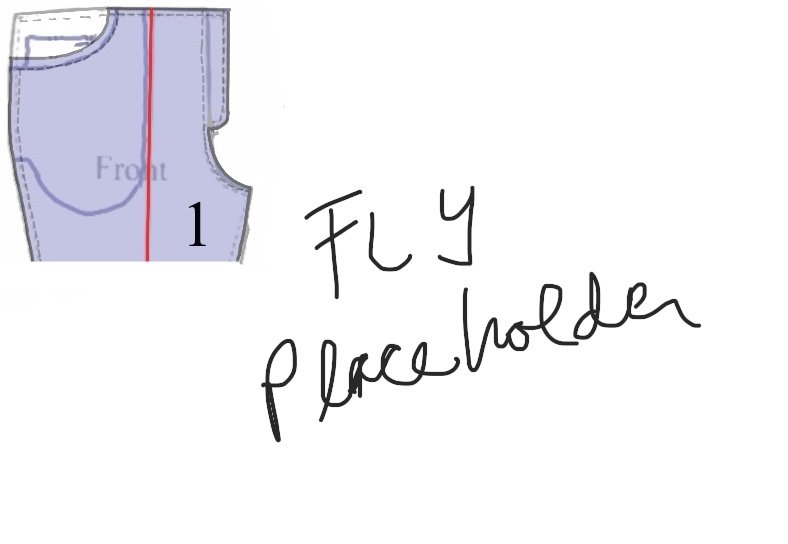
Fly
Darts (if any)
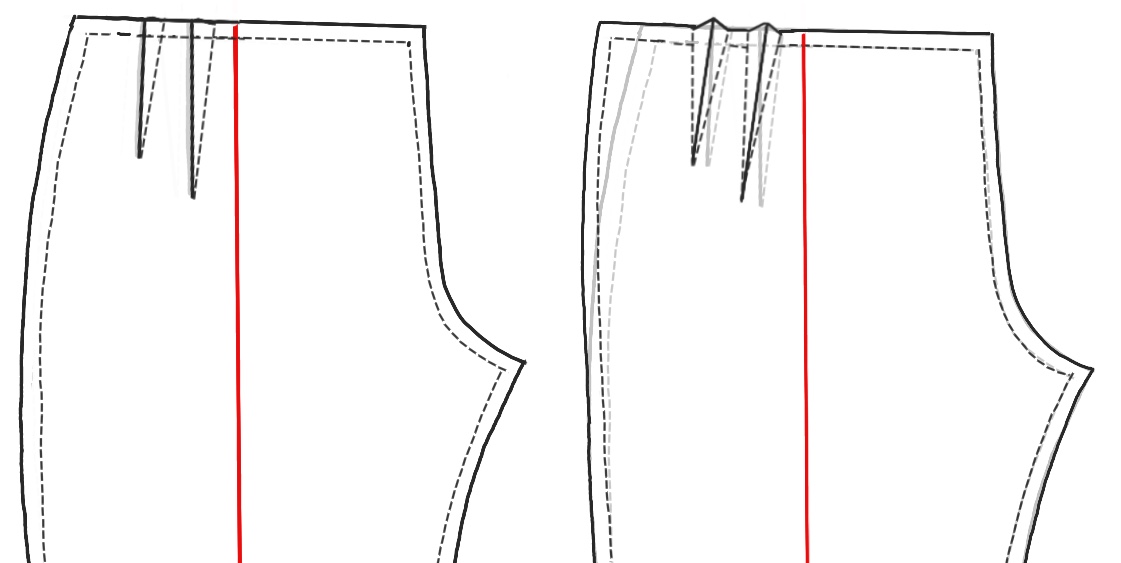
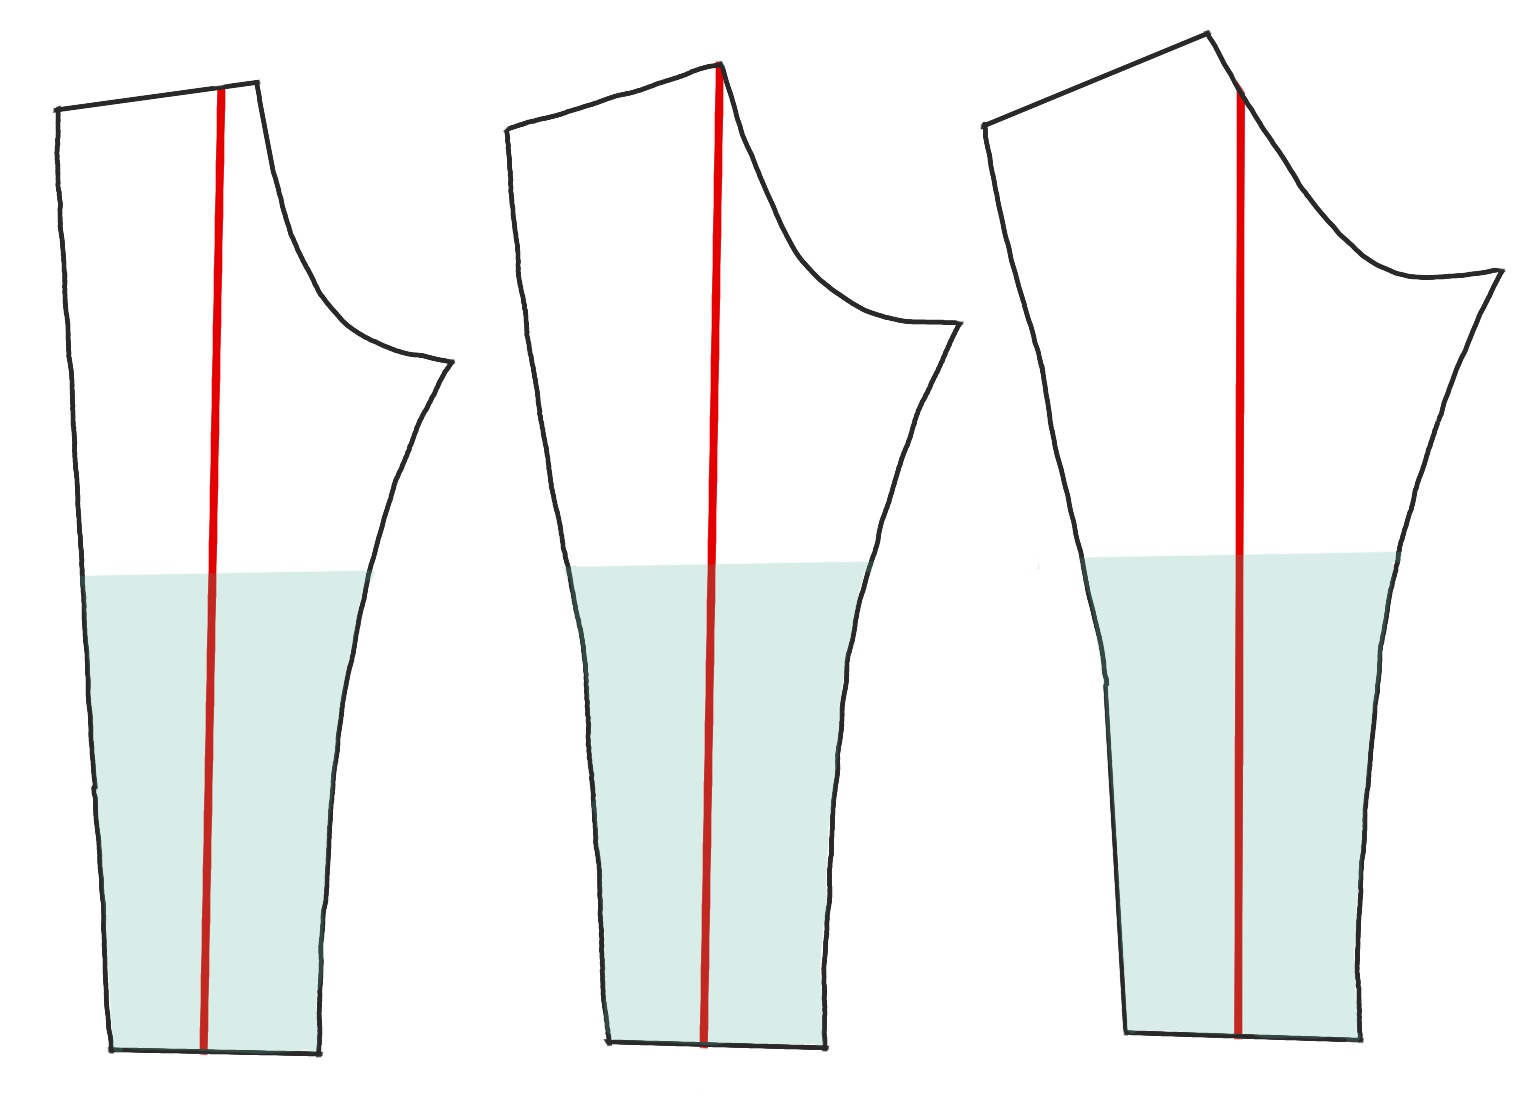
Rubbing off the creases isn’t hard, but figuring out how to open them up and move over the pattern’s outseam can seem baffling. Essentially, add the width(s) of the opened darts to the waist at the outseam, and redraw the top of the outseam to rejoin the side at the darts’ length. Give it your best shot. Anywhere close will be corrected in your first muslin. Dart legs can be vertical or slant. Again, we’ll correct in the muslin.
Pleats/tucks (if any)
What’s the difference? One is folded and pressed, the other is sewn, folded and pressed. As with the darts above, the outseam moves over by the depth of the folds. Easier as it’s rectangles, not wedges. There are often two but you can see it as easily with one.
Front pockets
- Pants Front (denim, full length), cut 2
- Back pocket bag, cut 2
- Denim pocket facing, cut 2
- Front pocket bag, cut 2
- Coin pocket, denim, cut 1 (grainline same as front)
- how to deepen the front pockets/stomach stay
Back pockets
Belt loops
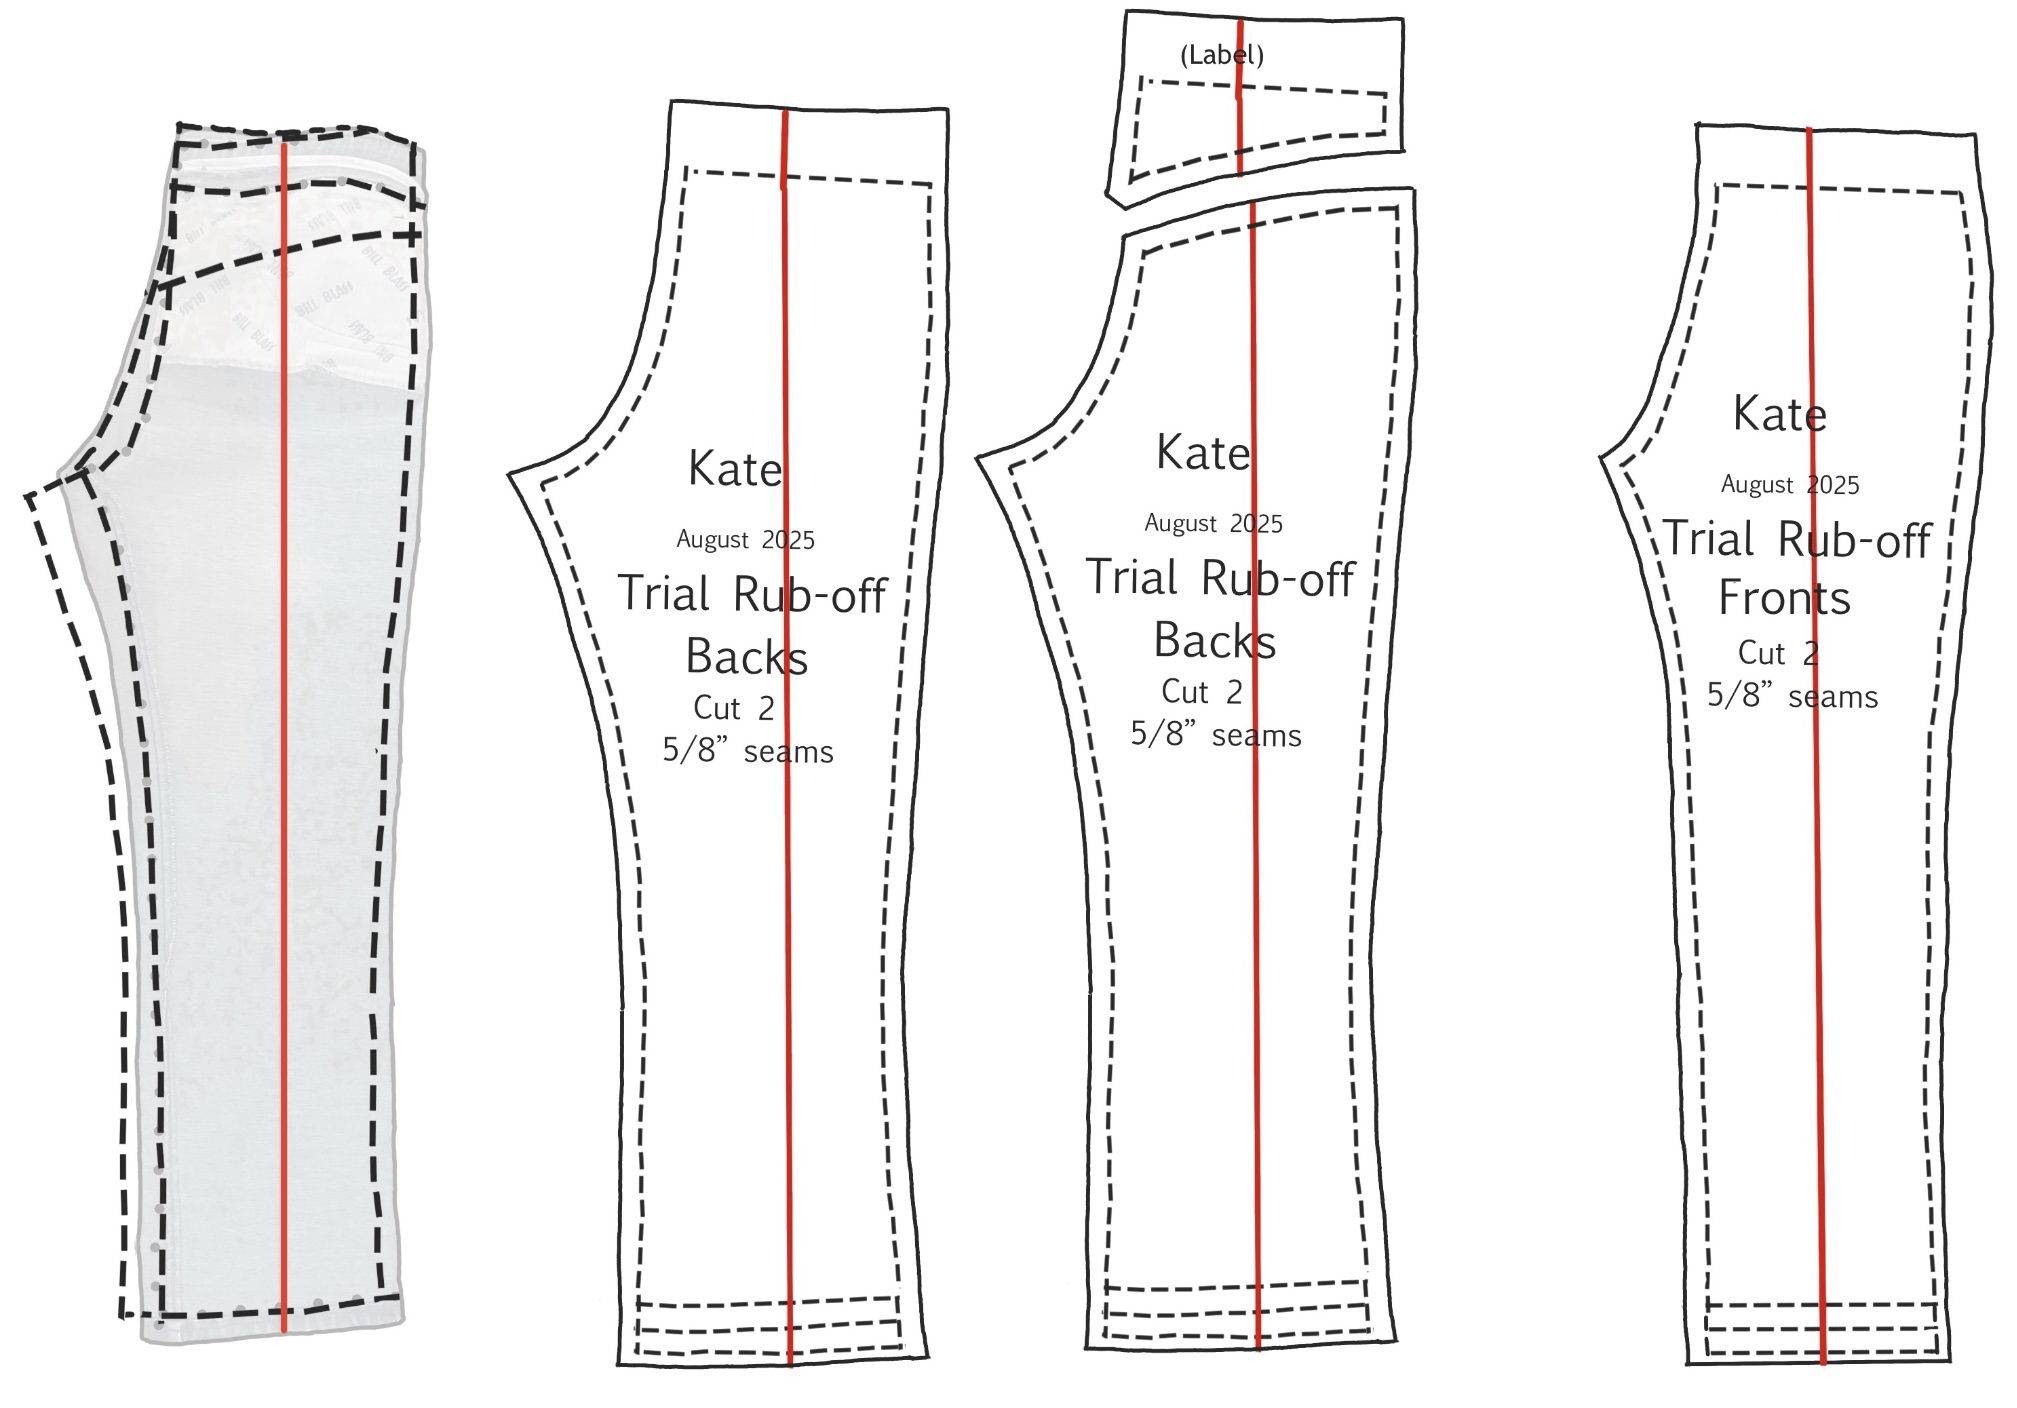
Cloning the back pattern piece: on a fresh long piece of paper copy the back information. Start with the grainline.
The crotch curves and the outseam are cheated over to be on the actual stitching lines.
The back inseam is not parallel to the front: it mirrors the distance from the folded edge.
Do not include the waistband, but add an extension (2 1/2”/ 6 cm) for fitting the first muslin’s waist.
Reconcile (true/pin-track/justify) the inseam and outseam – check that the sewing lines are the same length.
Extend the hem turn-ups and add the seam allowance.
Repeat for the front.
Label the pieces with name, date, pattern piece, and description (such as “Trial Rub-Off”).
If you made a working pattern from this, you’d be re-creating the original garment.
Create a new pattern by copying these pieces exactly and then incorporating the changes you want. Altered masters: “sleeve length should be 1/2”/1 cm longer” “drop front neckline xx amount” “widen shoulder strap to xx”
This is what you’ll use for your first muslin. The legs should be full length (though folding them up to make above-the-knee shorts is fine).
It’s useful for fitting try-ons to put a cheap zipper in the center front. Don’t bother with a fly; topstitch it to the turned-back seam allowances.
**********
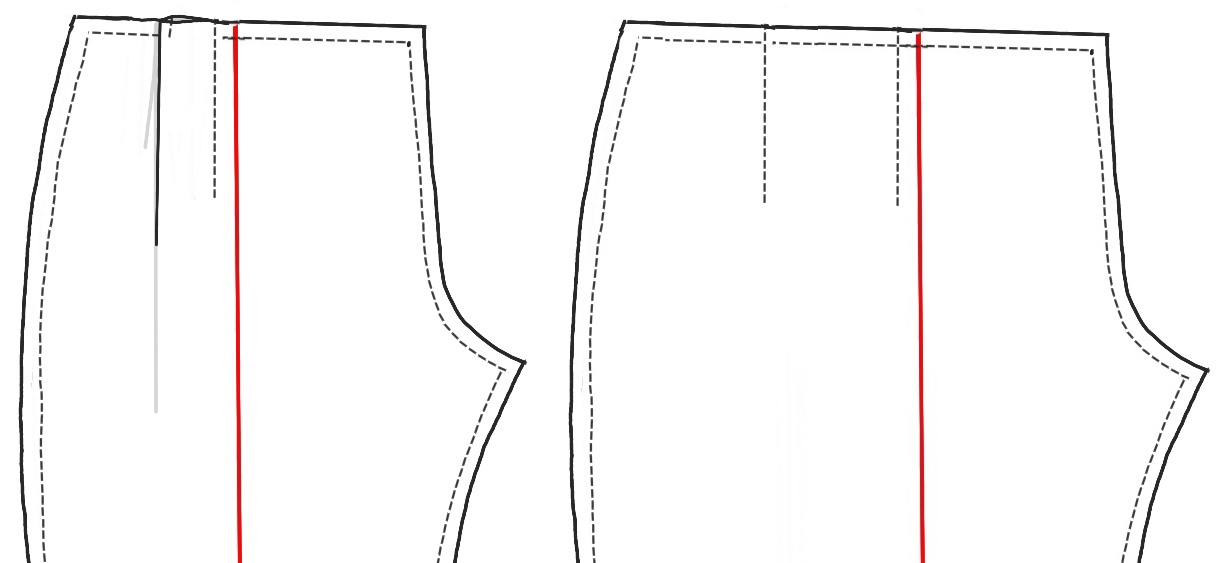
- Note that the waistband is NOT perpendicular to the grain. If you want your pants to fit and your waistline slants, so must your waistband. We’ll reconcile any difference in angle between the front and back when we do the back.
- Extend the upper front edges so that the waistband is the same circumference as the hips.
- Add a seam allowance to the hem.
- The little red lines are for nips in the seam allowance. They show how far to fold the waistband down, the hems up, and where the side front stitching through the elastic will go.
- Label your pattern.
For non-raveling fleece pants, my default is a 3/8” seam allowance. Whether it’s drawn in (the dashed lines) or written doesn’t matter as long as it’s there.
This is close to finished; the back will need to be reconciled with it first. Usually changes will be made to the back, but not always. Don’t cut it out yet.
The angles of the hem allowance must mirror what’s above them, and they may not be the same on each side.
Fold the pattern up on the hem line and trace.

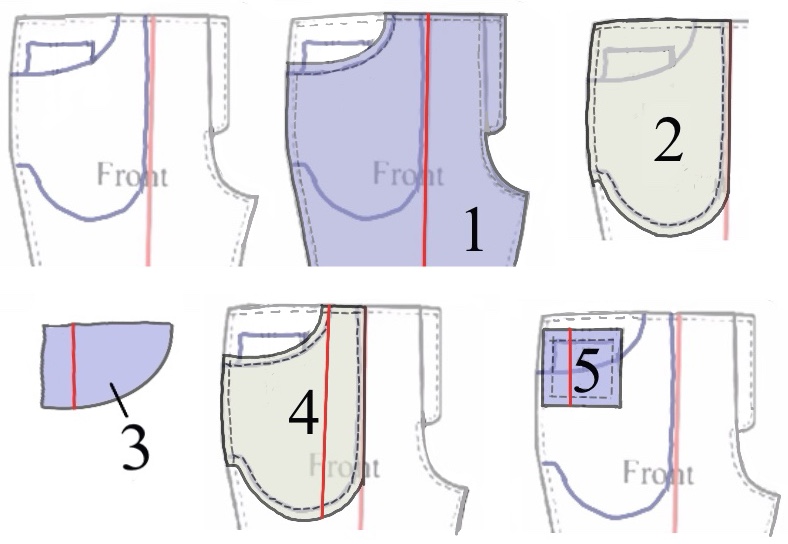
Adding a side seam pocket (this is general theory; it may be reworked/edited at the construction stage).
This pocket is cut in one with the front and back pieces; it’s fastest to sew but takes more fabric, particularly if you’re working with a nap. You can cut the pocket pieces separately and sew them to the side seams at the expense of a little more bulk there.
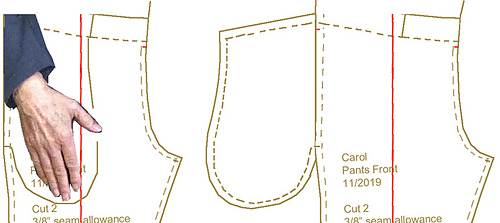
- Place your front pattern on your body.
- Position your hand “in your pocket”.
- Draw around your hand.
- Flip the pocket to the outside.
- Add the seam allowance.
If the bottom of the pocket opening is lower than the crease at your hip when you sit down, stuff will fall out of your pocket (maybe not a Kleenex, but a pocket knife, definitely). You can shorten the opening in the pattern or sew up commercial pants: it’s a trade-off between fall-out and being able to get your hand inside.
A slant pocket opening solves this.
Slant pocket details
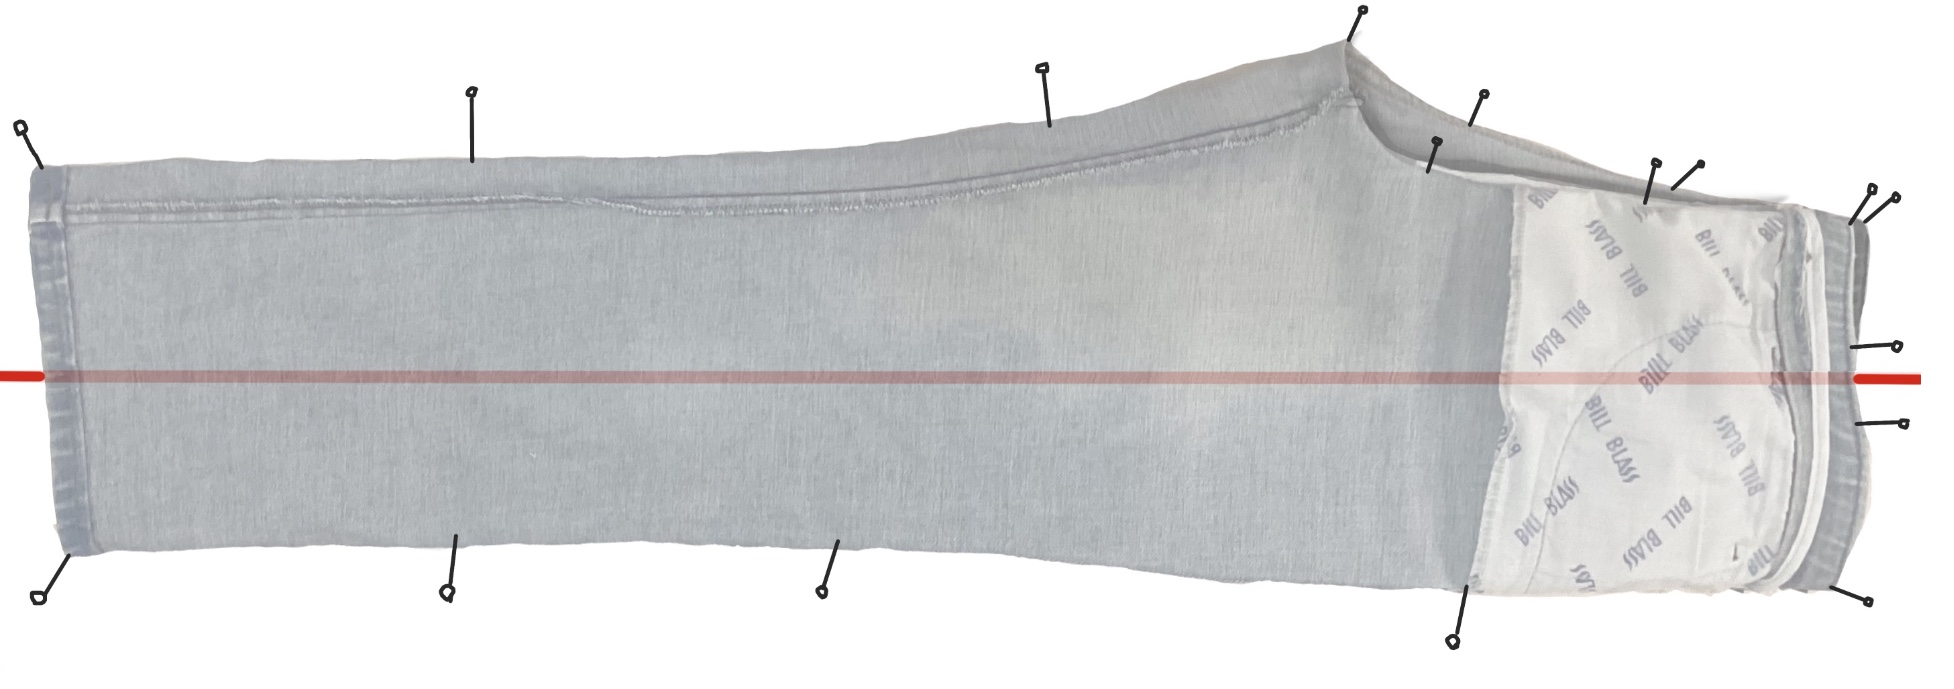
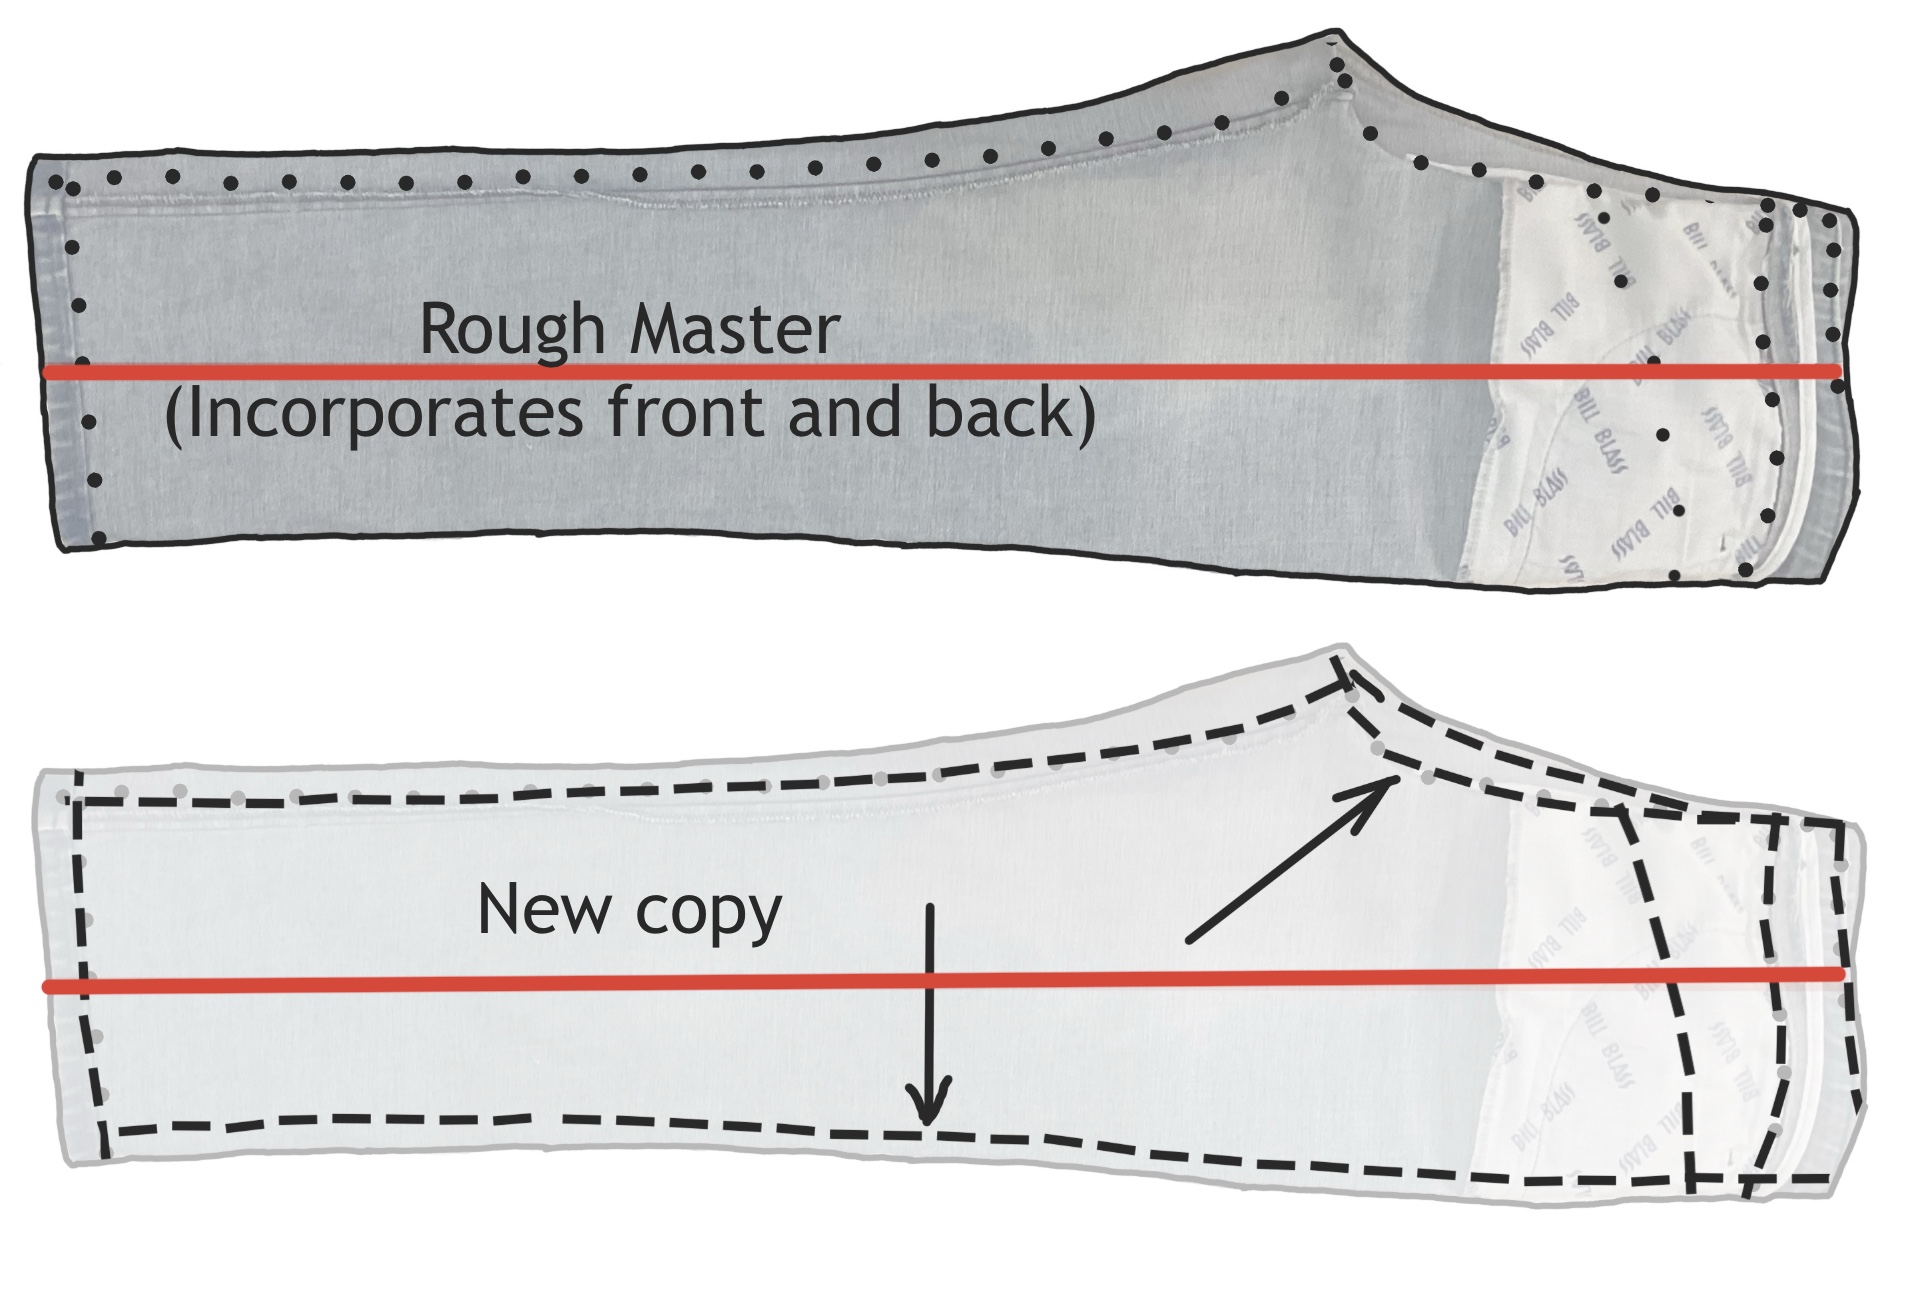
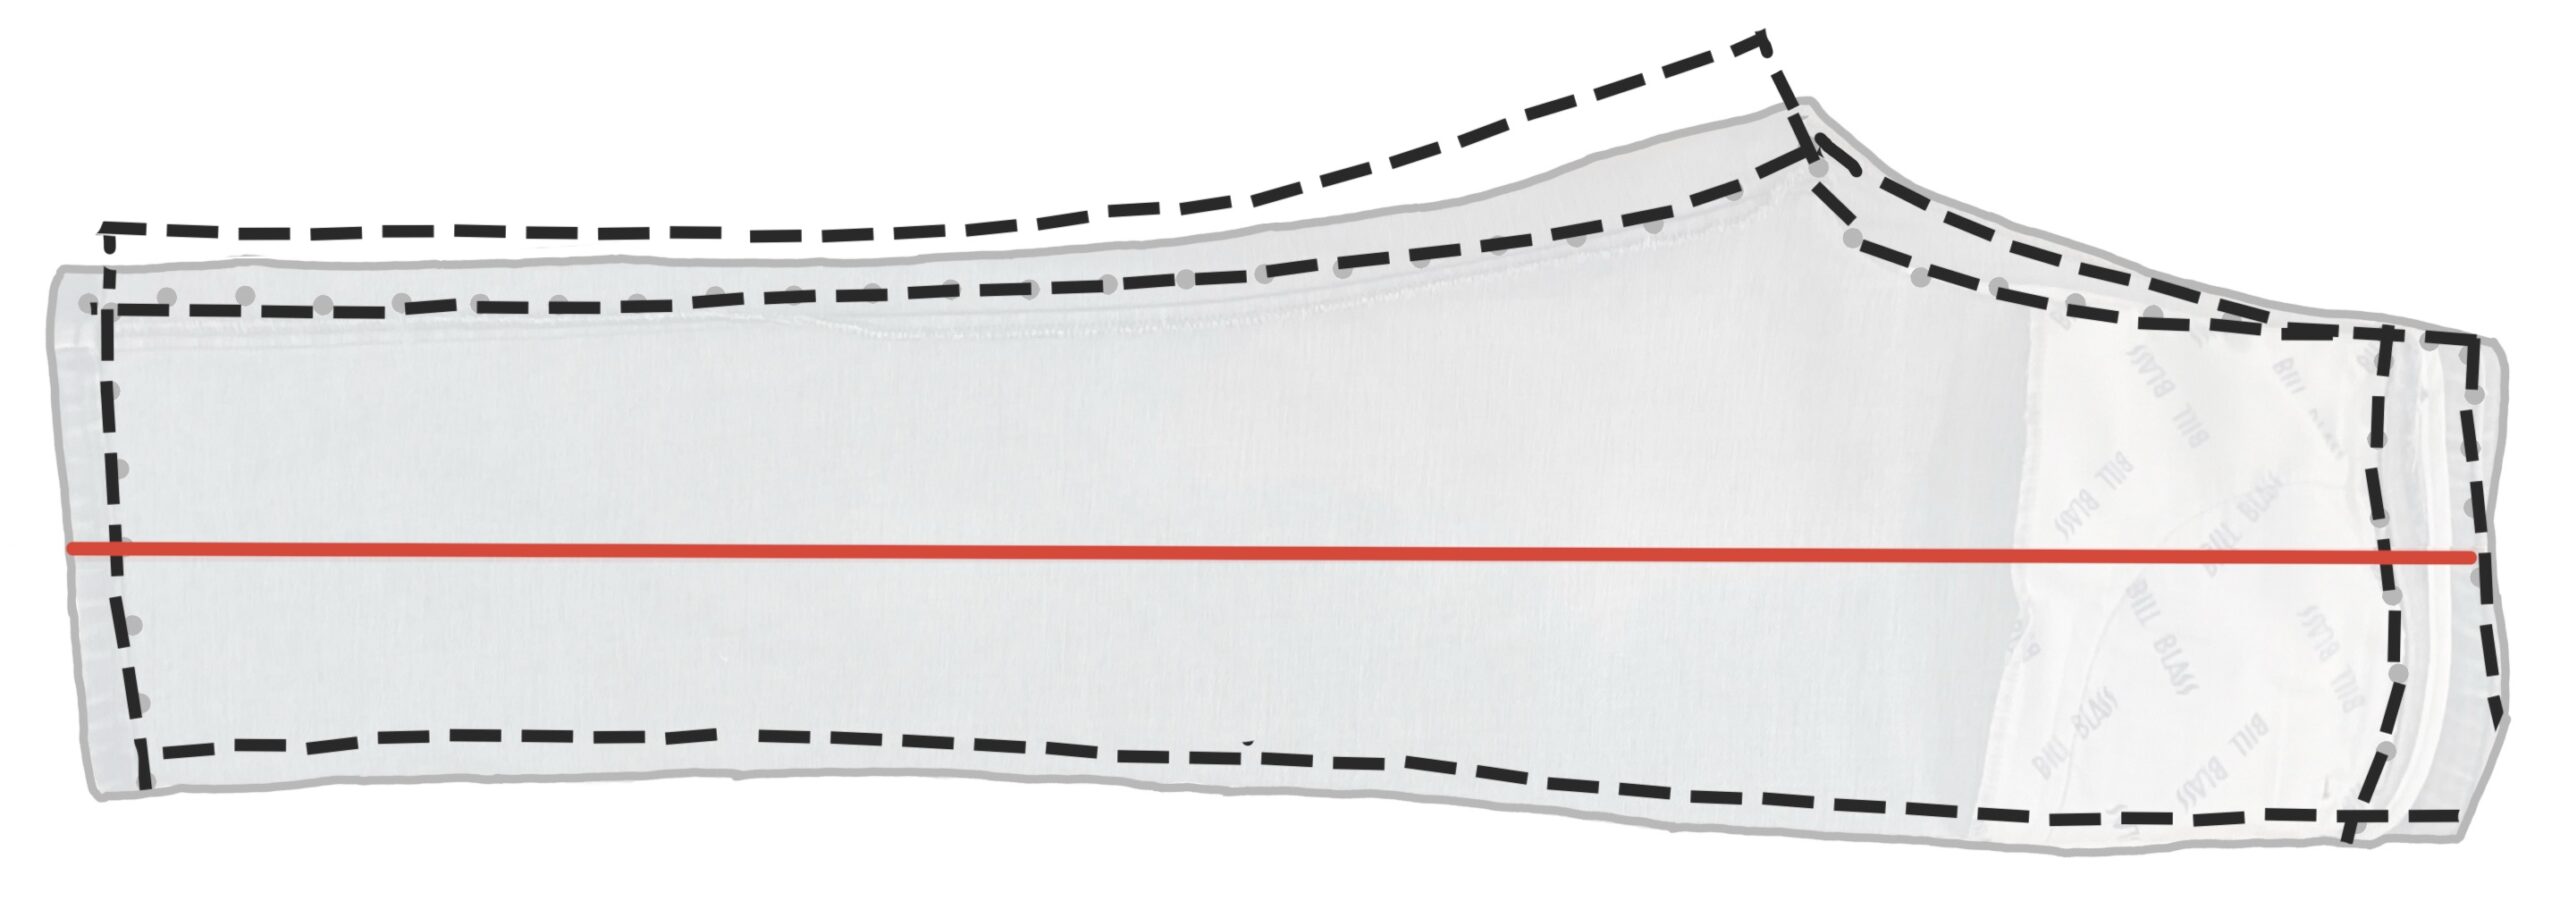
Pulling a pattern from the back of pants (or any piece that won’t pin out flat):
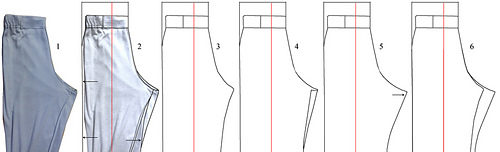
- Gray pants with a European crotch (the inseam is closer to the front of the body).
- Master pattern. The legs have curled/twisted, which is reflected in the width drawn. The back leg is wider than the front.
- Front for these pants.
- Back with crotch fork as pricked (leg is also pulled under).
- Back with crotch unfolded.
- Superimposed front and back.