
Who’s Courtney?
Courtney and Connie Willis have been friends for decades. Courtney has doctorates in physics and chemistry. Connie has sewn deliberately awful fat ties (which I handpainted with scenes such as Galileo dropping balls off the campanile of Piza, etc.).
Courtney has become an authority on vintage and antique sewing machines (Connie has reminded him that he doesn’t have to own one of every model – “no, sometimes you need two or three”). For years he brought his collection of hand-cranked machines to MileHiCon, Denver’s Literary Science Fiction Convention, and shepherded children (and some older folks) into the basics of sewing. I was delighted to pitch in, donating fabric scraps for his projects and helping with which way the thread went through the eye of the needle.

Scenes from The Yellow Dog, a film about a Tibetan family in their summer yurt. The mother sews clothing for her fast-growing brood on a hand-crank machine (I have never had a hand crank). I stumbled across this while we were discussing my upgrade.
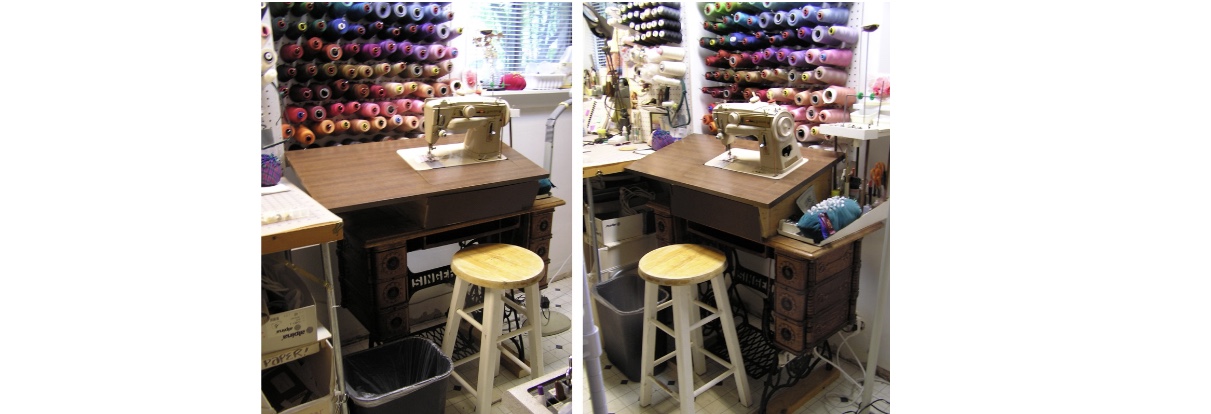
Years previously, I had found a set of irons on a visit back to Nebraska. After copious applications of Naval Jelly and elbow grease, they worked fine. Their cabinet had likewise been kicking around for years but was sound. The head was a Singer 411G, which I had found on a Canadian website and had converted from electric back to treadle.
I loved the control inherent in a treadle. I could creep along stitch by stitch, manipulating the fabric with both hands, or almost stand and pump close to the speed of an industrial machine. I am not a large person, but I have more power in my thigh muscles than any motor that would fit inside the machine head.
It was a better fit for my needs than any other home machine, but it had their design limitations.
When I was describing the ergonomic modifications I was planning, Courtney’s eyes lit up: “Want help!?”
Parts of a treadle machine:
- “The Irons” – the base, including the flywheel and the treadle assembly
- The cabinet – the wooden bit; its top is the bed, the sewing surface
- The machine head
Between us, we had ample old cabinet parts to raise and tip the cabinet. Courtney sent me these mock-ups he’d done at home in Greeley.
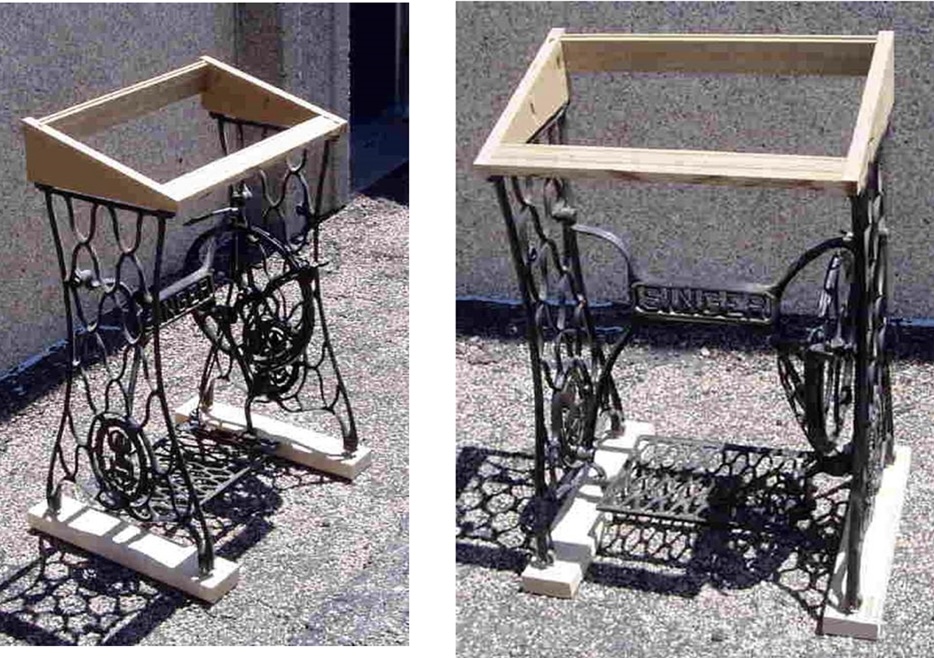
Here’s a cabinet sitting on top of the tilted section.
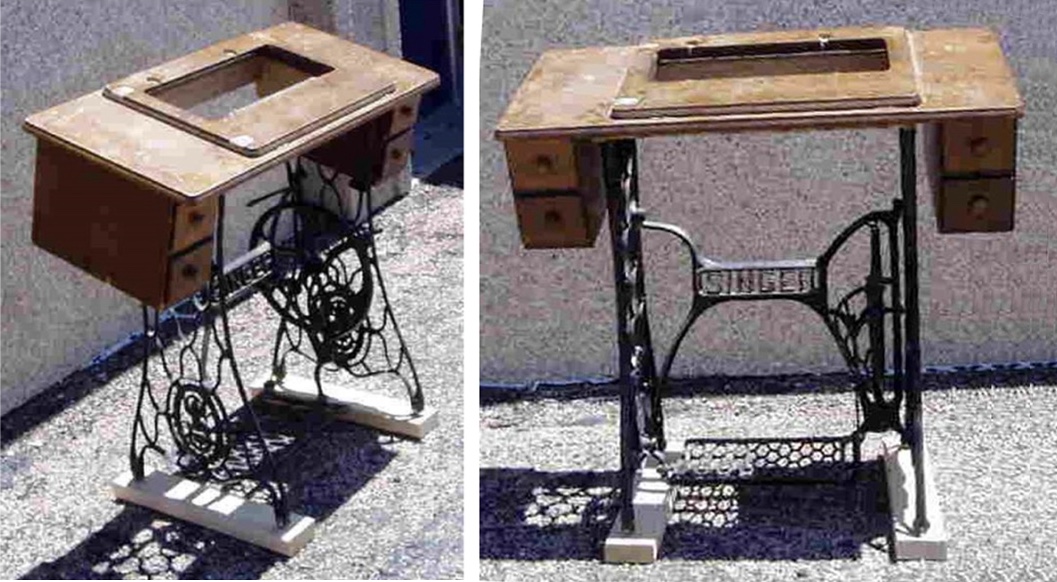
We decided it would be better to seat the cabinet squarely on the irons (as originally done) and add a box to get to the right height. It would include a folding top/bed cannibalized from a machine in Courtney’s stash.
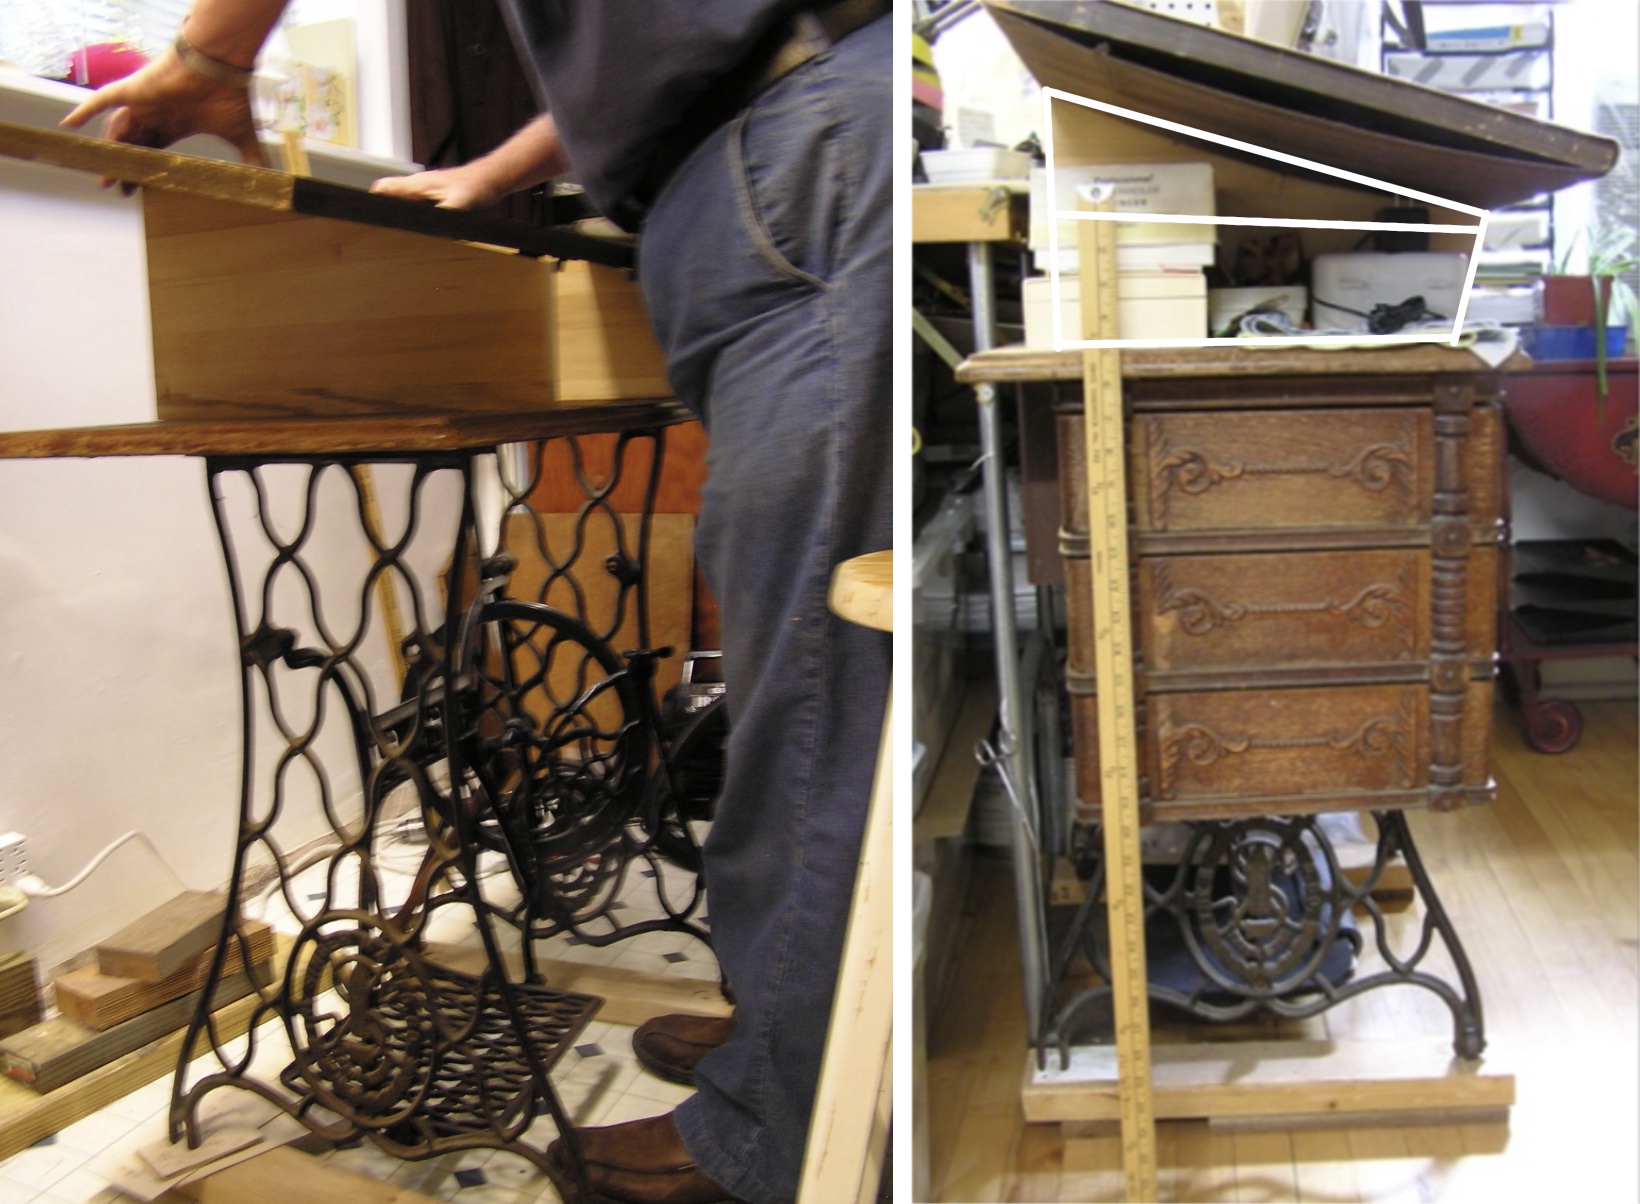
Trying out the actual tilted portion, the raised box and the new top (without the cabinet). Everything had to be bolted and screwed together solidly, so there was constant checking of alignment. At right: side view of the finished spacer. Note that the front edge is angled out.
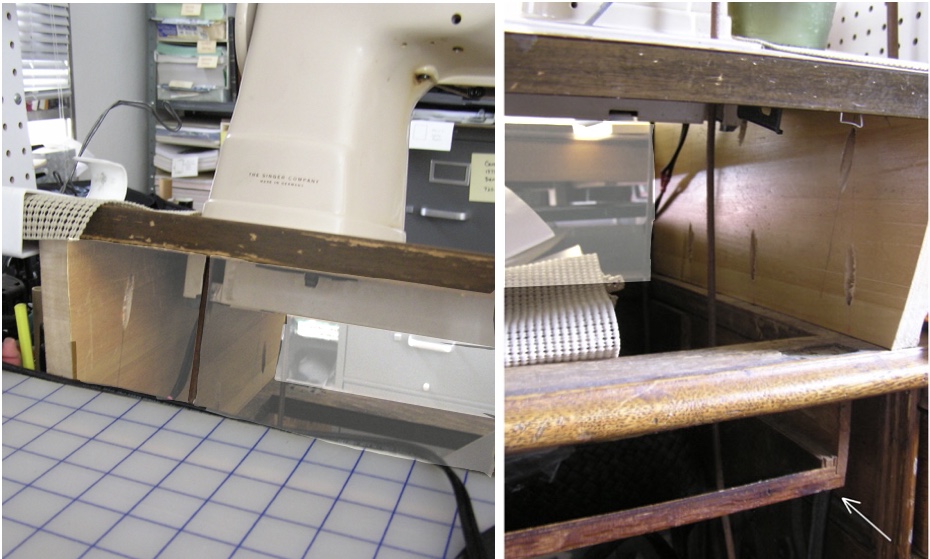
The treadle belt viewed from the back and the front. The machine head was cheated as far to the right side as possible (without the belt touching the sides of the cabinet or the irons) to center the needle bar in front of the person sewing.
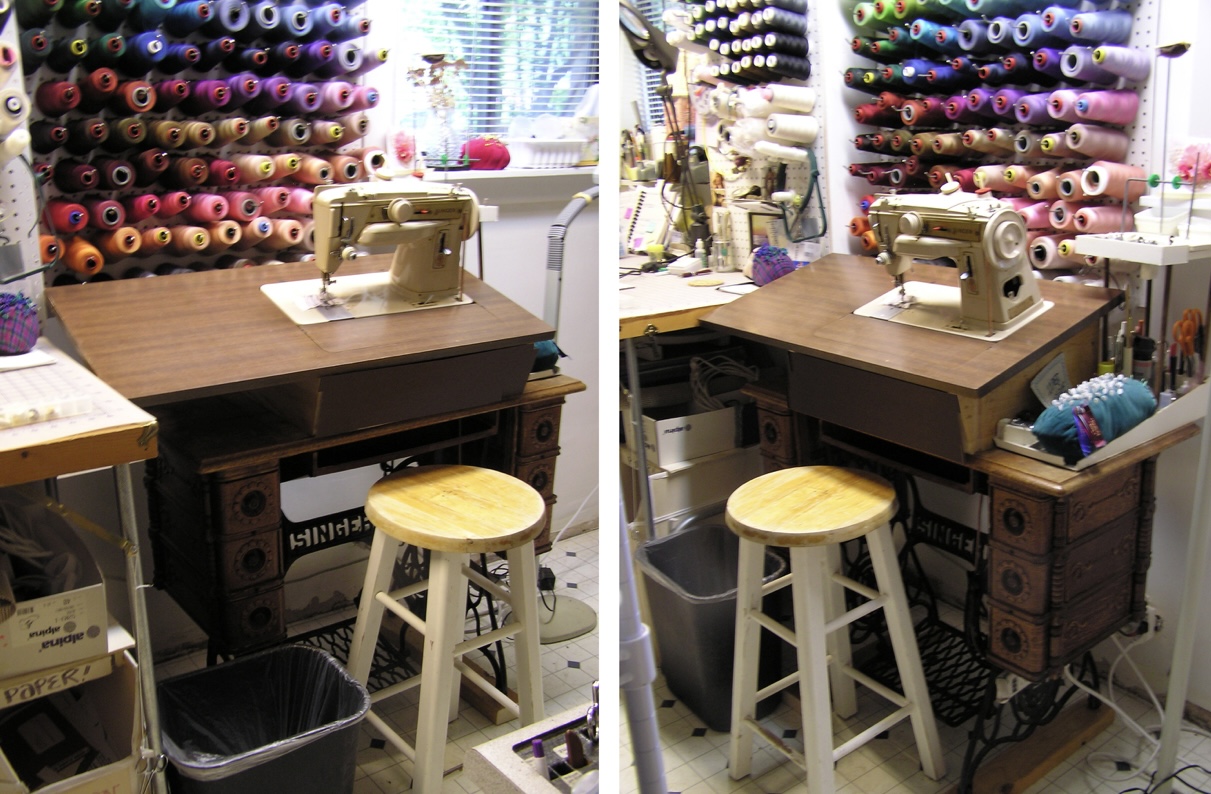
The finished assembly. I tacked a piece of brown matboard across the hole in the front.