Others’ graphics and memes

Hallowdogs

How to get help in a big box hardware store or lumberyard: carry a pair of well-broken-in leather gloves.

I’ve felted small objects (mittens) in a stand mixer using the dough paddle.

Soap, very hot water, low speed. Prepare for a lot of sloshing about.

This is a quick, amazing trick that works as long as your lead is long enough, as it instantly releases as soon as they stop pulling. It doesn’t/cannot hurt the dog. In my pet-sitting days I used it for young dogs that outweighed me by about half again and would easily have pulled me flat.


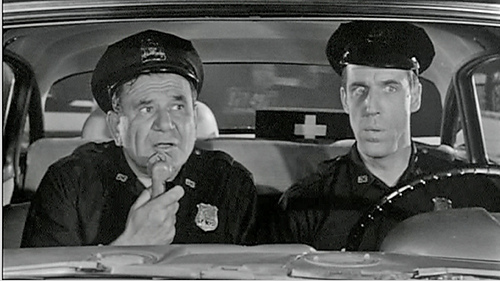
Toody and Muldoon (Joe E. Ross and Fred Gwynne), “Car 54, Where Are You?” TV show

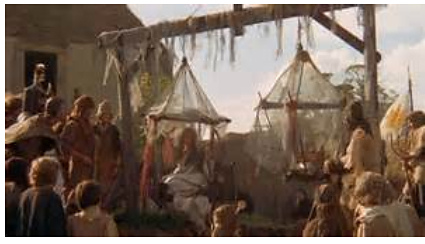
The “Holy Grail” balance checking the comparative weights of the witch and the duck.

Confusing ‘ (feet) and “ (inches). From “This is Spinal Tap”.

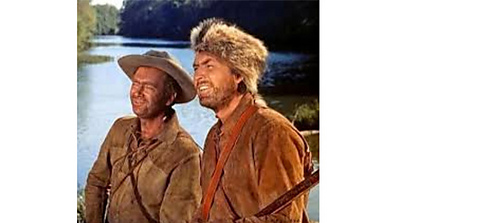
Buddy Ebsen and Fess Parker, “Davy Crockett”

(Irene):

  1. I know I’d like warm greens, and complementary colours to the greens
  2. yellows, oranges, violets
  3. would apple-ish greens work with lavenders and purples? don’t like greens with too much blue

(Carol): Golden ochres/tan/orange/violet

(reference for dyeing)

A. “Sloth”
Crayon Green, Lemon Yellow, Fuscia, Cerulean Blue; crochet too tight along bottom

B. (Unnamed) Fuscia, Sky Blue, Cerulean, Crayon Green, Lemon Yellow; crochet was too tight in fuscia area

Apple green to the purples tends to go through brown, though the purplish brown at the top is interesting.

C. “November” Midnight Blue, Brown, Black

The Midnight Blue goes to the navy (not fond of here), the sample is darker than I’d like, and there’s not much variation.

D. (Unnamed) Fuscia, Cerulean, Sky Blue? Midnight Blue?

E. Lemon Yellow, gold, Crayon Green, Cerulean?, Brown?

Maybe a touch of Fuscia

F. “Carnival”

Fuscia, Lemon Yellow, Gold, Cerulean Blue


November 2

swatches: crochet single stand of bootie yarn
One: try again for yellow/orange/violet.

Lemon Yellow/Gold/Fuscia/Sky Blue
Two: try agan for apple green/lavender/purple.

Lemon Yellow (no gold, that went brown with the green)/Crayon Green/SkyBlue/Fuscia

Three and Four: try these two progressions:

Gold, Brown, Fuscia, Black, Cerulean Blue.
Black, Cerulean Blue, hint of Brown, water, water

Five: Black/tones for the CC (smaller amount)

Will lack subtlety but eh

Bootie single strand for less wound-together blanks: clearer color progression

might crochet the results, if it looks promising try Myrtle

I: Gold, Brown, Fuscia, Black, Cerulean Blue.

L. and M. as above, with Lemon Yellow, Sky Blue

Yarn needed by weight – 2 skeins twisted together = 200 gm

Front/back (with contrast yarn but no sleeves) = 362 // 200 + 162 minimum – do 200 + 175

One sleeve = 113; 2 = 226 // 200 + 25 minimum- do 200 + 25

Contrast yarn – original was 178 gm, have about 50 gm left; do 200 grams, 2 original skeins

Body 1 segues into Body 2, which continues into the unneeded X section. The blanks will be roughly proportioned to the sweater body.

Sleeve 1’s blank will be longer/narrower than the body, so that the painted dye coordinates across. The extra at the bottom of Body 2 (175 for body, 25 for sleeves) will plug in there.

The contrast color will be two single-strand skeins vat-dyed separately and then plied together.

Each sweater will use 8 single-ply Sakkie skeins.

Notes for Myrtle Revisited

construction roughs, taken from private conversations with Irene

False-color mock-up working out short-row shoulder wedge(s). Orange lines are the highest point across my shoulder and my natural shoulder seam.

Contrast yarn defines short row wedge.
Blue yarn is my natural shoulder seam.
The distances from any point on the long sides of the wedge to the floor are the same (white arrows), so adding Front/Back/Sleeves from the insides of their cakes – original tops of blanks – puts the bands in sync.

The short end is one band plus its two bracketing CCs: 12 stitches

JMCO 27 + 23 (24?) + 27 = 77 (78?) with dark gray contrast color.
The double-row join between front and back will be a straight-ish line rather than scalloped. Can’t be helped.
Put the back neck stitches on a cable and as work goes around the neck, loop around the cable at each end of the inner wedge to add a stitch


When the wedges are done, switch to Front (with neck shaping) or Back cakes and work down the body (add specs).
The swoops of the scallops are dependent on direction (top-down or bottom-up); they will be opposite to the first Myrtle.
Document further once actually cast on

Check set of pattern across center front/center back: where does k3tog fall?

Put (back) half of sets on cable. Place running markers every ten stitches on front, working from shoulder. Count from shoulder on Front and place 2 markers at 27 (10 + 10 + 7) [26 in center for back neck] mirror second side

Flip markers every row

Begin row shoulder wedges with separate balls, maintaining pattern between markers

Longer set of short rows:

From shoulder, for longer short rows: work MC across to neck, then over to 5 sts from end, twin, work back to neck edge. Place back neck stitches on cable. Each time you reach the neck edge, wrap yarn around neck cable.
Might be better to pick up later? Note to self: no, idiot, choose the right cable to wrap over.

Second side: mirror longer short rows. Pick up twins on next row.

Row 1 Myrtle sequence (pattern of ten x2, knit seven) … (knit seven, pattern of 10 x 2)

Row 2 knit back, decreasing one at neck edge: slip 1, k to last 3 sts, knit2tog, k1 … slip 1, k2tog, knit to end

Row 3 continue pattern, working 2tog at each end NO DO NOT DECREASE (k2tog, YO, k1, k3tog, k2, YO, k2; (complete pattern), k3, k2tog, k1 … k1, capturing loop of yarn over neck cable, k2tog, k3, (complete pattern), pattern except k last 2tog

Row 4 knit back, slipping first stitch

Row 5 (pattern for last 9 sts), (pattern), k4 … sl1, k3, mirror

Row 6 work back, slipping first stitch

Row 7 decrease by k2tog at each shoulder, NO DO NOT DECREASE otherwise follow pattern

Row 8 work back, slipping first stitch

Second set of short rows: work from neck edge to 10 from sleeve end, twin, work back to neck. Pick up twin on next row. Add pattern details!

Row 9 [1] sl1, work one more set across and back, ending at right shoulder

Row 10 [2] Work two rows CC

Wedges. (Pattern will continue in stockinette areas)

User error: the neck edge wraps on one side were on the back rather than the neckline cable. Stitches a bit loose after moving/will know better on real one.

Notes: Test sample is good enough (unblocked). 80 stitches each f&b, pattern tracks.
The shoulder wedges need pattern completely across, but they sit perfectly.
Start pattern on Row 3 of Kate’s pattern so it segues into the front.
Suspect the JMCO will be a flat line, as on the first Myrtle due to tension being balanced on each side rather than free to pull into scallops. Think this happened on all projects but have not bothered to check.
Had about half the CC for the height of the neck binding. Did a simple bind-off at the neck edge due to laziness, will use Jeni’s stretchy one as per first Myrtle.

Myrtle Revisited, Instructions

https://www.simple-knitting.com/horseshoe-lace.html

Put (back) half of sets on cable. Place running markers through cast-on every ten stitches, working from shoulder. Count from shoulder on Front and place 2 markers at 27 (10 + 10 + 7) [26 in center for back neck] mirror second side

Shoulder wedges are worked with the tail end of separate sleeve balls: all front stitches are worked from the front half of JMCO.
Neck stitches are put on a separate cable as soon as accessible
Right wedge is worked, capturing stitches over the neck cable
Then Left Wedge is worked with the end of the other sleeve ball
The wedge patterns are not reversible as the right is worked from shoulder in and the left, from neck out