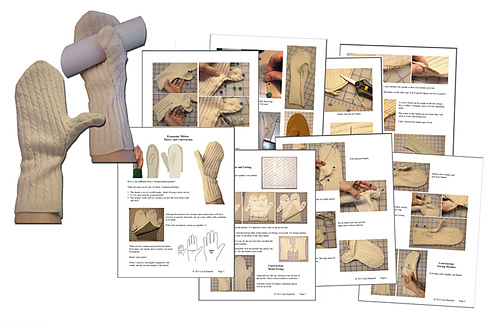
Sewn from felted sweaters; the pattern is available for sale here.
The UnRavelers Group was playing with patterns for knit mittens.
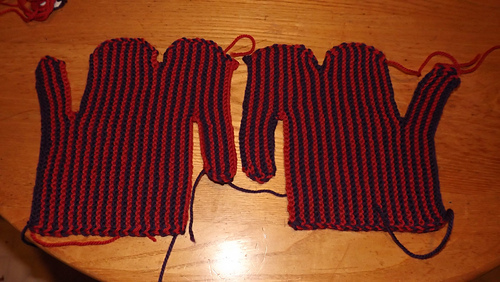
Separately, but related, they were bemoaning sweaters that had felted (not necessarily a problem) and shrunk (definitely a problem) in the laundry. The second photo came from a woman who had knit the first and then pulled a pattern to use with felted “fabric”. She used cashmere (far too fragile for mittens themselves) as a lining for several.
Here’s a link to Karin’s project page for this on Ravelry.
Larger sweaters can yield 5-7 pairs of mittens. When we had several areas to ship to, no big deal, each place got a set of purple mittens. But when we had twenty pair of almost identical red, the solution (!) was to dye them.
Here they are sorted into tubs to get different colors.
The five sets in tubs will start soaking – plain water. When they’re thoroughly wet, they’ll get upgraded to rubber-glove-hot water with salt and white vinegar for a while, then lifted out while the actual dye is added to the solution. Gentle agitation. Soak, soak, soak, gentle agitation; rest. Gentle agitation a time or two more.
Then heat-set them and let rest for a couple hours. It’s an enforced breathing spell. The dye is then chemically inert – it safely went into our septic tank when I lived in the mountains.
Dyeing is a leisurely activity.
(Dyeing will move to its own thread eventually)
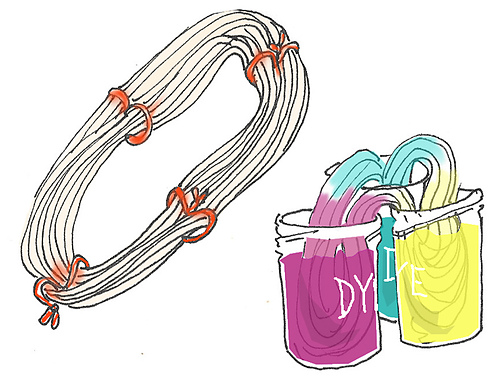
An average skein should be tied in at least four places (every foot or so if you make a whopping big loop). Your waste yarn should be a figure-8 and NOT too tight. Pretty much any of the dyeing tutorials start by showing you how to do that. Note: use a waste yarn that will NOT bleed!
Most first-timers don’t use a fraction as much dye as they need. If you can see through the liquid easily, add dye. Add a LOT more dye (this is why food-grade stuff gets expensive*).
You can also use more than one color with a skein though there’s less control. The color will wick up for longer than you think. Let it sit 10 minutes or so before you re-dunk the joins.
* I have a dedicated set of dyeing tools. I write on the outsides with office-store white-out.
Early dyeing of yarn:
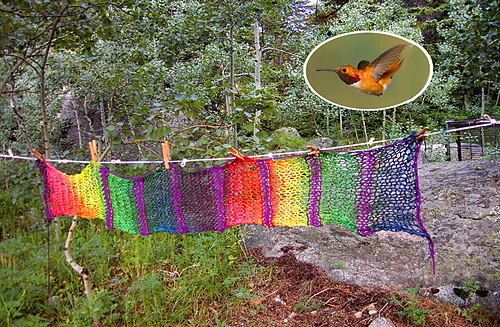
When I lived up in the mountains we had tons of hummingbirds. The Rufous males, though tiny* – barely as big as one of the wider pieces of purple waste yarn separating the dyed sections – were incredibly aggressive bits of flying gold/brass/copper who would take on all competitors, real or perceived (woe betide you if you had on a bright flower-colored sweater going out for wood).
When I’d hang my freshly-dyed yarn** out to dry, they’d dive-bomb it.
* and noisy
** see? I can tie this to our topic
Tie dye (fiber-reactive dyes):
Though this is a current photo, most ol’ hippies have tie-dyed shirts decades old that have not significantly faded or bled. This is the glory of fiber-reactive dyeing. There is a chemical bonding between the dye and the fiber. Once any excess unfixed dye is rinsed out, the colors are permanent. Depending on your recipe, either plant or animal fiber works. Plant fibers are fixed with an alkali (base), animal products, an acid (and must also be heat-set).
I cheerfully wash any stuff I’ve dyed myself without sorting for color, and have not had problems.
Some “real” old hippies. The the purple parts of the guy second from right’s tee looks to have faded, but none of the colors have bled.
Overdyed mittens
Five pairs of mittens from one felted sweater.
New Patterns from fused, layered fleece!
Above are three sets that went through separate dye baths. Even the original olive sweater took enough dye to look different. We found that they can be dyed after being sewn, which is much easier.
Larger pairs.
xxxxxx


