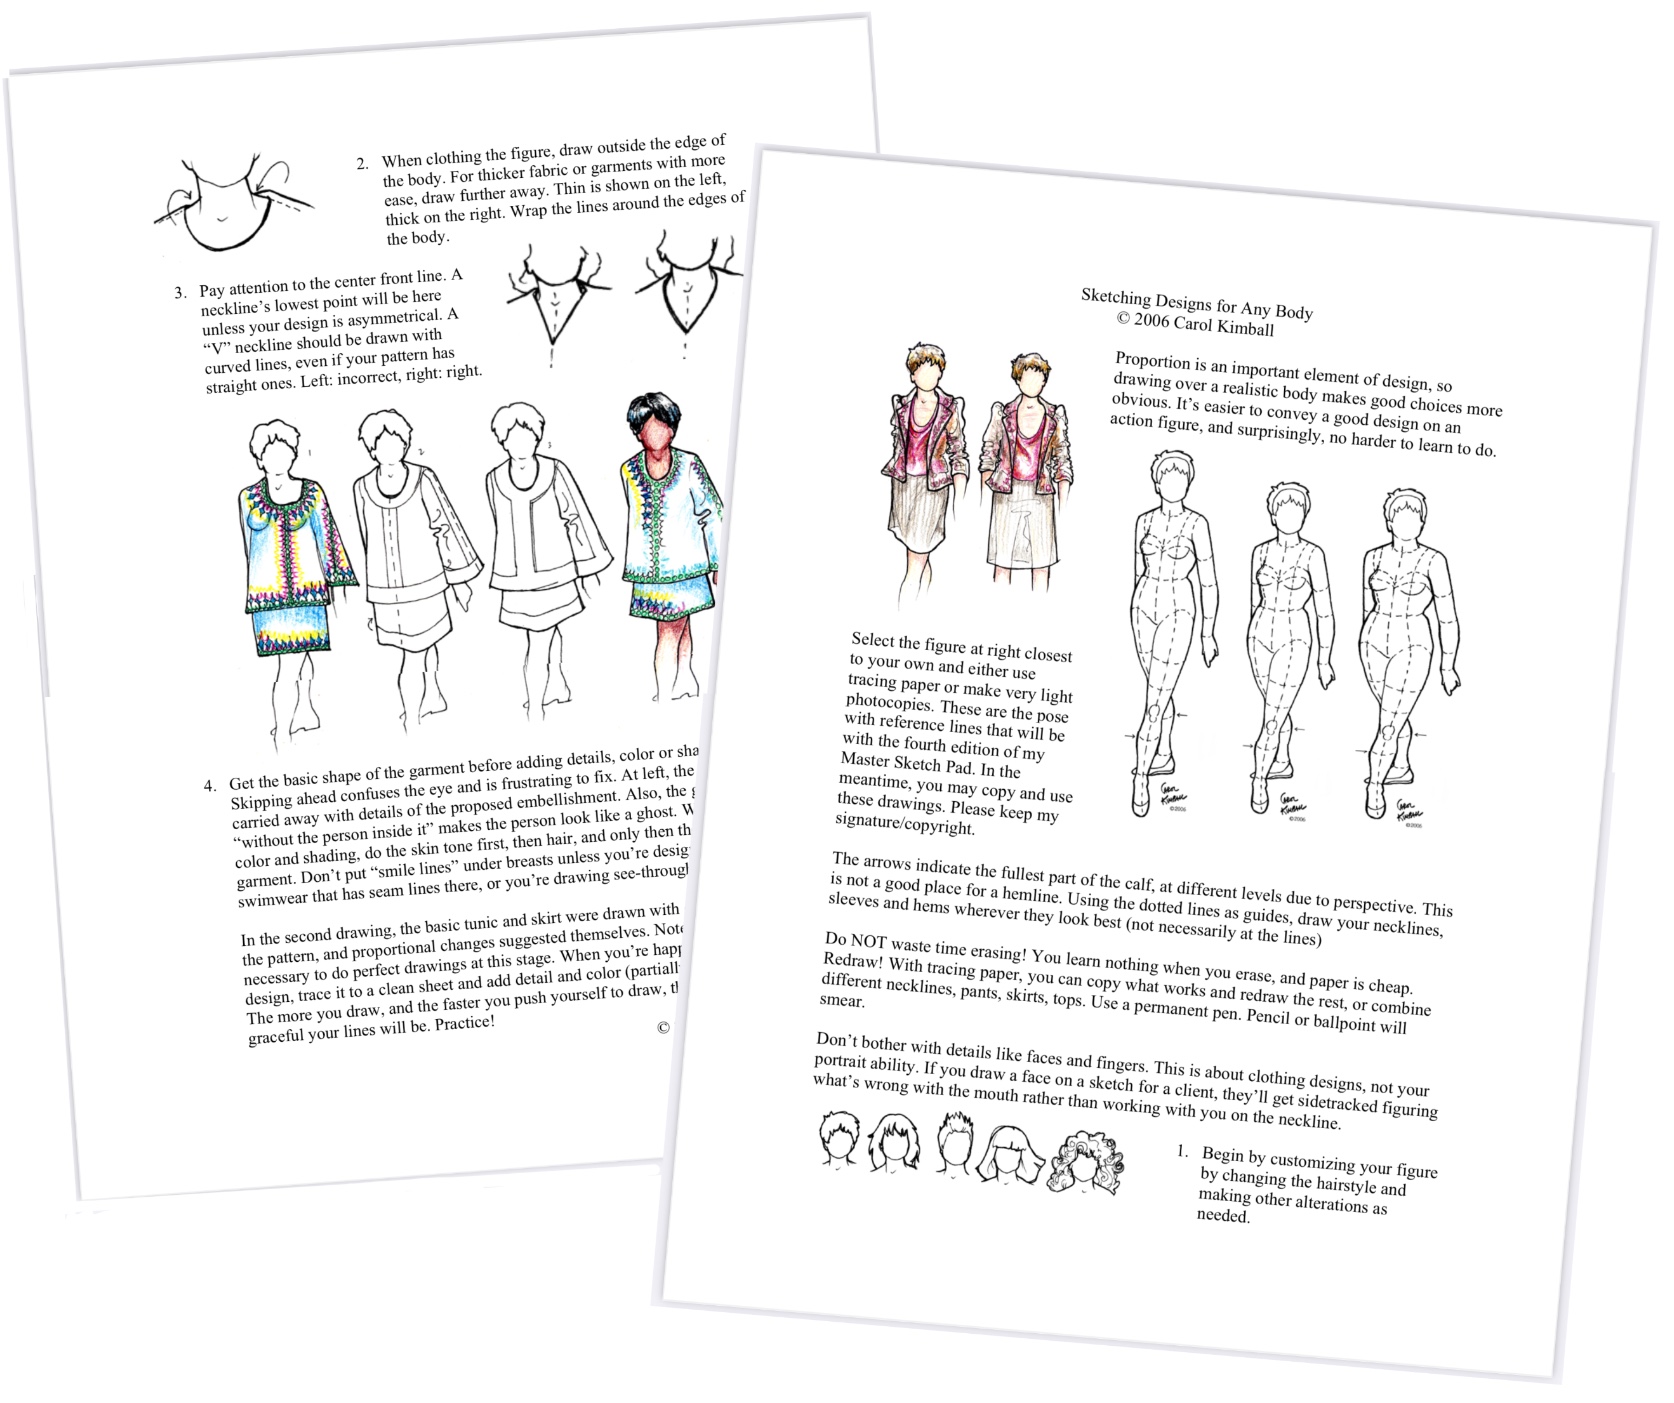
You know how valuable it is to be able to sketch quickly or illustrate with more care, yet the thought of picking up a pen or pencil scares the willies out of you? I can help. Start by downloading the free tutorial and a page of the body templates – it looks easy to get into because it is. Set a timer and play for ten or fifteen minutes, then go have a walk or a cup of tea. You’ll be surprised at how good you are, and how quickly you get even better.
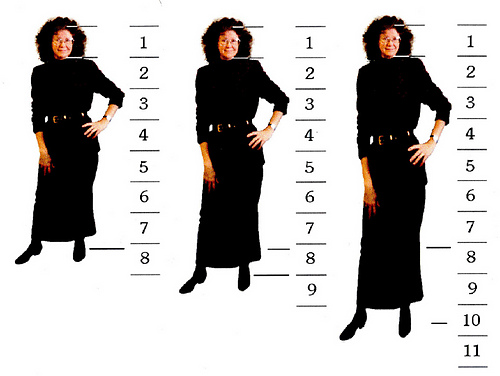
Very, very old photo from my earliest fashion sketching teaching days, when I used this to drive home how important it is to use realistic bodies for clients and personal designs. The one on the left is unmanipulated at roughly 7 heads tall (talk about a dumb measurement). The center was what at the time was “U.S. average” height, and at right the ideal fashion model. It was early days for photo manipulation for me.
Butterick/McCall’s/Vogue’s illustrated figures were up to 14 heads high.
When clients ask me what size they really are, I tap the pattern I’m building on them and say, “this size”. I have no idea where I fall, other than under the petite label.
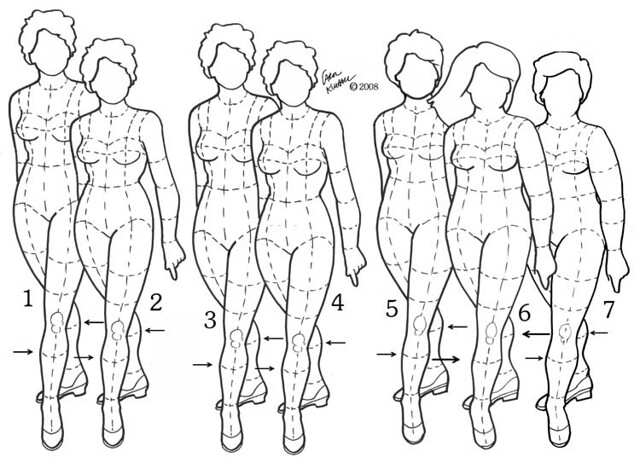
Six “hourglass” petites (except for the normal average common American Standard mid-height figure to the left who’s about 5’4”/162.5 cm.).
None of them would really fit in any of the others’ well-tailored clothes, though they all probably buy off the rack. I am closest to #4, but my shoulders are much narrower and rounder, so her jacket wouldn’t hang correctly on me.
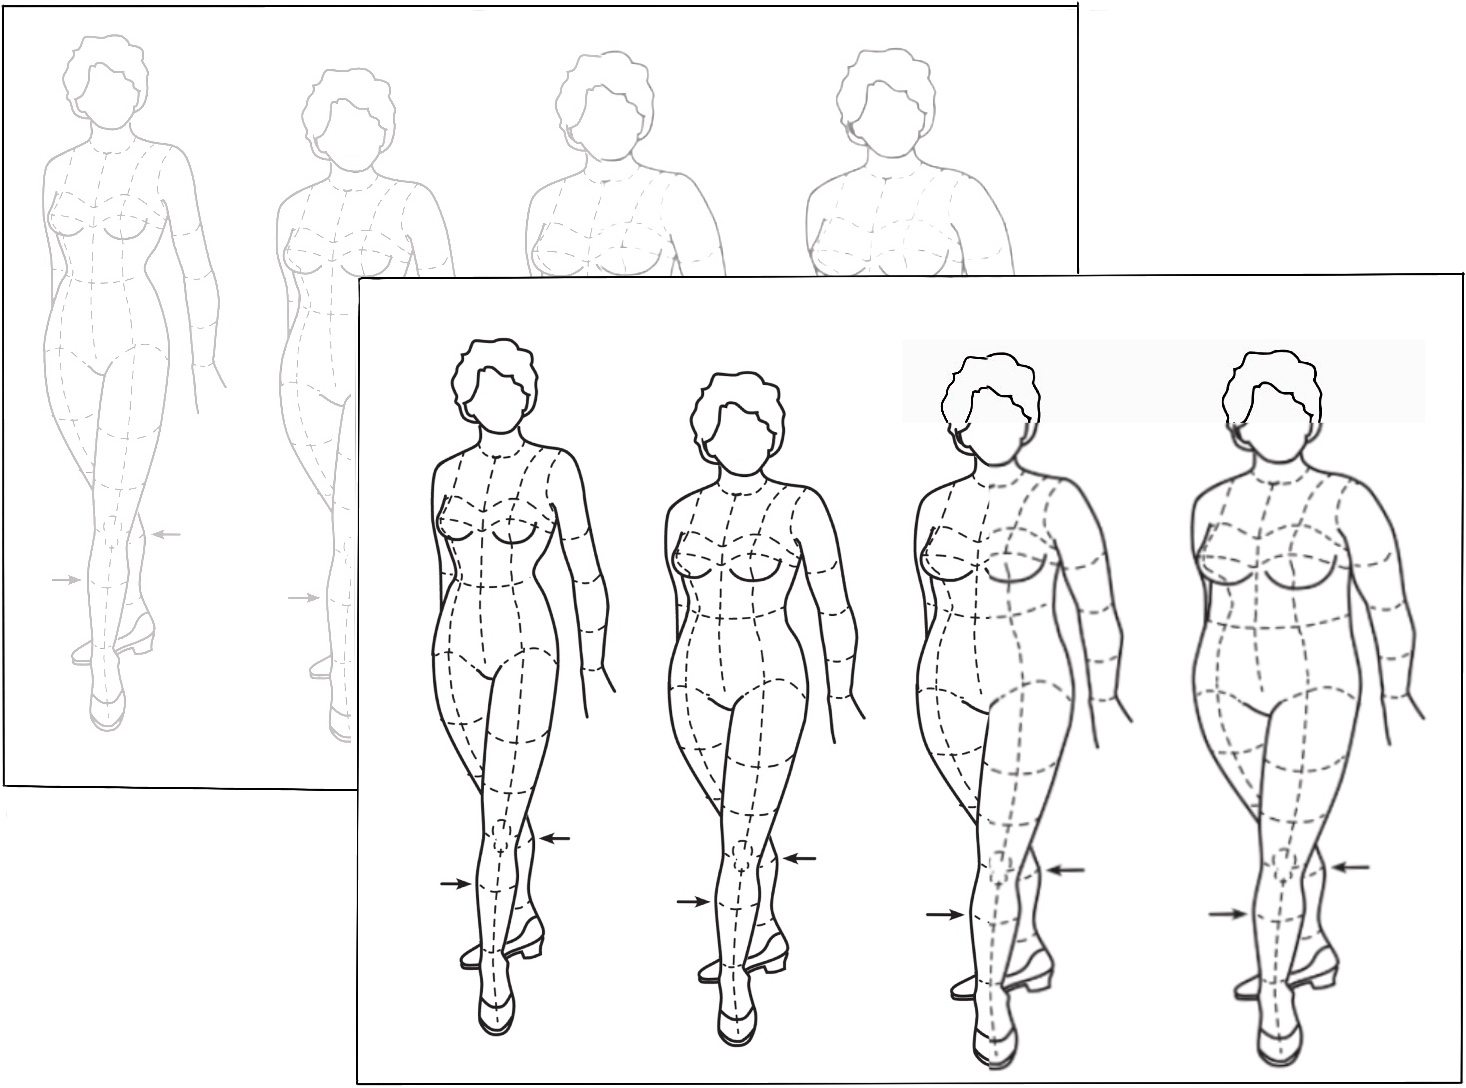
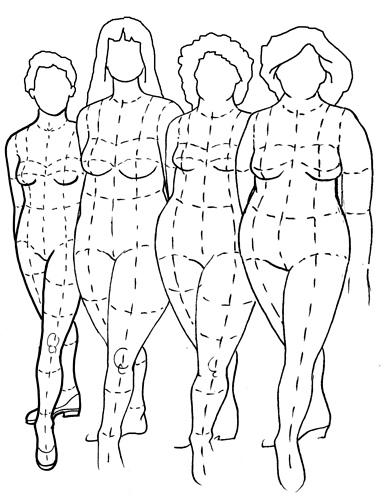
Four different bodies to use for your own sketching, in black line and light gray.
If you’re working from a tablet or a smart phone, please consider going to your local library or office supply store for printouts of PDFs.
Free downloads (links at bottom right)
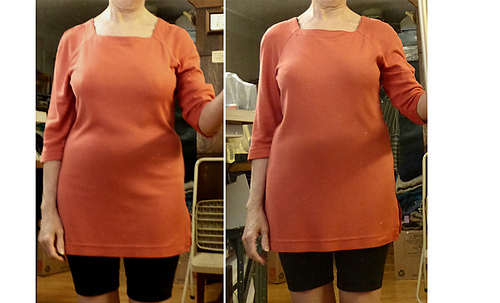
Here are two examples with/without a small shaping pad.
I’m in the orange; this is a slightly thicker pad than usual but most of what I wear has the pads sewn in. The blue is Photoshopped.
The other adaptation for the blue dress (as this woman has good waist definition) is to add fabric above the waist to increase the blouson, which visually lengthens the upper torso.
This is by far the best book on body image I’ve seen:
The Triumph of Individual Style by Mathis and Connor
The link is to AbeBooks, one of my favorite sites, but it’s out there across the net; many libraries have it.
Profusely illustrated with drawing/paintings/sculpture* which carry the not-particularly-hidden agenda that if an artist thought the way a woman looked was interesting, she had merit. None of this “the best figure type is the (slender) hourglass, and if you don’t have it here are ways to fake it”.
The page to the right shows a Picasso drawing of a woman with stocky legs/thick ankles. To one side is how to minimize them, the other, how to emphasize them.
* largely Western women, no men or children, because that’s where they could find images in the public domain.
ETA: No affiliation.
Four clients. They’ll be better able to make design choices for the clothes I build for them if they can see a sketch on a realistic version of their body.
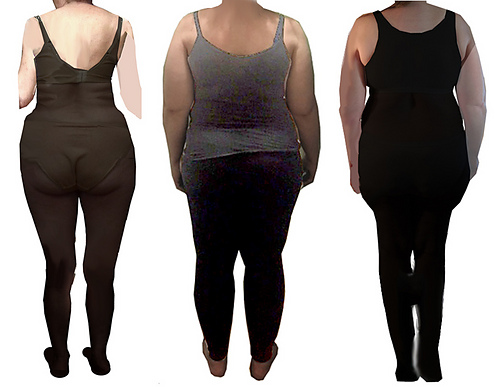
”Pear-shaped bodies”
These are NOT in scale to each other, rather their neck-to-crotch is about the same length.
ETA: These are the most extreme examples of what I was sent. Everyone gave written permission to post.
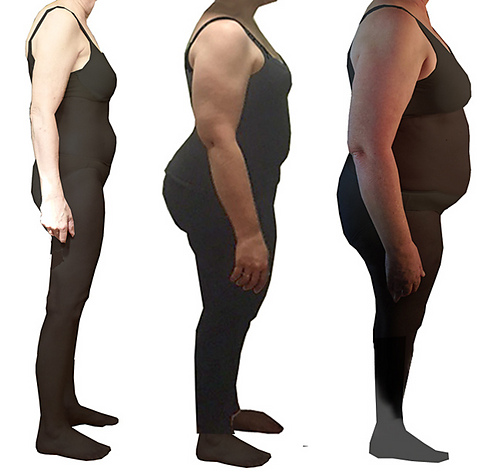
Side views, general:
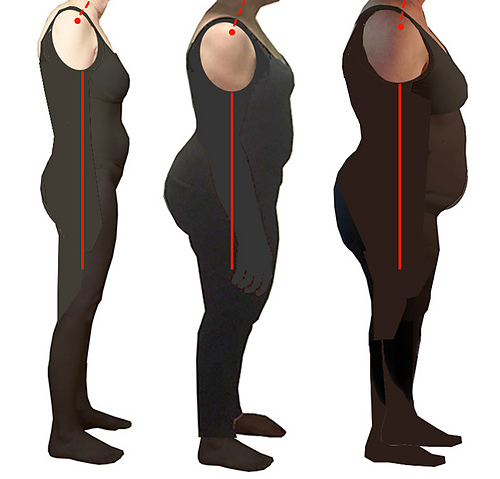
The shoulder seam runs from the joint at the top of the arm to the bone behind the ear. A seam sitting here will not pull the neckline back as it would if it were at the highest point of the body.
The three women on the right are the same height and weight, and have the same measurements for bust, waist, hips. They cannot fit comfortably into each others’ clothes.
In a well-designed garment, the back is longer than the front. On sewn fabric, the back shoulder seam is slightly wider and eased to the front to give the muscles more room, as we move our shoulders forward more than back.
You can feel this for yourself. Put a hand on top of your opposite neck/shoulder and shrug/wiggle the joint. There will be a stable line in front of the top of the trapezius. That’s where the seam will stay put.
In close to forty years I’ve had one client whose carriage was so erect that her shoulder seam was almost at the top of her body. Almost.
The industry now cuts front and backs the same because it saves money. Emphasis on the cheapest clothing possible, much of it made of knit fabric (t-shirts), and acceptance of a more casual look has led to widespread ill-fitting clothing.*
It’s increasingly rare to find ergonomic construction in garments, but we can build it into ones we make.
One of the couture houses** (I don’t remember which) put seams behind the body’s silhouette a couple decades ago. The thinking was that it gave a sleeker look, but you must engineer almost all of the ease from the upper body to keep the neck area stable. I tried it and didn’t think that the limiting of shoulder movement was worth it.***
* I can’t stand having to constantly adjust my clothes.
** There’s nothing holy about couture in my book; much of it is deliberate conspicuous consumption (I’ve taken workshops/seminars in it, made samples of its techniques, and used their techniques for clients when they thought it was worth it). I was astonished to learn that a priority is that once a garment is on (it takes more time than simpler clothing) it will look great, feel comfortable (although sometimes with a limited range of motion), and reset itself correctly after movement. An example is a weighted hem in a jacket, so that when Her Chic-ness waves to the hoi polloi, it won’t hang up at her waist when she lowers her arm for a photo op.
*** I also don’t hold with “there’s one right way to do it”. Make your choice considering the trade-offs.

