
Back to Crotchmaster series
(next) Elastic-Waist Pants: Laying Out, Cutting and Sewing
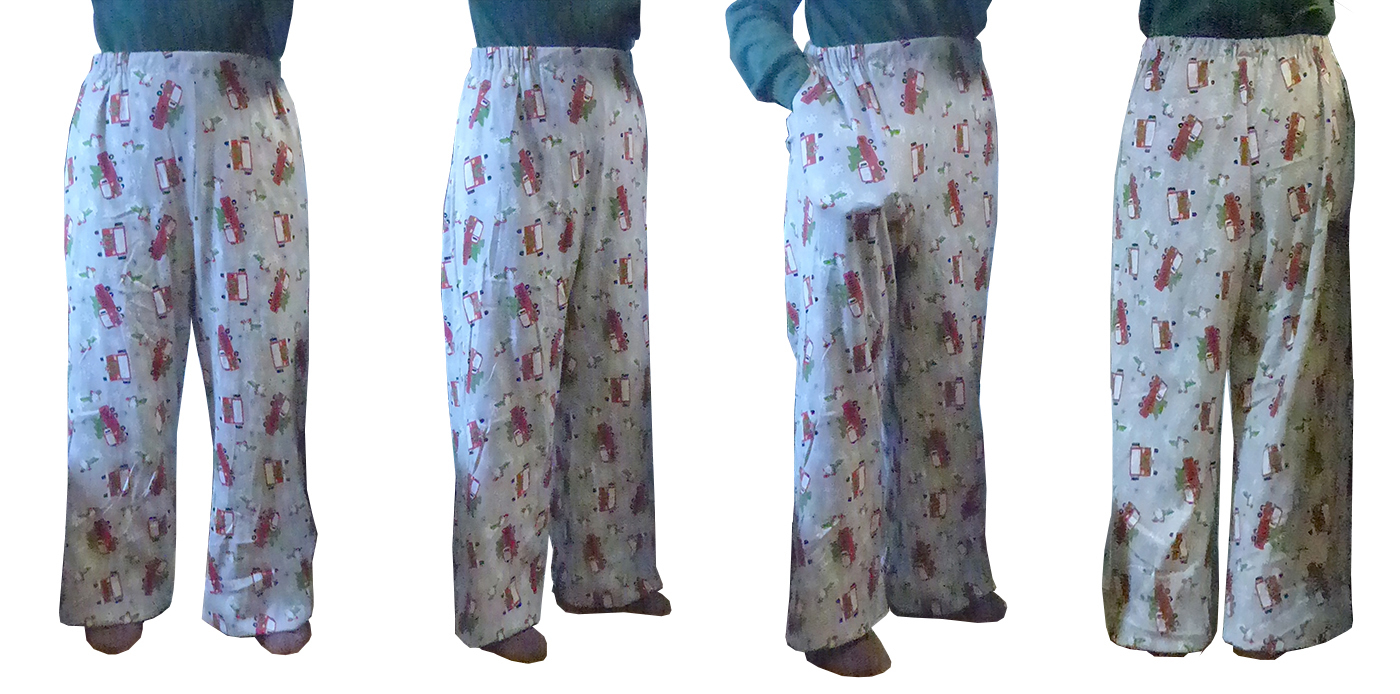
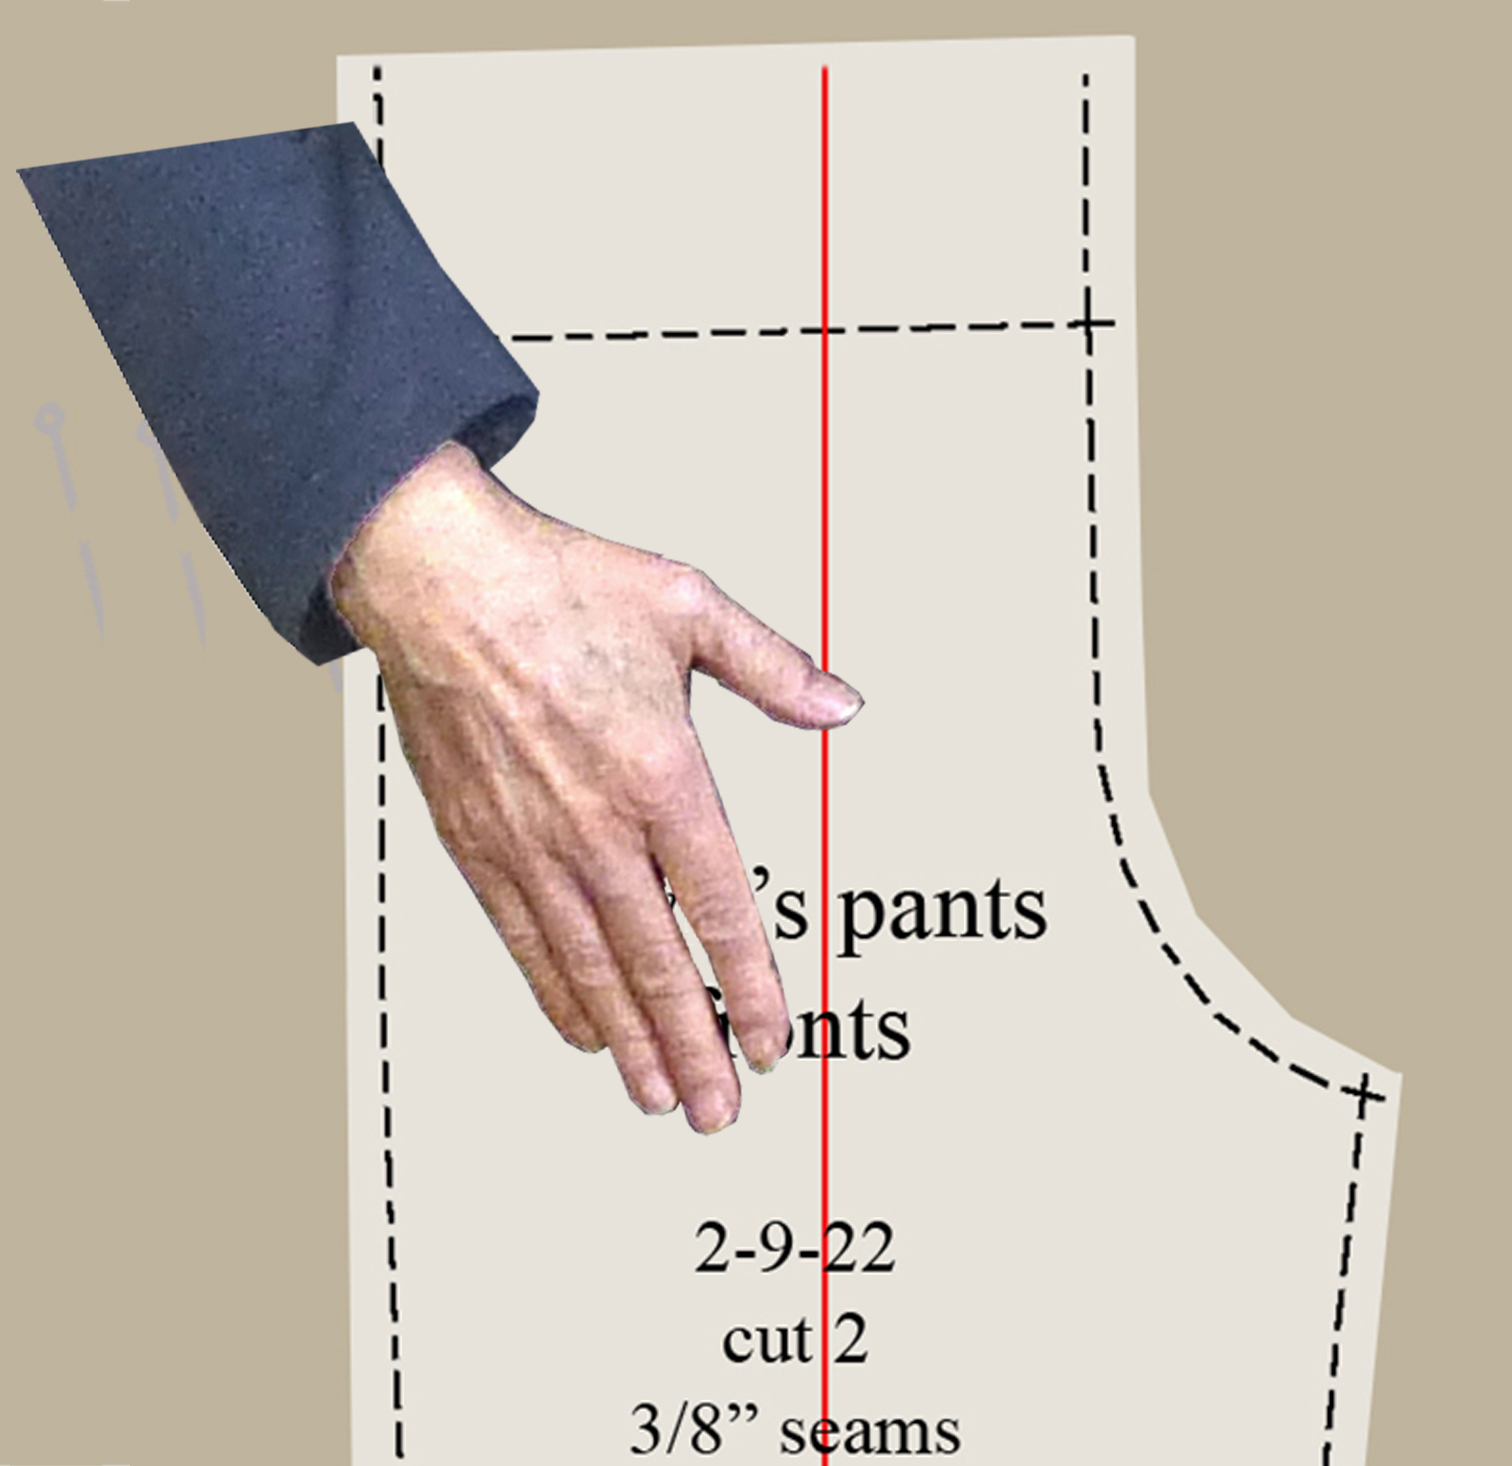
These are loose-fitting pants with a cut-on, fold-over waistband (yes, same as PJs). To get more ease around the body we’ll move the side seams out: how much is your decision. If you’re making them of a lightweight, stretchy jersey you may decide you don’t need more ease than is built into your muslin. Notice that there’s a slight taper in on my fronts at the waist, but we’re adding enough that I’ll be able to easily get them over my hips.
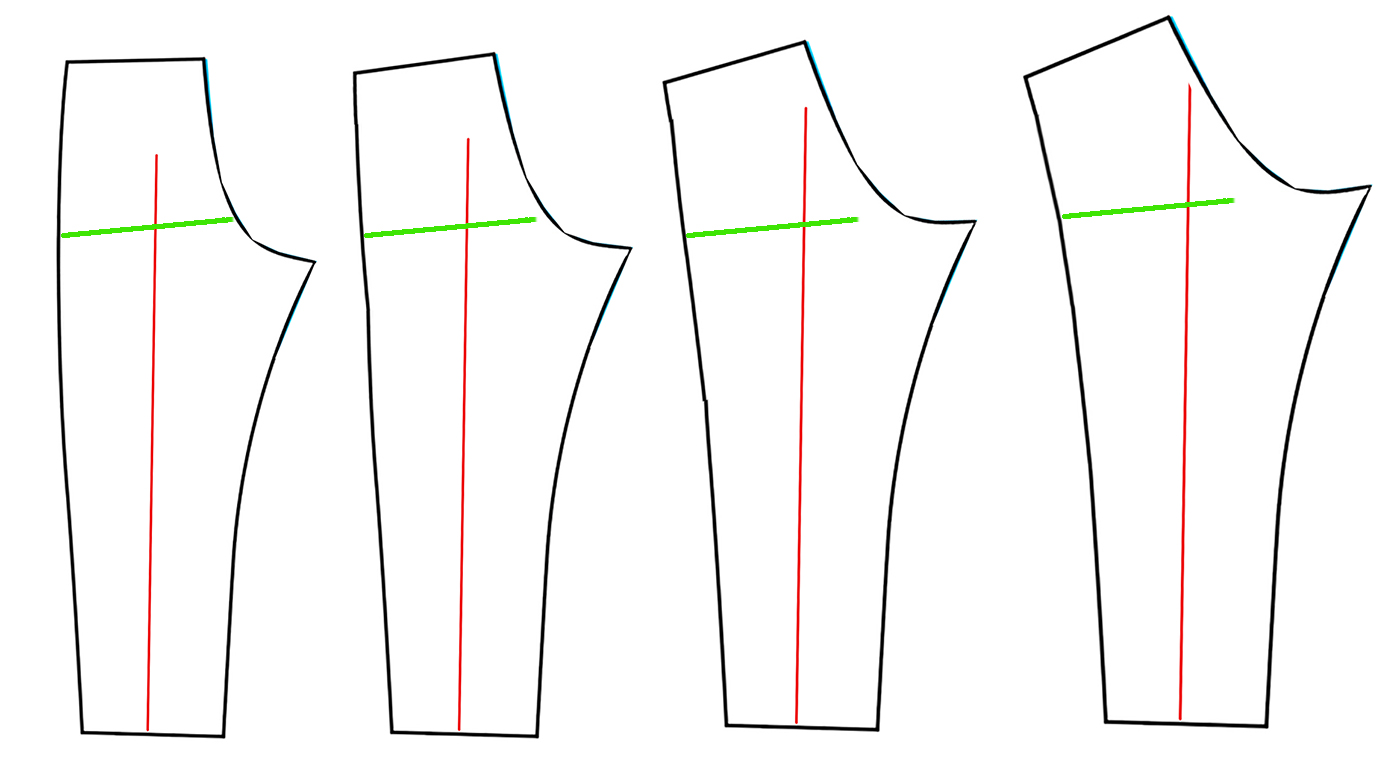
These pants’ legs look very narrow; remember that Virginia was a little slip of a thing. Here’s a common range of pants back pieces.
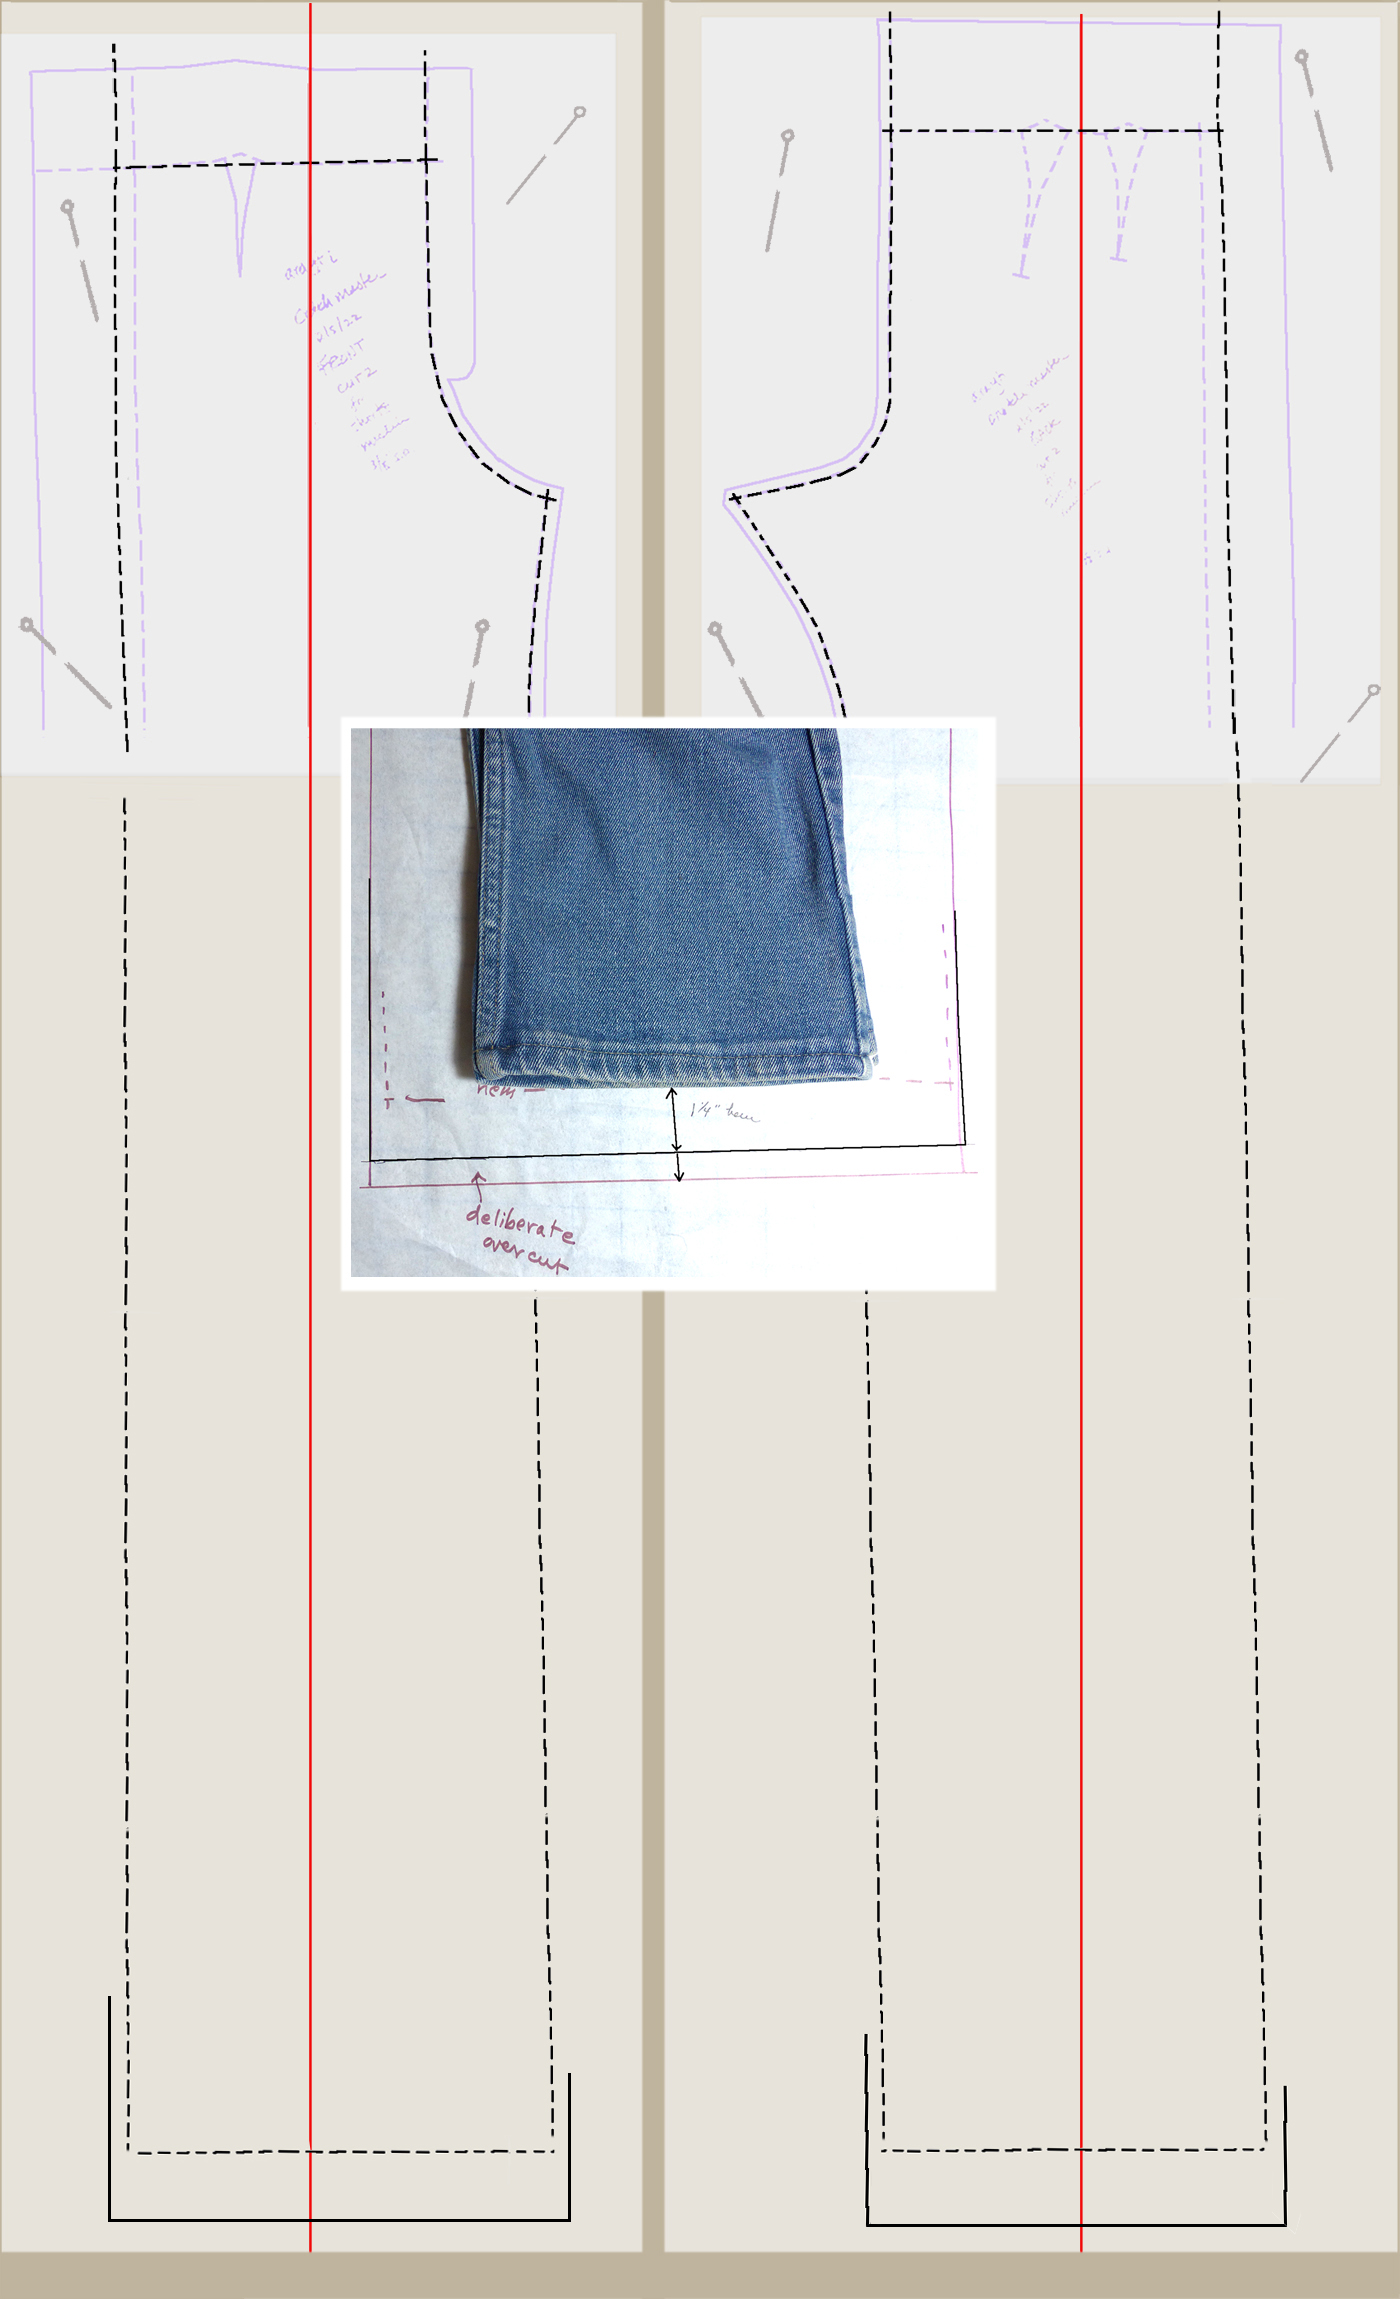
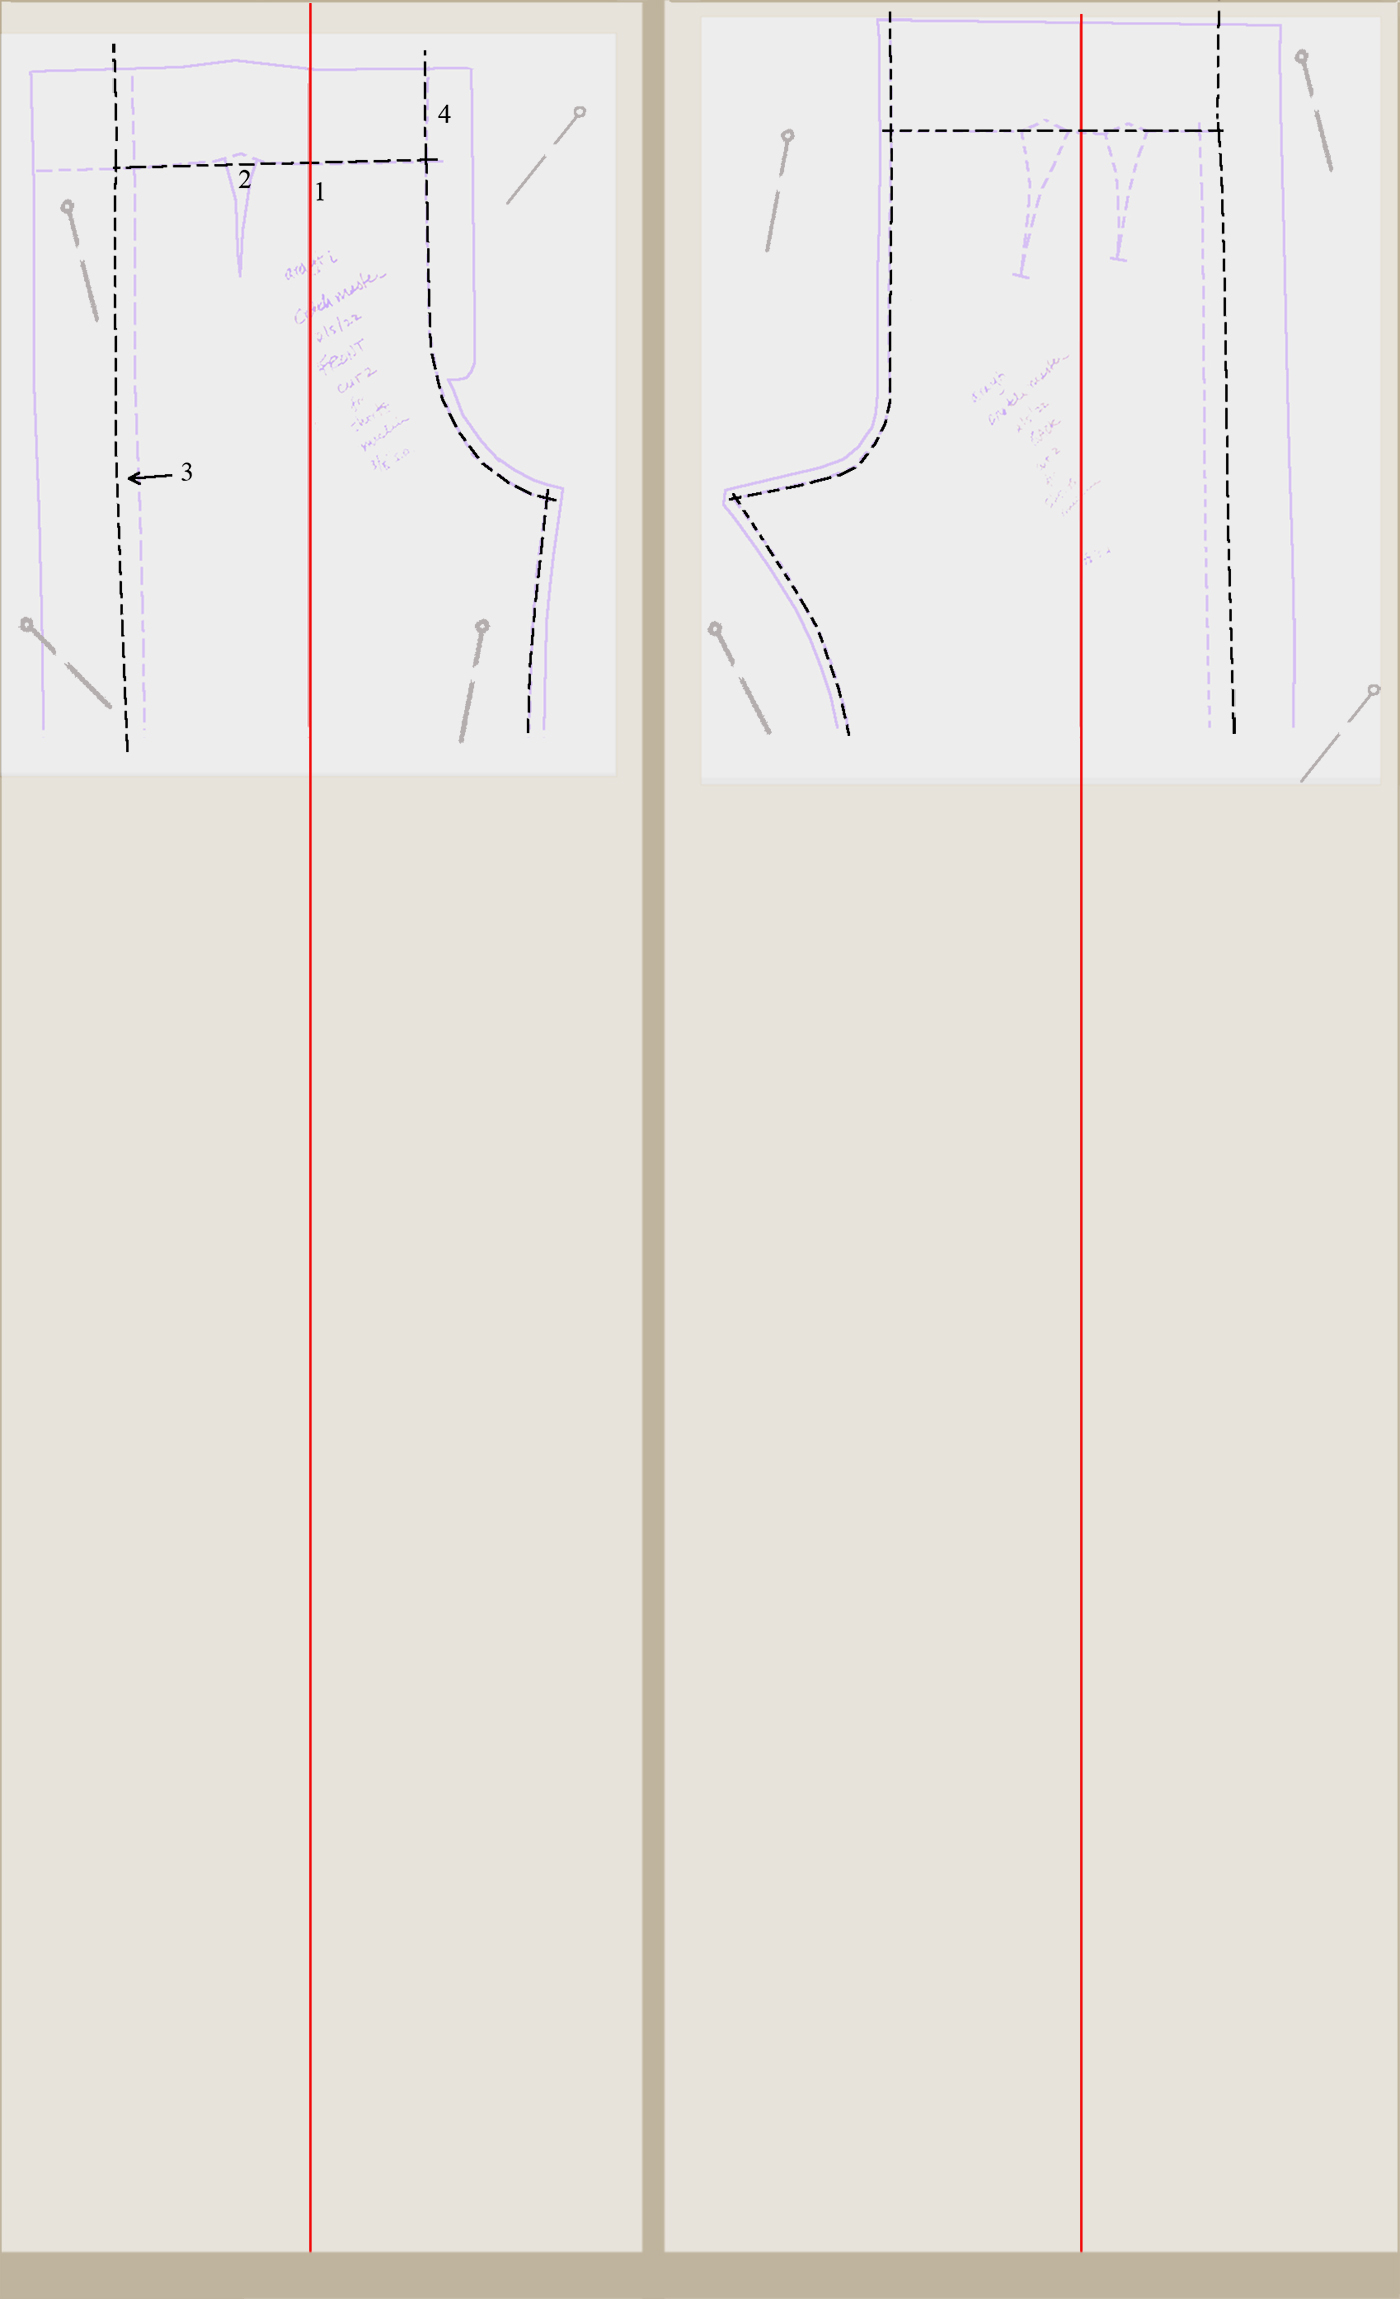
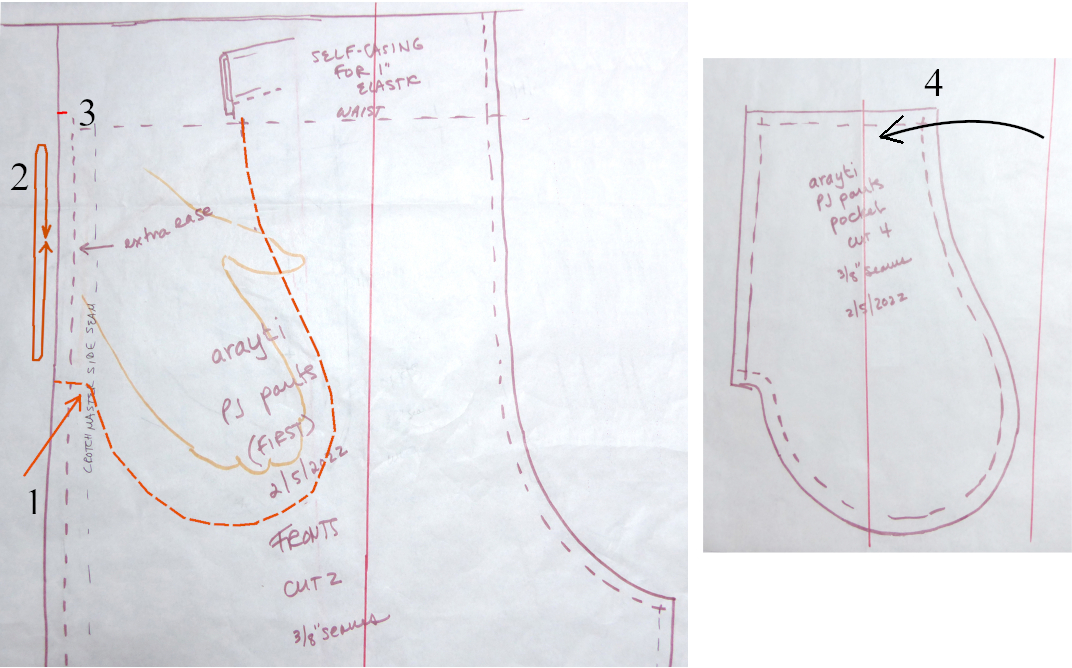
1. Move the side seams out for a roomier fit. 1/2″ / 1.5 cm is ample as that adds total ease of 2″ / 5 cm.
2. Get the length to the hem from current pants. Square up to the upper thigh area. It’s okay if your first pair is wider and boxier than you’d prefer; it’s easy to take in the seams and adjust your pattern for the second+ pair.
3. Decide on your width of waist elastic and add two sections to make a self-fabric-fold-over waistband. Standard is 1″ // 2.5 cm. I am short-waisted and don’t carry much in my pockets that would pull the waist down so I sometimes use .75″ // 2 cm elastic.
If you don’t want pockets, add your seam allowances (next step) and you’re good to go. PRE-SHRINK YOUR FABRIC!
1. Seam allowances are the standard 5/8″ // 1 cm unless otherwise noted.
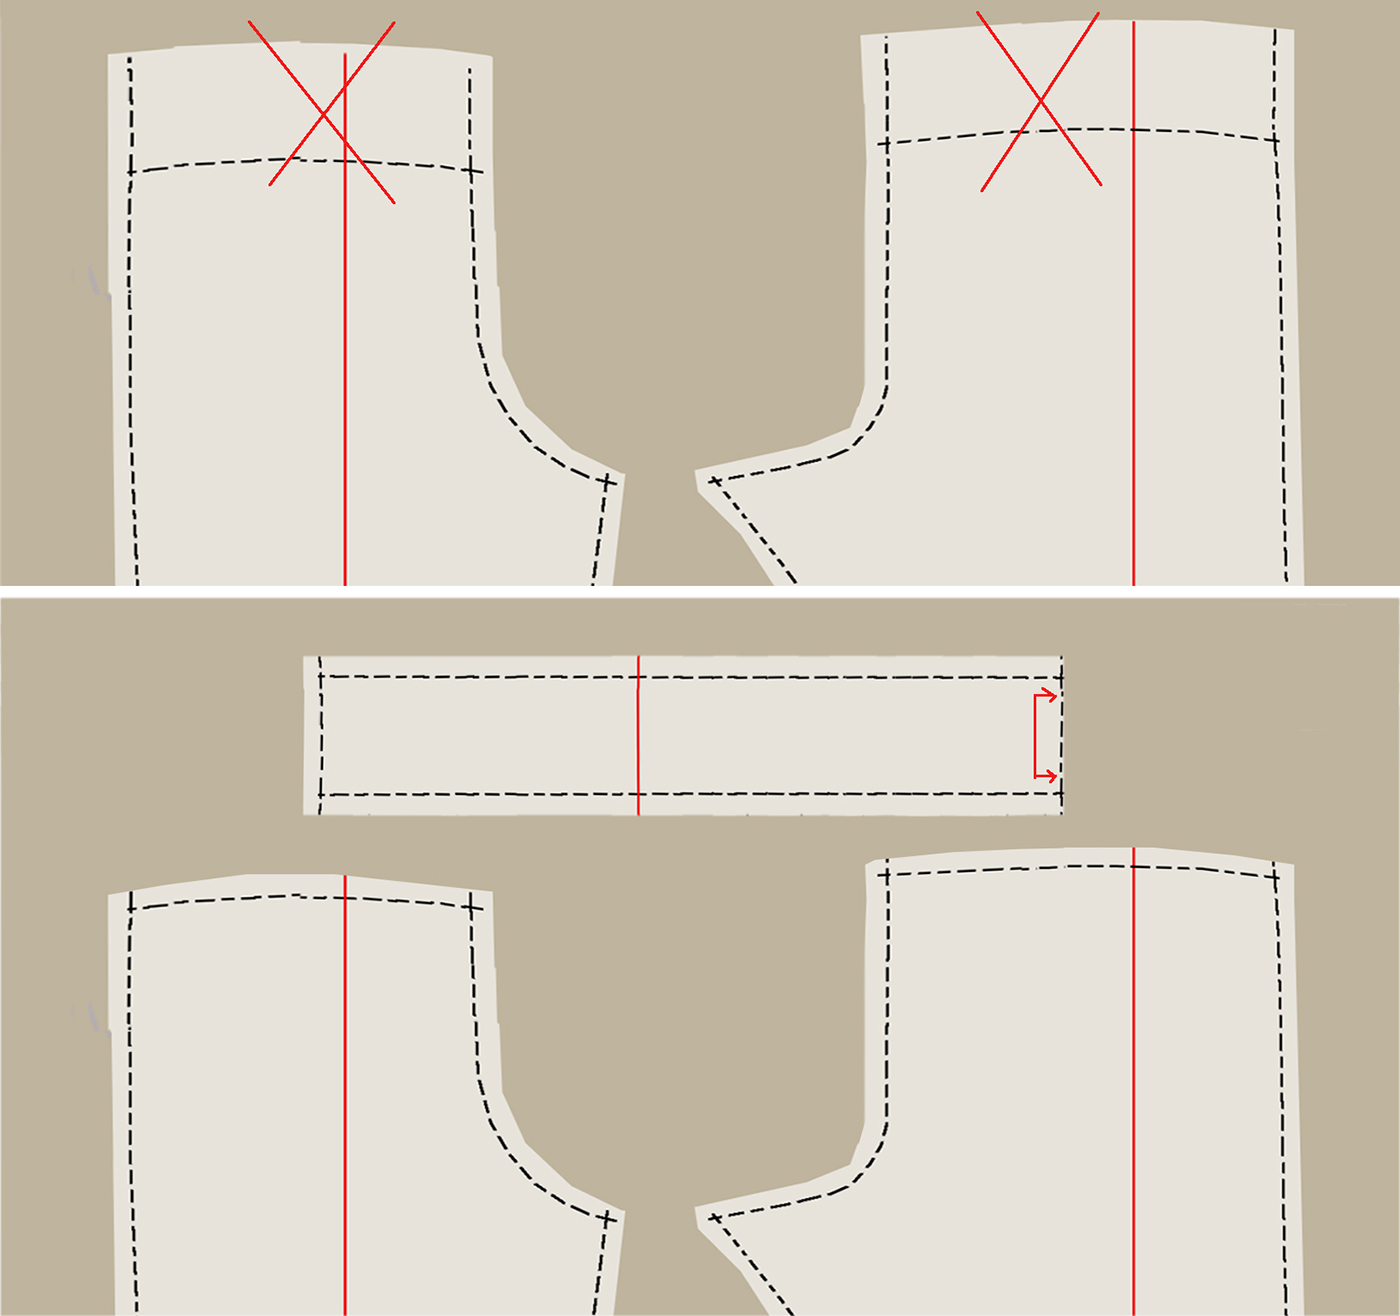
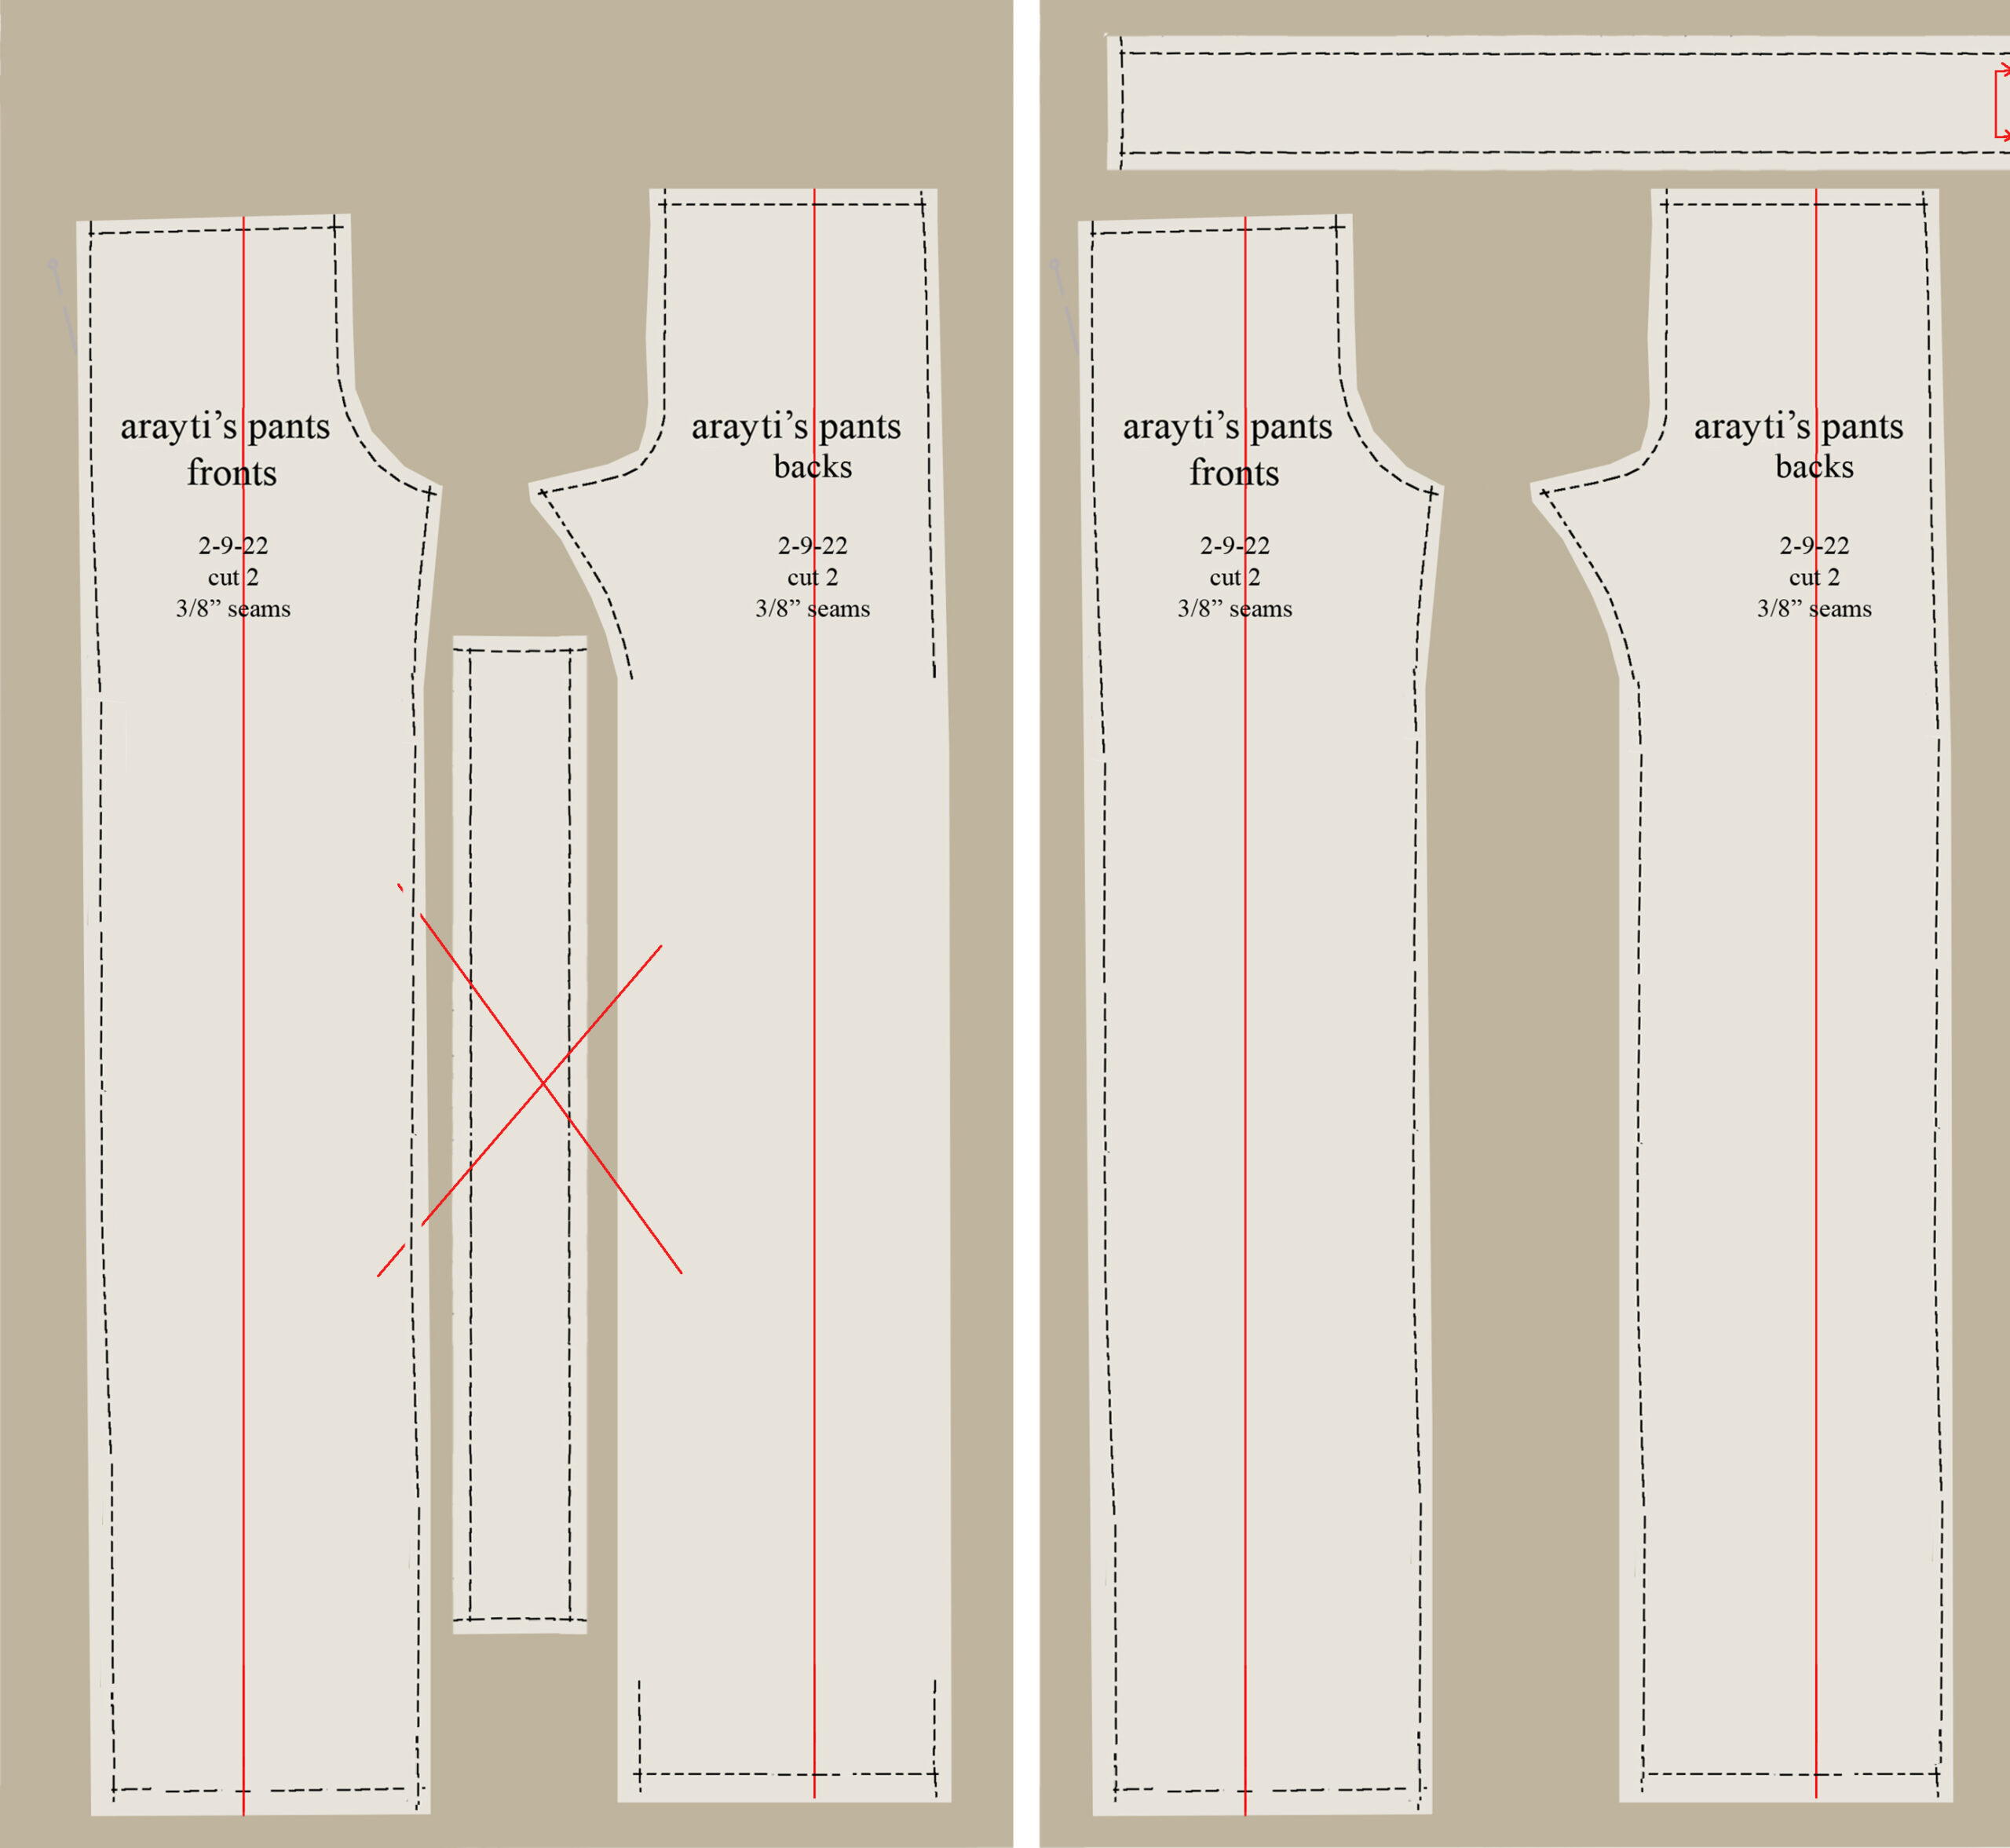
2. Stitch-in-the-ditch for the fold-over elastic casing is about half of (1). note: the casing extension is squared up from the waistline. Do NOT taper it!
3. The little triangle at the back crotch fork can be trimmed as long as you leave a bit at the point. 4. The hem is usually 1.25″ // 3 cm. It’s better to overcut the length on your first pair.
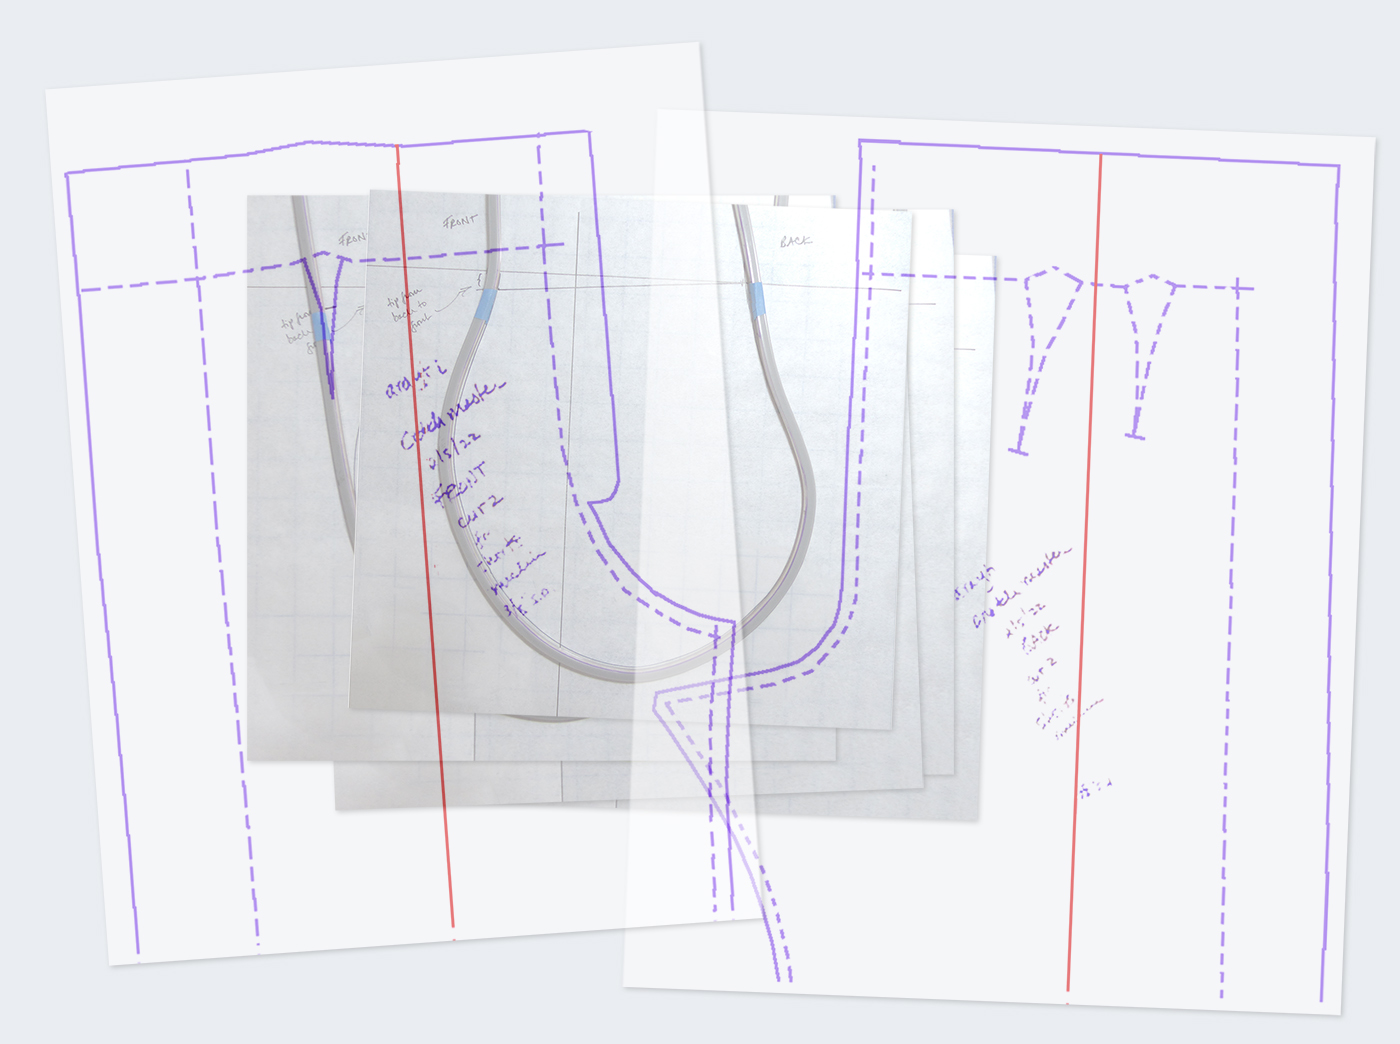
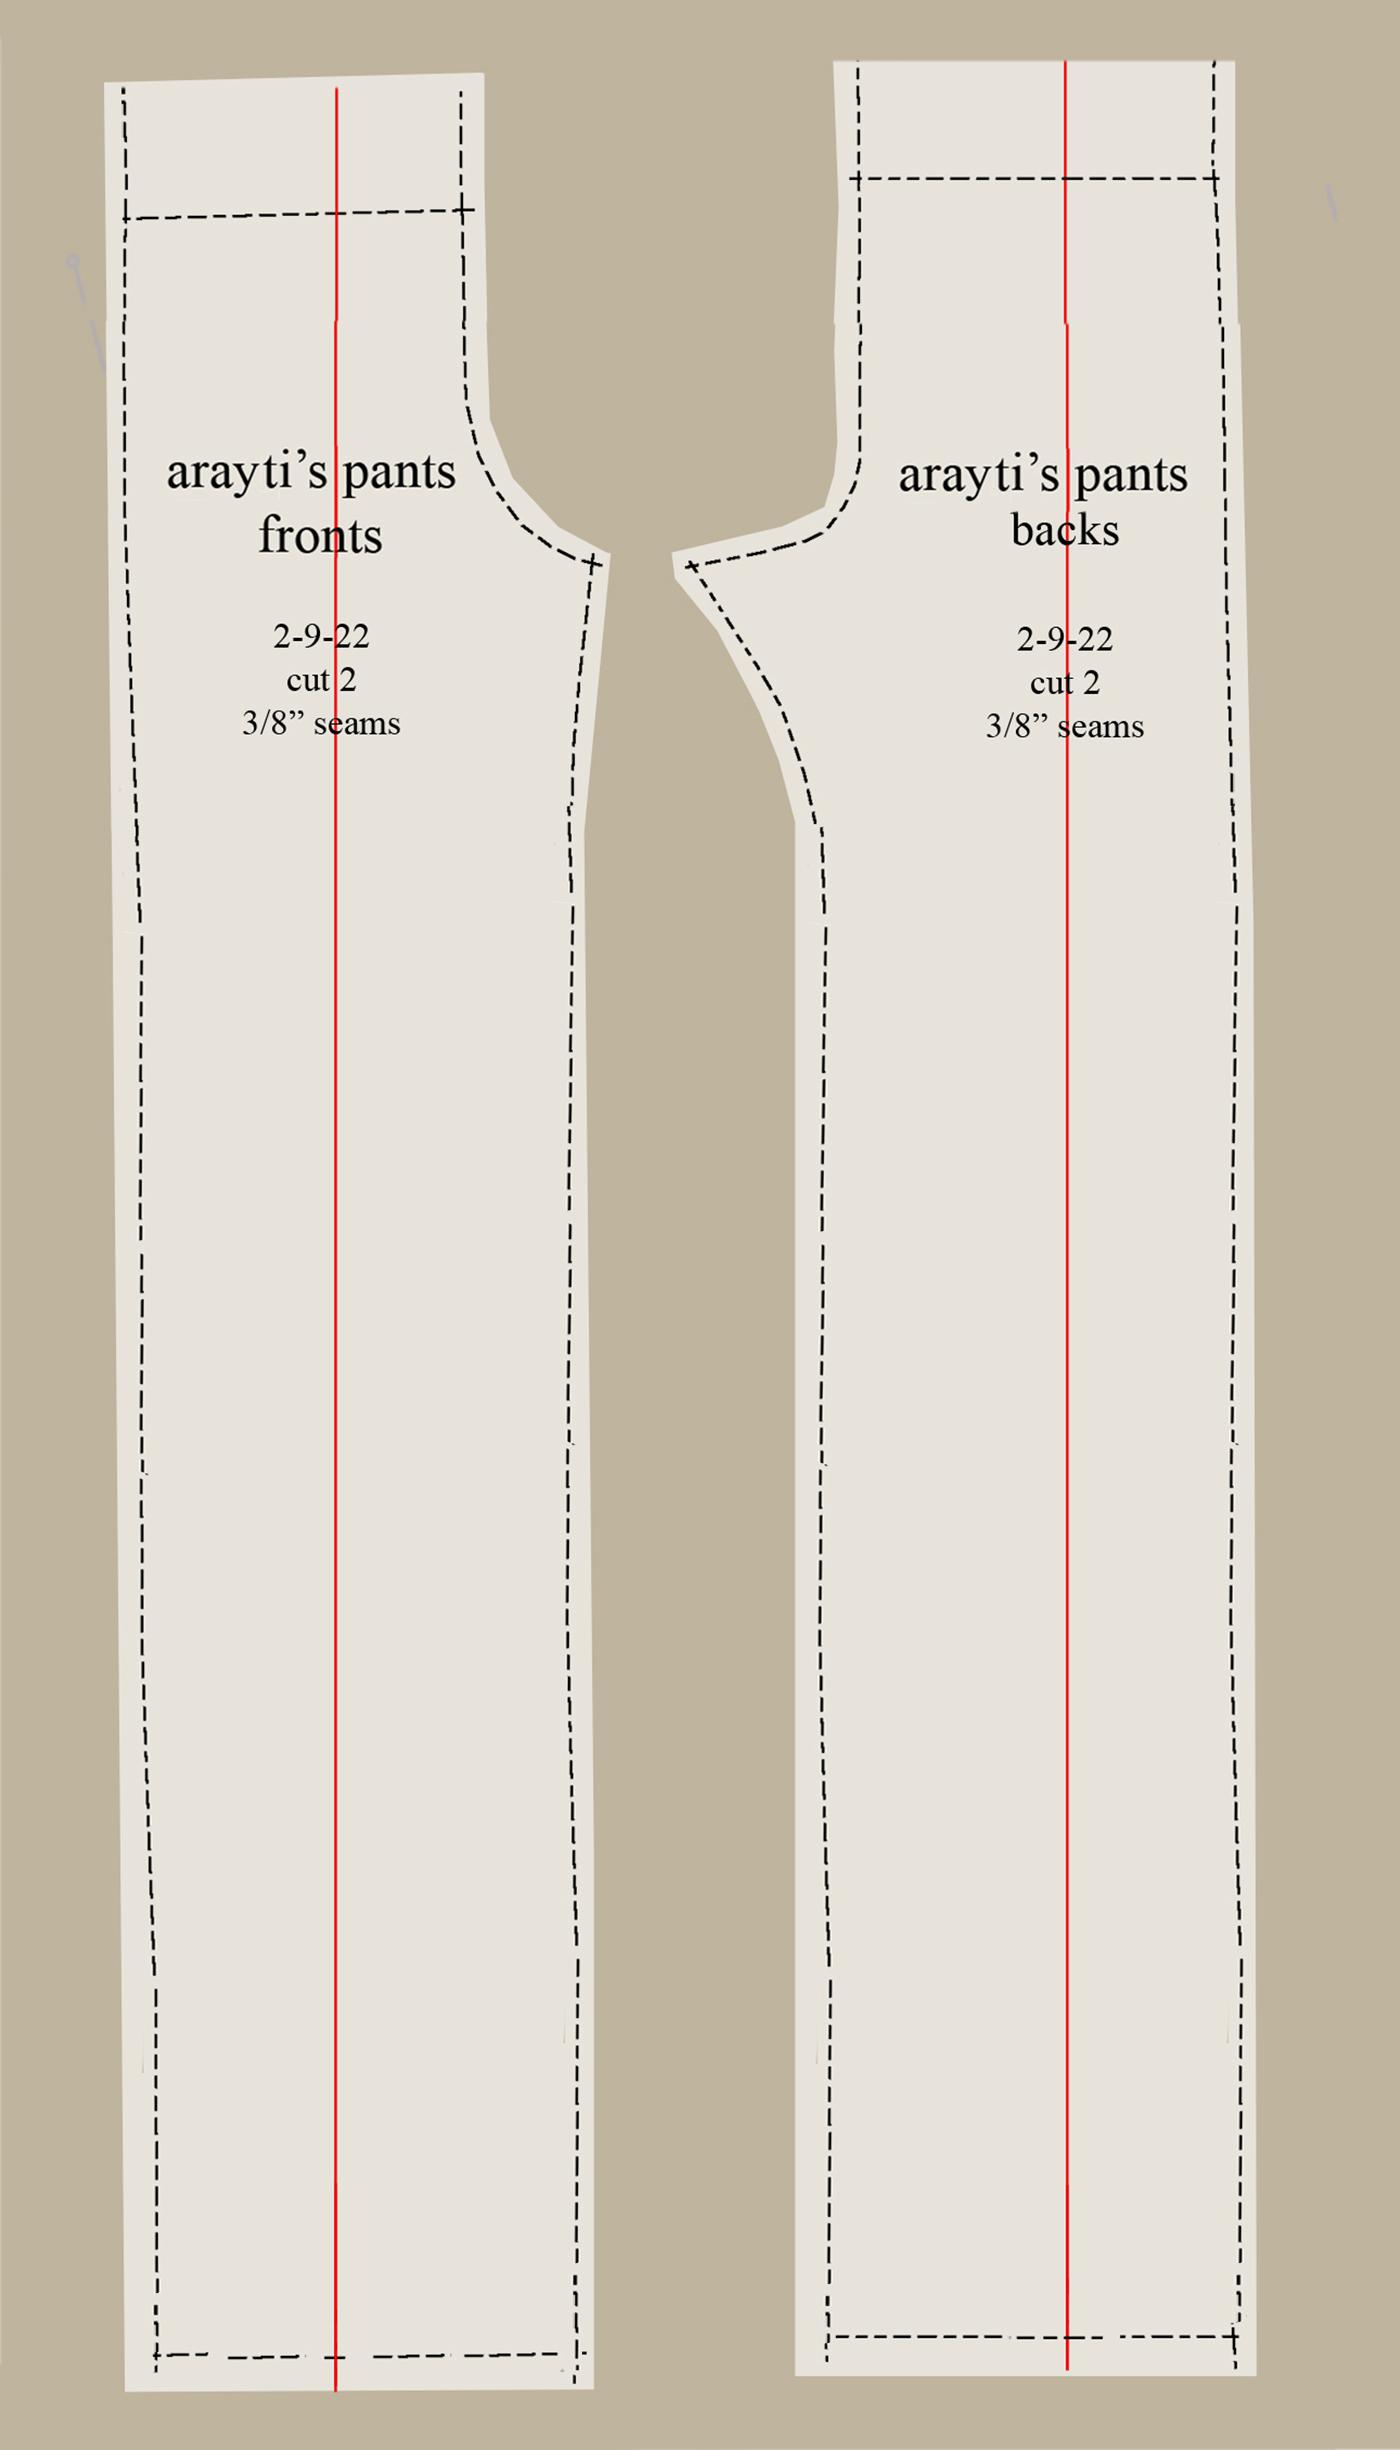
Note that the wobbly lines have been straightened.

1. Trace around it.
2.Measure around the fullest part of your knuckles – make a loop of your tape and be sure your hand fits easily through it.
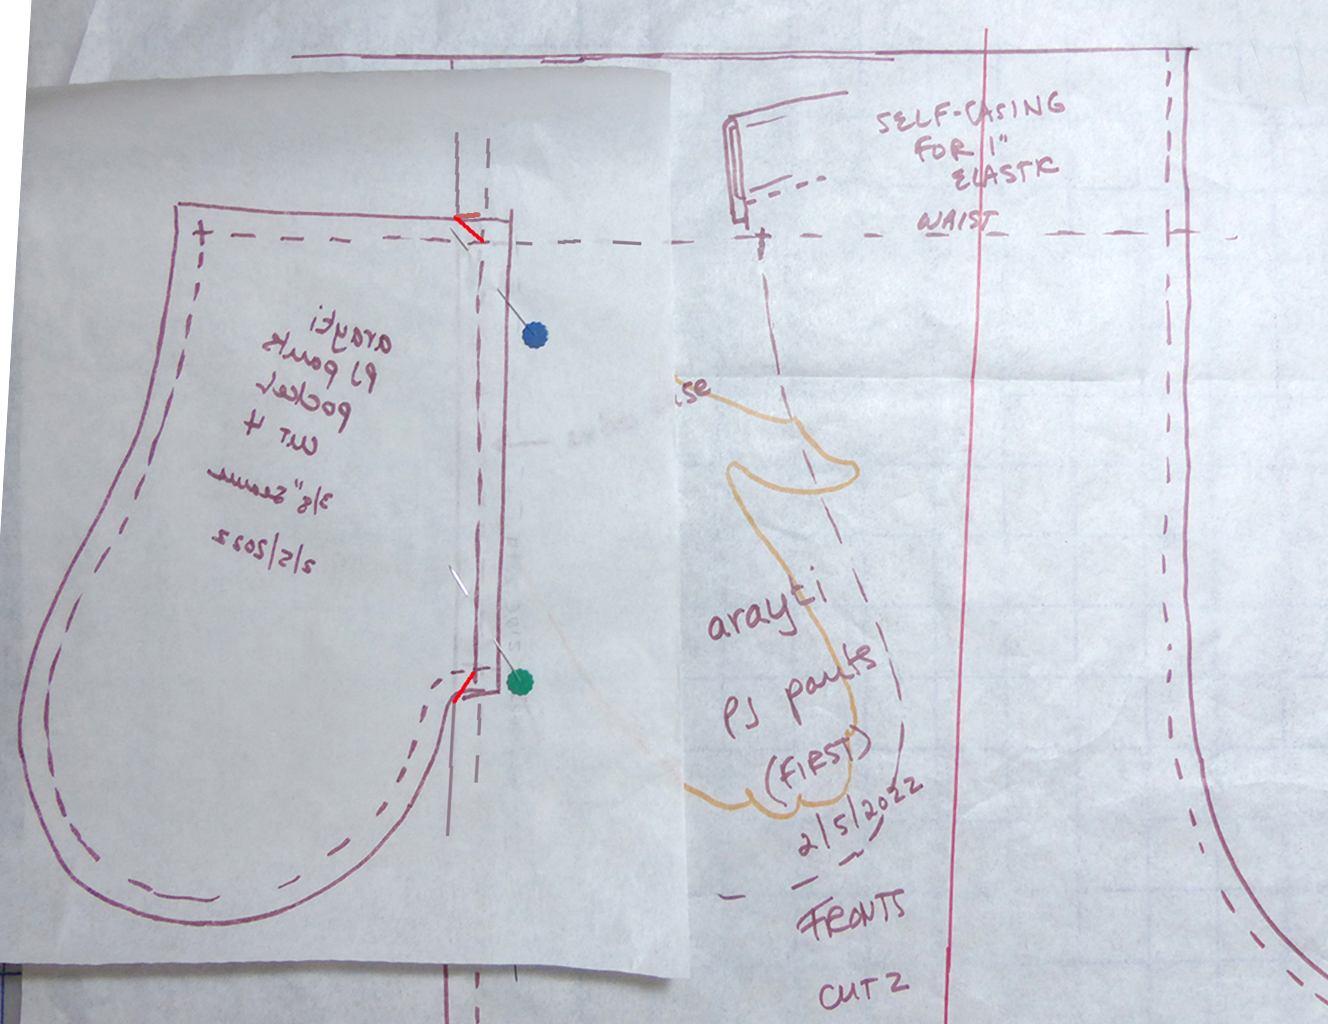
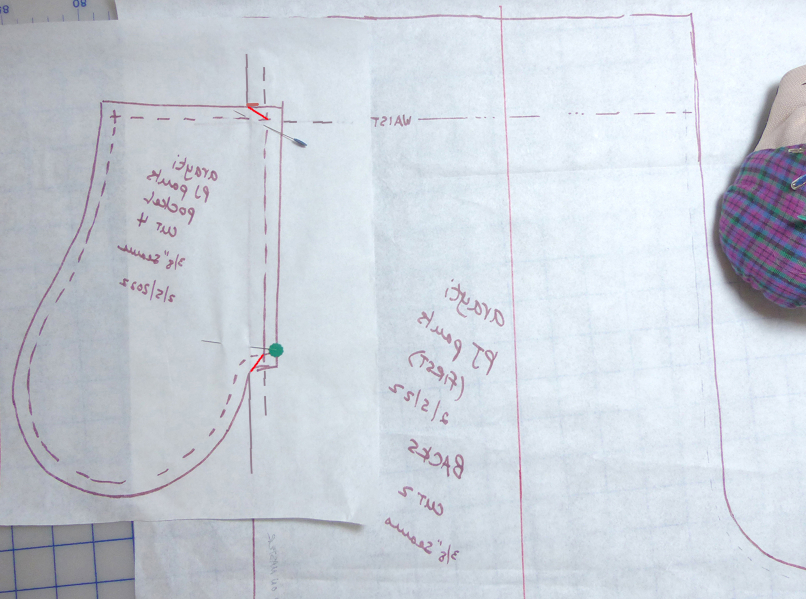
2. The opening in the side seam must be big enough for your knuckles if you want to put your hand in it.
3. The top of the pocket must extend past the waistline so it’s caught when the waistband is sewn.
4. The pocket piece doesn’t show (as it would in a slant pocket), so its grainline is adjusted so that its weight is better supported from its top. Its longer curved side is scooped a little to minimize fabric layers over the stomach while its top is wide enough that the pocket will be supported.
(next) Crotch Master to Elastic-Waist Pants: Laying Out, Cutting and Sewing
Jump to Crotchmaster from a rub-off (not ready yet)